Overview
Admins and team leaders can create and manage audiences by filtering the customer database for specific factors that will better isolate the targeted audience for the designed campaign.
Key Considerations
A. Audience files can use either existing customer databases or uploaded files.
B. The new Audience file can be kept as a static listing of chosen customers or as a dynamic file with the filter continuously looking for additional customers who fit the filter’s criteria.
C. When selecting a Dynamic audience file, the number of relevant customers is based on the matchings to the filter’s criteria at the time of launching (and therefore not set).
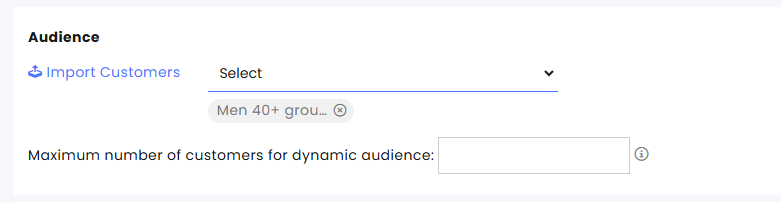
D. When selecting the Dynamic audience, you can set a limit (optional), which will stop the campaign when the limit is reached. This helps organizations with limited capacities handle customers who are responding to the campaign.
Use case example: Every morning, we send a campaign inviting customers who initiated a call the day before, after business hours, to call back. We limit the number of messages to the number of callbacks we can adequately manage.
E. When filtering WhatsApp Groups, you can either send campaigns to the WhatsApp group entity or to each member of the group individually.
Creating Filtered Audience File
-
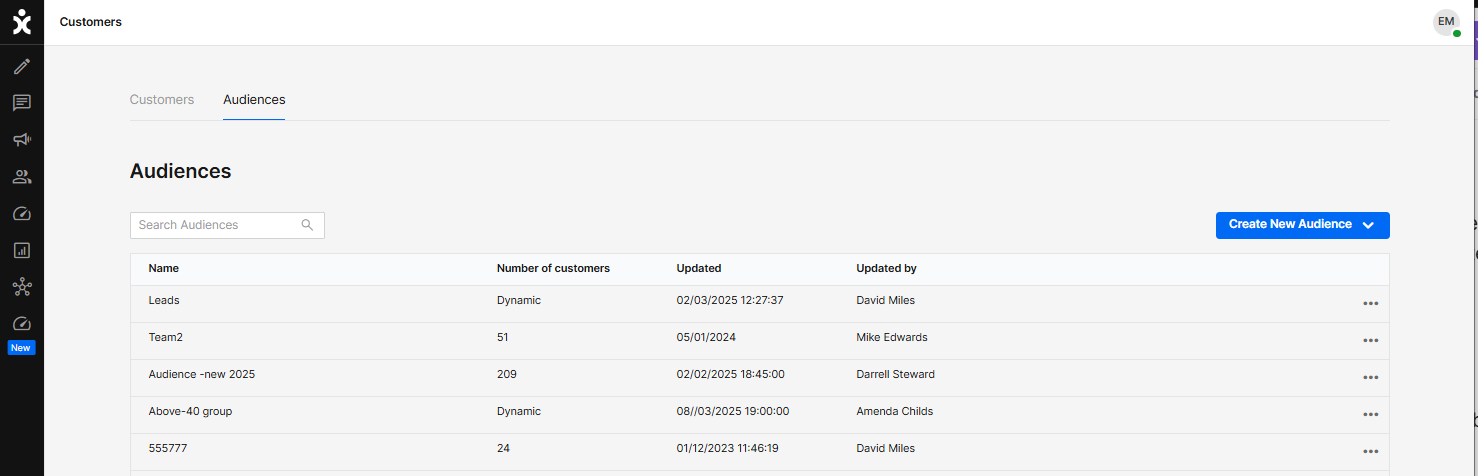
At the CommBox platform, click the Customers section from the sidebar menu and select the Audience tab.
-
At the top of the page, click Create New Audience.
-
Select Filtered Audience from the menu, which will use the existing customer base.
-
In the new dialog box, name the Audience and click Next.

-
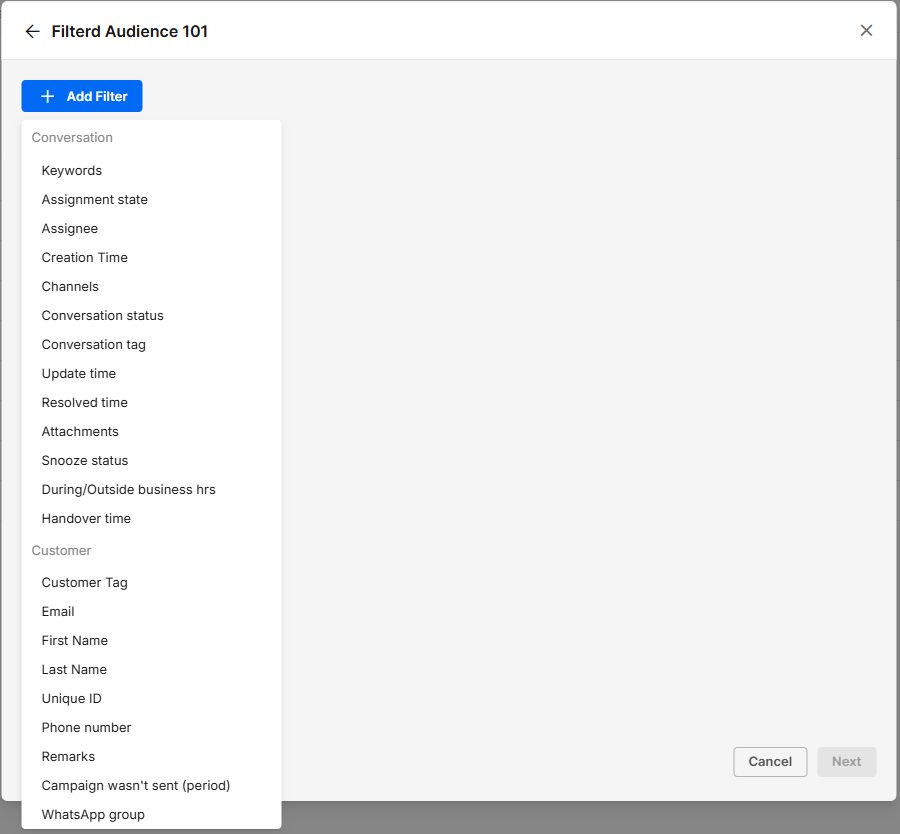
In the new dialog box, click the + Add Filter to see available filter options.
-
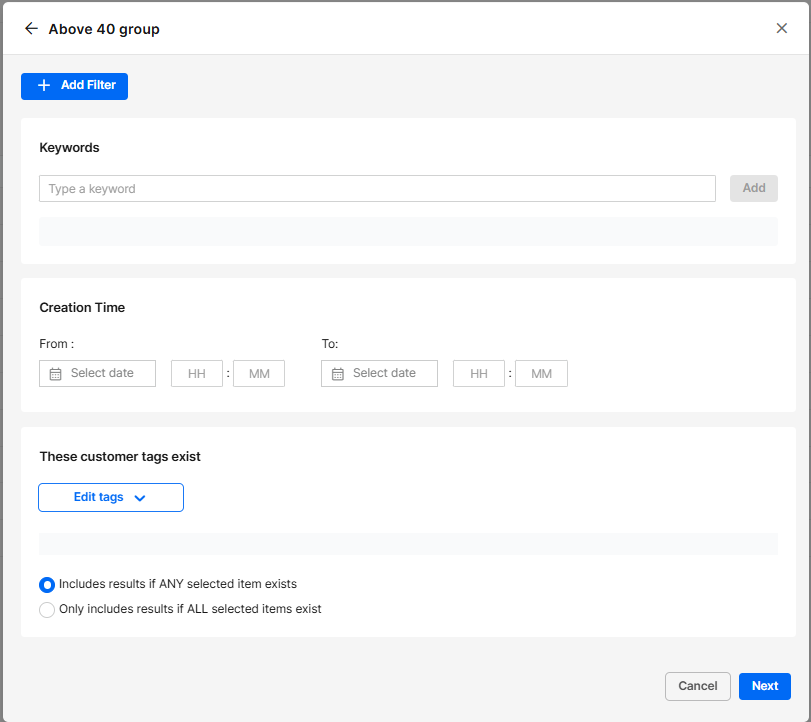
Enter the acceptance criteria for each filter, adding additional filter options as needed.
To remove a filter component, hover over the section and click the trash icon that appears. When you are done, click Next.
WhatsApp Groups
When selecting WhatsApp groups as the filter, select Group conversation to send messages to the group’s entity, or Customers within the group, to send campaign messages to the individual group members. You can then select the relevant WhatsApp groups for your audience.
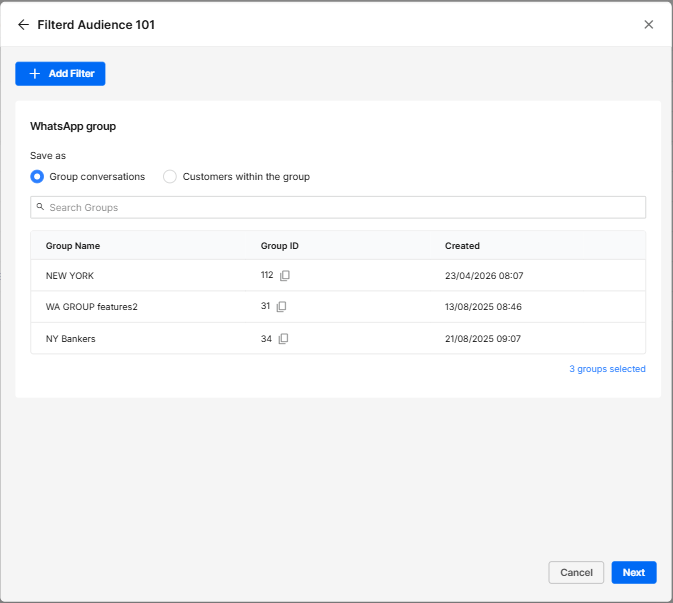
Note:
The WhatsApp group filter may add additional customers to your audience. The group conversation content and individual customer records are not affected by other filters. -
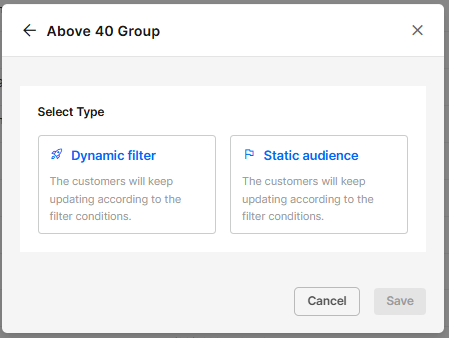
Choose between Dynamic filter and Static audience, and click Save.
Dynamic filters will add customers that fit the filters’ criteria to the file during the campaign launch.
Static audiences will only keep those customers that fit the filter criteria during the file’s creation time.
Importing Contacts into an Audience File
- At the CommBox platform, click the Customers section from the sidebar menu and select the Audience tab.
- At the top of the page, click Create New Audience.
- Select Import contacts to upload new customer listings.
- At the dialog box, name the file and click Next.
- Upload the new Contacts from a CSV or XLSX file.
Note: One of the column headings must be Phone1, and phone numbers must be in the international format (including country code).

Once successful, the new contacts file will list the number of added customers.
Editing, Renaming, and Deleting Audiences
To edit, rename, or delete the dynamic audience file, navigate to the Customers page, select the Audience tab, click the 3-dot menu at the end of the listing of the relevant file, and select the desired action.
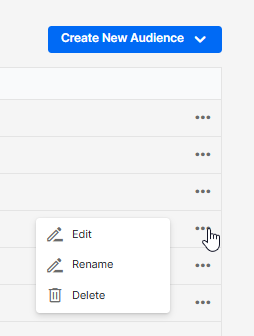
Note that when the file is not a dynamic audience, the editing option is not available.