Overview
WhatsApp templates are pre-approved message formats that enable businesses to initiate conversations with customers outside the customer service window. Templates can be used for a variety of use cases, including promotional campaigns, customer updates, reminders, notifications, and other business-initiated communications.
This guide explains how to create and edit Marketing and Utility templates in CommBox, including configuring template content, variables, media attachments, buttons, and language variations before submitting the template for Meta approval.
For information about template categories, approval statuses, quality ratings, and template performance, refer to the Template Management guide.
Note: This guide covers Marketing and Utility templates only. To learn how to create templates for one-time passwords (OTP) and verification messages, see the Authentication Templates guide.
Click here to learn more about Meta’s template guidelines.
Creating a New Marketing or Utility Template
-
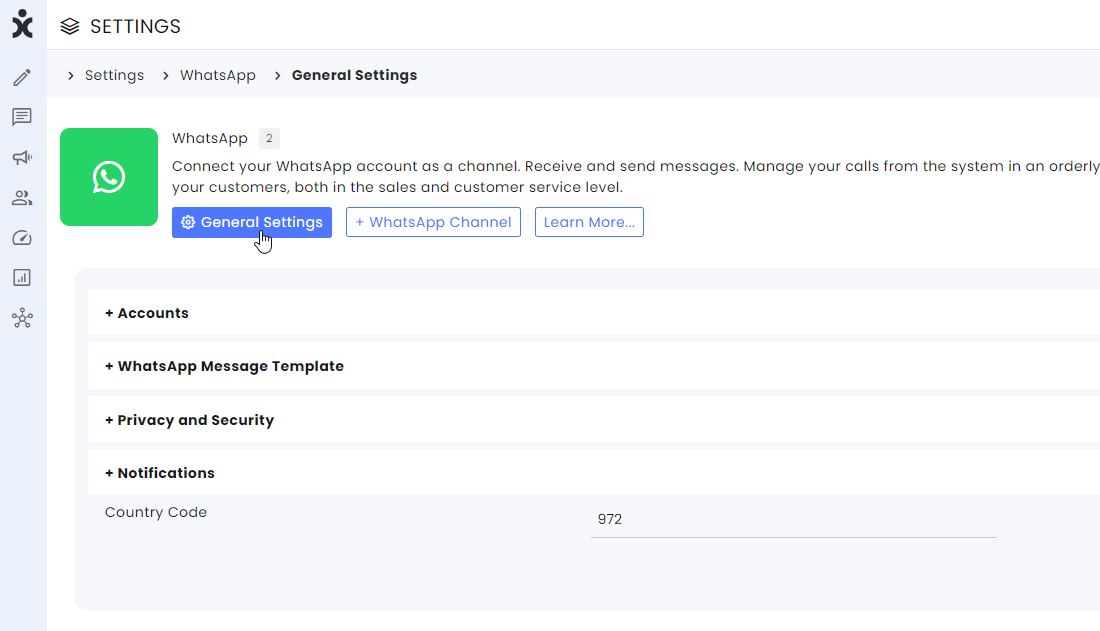
In the CommBox console, navigate to Settings and select WhatsApp from the Communication Channels section.
-
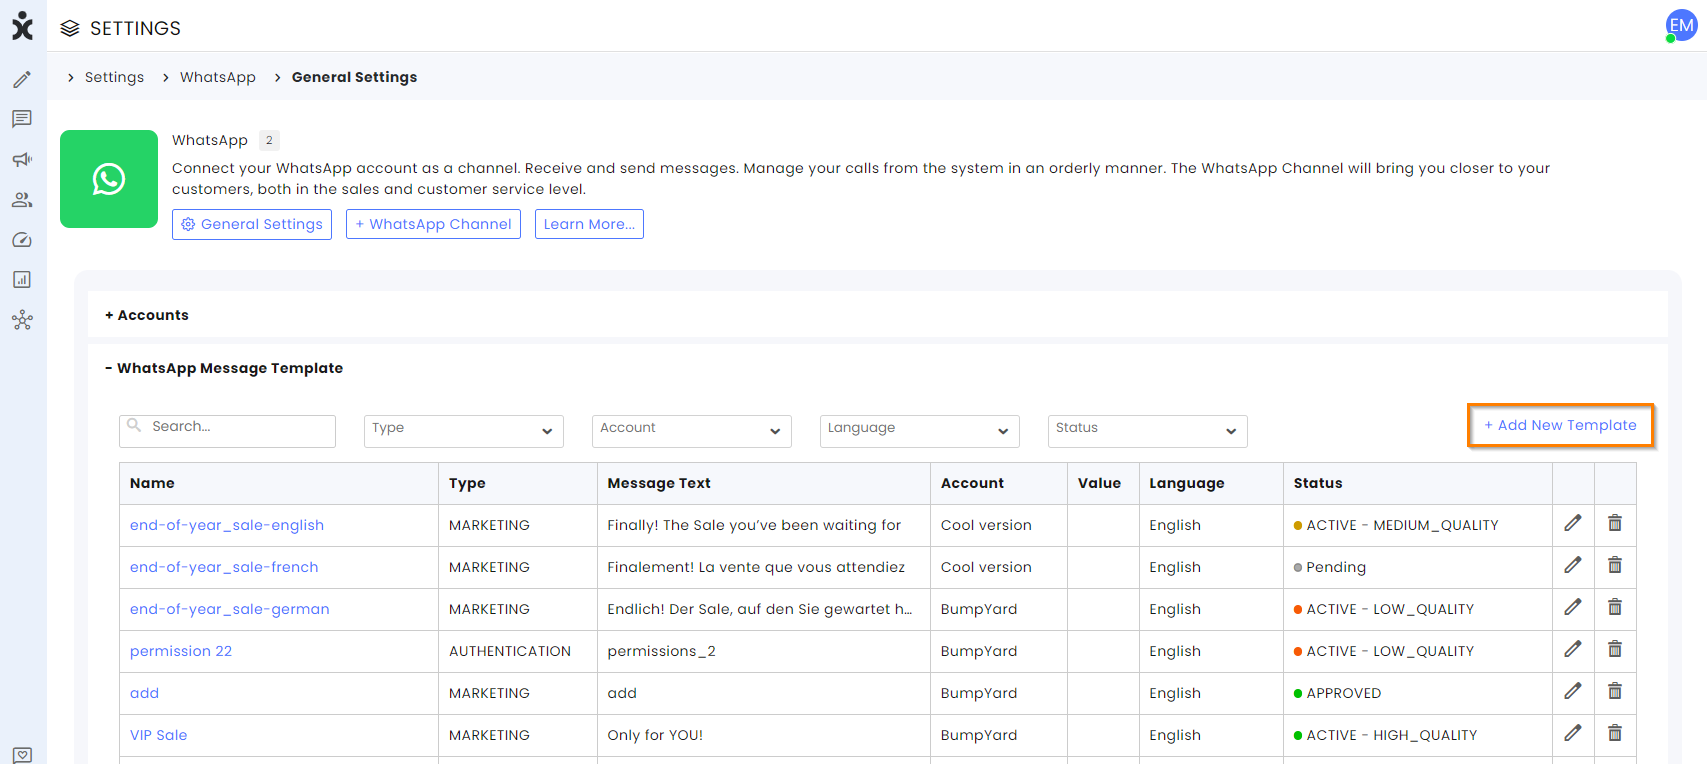
Select the General Settings tab and expand the WhatsApp Message Templates section.
-
The template list displays all templates associated with your account, including their category and approval status. Click Add New Template.
-
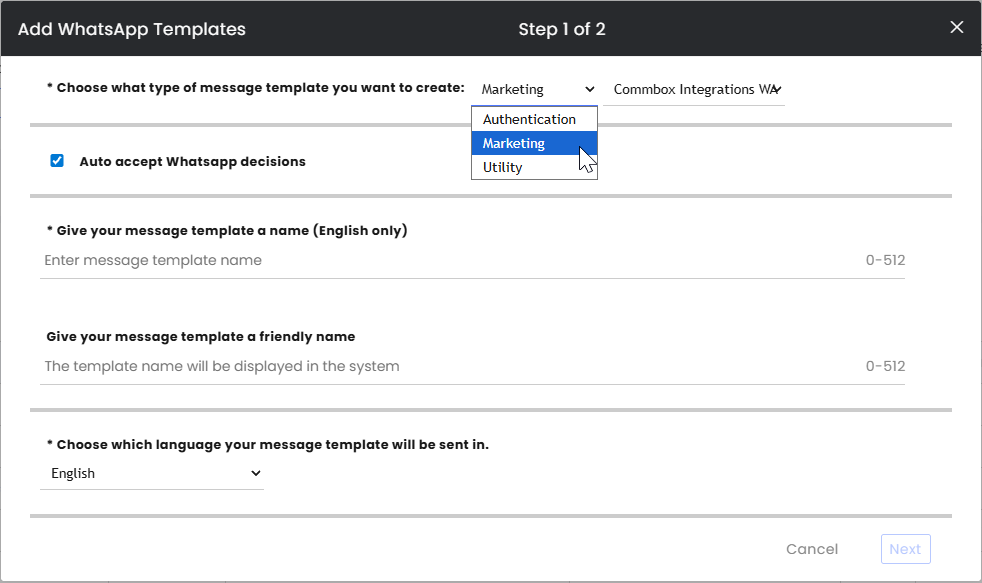
At the new dialog box, select the template category (for this guide: Marketing or Utility) and choose the relevant WABA (WhatsApp Business Account).
Note: Template categories are determined and billed according to Meta's policies. Meta may reclassify a submitted template if its content does not match the selected category. For example, a business may consider a customer update to be a Utility message, while Meta may classify it as Marketing.
-
To automatically accept Meta's category decision, leave the Accept WhatsApp Classification option enabled (recommended).
-
Enter a template name using lowercase English letters only. Choose a descriptive business name that clearly identifies the template's purpose (for example, end_of_year_sale).
.png)
-
Select the template language and click Next.
-
Template Content
-
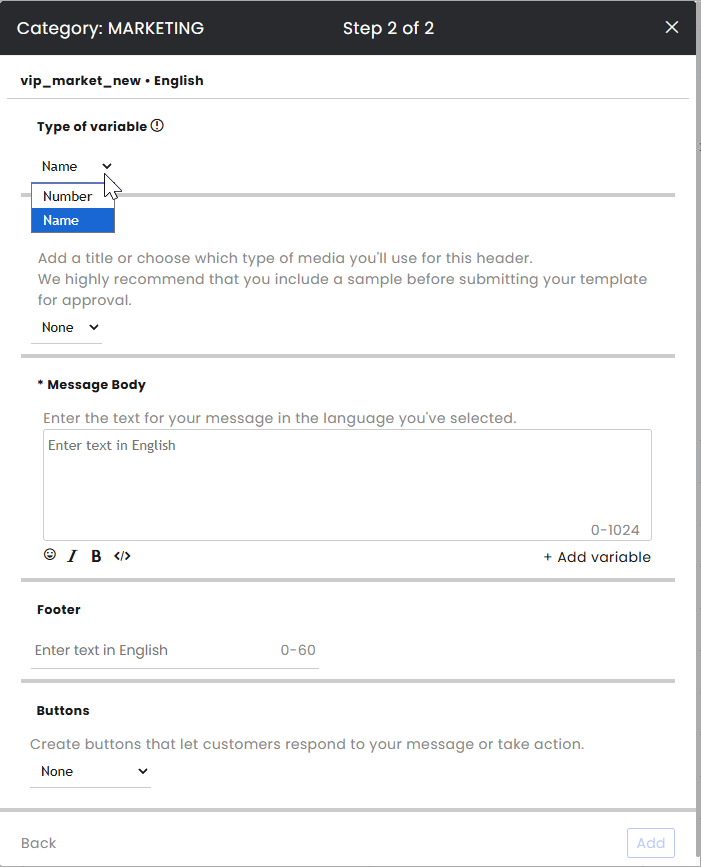
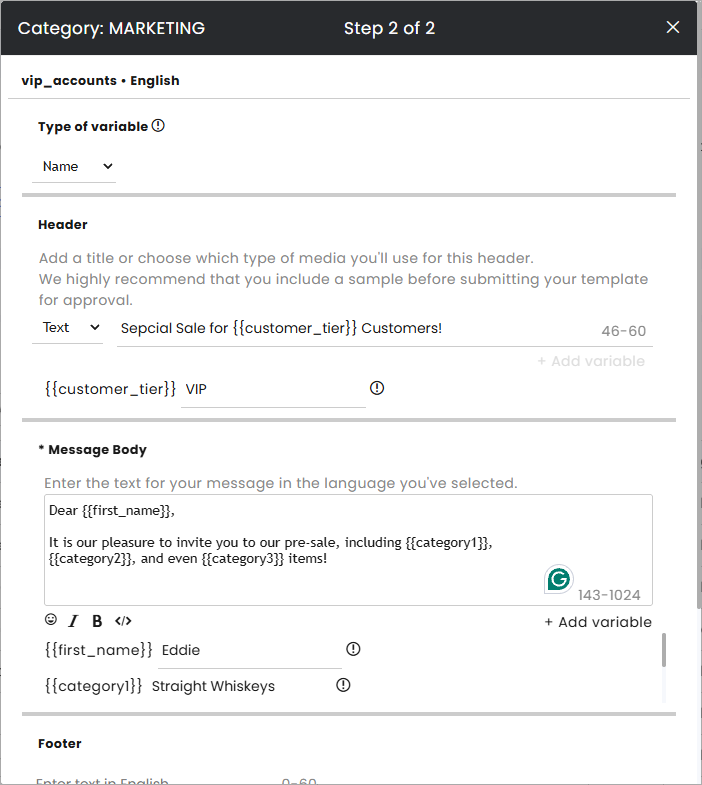
Type of variable
Before configuring the template content, select the variable format that will be used throughout the template.
CommBox supports two variable modes:- Number Mode – Uses numbered placeholders such as {{1}}, {{2}}, and {{3}}
- Name Mode – Uses descriptive variable names such as {{customer_name}}, {{company_name}}, and {{appointment_date}}
Named variables improve template readability and make it easier to understand the purpose of each variable when configuring automations, CRM mappings, and campaign workflows.
Important:- A template can contain only one variable type. Numbered and named variables cannot be combined within the same template.
- Named variables must contain lowercase English letters only.
- Variable names should be descriptive and meaningful.
- Template text cannot begin with a variable.
- Meta's variable requirements and sample value requirements apply to both variable modes.
-
Header (Optional)
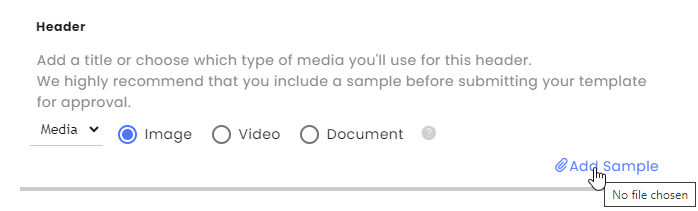
You can add either a Text or Media header.- To include variables in a text header, click Add Variable.
- If you select a media header, you must choose the media type and provide a sample file for review.
-
Body
Enter the template message content (up to 1,024 characters).
Ensure that the content is written in the selected language. If you need the template in additional languages, create a separate template for each language.Adding Variables
To insert variables into the template:
1. Place the cursor where the variable should appear.
2. Click Add Variable.
3. Depending on the selected variable mode:- In Number Mode, the system automatically generates sequential placeholders ({{1}}, {{2}}, etc.).
- In Name Mode, enter a descriptive variable name (for example, customer_name or order_number).
Choose a descriptive name for each variable to help agents understand what information should be provided when sending the template.
Important:
Meta requires sample values for all variables. When submitting a template that contains variables, provide representative sample values that demonstrate how the completed message will appear.
Do not use actual customer information.
-
Footer (Optional)
Enter footer text to appear at the bottom of the template.
-
Buttons (Optional)
You can add up to two buttons:
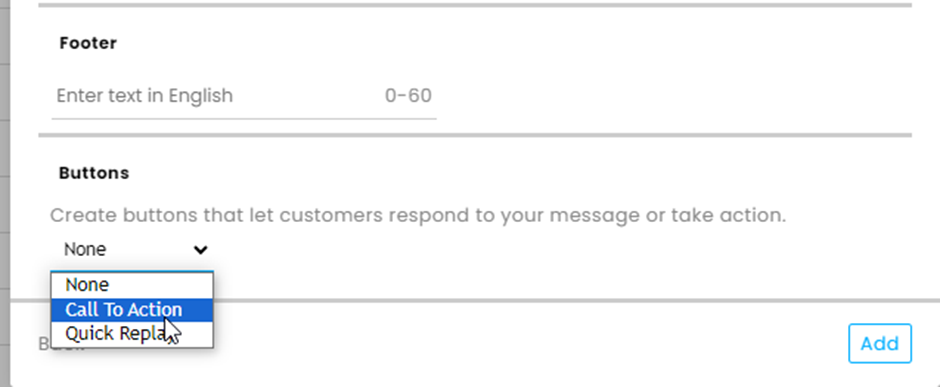
- Call-to-Action Buttons
- Website URL
- Phone Number
- Quick Reply Buttons
- Button text is limited to 20 characters
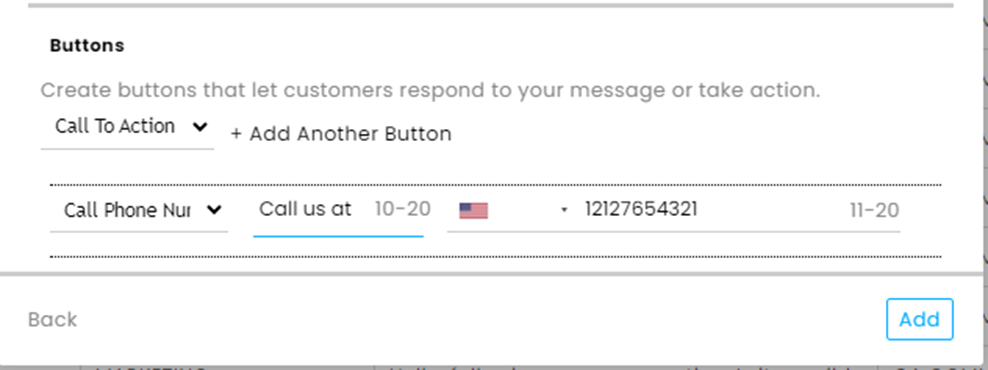
Note: If you add a URL button, the final URL can be configured later when the template is used in an Automation or Broadcast. It is not necessary to define the production URL during template creation.
- Button text is limited to 20 characters
- Call-to-Action Buttons
-
- Submit the Template
Review the template configuration and click Add to submit it for Meta approval.
Tip: Templates that clearly reference an existing customer interaction, request, or transaction are generally more likely to be approved than purely promotional content.
The template will appear at the bottom of the templates under Pending. Once Meta approves or rejects your template, you can edit the template (and send for reapproval).
Locate your template using the filters at the top.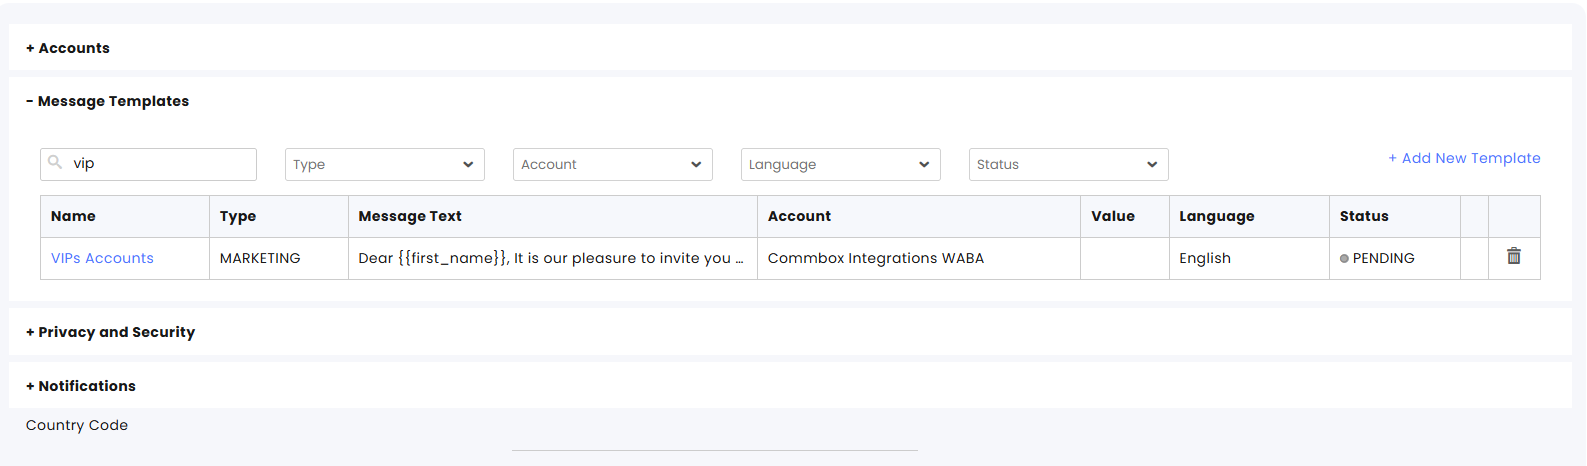
If you need assistance, contact support@commbox.io.
Editing Existing Marketing or Utility Templates
Before editing a template, note the following restrictions:
- Editing templates requires the appropriate permissions.
- Only templates with an Approved, Rejected, or Paused status can be edited.
- The template's official name, category, and language cannot be changed.
- When modifying a media header, you must provide an updated sample file.
- Approved templates can be edited up to 10 times within a rolling 30-day period, and no more than once within 24 hours.
- Rejected and Paused templates can be edited without limitation.
Editing Procedure
- Navigate to Settings > Communication Channels > WhatsApp.
- Select the General Settings tab and expand the WhatsApp Message Templates section.
- Locate the template you want to modify. Use the available filters to quickly find specific templates.
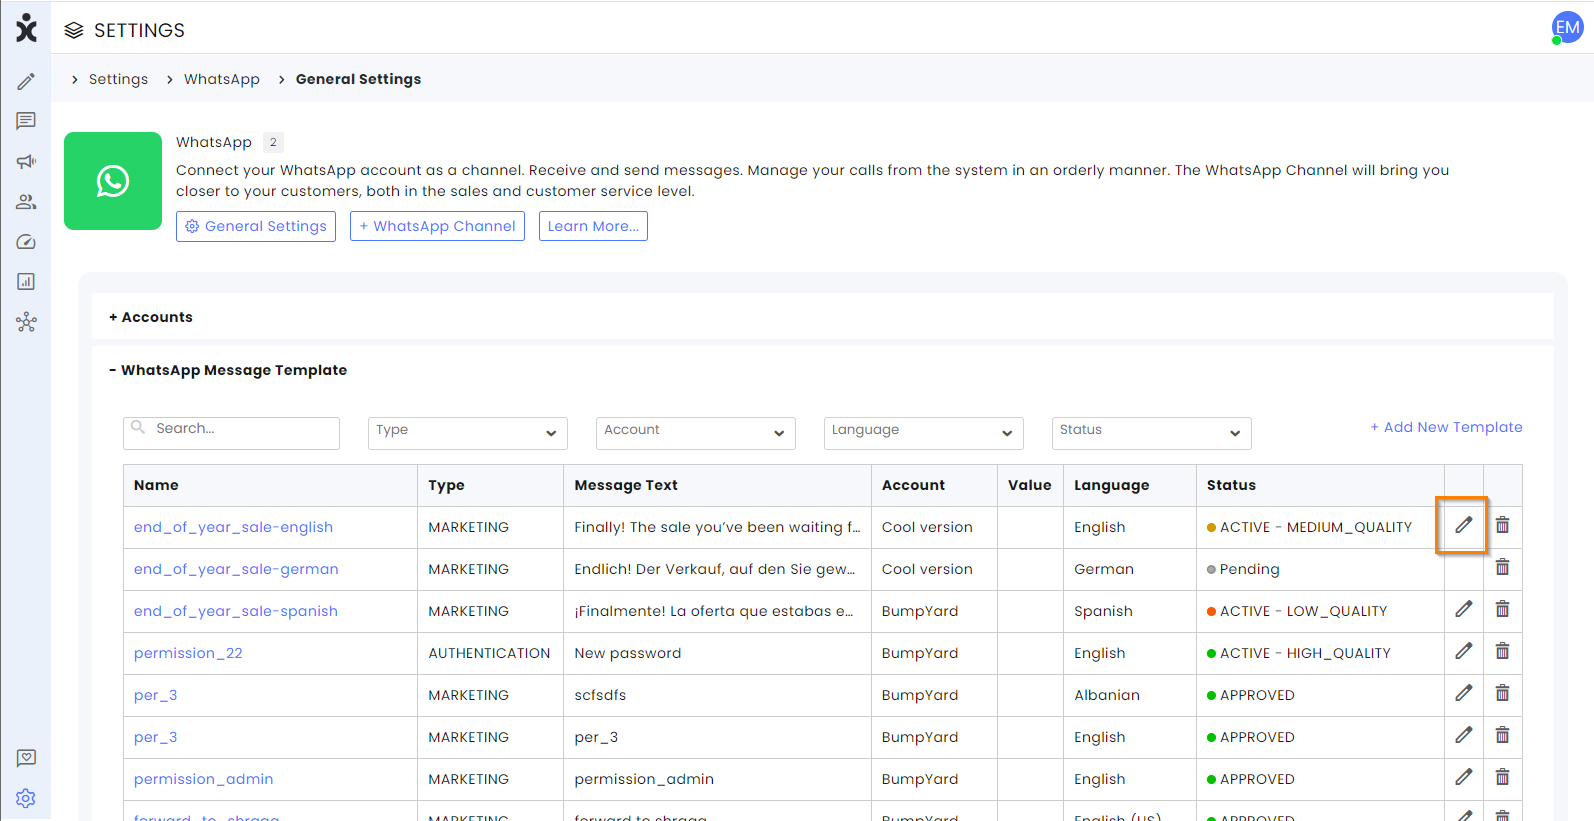
- Click the Edit (pencil) icon next to the template.
- Update the template content as required.
If you need to change the template's business display name, click Back, modify the name, and then click Next to return to the content screen. - Click Save to submit the updated version for processing.
The updated template will be reviewed and processed in accordance with Meta's template approval policies.