Overview
By utilizing this module, companies can automatically send an optional survey to be filled out by the customers. Use the Customer Satisfaction Surveys to gain valuable feedback about your customers' experiences. You can send customized surveys from all your support channels, in all your supported languages.
First, you need to activate the module:
1. On the main navigation bar, click on the Settings icon (visible on the lower-left-hand side)
2. Underneath Settings and Features, click on Customer Satisfaction Survey

Module Settings
Once the module has been activated, you can set default survey settings in the module settings.
The module settings present a default survey setting that will apply on all of the brand’s channels (the ones who activate the survey in their settings). The settings that are presented in the module settings are the same as the settings in the channel surveys.
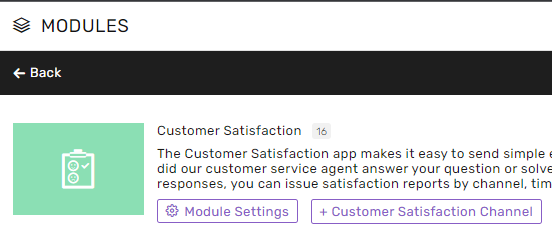
To access the Module Settings (not channel-specific) click on the Module Settings button (appears as seen here -->)
Customer Satisfaction Survey channels
Click on +Customer Satisfaction Channel to create a new Customer Satisfaction channel

Prerequisites for sending a survey
- The specific conversation includes a preexisting response from a bot/human representative (based on the fact that the survey must be attached to some type of representative)
- The conversation status has been set to resolve.
- A survey has been enabled for the specific channel, which hasn’t received a survey in the past.
After receiving the survey response from the customer, a tag indication will be added to the specific conversation window, appearing with the module icon and color with the score, visible in the screenshot below.

After you create a channel, you will be able to define the settings of your Customer Satisfaction Survey channel.

Activating the Channel: Toggle On/Off
Toggling this option in the main module will activate it in all channels through which you intend to send a survey to the customer.
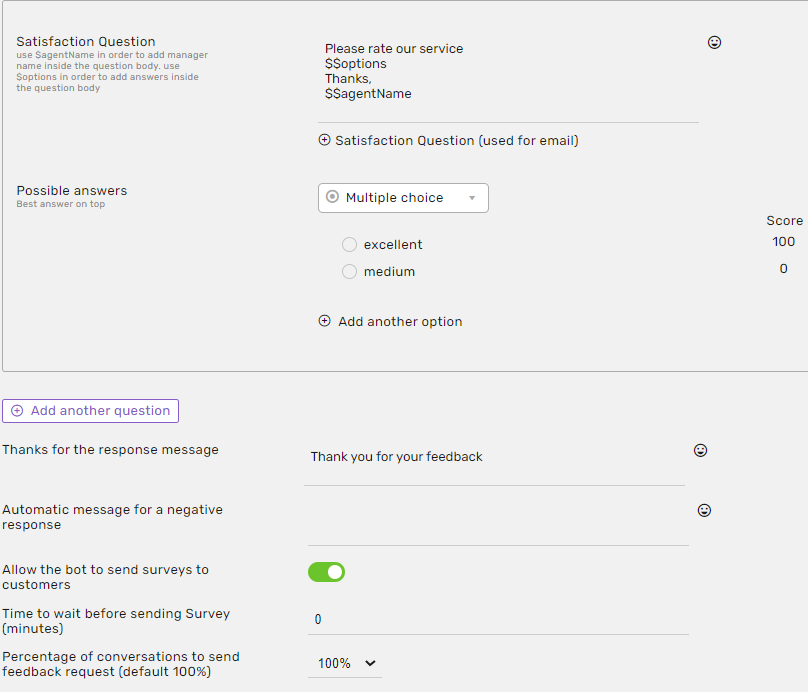
Satisfaction Question - the question that will appear at the top of the survey message.
Pro Tips
If you wish that the name of the agent who is assigned to the conversation will be displayed inside the text body of the question, you can write “$$agentname” in the location you want it to be.
If you wish that the possible answers will be displayed inside of the question body instead of at the bottom, you can write “$$options” in the location you want it to be.
Possible answers
You can select one from two choices: Multiple choice/Open answer
Multiple choice
This is the default state of the possible answers, in that state you can add as many answers as you like.
- You can edit the title of each answer by double-clicking it.
- You can delete an answer from the x icon that will appear when you hover over one of the answers.
- You can add another option using the button at the bottom of the answers.
- Each answer can be dragged to change its position (and its score).
- Please note that each change of the answers (adding/removing an answer will eventually change all answers scores.
The first answer will always have a score of 100 and the last answer will always have a score of 0. All other answer's scores will be rendered automatically and equally by the sum of the number of answers.
Open answer
The second option to select in an open answer. This will allow your customers to answer a question freely without limitations.
Please note: These answers won't be scored, we recommend adding an open answer question as a following question after a multiple choice question. That way you can guarantee that your agents will get scores and your customers will get a chance to express their satisfaction in detail.
Add another question button
When clicking on the button a new question setting window will appear under your first question.
You can add up to 3 questions in one survey.
Each question will be sent separately to the customer right after each answer.
Each answer will be scored separately at the satisfaction report.
Thanks for the response message - the message that the customer will receive after responding to the last question on the survey.
Automatic message for a negative response - You can add a custom response according to the customer’s selected rating, in case that the customer selected an answer with a score less than 50 this is the message that will be sent in response.
Allow the bot to send surveys to customers - Determines whether the survey will be sent by a bot in a conversation (without the involvement of a human representative).
Time delay before sending the survey - Determines how long after the conversation status changes to resolve, the survey will be sent to customers.
Percentage of calls to send a feedback request - the frequency of conversations that will receive a satisfaction survey.