Overview
This guide introduces the different functions in the Agent Workspace Homepage window. It provides an overview of the platform’s home page, featuring links to articles that offer deeper insight into each section.
This guide assumes you have Admin privileges. If you don’t see something described here on your screen, you are missing the appropriate permission to view that feature. If you are an admin and you don’t see a particular feature on your screen, verify that your credentials are appropriate.
Opening Screen
The initial screen that opens is the Conversation page. Click on a conversation to open a detailed screen with a customer pane that looks like this:
.png "image(665).png")
Personal Settings
Located at the top corner opposite the main menu sidebar, Personal Settings is a circle with the user’s initials and a small, colorful circle indicating the agent’s statuses (active/busy/away). Click on the circle to open the settings menu.
Click here for more information about this topic.
Agent Dashboard
Next to the personal settings is the Agent Dashboard with the daily accomplishment indicators, including a count of resolved conversations and total conversation time. To set the Agent’s daily statistics, navigate to Settings > Organization and expand the Agent Dashboard section.
.png "image(406).png")
Click here for more information about this topic.
Reply Box
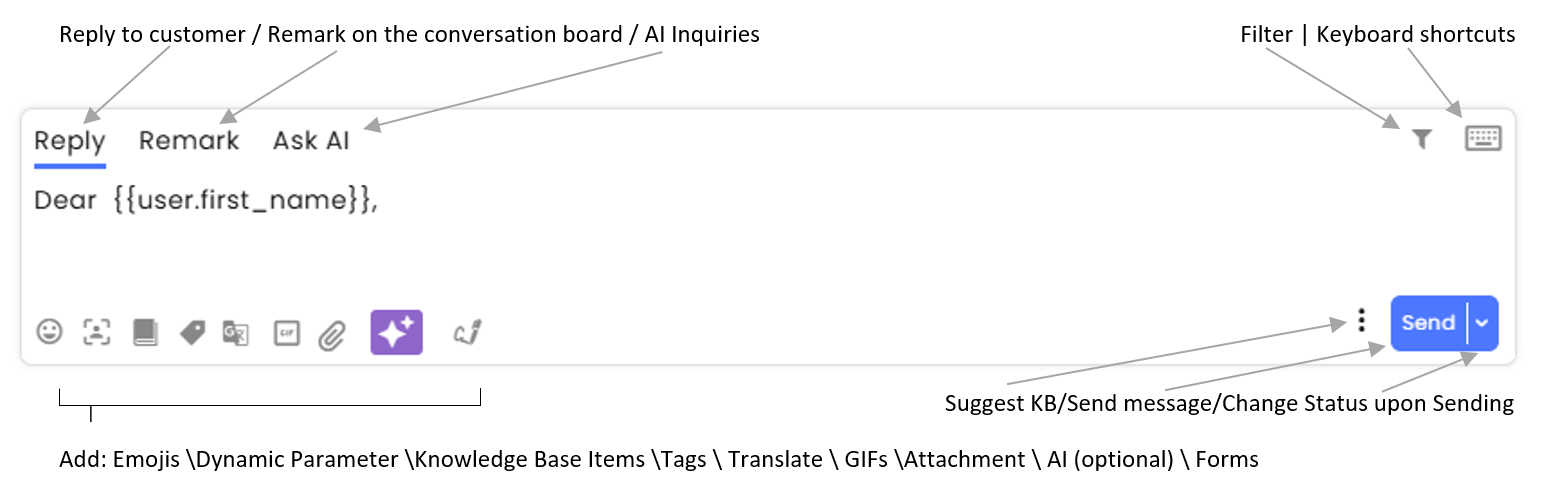
Activate the AI features at the specific channel (optional addition):
.png "image(646).png")
Conversation List
The side pane lists relevant conversations produced by the different filters.
Hovering over a specific conversation reveals another menu.
Click the pin icon to have the conversation readily available at the top of the screen (up to 50).
Click the snooze icon to set the conversation to come again at a later time.
Click the tag icon to add a tag to the conversation.
Forward the conversation to another channel, or open additional actions.
At the bottom of the additional items menu is the conversation ID – used in APIs and webhooks.

At the top of the page, there are two filters related to the conversation list.
The three-dot menu is a viewing filter that hides (simple) or reveals (advanced) information about the conversation.
.png "image(666).png")
The filter on the other side of the conversation list can sort the conversations by priority, last update, or creation time. A downward arrow will show the most recent/ highest priority first, and an upward arrow will show the most recent/ highest priority last.
Click on the wording to select the sorting mechanism and on the arrow to turn its direction.
.png "image(667).png")
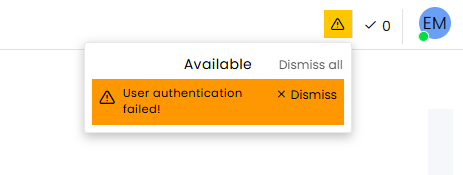
Banners and Notifications
Top Banners appear periodically to advise CommBox’s clients of impending issues, such as API Key or Refresh Token.
.png "image(421).png")
Real-Time Connection Notifications alert agents when conversation data may be missing due to connectivity issues. Agents can reopen the notification after it disappears by clicking the connectivity icon and copying diagnostic details to share with their IT team for troubleshooting.

Error codes appear at the top corner. A log entry is recorded when the agent dismisses the alert.
Main Menu Sidebar
To expand or collapse the Main Menu, toggle the thumbtack icon.
Use Search to look up conversations and customers. Click the arrow to open the Advanced Search to conduct a system-wide search.
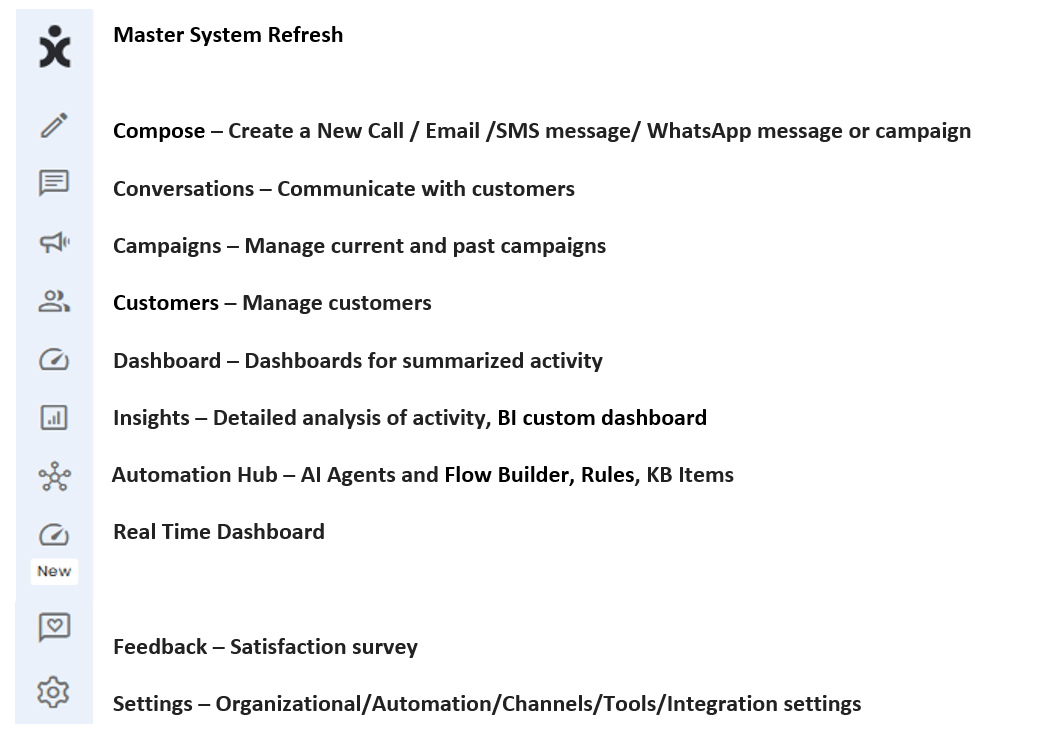
Master System Refresh
![]()
Appearing as the CommBox’s logo (located at the very top of the navigation bar), it serves as a master refresh button for the entire system.
Clicking on it will refresh the entire system and redirect you to the Agent Workspace Conversation Inbox.
Compose
![]()
Appearing as a pencil, it will redirect you to the Create a New Conversation interface, which appears as seen below:
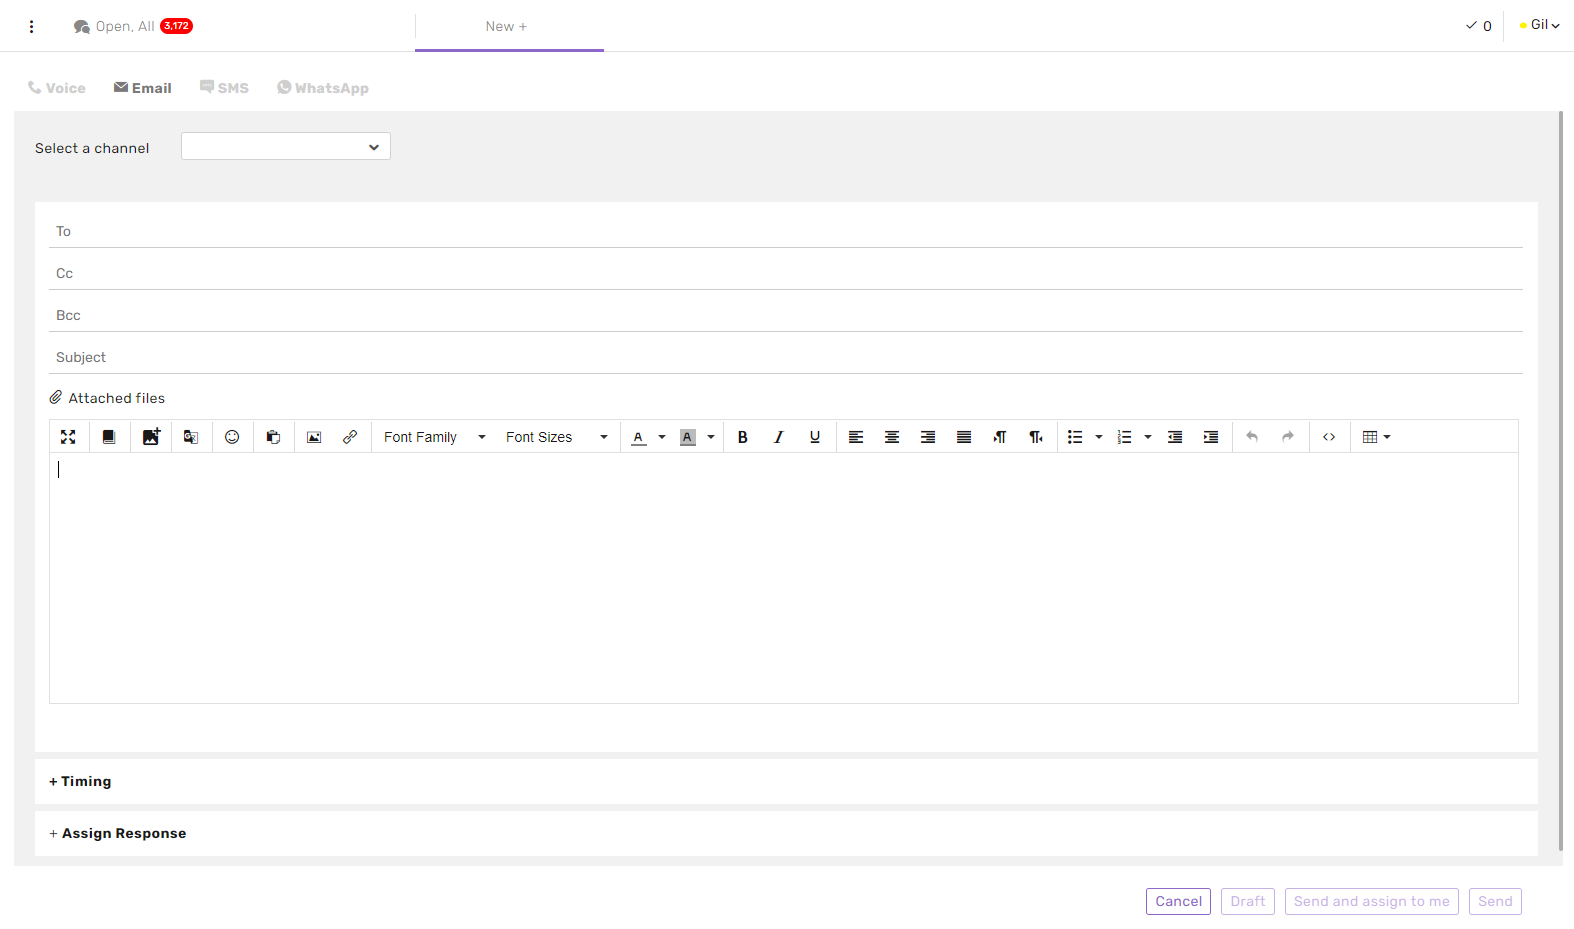
You can dial a call, send an email, send an SMS message, or set up a campaign, send a WhatsApp Template, or free message (if within the 24 hours of last communication), or set up a WhatsApp campaign.
Conversation Inbox
![]()
The 3rd button from the top will redirect you to the Conversation Inbox, which was described above. From this window, you can access all conversations of the account.
Read the Conversation Inbox window guide, Conversation Filters guide, and Channel Filters guide for further details.
Campaigns
![]()
The 4th button from the top, appearing as a megaphone, is the Campaigns overview window (appearing as seen in the screenshot below). Here you can track all campaigns in the brand.
.png)
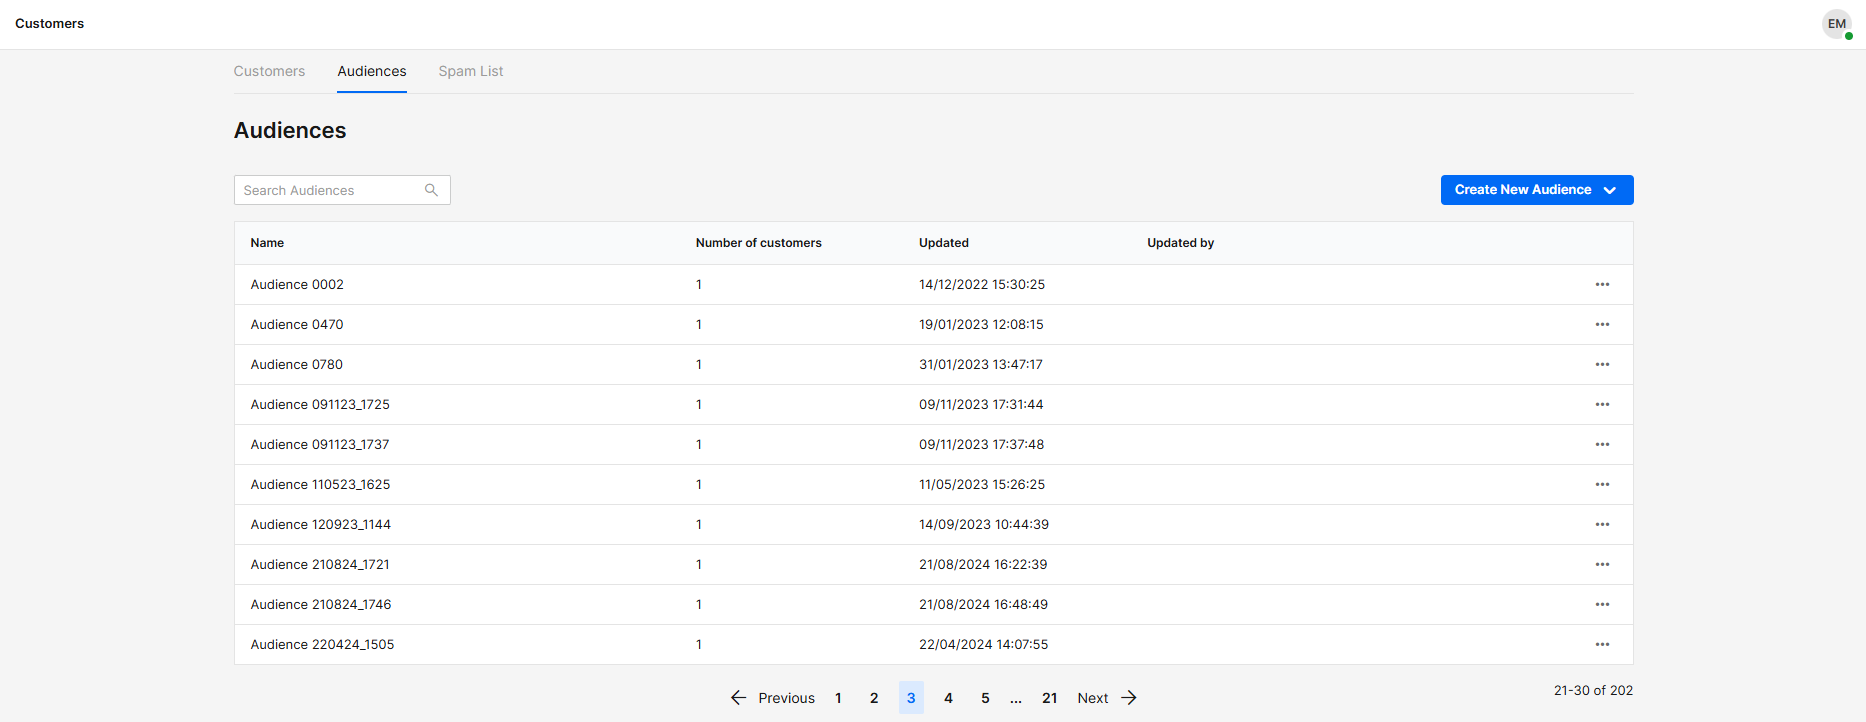
Customers
.png "image(416).png")
The 5th button from the top is the Customers area. Manage your customers individually, or as part of an Audience.
Dashboard
![]()
The 6th button from the top, appearing as a scale meter, is the Dashboard window.
From the Dashboard, monitor the agents’ activity and performance statistics and channel streams.
.png "image(587).png")
Insights
![]()
At the Insights hub, all the performance and usage data of the different channels and modules system-wide, as well as the BI custom dashboard ,are centralized in one location.
.png "image(588).png")
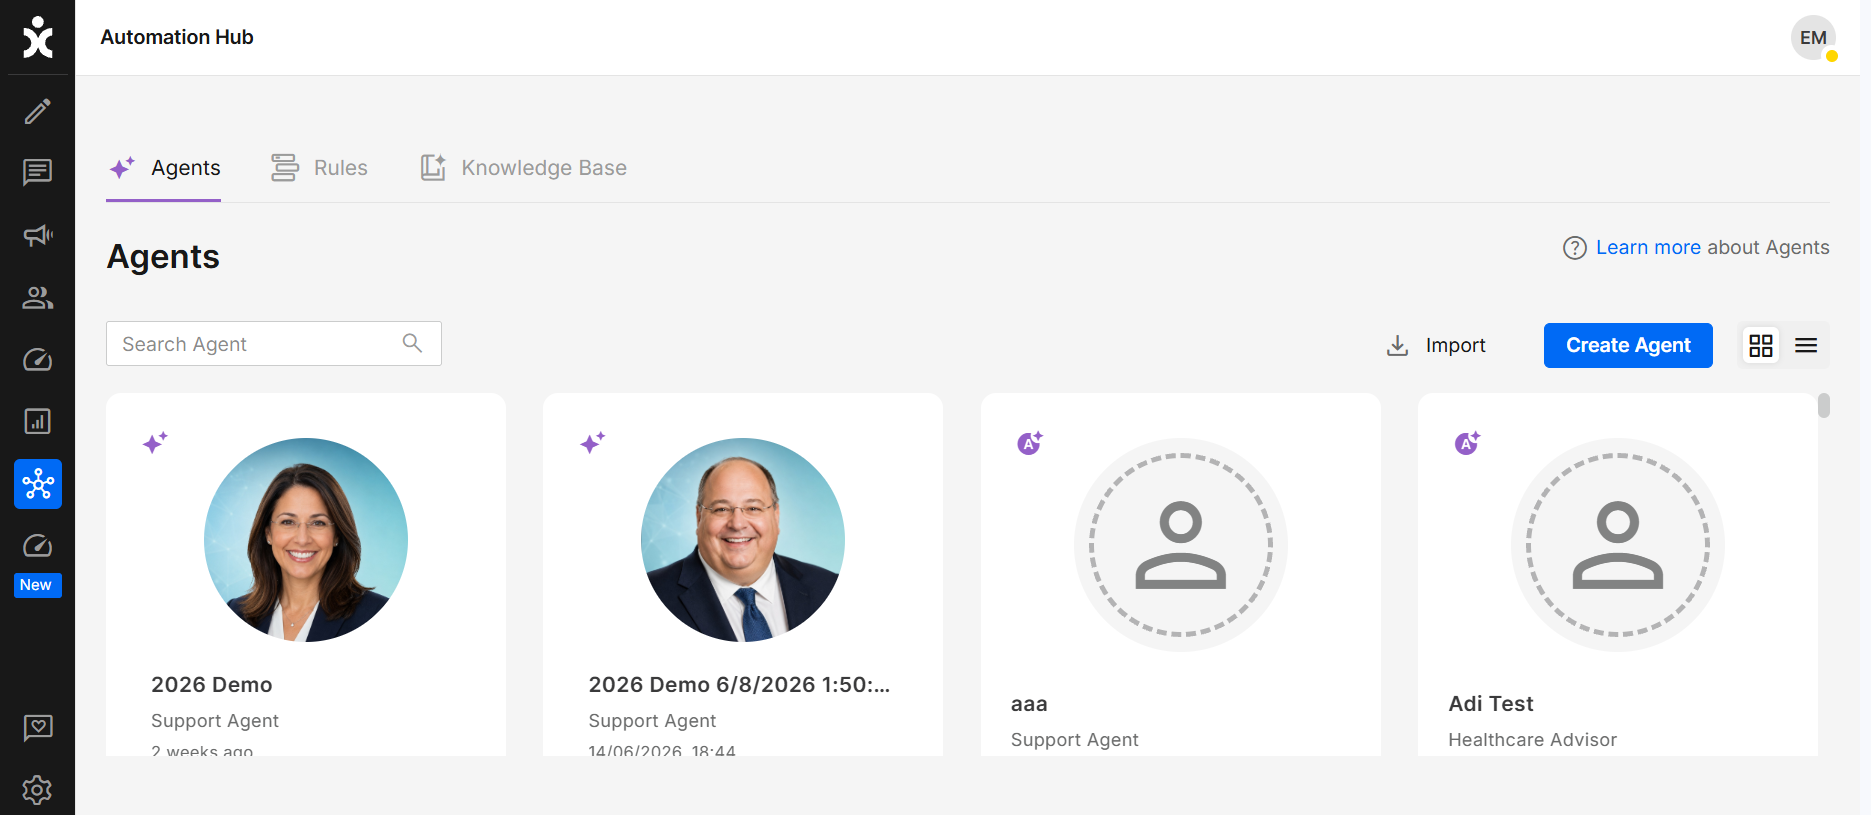
Automation
![]()
The new Automation Hub includes Automation Agents, Rules, and Knowledge Base modules.
Feedback

Each area has its own survey questionnaire. Input is forwarded to the relevant product manager.
.png)
Settings
![]()
At the bottom corner of the screen, the Settings page enables admins to set different CommBox functionalities.
.png "image(647).png")
The Module Settings are organized in the following categories:
Automation features - (Flow Builder, Rules, Intents, Auto-assigned, and AI capabilities)
Channels - (Email, SMS, WhatsApp, Telegram, Facebook, etc.)
Applications - (Chat, Video Chat, Voice Chat, Contact Us, etc.)
Settings & Features - (Forms, Business Hours, Custom Fields, SLA, etc.)
Integrations - (SAP C4C, Salesforce, Dynamics CRM, etc.)
Sidebar Settings

Organization – Sets the general functionality of the account, including language, communication, agent’s workspace, and more.
Teams – Deals with the teams within the organization and their related assets.
Agents – Lists all associated agents for the account and their email, current status, and last login.
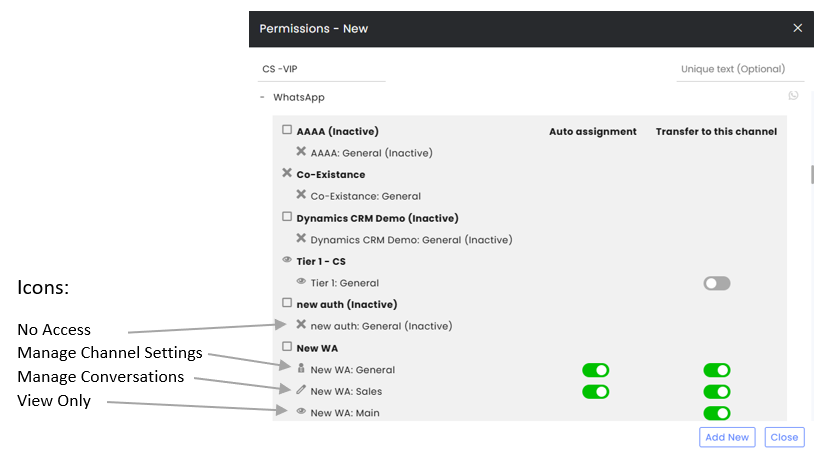
Permission Profiles – Designates the permissions agents may have. Each group of permissions is named and lists the channels and subchannels the holder of that profile may access.
Each channel can be configured to grant agents a specific permission level: View only, Manage Conversations, Manage Settings, or No Access.
Agents must also be included in auto-assignment and granted permission to transfer conversations to the relevant channel.
Agents Status – Manages the statuses the agent can choose. Statuses are categorized into Active, Busy, and Away.
Contacts
Accounts – Lists the number of agents and channels used in the account. Used by the Financial Dept.
Support Tickets - The Support Portal lists the support issues and concerns, opening date, reporting agent, and their status.
.png "support portal(2).png")
Send an announcement – Used to communicate with all agents.