 Overview
CommBox’s Voice Chat module is one of the communications channels developed in-house to provide an additional platform to provide its customers with an extra layer to expand its reach to serve their end customers better.
To set up the Voice Chat module:
1. Click on the Settings icon (located in the lower-left-hand corner of the CommBox’s Agent Workspace).
2. Click on +Voice Chat Channel and type in the Channel Name and sub-channel name(s) if necessary (optional).
3. Once finished, click on Continue.
Module Settings
Advanced
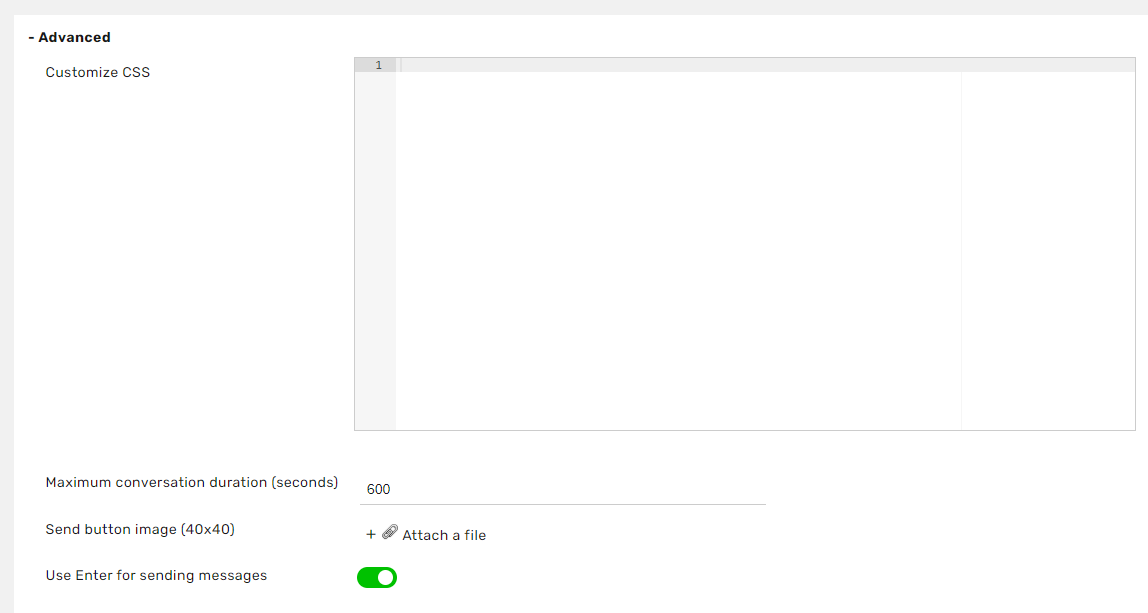
Personalized system design using CSS - you can add specific designs such as other font types, colors, etc.
Maximum conversation duration - this setting will set a conversation’s time limit (in seconds) until closing an opened first inquiry after the first customer response.
When you want to set the maximum duration as 10 minutes (for example), you will input it as 600 seconds.
If the conversation duration exceeds this, the number will appear on the Agent Workspace’s Dashboard on the pages assigned to the agent - an indicator will be added that notes a Max duration exception.
Photo of the send button (40 x 40) - You can replace the default send icon with a different icon/photo to send a message.
Pressing Enter to send a message - if this is set to off, the customer will need to press Ctrl+Enter to initiate the sending or click with the mouse.
General
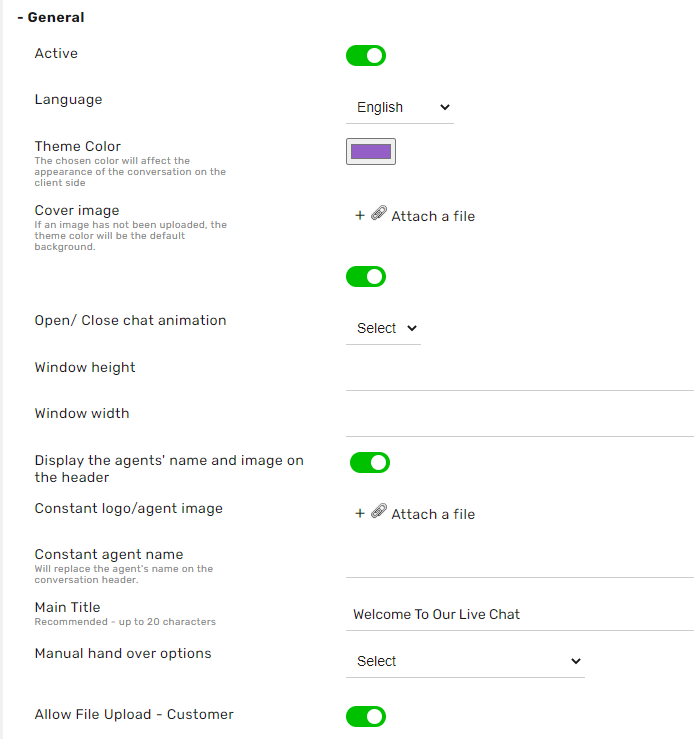

Active – to activate/deactivate the chat (it’s a similar button on the Channel). The difference is that the Channel button initiates a system restart, meaning it deletes the cache, etc., whereas the button here only boots the system and shuts it down.
Language - The language in which the chat will be displayed
Theme color - The chosen color will affect the appearance of the conversation on the customer side
Cover Image - you can upload an image to serve as the default background to the voice chat. If an image has not been uploaded, the theme color will be the default background.
Accessibility icon - toggles on/off the display of ease of use options for the visually impaired
Open/Close chat animation
- Pop-up - a new window will appear.
- Slider - a window will be opened above the button inside the website
Window height -
Setting the chat window’s height
Window’s width - Setting the chat window’s width.
Display the agents' name and image on the header- if activated, this is where the agent’s photo and name (as seen in the General Settings tab) will be displayed.
Constant logo/agent image - a photo of the agent that will appear throughout the conversation a picture that appears before connecting
Constant agent name - Will replace the agent's name on the conversation header. Often customers emphasise the name of the team and not the agent’s name, perhaps because another agent may have been given responsibility for handling the specific issue.
Main title - a title that appears on the Header
Minimum duration for a conversation to be dropped due to inactivity - if a customer responds after the conversation was dropped due to the customer’s inactivity, the conversation will not be counted as a dropped conversation.
If the score remains zero, the conversation will not be displayed as a dropped conversation.
Hiding the chat during busy times - the chat will not be displayed on the website when all the agents are busy.
SLA
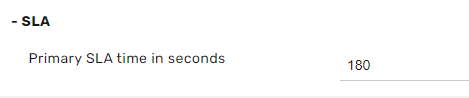
First SLA time (in seconds) - The time elapsed before receiving the first response
For example: when the conversation begins, the customer sends a message, i.e., hi, the agent answers, how can I help you? (first answer)
Business Hours (Operating Hours)
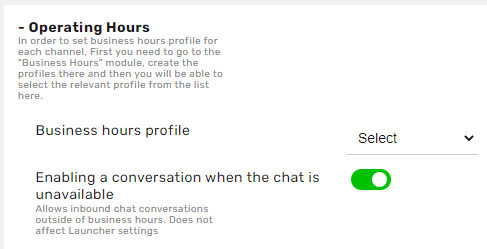
Under these settings, you can choose the Business Hours channels.
Business hour channels are administered from the Business Hours module. Using this module, you can set which message will be sent to the company’s end customers during and outside regular business hours.
Additionally, you can set special messages on special days (i.e., a specific message to be sent on Yom Kippur, etc.)
Enabling a conversation when the chat is unavailable - this setting is relevant only to those who use the automatic scripts in this chat, where one can be redirected to a closed chat channel.
Once this setting is highlighted, the button will be seen, and it will be possible to click on it and enter the chat even though it will be taking place outside of regular business hours.
Launcher
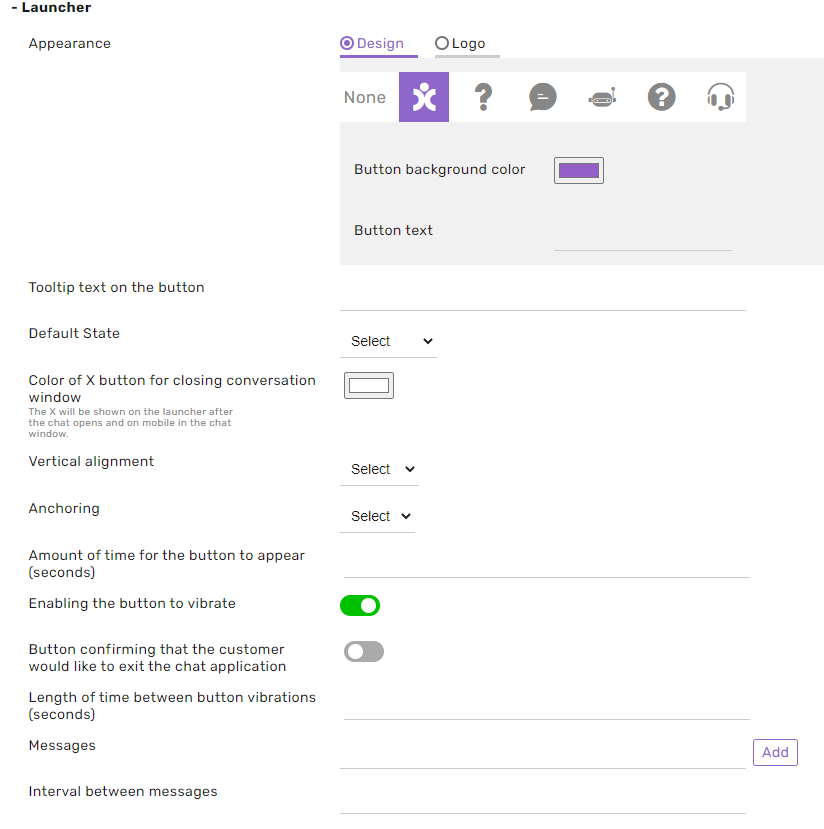

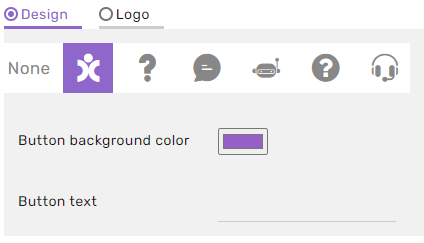
Appearance/Design/Logo
 Icon selection - you can choose one of our icons to be inside the launcher.
Button background color - choose the color background of your launcher
Button text - you can add text to your launch alongside your icon or without an icon
Logo - Uploading the website’s mobile device logo - uploading an icon that will replace the chat icon on the mobile device
Uploading the website’s desktop button image - uploading an icon that will replace the chat icon on the desktop/laptop computer
Default State -
- Open - a chat window at the entrance of the website
- Pre-button - the button displayed and clicking on it will open the window
- Hidden - the button will be hidden and will pop up after ‘X’ amount of time which will be set in the clause below (by embedding a BY.Show code on the customer’s website)
Color of the X button for closing the conversation windows - usable when the opening button is set to hidden -The X will be shown on the launcher after the chat opens and on mobile in the chat window.
Vertical alignment -
- Button - the button located at the bottom of the screen
- Middle button - the button located in the middle of the screen
Anchoring -
- Right - button on the right-hand side of the screen
- Left - button on the left-hand side of the screen
Amount of time for the button to appear (seconds) - in the case of Default State, we’ve set it up so that the button would be hidden, and this setting will determine that after a few seconds, the chat window will appear.
Enabling the button to vibrate - setting the button to vibrate on-screen allows the user to locate the chat button on the website more easily.
Button confirming that the customer would like to exit the chat application - after the customer disconnects from the chat, they will be asked, Are you sure you wish to exit the chat?
Length of time between button vibrations (seconds) - setting the frequency of the vibrations
Messages - floating messages are written to invite the user to enter the chat.
X for hiding launcher on the screen - when this setting is on, an X icon will appear on launcher with text/image launcher that will enable the user to hide the launcher from the screen.
Welcome
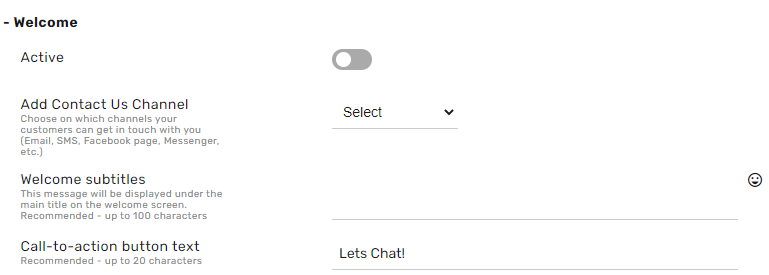
Active - toggle on/off whether or not these settings will appear in the Chat.
Add Contact Us channel - select which channels your customers can get in touch with you (Email, SMS, Facebook, WhatsApp, Telegram).
Welcome Subtitles - this message will be displayed underneath the main title on the welcome screen (up to 100 characters).
Call to action button text - text displayed on the button to send messages in the opening prompt of the chat wizard.
Auto Messages
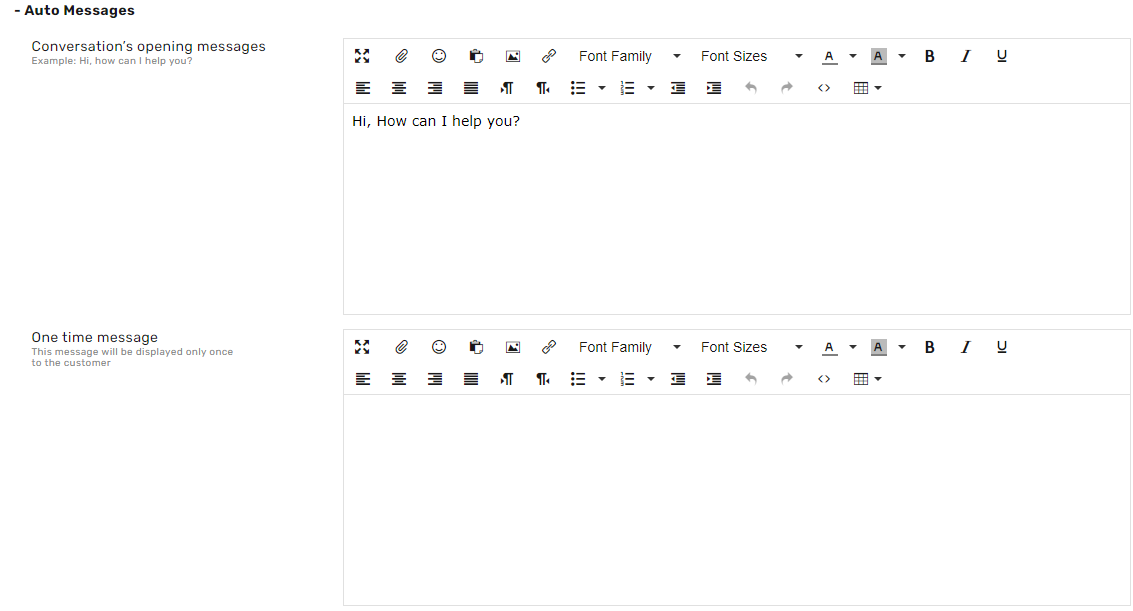
Conversation’s opening messages - messages to be sent at the beginning of a conversation with an end customer.
One-time message - this message will be displayed on a one-time basis (the message sent to the end customer before the conversation’s opening message)
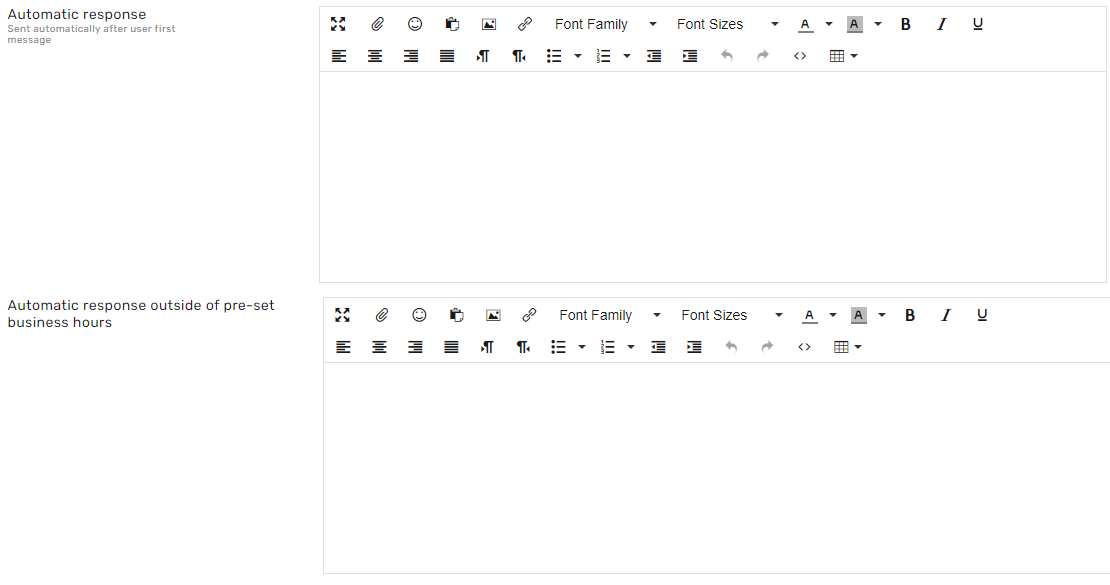
Automatic response - is the automated message sent in response to the end customer’s first message.
Automatic response outside of pre-set business hours - a message that will be sent to the customer in the instance of a customer sending a message at a time that is not defined as being within set business hours
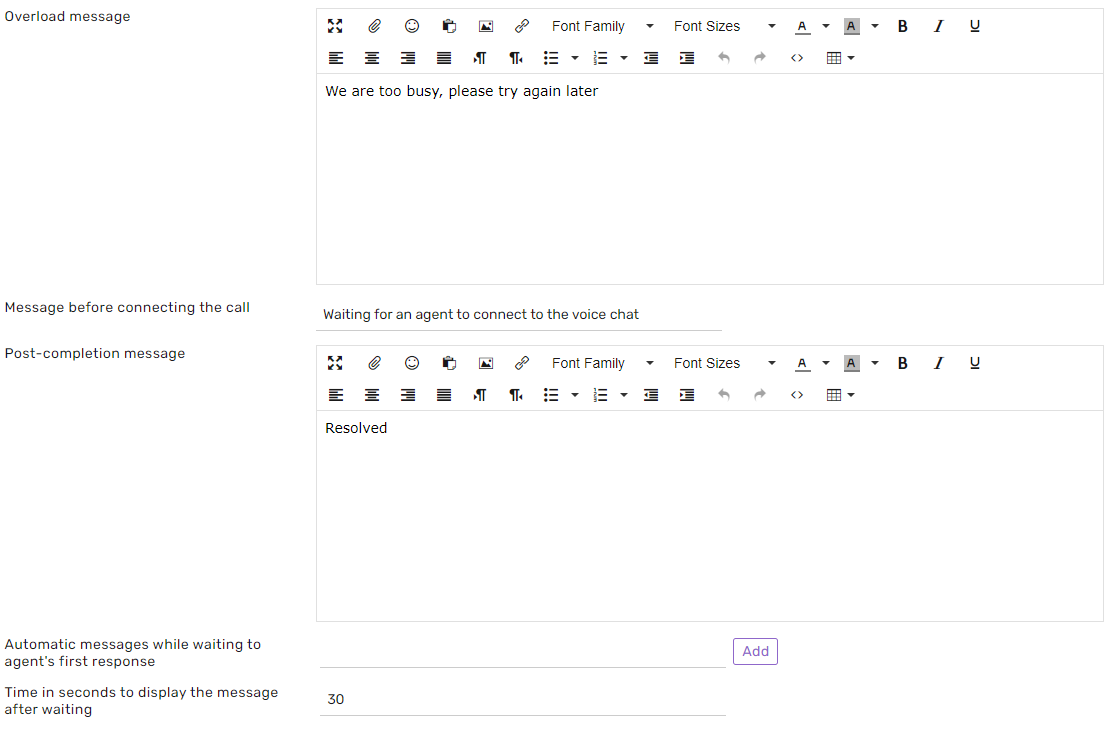
Automatic messages during waiting times (Overload message) - messages displayed to the customer during the conversation waiting period
Message displayed while waiting for agent - message displayed while voice chat is ringing, waiting for agent to answer the voice call
Post-completion message - message to be sent to the customer once the conversation status has been set to solved.
Busy message - message that will be sent to the customer when the agent is busy (you can find an expanded explanation underneath the section titled General Settings in this instruction manual)
Auto-Assign
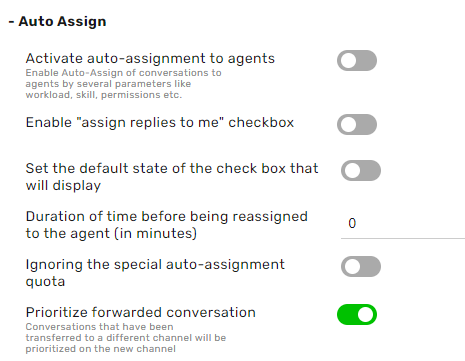
Activate auto-assignment to agents - set whether to utilize or turn off the channel’s auto-assignment capability.
Enable the assign replies to me checkbox - a checkbox will be added to the line item titled, assign responses to me.
Set the default state of the check box that will display - sets the default position of the checkbox to Auto-Assign responses to me (open to toggling).
Duration of time before being reassigned to the agent - the conversation will be assigned to the agent who responded to the conversation if Assign Responses to me has been selected.
If the answer is on the condition of Time Duration before being reassigned back to the agent (in minutes). If it exceeds this duration of time, the conversation will not be assigned.
Ignoring the Special Auto-Assignment quota - activates the system feature. This overlooks the agent’s assignment quota and assigns conversations using the special auto-assignment feature. Special auto-assignment contains five unique assignment types:
- Assign Responses to me
- VIP customer - priority ticket
- Providing a direct link to the chat through the Knowledge Base
- Tracking settings
- Composing messages underneath the assigned responder is set to assigned to me.
Prioritize forwarded conversations - conversations that were forwarded from another channel will be given priority assignment on the new channel if the following conditions are met:
- The conversation is assigned to an agent while it is being forwarded
- The agent forwarding the conversation has no access to view the destination channel
If the conversation has met all the following criteria, it will receive priority above other conversations.
Are you looking for an expanded explanation of the Auto-Assignments module? Please feel free to view the relevant instruction manual.
Login
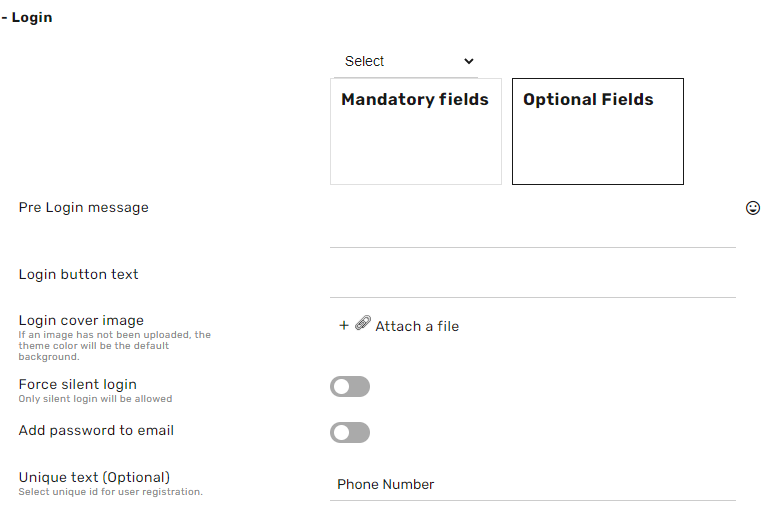
Attached is an explanation of the settings subordinate to the Login tab.
Input fields - In this area, you will define which fields the end customer will be required to enter to proceed and which will not.
For example: first name, last name, email address, etc. The customer card will also define these fields in the conversation itself on the agent side.
Pre-Login message - text displayed on the login interface screen
Login Button text - the text that is written on the login button
Force silent login - Logging in without entering identification details through early identification of more information within the URL.
Adding a password to an email - A password will also be requested if an email is set in the input fields.
Unique ID (optional) - A unique ID is one of the input fields that, if selected above, will display the text set here and enter it in the Unique ID field on the customer details tab on the system administrator’s account.
Customer Satisfaction Survey

The Customer Satisfaction Survey channels are administered from the Customer Satisfaction Survey module. Using this module, you can set which Customer Satisfaction survey will be sent to your end customers after their conversation has been resolved.
Additionally, you can set special messages on special days (i.e., a specific message to be sent on Yom Kippur, etc.)
Activating the Customer Satisfaction Survey - Defines whether to trigger the customer satisfaction survey. A customer survey was issued only after a change to the solved status of the object and if there was a manager message in the conversation (if there was no manager message and the conversation was closed - a satisfaction survey was not issued).
Survey for the conversations when their status is resolved - Here you can select which one of the pre-loaded surveys will be sent to the customer once the conversation is set to resolved.
For more information on the Customer Satisfaction survey module, click here (link needed)
Intents
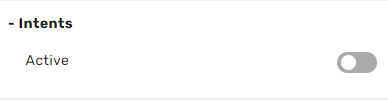
If an Intentions module is activated, the option to enable or disable the Intentions module in the channel will be added.
Each time an Intent is detected by Commbox's artificial intelligence system, a small indicator (an image looking like a brain) will be added to the conversation’s sub-window on the current conversations page of the Agent Workspace.
For more information, please view the Intentions instruction manual.
Customer Verification
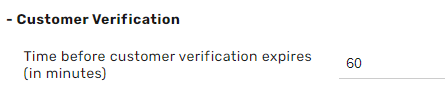
You will see these settings if the customer verification module is set up.
In combination with the Customer Verification module, this section determines the time from the moment of receipt of the Customer Verification (OTP) certificate until re-verification is required.
Interface support is necessary with our API and usually with your company's verification and customer approval service.
Maintenance
Number of days without activity to transfer an application to archive status: This section will define the number of days after an application on which 'status' has been documented.
No further action has been taken and will be transferred to 'Archive' status (display management of filters can be found under the General Settings module 🡪 Conversations).
Number of days without activity before an application in automatic status is transferred to the archive: This section will define the number of days until an unanswered automated request will be transferred to 'Archive' status.
SAP C4C integration
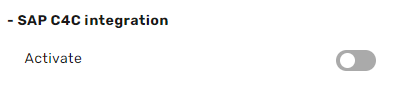
Activate - enable the SAP C4C API to be integrated with the Voice chat