
Overview
Single Sign-On (SSO) allows a user to use one set of credentials to log in to multiple websites and applications, which simplifies credential management, provides secure access, and streamlines the IT process.
Depending on how your organization's identity provider support protocol is set up, select between Directory Service (LDAP) or SAML Authentication. The sections below discuss the related information for each of the protocols.
This guide requires a deep understanding of cyber security and appropriate admin privileges. Feel free to contact our support to activate this service for your account.
In this guide, we used AzureAD (Also known as Microsoft Entra ID) as the IdP of choice.
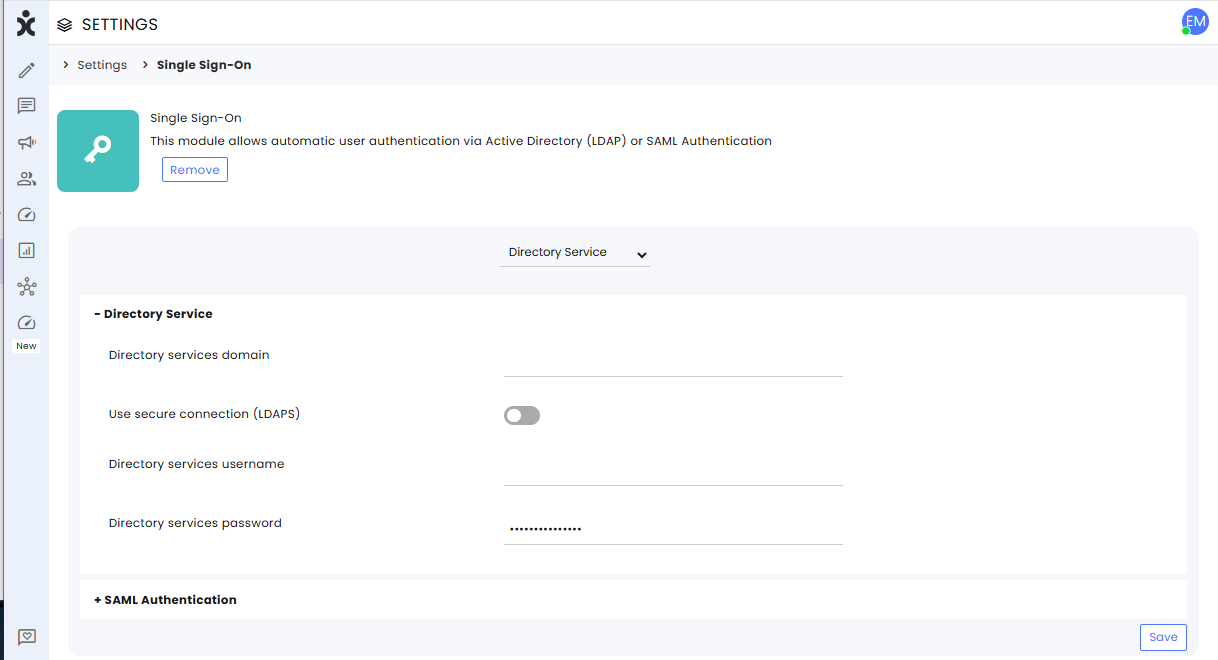
Directory Service
If your organization is using LDAP for the SSO configuration, select Directory Service at the top and expand the first menu to enter the following information:
- Enter the URL of the Directory
- Toggle to On if you are using LDAPS protocol.
- Enter the authorized IdP admin username and password.
- Save settings at the bottom of the page.
SAML Authentication
If your organization is using SAML for the SSO configuration, you will need to integrate your Identity Provider (IdP) with CommBox (Service Provider), exchanging metadata files between the two.
Log in to the Azure portal as a User administrator for the organization.
Procedure:
- Add a new Azure AD User
- Create Azure AD Custom Application
- Configure Azure Application
- Assign Existing Users To The Application
- Configure SSO in CommBox
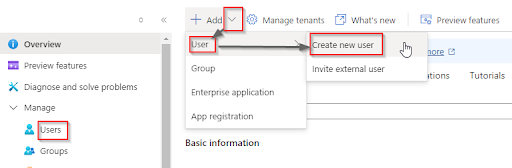
Step I: Add a new Azure AD User
-
Search for and select Azure Active Directory from any page. Also known as Microsoft Entra ID.

-
At the sidebar menu, select Manage > Users, click the down arrow at the top, select User, and click Create new user.
-
On the Create new user page, enter the required information for this user.
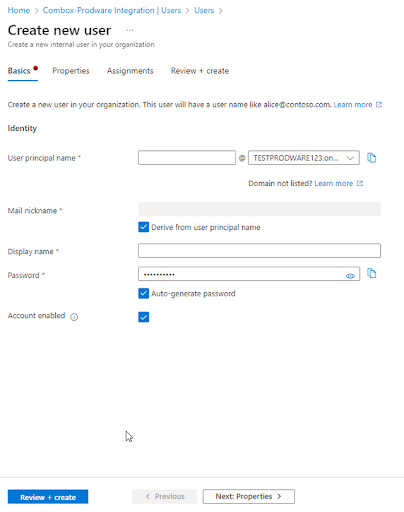
Note: The User principal name in AzureAD will be used for SAML authentication vs. the user.username in CommBox. -
Copy and save the autogenerated password provided in the Password box.
-
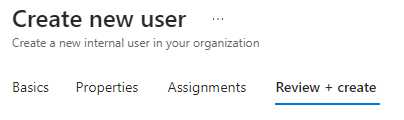
Click on the Review + create at the bottom of the page. It takes a few seconds to create the account. You may click the Refresh button at the top.
-
On the next screen, review the created user information. Add Basics, Properties, and Assignments as desired and required, and click Create.
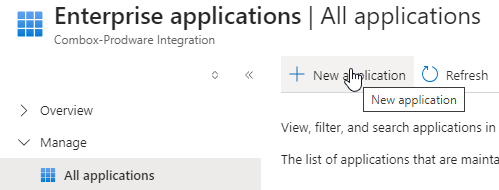
Step II: Create Azure AD Custom Application
-
On the sidebar menu, select Enterprise applications and then click on the + New application button at the top.
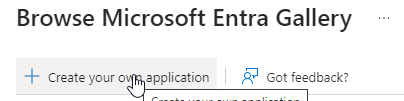
-
In the Microsoft Entra Gallery, select + Create your own application.
-
In the name of your app field, enter your Commbox brand URL (for example, xyz.commbox.io). Then, select the Integrate any other application you don't find in the gallery (Non-gallery) radio button option.
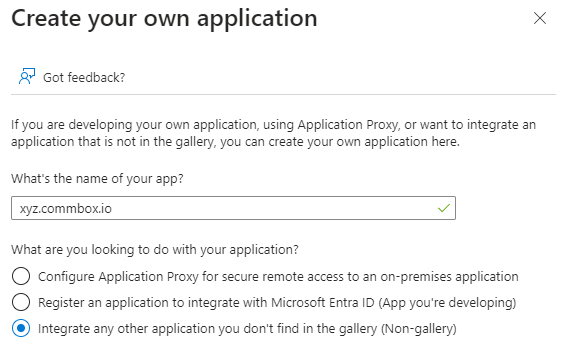
-
On the bottom of the page, click Create.
Step III: Configure Azure Application
-
Navigate to Home > Azure Active Directory > Enterprise applications.
-
Select your account from the list (xyz-corp.commbox.io)
-
On the sidebar menu, navigate to Manage > Single sign-on and select SAML.
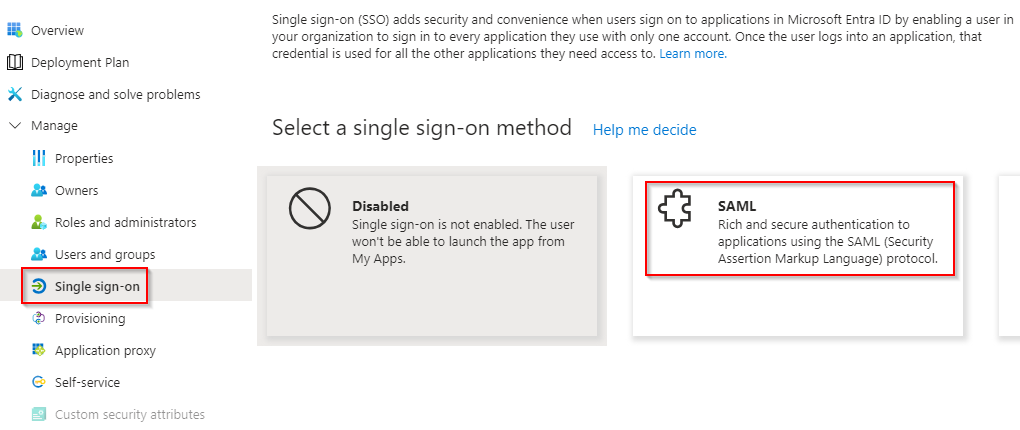
-
On the Set up Single Sign-On with SAML page, the following sections have to be configured:
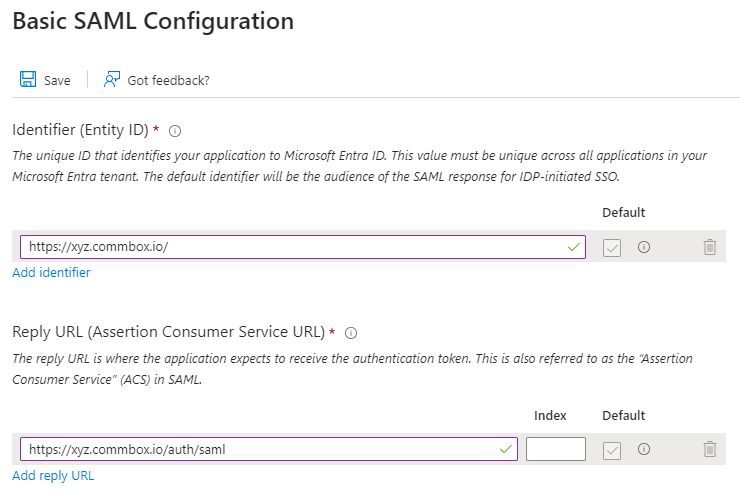
a. On the Basic SAML Configuration section, for the Identifier (Entity ID) field, enter your CommBox brand URL (for example, https://xyz.commbox.io).
b. For the Reply URL (Assertion Consumer Service URL) field,
Set your Commbox brand URL with /auth/saml suffix (for example https://xyz.commbox.io/auth/saml).
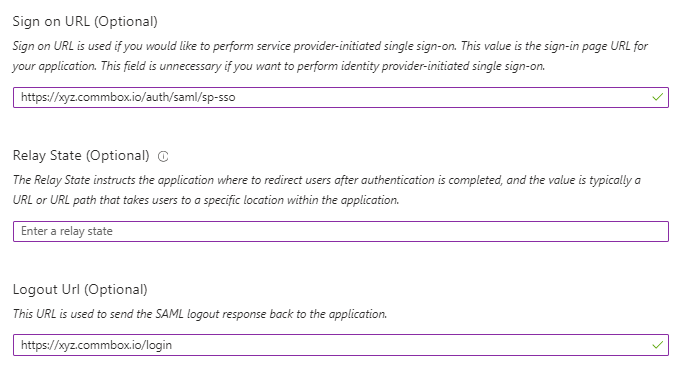
c. Optional step: If you wish to use service provider-initiated single sign-on, at the Sign on URL, enter your Commbox brand URL with /auth/saml/sp-sso suffix. (e.g https://xyz.commbox.io/auth/saml/sp-sso)
-
Click Save.
-
Reload the current page by re-selecting Single Sign-On on the sidebar.
-
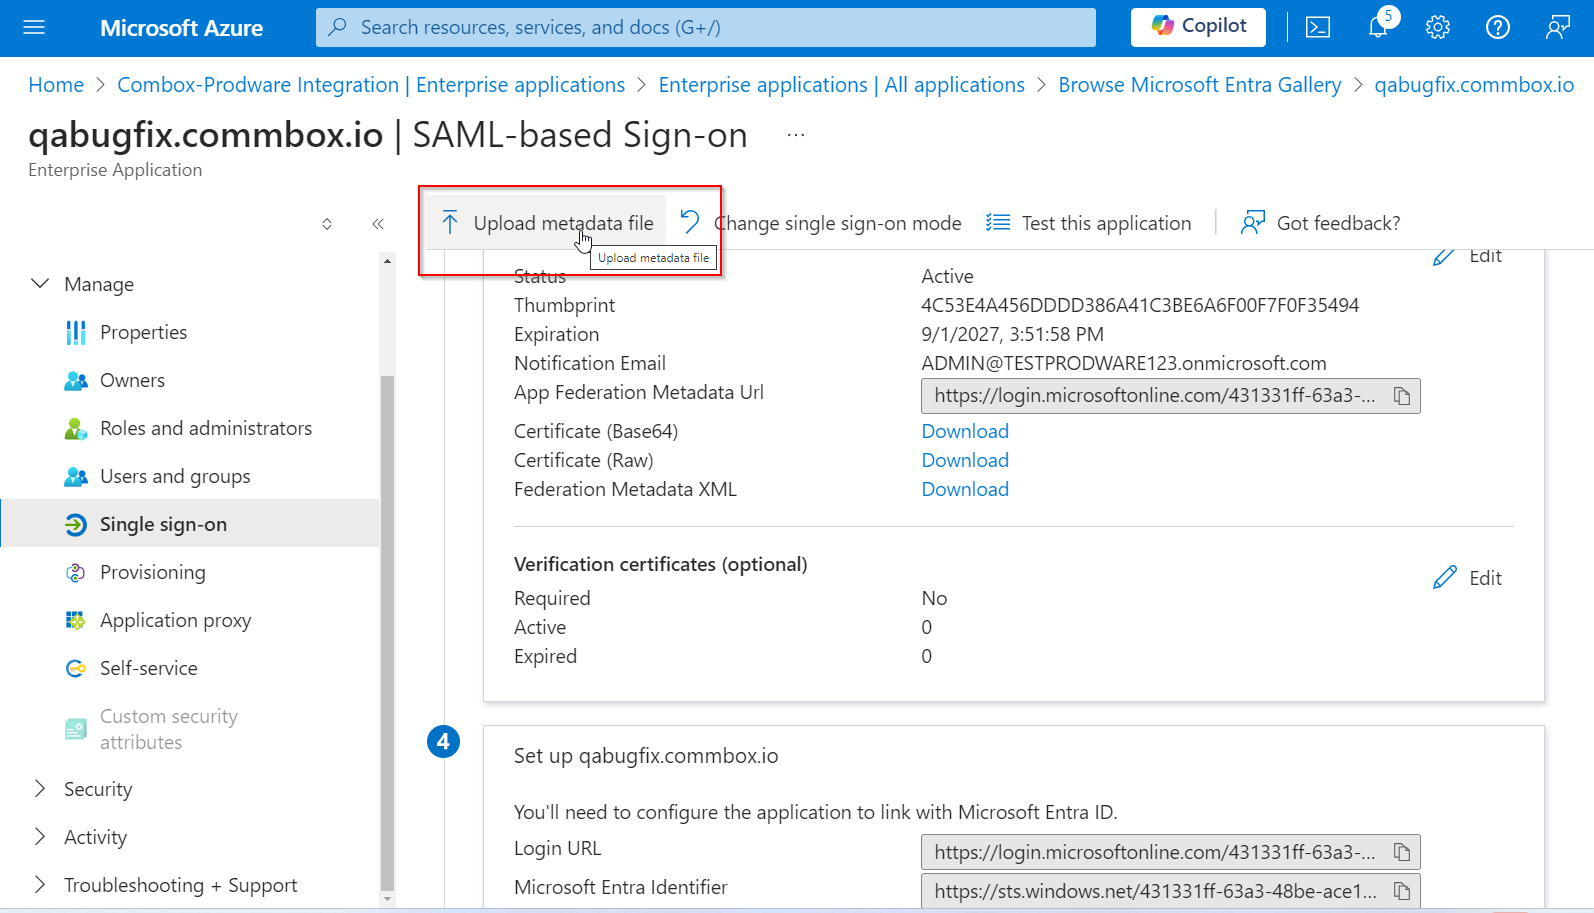
In the SAML Certificates section, click the Download link next to the “Federation Metadata XML”.
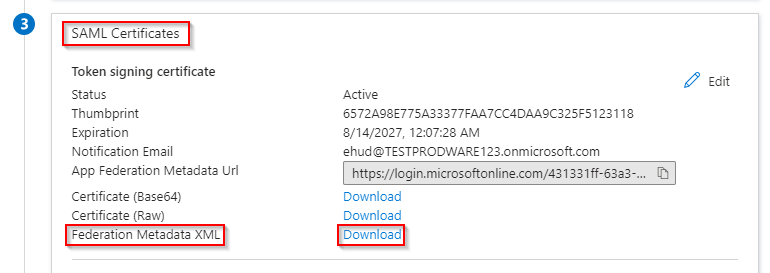
Save the file (e.g., xyz.commbox.io.xml) on your Computer. This Federation Metadata XML file will be used in the SAML Configuration in CommBox. -
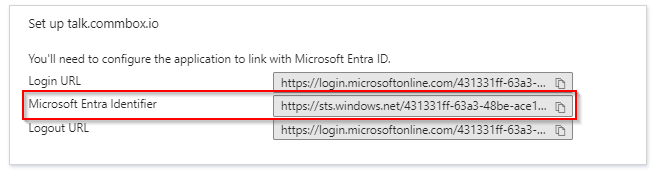
In the Set up xyz.commbox.io section, copy the Microsoft Entra Identifier into a notepad. It will be used in the SAML Configuration in CommBox.
Step IV: Assign Existing Users To The Application
-
Navigate to Home >Azure Active Directory > Enterprise applications, and click on your custom application, e.g., xyz.commbox.io
-
At the sidebar menu, select Manage > User and groups, and click + Add user/group at the top.
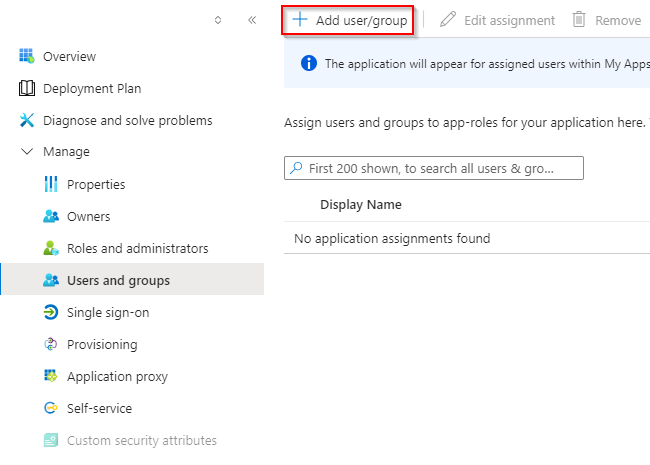
-
If you don’t see any users, click None Selected.
-
Select the user(s) you wish to assign the application to and click Assign.
Step V: Configure SSO in CommBox
-
Log in to your CommBox account as an Admin.
-
Navigate to Settings > Single Sign-On module, select the SAML Authentication option at the top, and expand the +SAML Authentication section.
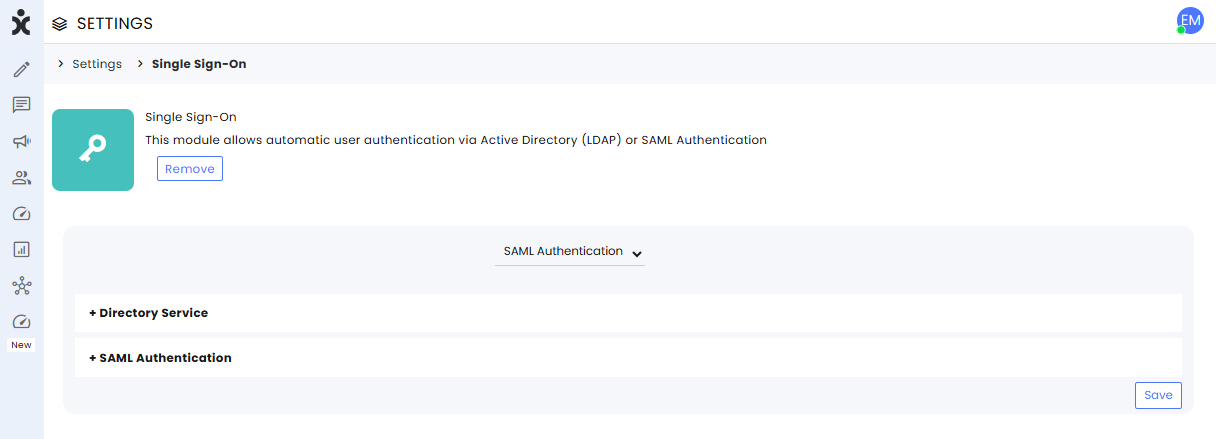
-
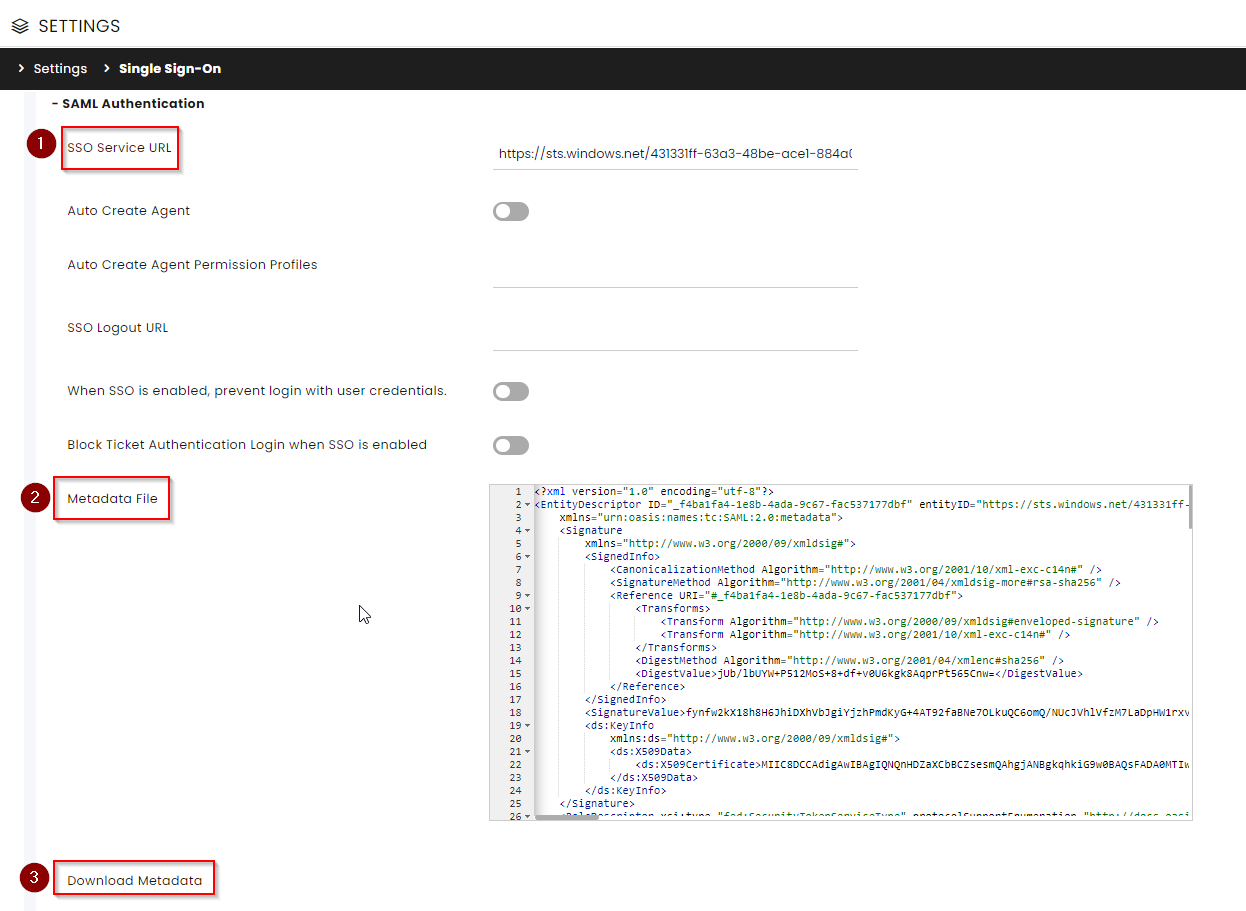
In the SAML Authentication section, enter the following information:
a. At the SSO Service URL field, enter the Entra Identifier copied earlier (step 3-8).
b. At the Metadata File section, enter the data you downloaded earlier (step 3-7).
c. Download the CommBox Metadata (commbox.io.metadata.xml) and save it on your PC
-
Upload the CommBox metadata to the IDP (Consider this final step for the Configure Azure Application part). You might need to click another ‘Save’.
-
Test the connection by going to CommBox SSO Login URL:
For example https://xyz.commbox.io/auth/saml/sp-sso
If everything is set up properly, you will be redirected to the IDP login page.
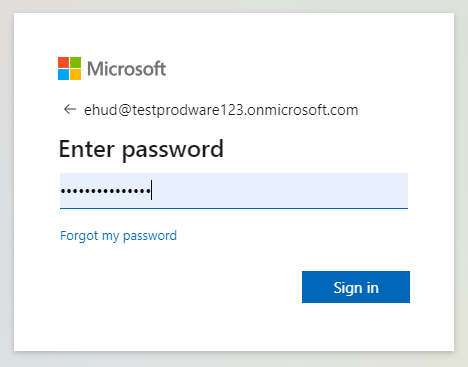
Log in with the user created in the Azure user creation (Make sure you’ve logged out as the admin user beforehand; otherwise, you’ll get an error message from the IDP).
Related Articles:
SAML authentication with Microsoft Entra ID
Quickstart: Add an enterprise application - Microsoft Entra ID