Overview
This article discusses in detail the different aspects of the Ask/Input step.
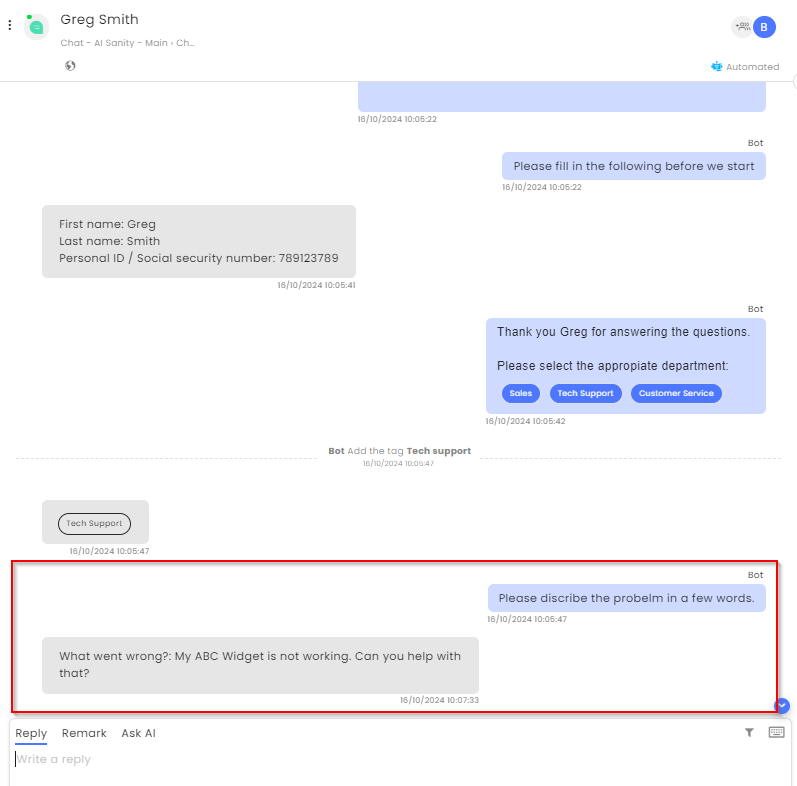
The Ask step requires the customer to answer a question. The designer can enter the actual question as well as the wording that appears in the reply box of the user’s device. The answer is then stored in a data field and as a message in the conversation for the agent to view.
Inbox:
Creating an Ask Step
- Add an ASK step to the Flow branch.
- At the step’s properties, check the “Add a short message…” box and enter a short question or message explaining what the users need to answer.
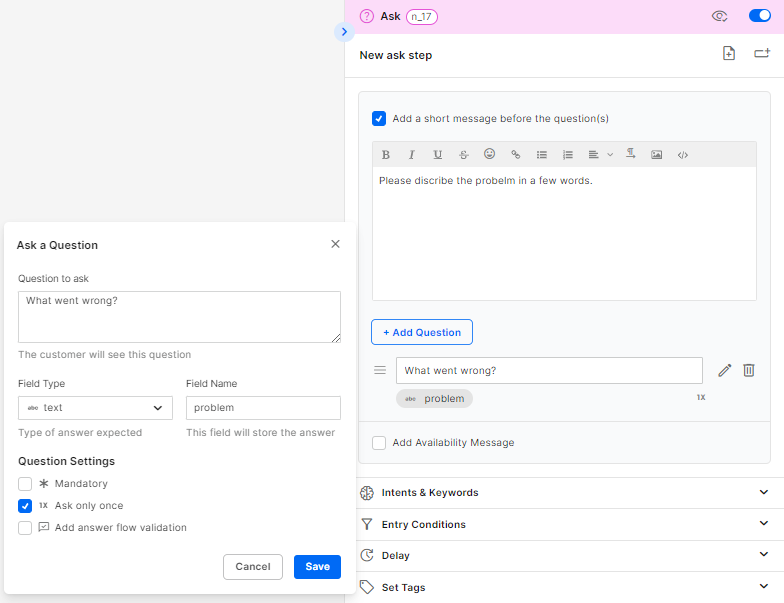
- Click the +Add Question that will open a dialog box next to the step’s properties.
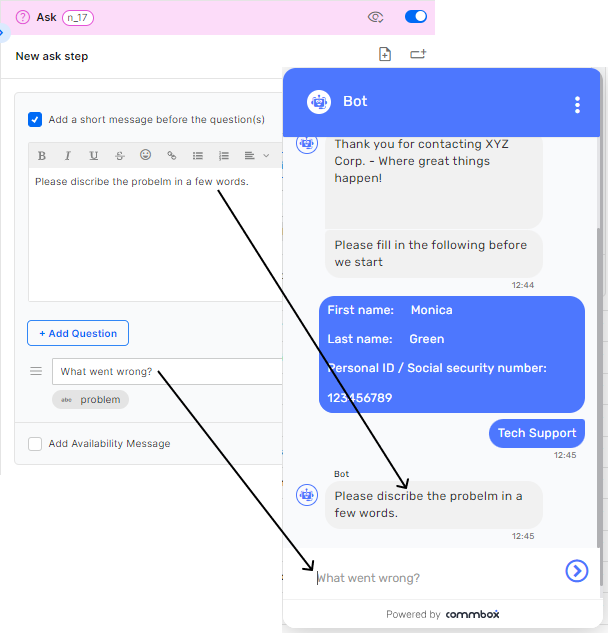
- Enter the question for the user. Note that the actual question appears in the chat’s reply box, so the questions or instructions must be short (up to 30 characters).
- Based on the type of answer you expect the customers to enter, select the appropriate field type to store the answer. See the Field Types section below for details.
Note: When users enter content that does not match the field type, the flow will prevent them from moving forward.
- Name the field with the answer (lowercase only and underscore instead of space)
- Select the Question Settings:
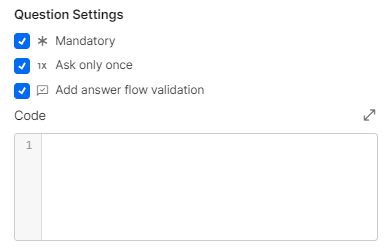
- Mandatory questions will stop the flow until the information is entered and clicked Send.
- In some designs, the flow may return to the same spot. If you don’t want the question to be asked again, select the Ask only once option.
- Add answer flow validation uses a code to verify the customer's entry against existing data or format rules.
- Click Save in the dialog box.
Displaying the Ask Step
Single question
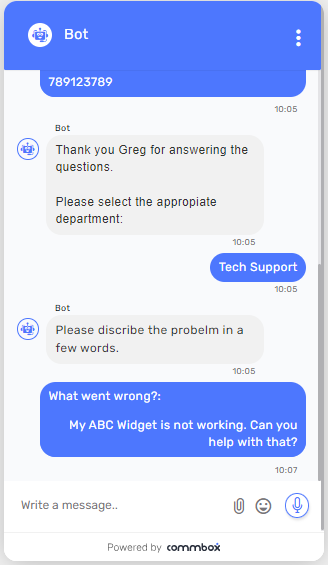
The process above creates a question that is answered in the input field.
Multiple Questions
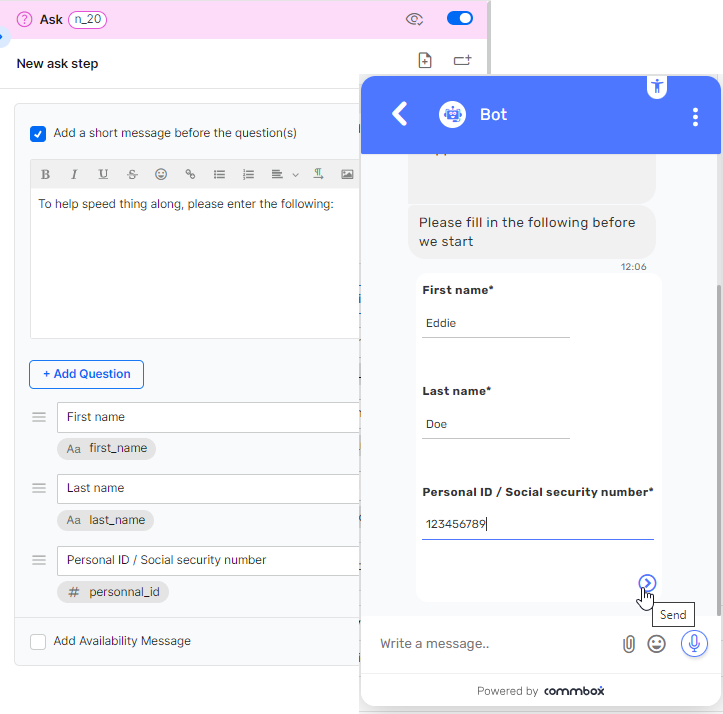
One Ask step can handle a few questions, so you can split the “answer” into components that will make the collected data more concise.
For example, you can request the user’s information by asking each field (first name, last name, etc.) as a separate question.
When multiple data fields are present in one step, the questions are answered in the chat interface and in the input field
Applying the Data
The input from the customers can be used in multiple ways by the flow:
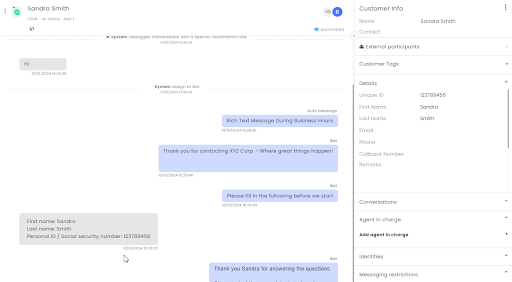
A. When the flow ends with a transfer to an agent, the agent can view the customer’s journey, including the input that can help service the customer.
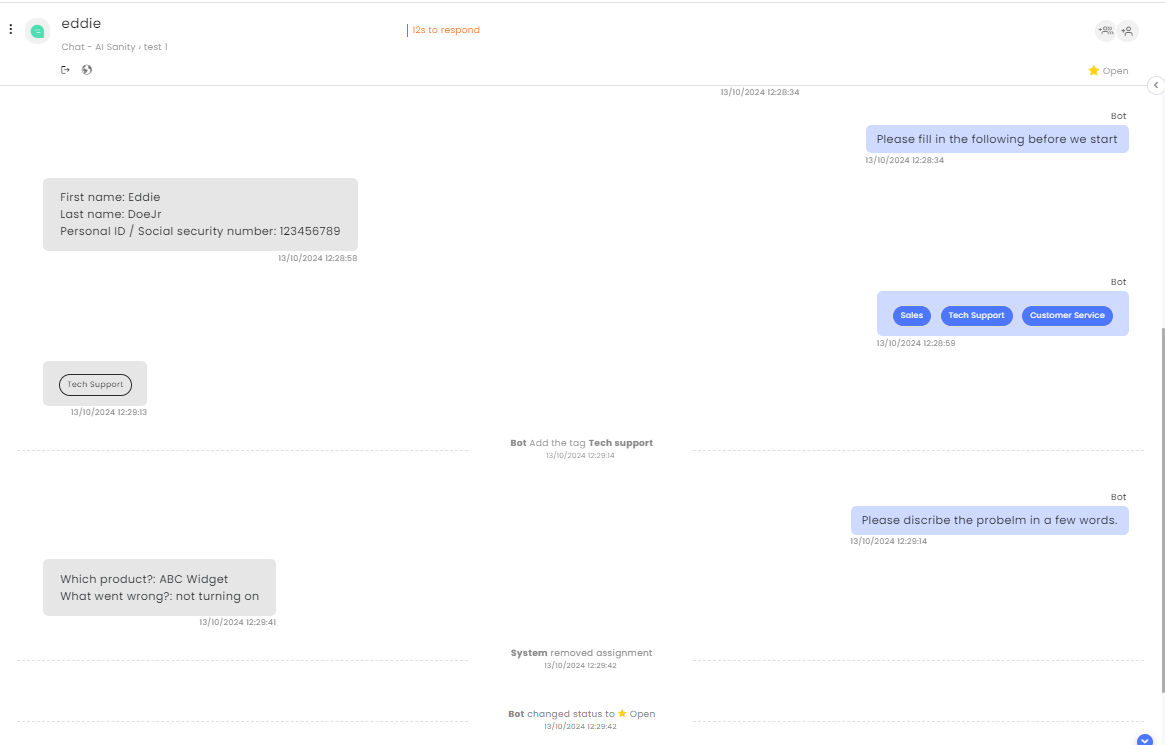
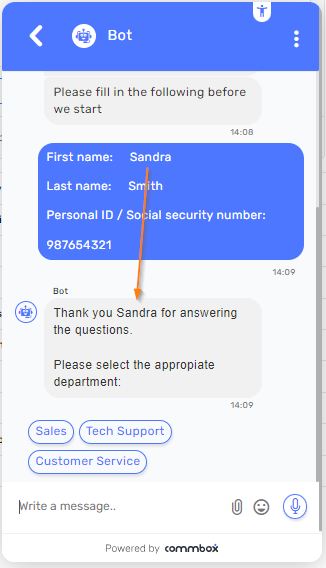
B. Adding the input into the flow to personalize the interaction.
For example, after requesting the customer’s name, enter it into the dialog surrounded by double curly brackets: “Thank you {{first_name}} for answering the questions. Please describe….”
C. Adding the information into the customer’s records.
-
At the Say step after the Ask step, in the Set Variable section select Set by value.

-
At the dialog box, enter the field name you want to populate.
Those fields usually start with user.XXXX but you can check those values in the reply box’s variable fields icon. -
Enter the data type
-
For the value, enter the field name you used with the preface “data.”
Example: The field name of user.last_name will have the value of data.last_name

The Agent's view (automation):
D. Use the customer’s info as a condition for entering a certain branch.
For example, if the driver’s age is over 24 with more than 3 years of driving experience the flow will enter the branch that offers a discount. The Say step will say:
“You are qualified for a 34% discount on your comprehensive insurance. Would you like to hear more details from the agent?”
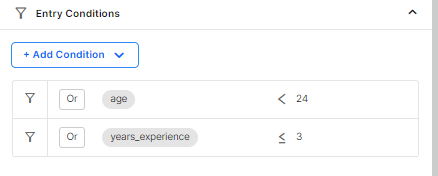
Note: Entry conditions must include ALL possibilities. If “A” is required to enter the branch, you must include the opposite condition (Not A) in the other branch.
-
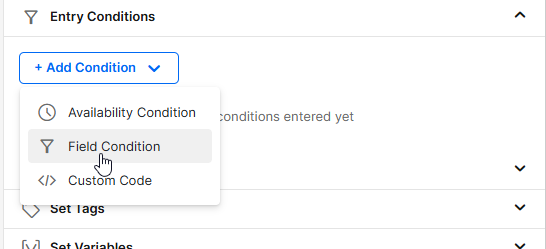
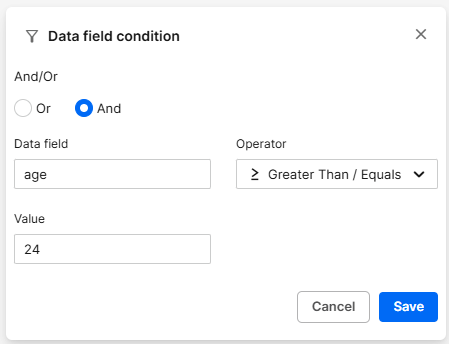
At the step that starts the “Discount branch” select the Entry Conditions section and select Field Condition.
-
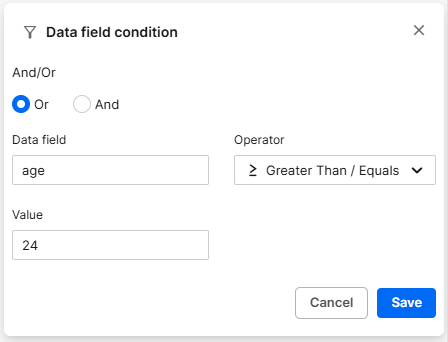
a) Select AND (age + experience)
b) Enter the data field “age” (It was created separately in the Ask step or Field settings)
c) Enter “greater than/equal” to the Operator
d) Enter 24 for the value
e) Click Save.
-
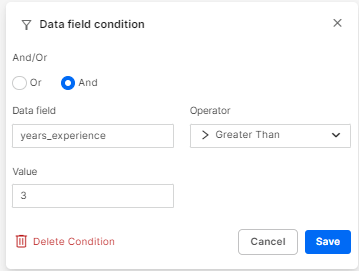
Again, click Add Condition and select Field Condition.
a) Select AND (age + experience)
b) Enter the data field “years_experience” (was created separately in the Ask step of Field settings).
c) Enter for “greater than” to the Operator.
d) Enter 3 for the value.
e) Click Save.
-
For the other option, enter the opposite values
Field types
The Field Type limits the type of answer the user can enter. For example, when selecting email type, the customer must enter an email format as their answer.
Int – A whole number
String – A short text
email – An email address
Phone – A phone number format
password – A "hidden" text area. (****)
Text – a longer text
Dropdown – A single select from options – see below
Multiselect – A multiple selection from options - see below
Bool – A check box (true/false)
Alphanumeric – Only numbers and letters (no special symbols)
Date – Date format DD-MM-YYYY (only) or a popup calendar when clicking in the input area.
Month – The numbers 1 through 12
Combobox – Opens a dropdown list of short texts when chosen. Usable with autocomplete when users type the selection.
Float – A number with a decimal point (12.4)
reCaptcha – Opens a reCAPTCHA security test (using unique and uneven symbols)
to tell apart humans from bots.
Document – Supported types include: PDF, DOC, DOCX, XLS, XLSX, PPT, PPTX, TXT, XML, XSL, HTML, HTM, CSV, EML, MSG, RTF, SVG, WSDL, DRAWIO, JSON, HEIC, HEIF
Document or Photo – Supports all file types listed in Document (above) and Photo (below).
Video – To upload a video file
Audio – To upload an audio file
Location – To share the current location
Photo – Upload images. Supported types include: JPEG, JPG, PNG, GIF, TIF, TIFF, BMP, WEBP, JFIF
Gallery - Choose from several items with images, titles, descriptions, and custom button text.
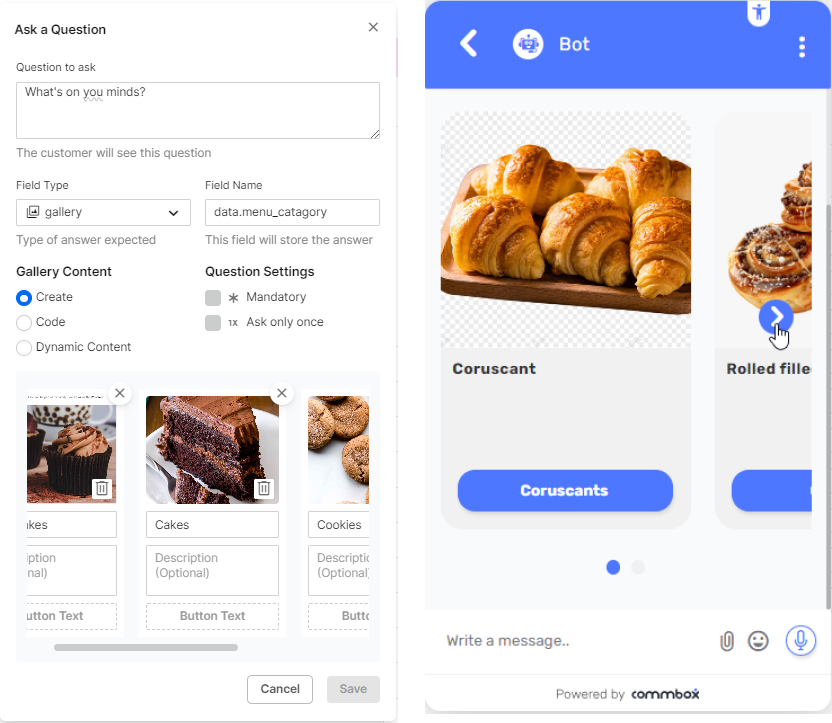
- Titles and buttons’ text are mandatory fields.
- Images should be JPEG, PNG, or GIF file type.
Listing options:
Dropdown and Multiselect fields have the following listing options:
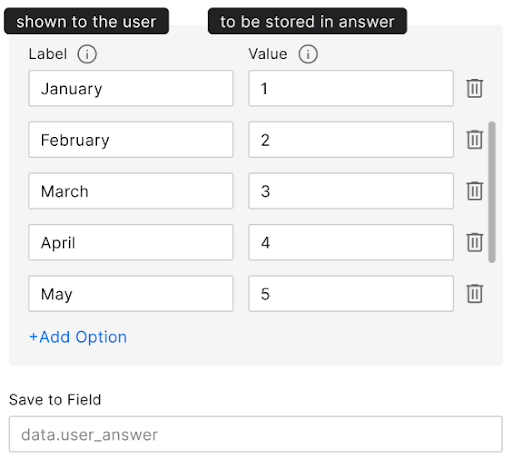
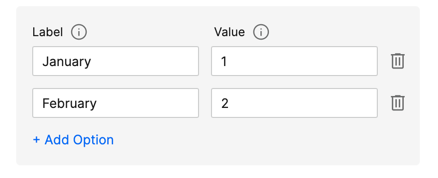
Manual List
The list enables the customer to select from the displayed labels, and the assigned value is stored in the designated data field. For example, the customer selects the Month’s name, and the numeric value is entered in the field.
Dynamic List
Data containing different fields is pulled (via an API for example), where the customer can see the selected list of labels, and the related value of the selected label is stored in the designated data field.
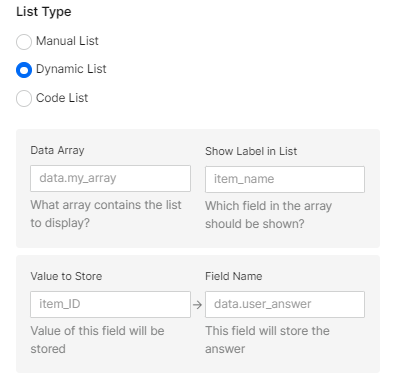
Example: A data array contains the First name and Unique IDs of many individuals. The customer selects a person's name, and that person’s unique ID is entered into the Field data.user_id.
Code List
Code containing the data array is entered here to select the desired value that will be stored in the field.
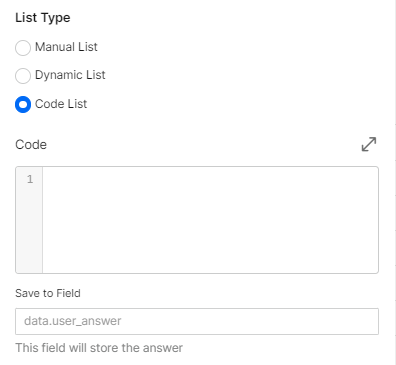
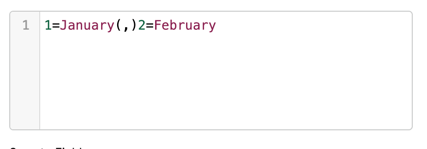
Example:
In “Code mode” will appear like this:
