Overview
APIs are powerful tools that enable the bot to perform tasks such as sending or pulling data and communicating with third-party platforms. In this guide, we discuss the Flow Builder’s API step and the Error step.
Available API Types
The API step can accommodate the following:
a. REST – An external REST API call with one of its methods (GET, PUT, POST, etc.)
b. Raw – Raw code of the API to activate 3rd party actions
c. SOAP – An external SOAP API call with one of its methods
d. Workflow – Code that will activate actions within CommBox
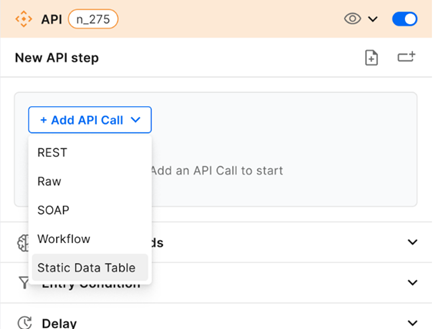
e. Static Data Table – Pull data from an uploaded table
Configuration of the API Step

-
At the flow builder, select the API step and click + Add API Call to select the type you wish to incorporate into the flow.
-
At the dialog box, enter the information as described below:
For Rest API:
a. Enter the URL and select the REST API methods (GET, PUT, POST, etc.)
b. Select the Content type from the dropdown menu.
c. User Agent (optional) – Enter the browser User Agent originating the request.
d. Enter the Header and Body parameters and click the Test button.
e. Save the response to – Name the data field and response header. Enter this field name in any of the steps that need to display or use the data.
f. Debug Mode (optional) – The Debug Mode is used when seeking help from our customer support. Check this box after contacting us with issues concerning APIs within a flow.
g. Message (optional) – Enter the message for the customer advising what this step is doing.
h. Click Save.
For Raw API:
a. Enter the raw code of the API and click the Test button.
b. Enter the message to the customer and click Save.
For SOAP API:
a. Enter the URL and select the REST API methods (GET, PUT, POST, etc.)
b. Select the Content type from the dropdown menu.
c. Enter the XML file name, the Encoding format, operation, and Action.
d. Enter the parameters and Requested Body parameters and click the Test button.
e. Enter the Response Root to which the API saves the response.
f. Debug Mode (optional) – The Debug Mode is used when seeking help from our customer support. Check this box after contacting us with issues concerning APIs within a flow.
g. Message (optional) – Enter the message for the customer advising what this step is doing.
h. Click Save.
For Workflow:
a. Enter the raw code of the API and click the Test button.
b. Enter the message to the customer and click Save.
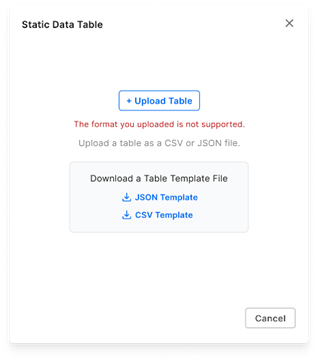
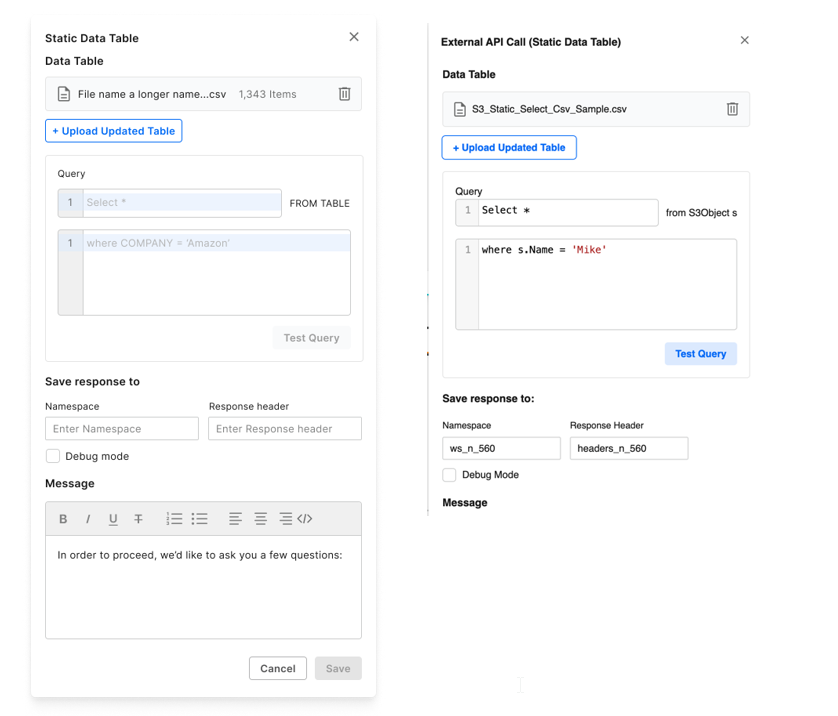
For Static Data Table:
a. Upload the table by clicking the Upload Table button. Download templates to see the required format (optional).
b. Set the query parameters for retrieving information from the table.
c. Save the response to – Name the data field and response header. Enter this field name in any of the steps that need to display or use the data.
d. Debug Mode (optional) – The Debug Mode is used when seeking help from our customer support. Check this box after contacting us with issues concerning APIs within a flow.
e. Message (optional) – Enter the message for the customer advising what this step is doing.
f. Click Save.
Error Step
- Add an Error Step to the flow.

a. The Error step must be placed in a higher hierarchy than the relevant API step.
b. When the API fails, the flow will go to the closest Error step above the failed API step, enabling the flow designer to have more than one reaction content to the failed API call.
