
Overview
The WhatsApp Cloud API is Meta’s official cloud-hosted solution for connecting businesses with customers over WhatsApp. Meta manages the infrastructure directly, so you can focus on using the API without handling server setup or maintenance. We also support WhatsApp Coexistence, allowing agents to use their personal devices while remaining connected to the business account. Note: Existing WhatsApp accounts must complete the onboarding process again to enable WhatsApp Coexistence.
This onboarding guide explains how to obtain a new WhatsApp number and complete the required verification steps.
To begin, you will use your personal Facebook account and grant CommBox managerial rights to your Facebook Business Manager account. Importantly, CommBox does not gain access to your Business Manager account itself—it can only manage the WhatsApp Business Account (WABA), which is used to create and configure the phone numbers for WhatsApp communication.
For successful onboarding, your business must be verified with Facebook. If not done previously, the process may fail, and the WABA will be blocked.
For more information : https://www.facebook.com/business/help/2058515294227817?id=180505742745347
For additional information about CommBox’s WhatsApp module, refer to the following resources:
- WhatsApp Messages guide – Overview on WhatsApp capabilities and where to set them up within the CommBox.
- Template Management guide – Policies, statuses, and reporting for WhatsApp templates.
- Creating Marketing / Utility Templates guide – Step-by-step instructions for creating marketing or utility templates.
- Creating Authentication Templates guide – Step-by-step instructions for creating authentication templates.
- WhatsApp Campaigns guide – Managing and running WhatsApp-based campaigns.
Prerequisites
To open a new WhatsApp account, you’ll need the following:
- An active Facebook account. The Facebook account must be a regular individual account. Using a fictitious user, or a user created specifically for the purpose of opening a WhatsApp account, may cause issues in the verification process and may result in Facebook blocking the account.
- A valid email address
- An active phone number
- The business information must be real and verifiable by Facebook. If not done, the process may fail, and the WABA will be blocked. For more information: https://www.facebook.com/business/help/2058515294227817?id=180505742745347
Step I: Getting a WhatsApp Phone Number For Your Business
- Navigate to Settings > WhatsApp, and click the + WhatsApp Channel button at the top.
.png)
- Click New WhatsApp business number.
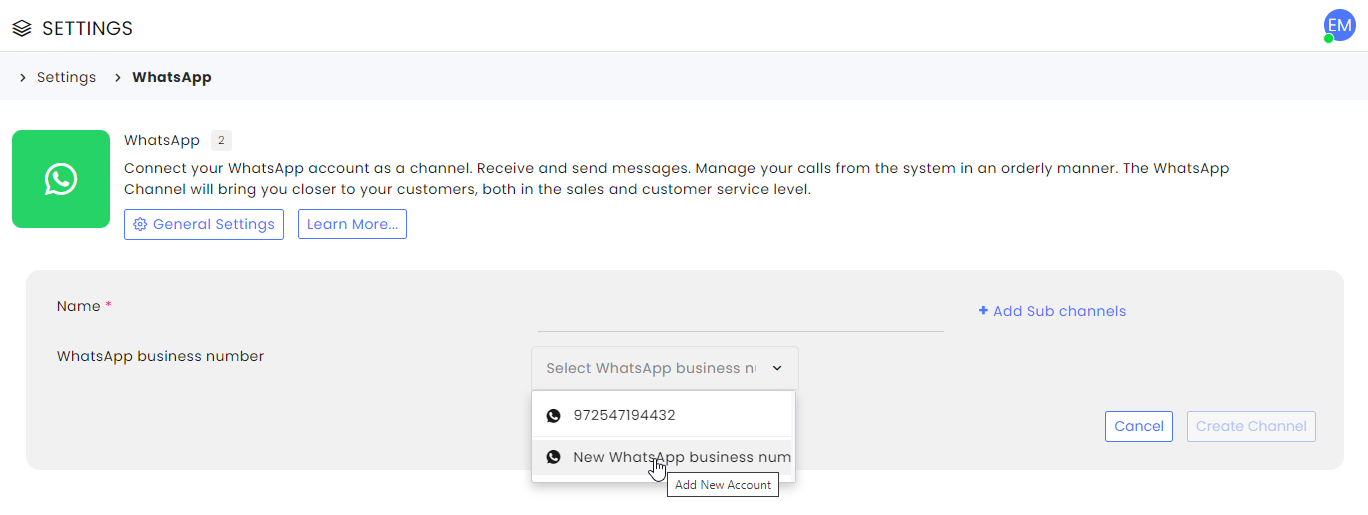
- At the new dialog box, continue as the user or change the account.
Note: Manage TEST is the environment (the brand) for this tutorial.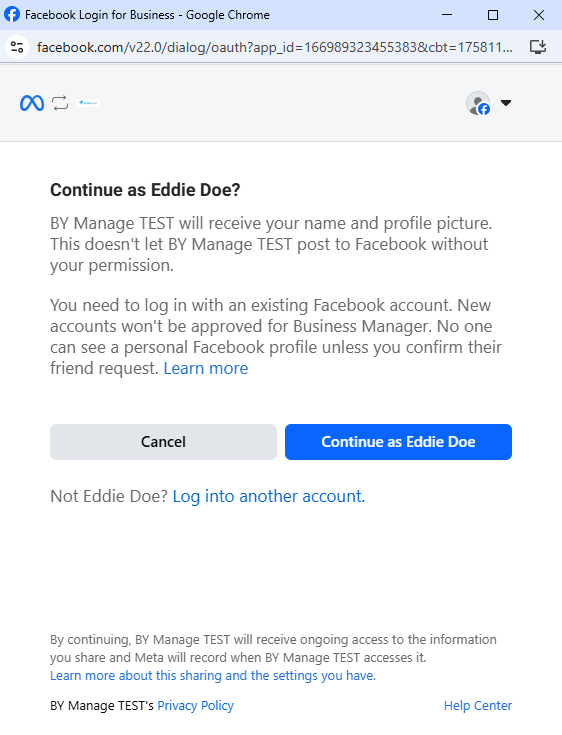
4. At the next screen, click Get Started. 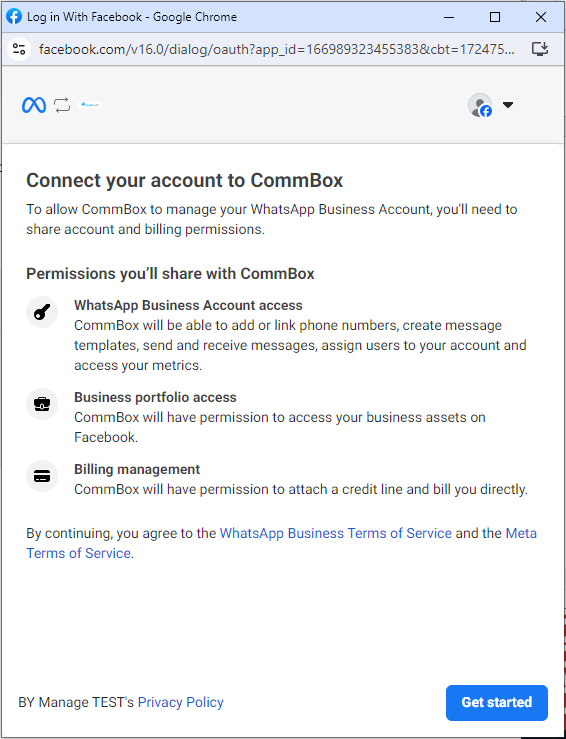
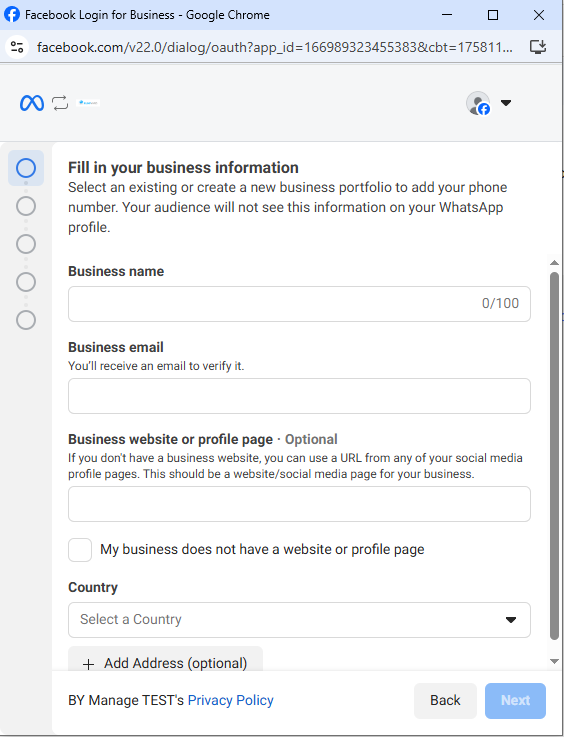
5. At the next screen, enter your business’s name, email address, and website URL. After selecting the country, click Next.
6. At the next screen, you’ll create the WhatsApp business account and profile. Click Next.
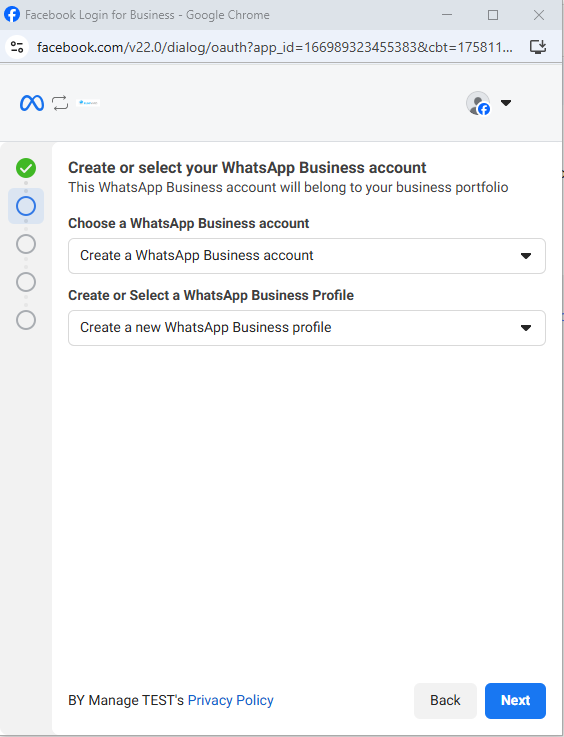
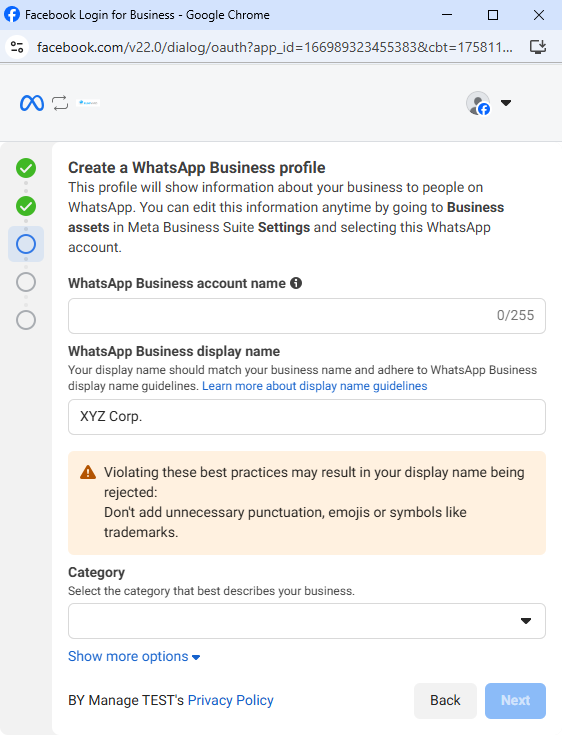
7. Select an account name (This name will not be displayed to customers), verify that your display name appears correctly, and select the related industry for your business. Then click Next.
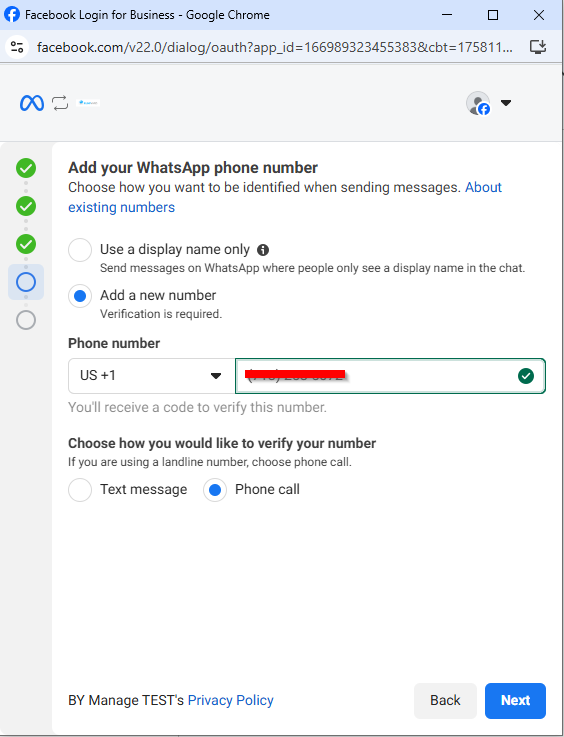
8. Select Add a new number.
The country selected previously will now display the phone number’s country code.
Enter your business phone number, including the local area code (without dashes) that will be dedicated to WhatsApp communication, and select the verification method of your choice.
Note: This phone number will still handle regular phone calls. However, landline numbers will not receive SMS messages.
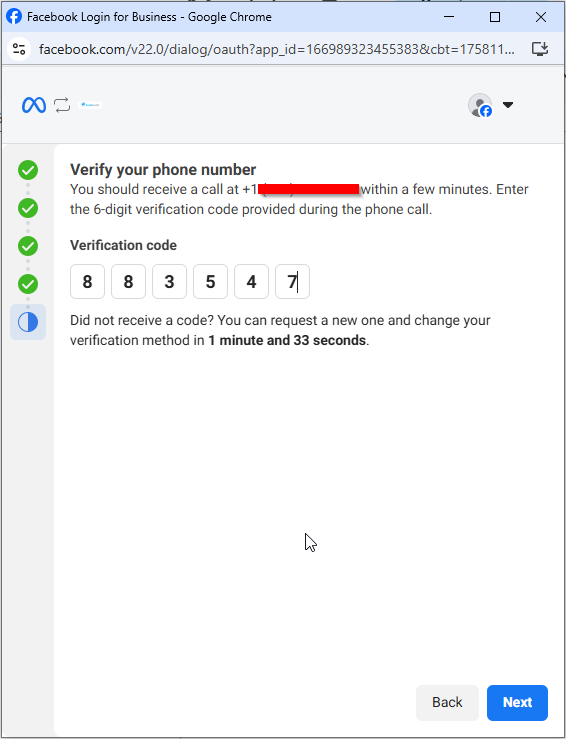
9. You will receive a phone call or text message to verify your phone number. Enter the code in the space provided. Click Next when done.
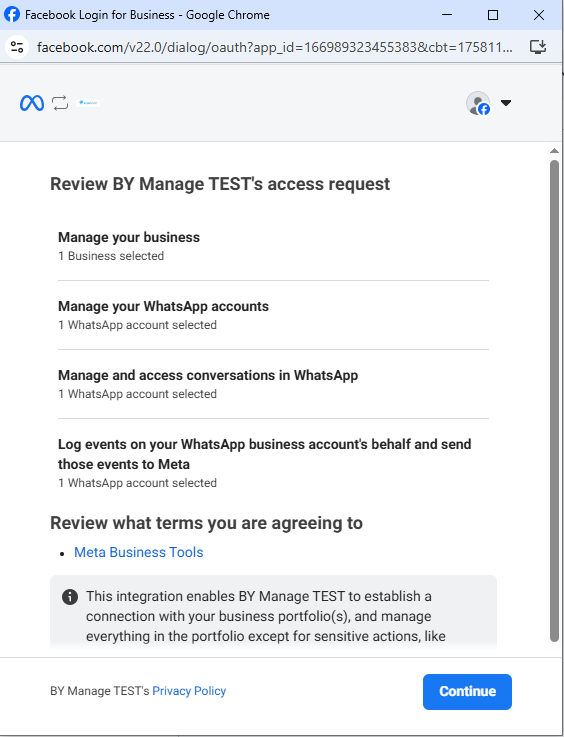
10. This integration allows CommBox to review and manage the WhatsApp Account. Click Continue.
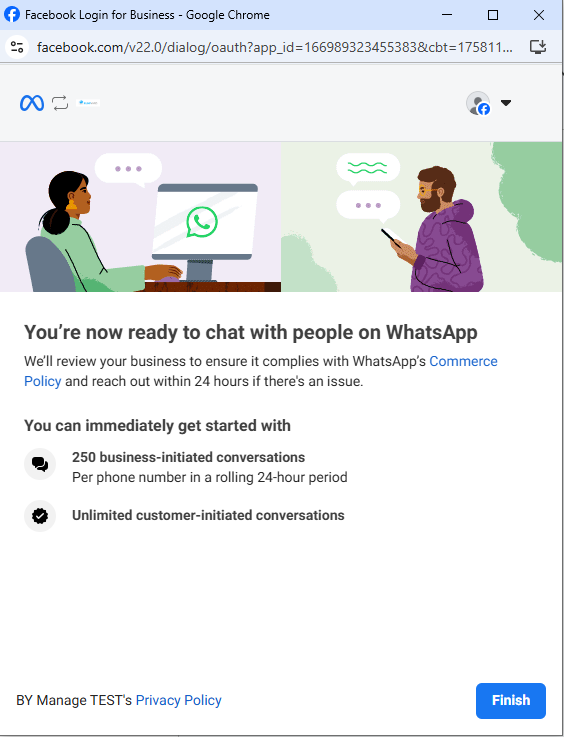
11. Congratulations! You have successfully established a WhatsApp phone number. Click Finish.
Step II: Creating a Channel
1. Navigate to Settings > WhatsApp and click the + WhatsApp Channel button at the top.
2. Enter a name for the channel, select the new WA phone number you just added, select ownership, and click Create Channel.
Note: It may take about an hour for the new number to appear. 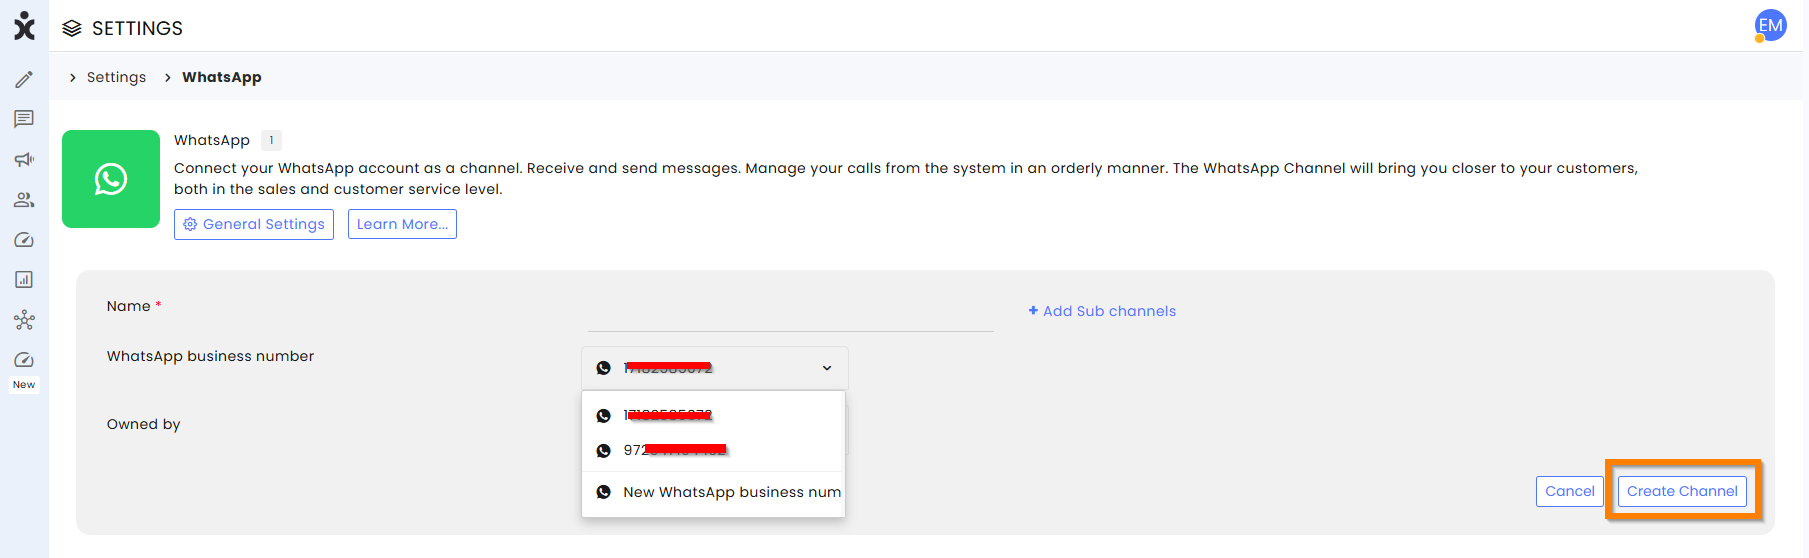
The new WhatsApp Channel will open, enabling you to set up the channel’s settings.
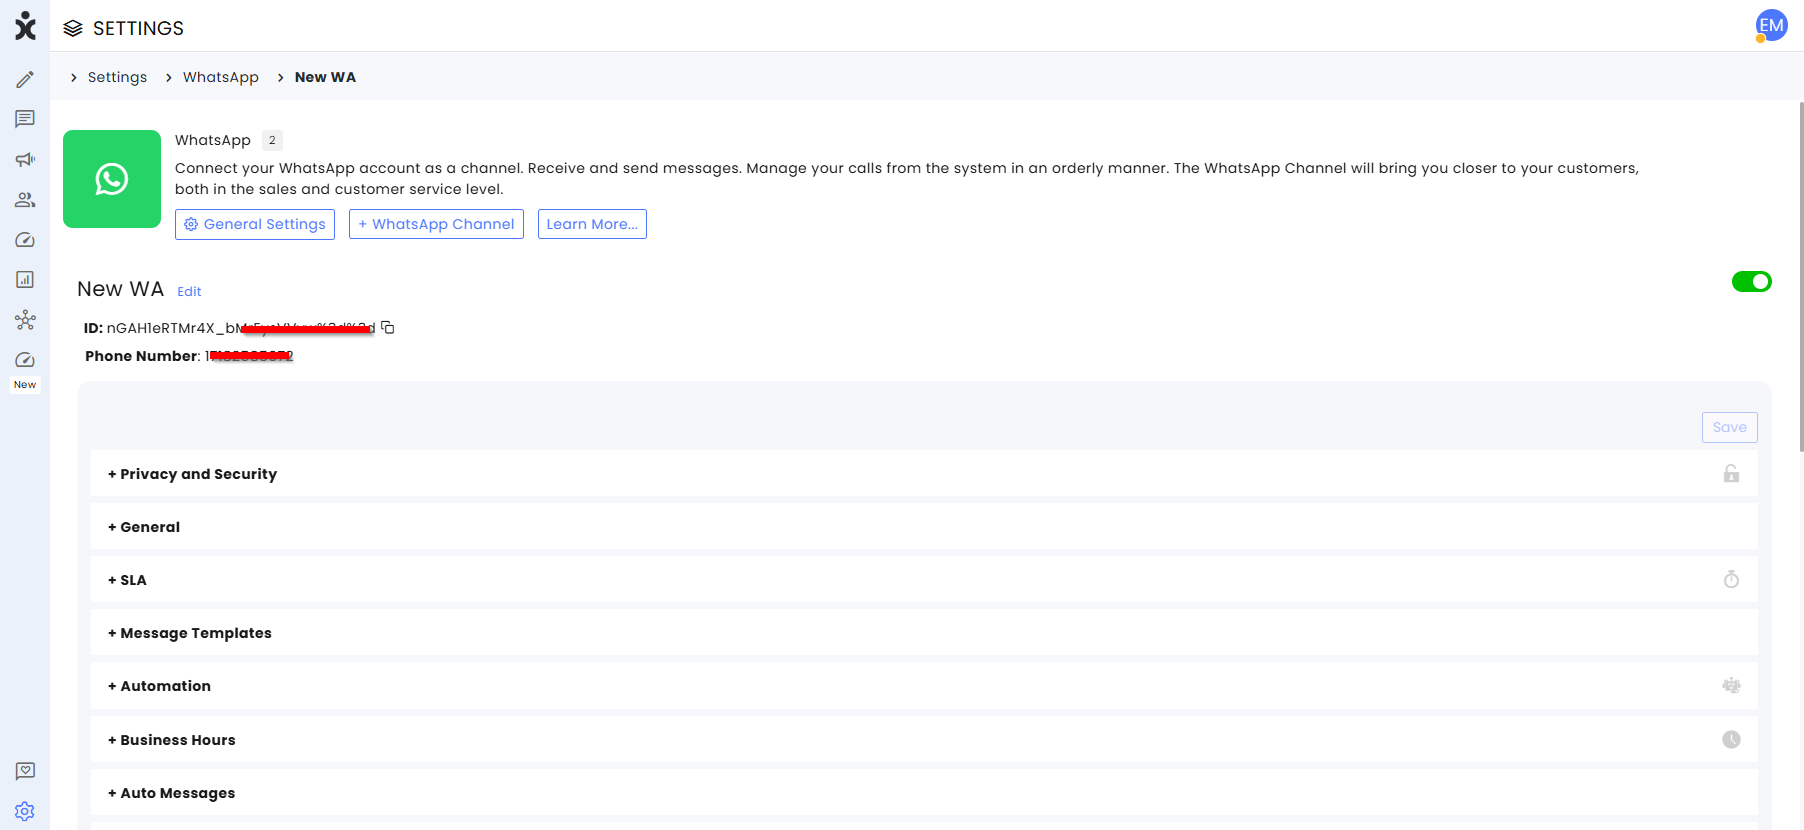
3. At any time, you can edit the channel name, add subchannels (each with unique channel settings), or change the ownership of the channel (subchannels cannot have different ownership than the main entity). To edit, select the relevant channel and click the Edit button next to the channel’s name. Use the section below to learn about the channel settings.
4. During the first 24 hours, you can send up to 250 messages to customers.
During this period, both CommBox and Meta will verify your business information. Providing incorrect or incomplete details during onboarding may result in suspension or permanent blocking of the new WhatsApp number.
General Settings
In the General Settings (at the top of the page), you can manage the WABA activities.
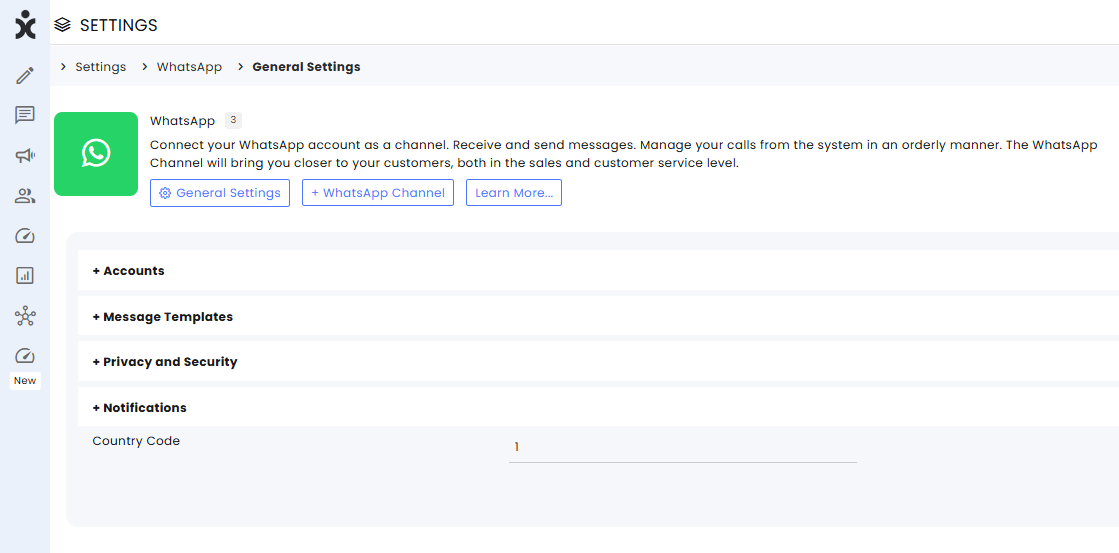
Note the default country code for your business is listed at the bottom.
Make sure to click Save at the bottom of the screen after making any changes.
Accounts
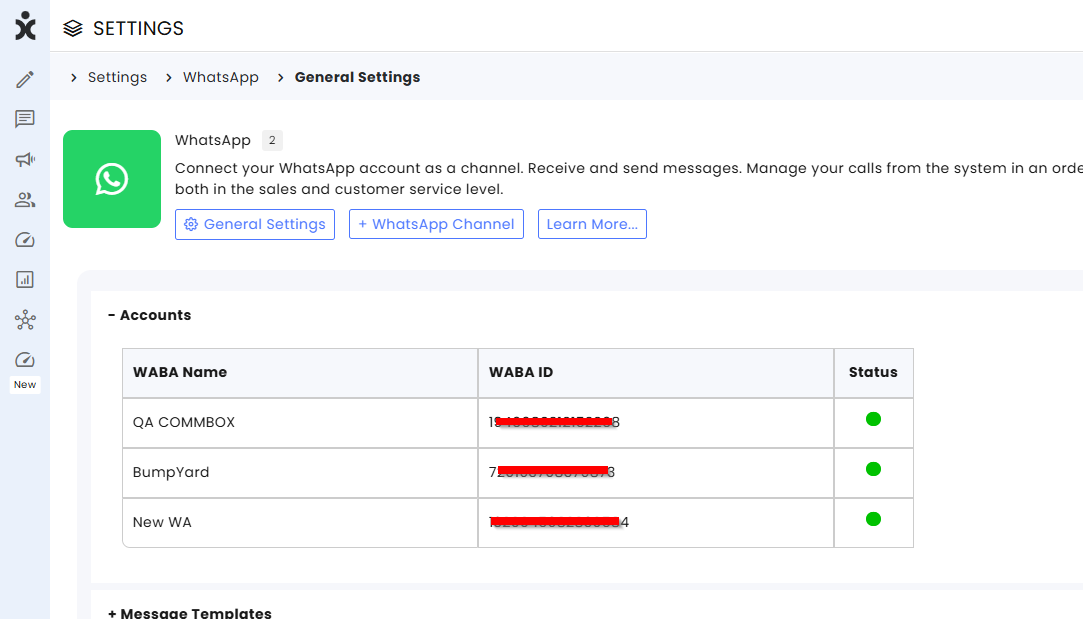
View all the active WhatsApp accounts for the brand, with their WABA ID and current status.
Message Templates
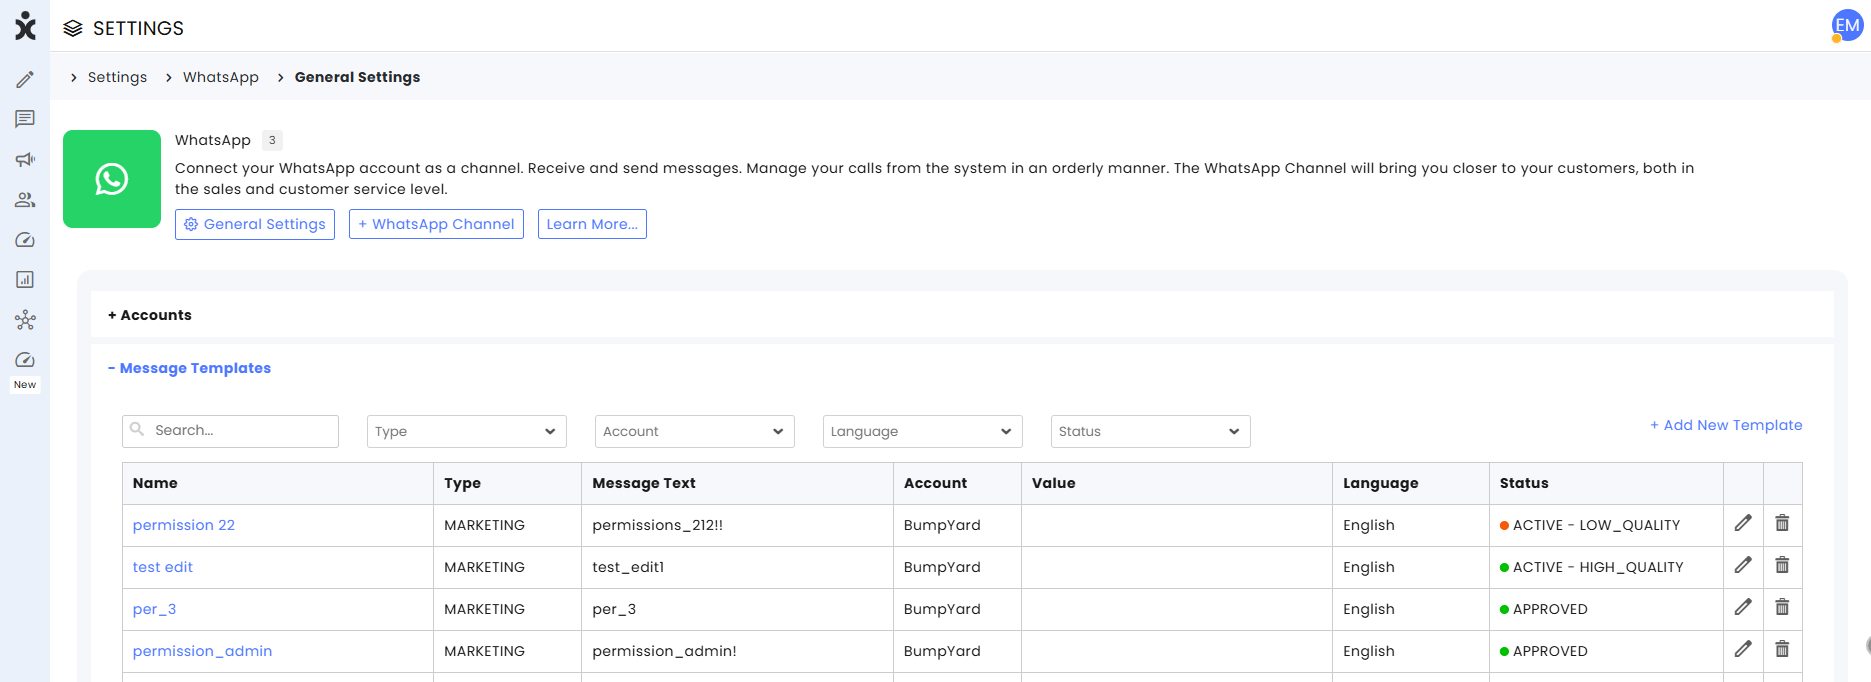
In this section, you can create and manage templates. All templates linked to your WABA accounts are listed here. To use templates in a specific channel, you must enable them separately in the Message Templates section under Channel Settings.
For more information, see the Template Management guide.
Privacy and Security
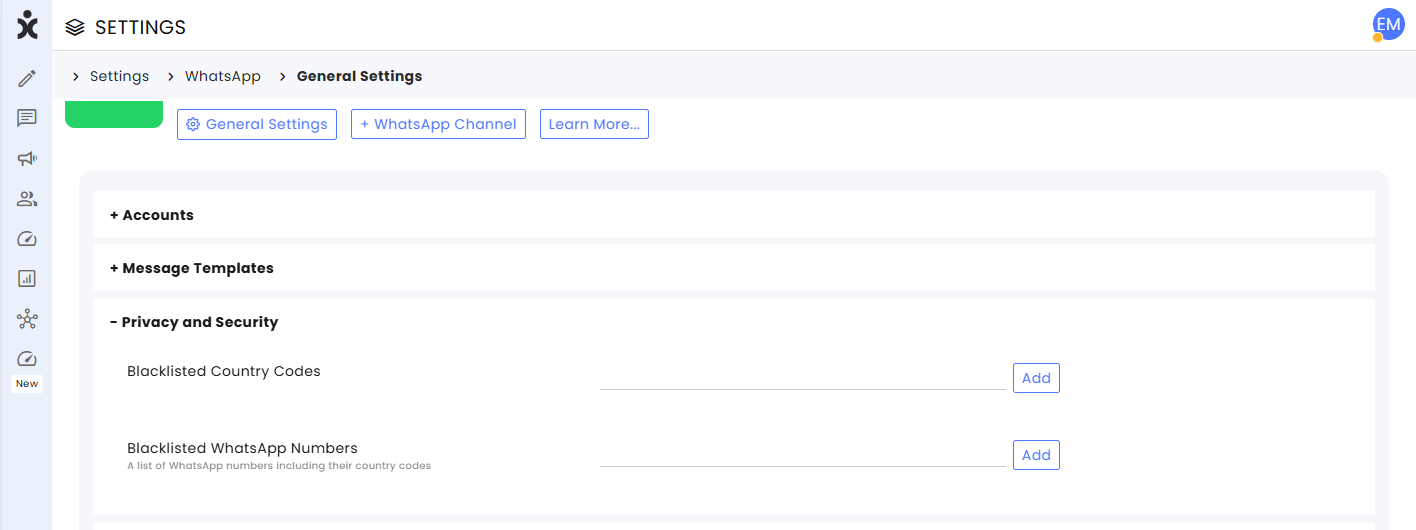
Blacklisted Country Codes – Enter the country codes you want to block from contacting your business on WhatsApp.
Blacklisted WhatsApp Numbers – Enter the WhatsApp phone numbers, including country codes, that you want to block from contacting your business.
Note: This functionality is available in its full capacity under Spam Listing.
You can also find the same option in the Privacy and Security section of Channel Settings for each channel.
Notifications

When WhatsApp changes the quality status of a template, CommBox automatically emails a predesignated admin advising them of the change. Enter the emails of designated recipients here.
Chanel Settings
Privacy and Security
.png)
Blacklisted Country Codes - Phone numbers with these country codes will be automatically blocked.
Blacklisted WhatsApp Numbers - These phone numbers will be automatically blocked. (Must include country code)
Allow File Upload - Customer - Enables customers to add attachments to their communication
Allow File types for customer - Defines which file formats customers are permitted to attach when sending communications.
Media disabled message - The message displayed to customers when they are not permitted to attach files.
Allow File Upload and Download - Agent - Enables Agents to upload and download files.
Allow File types for agent - Defines which file formats agents are permitted to attach when sending communications.
Number of digits without disabling sensitive information - Defines the minimum length of a numeric sequence that will be masked. After a conversation in this channel is closed, any number with this many digits or more will be replaced with asterisks (*) to ensure sensitive information is not retained.
Neutralize sensitive information from - When triggered, mask numbers entered by either only customers or both customers and agents.
Trigger for neutralize sensitive information - Select the trigger that will mask numbers as set above.
Time for Neutralizing Sensitive Information (Hours)- If the trigger for masking selected above is time-based, enter the number of hours for that trigger.
Hiding Numeric Data from AI Providers - Any number that meets or exceeds the specified length will be masked with asterisks (*) before being shared with AI providers.
Neutralize credit card numbers - When enabled, credit card numbers in messages are automatically masked, leaving only the last four digits visible (e.g., **** **** **** 1234). This helps prevent accidental exposure of payment details. Note: Masking may not apply to some networks, including Maestro, UnionPay, RuPay, and Elo.
General
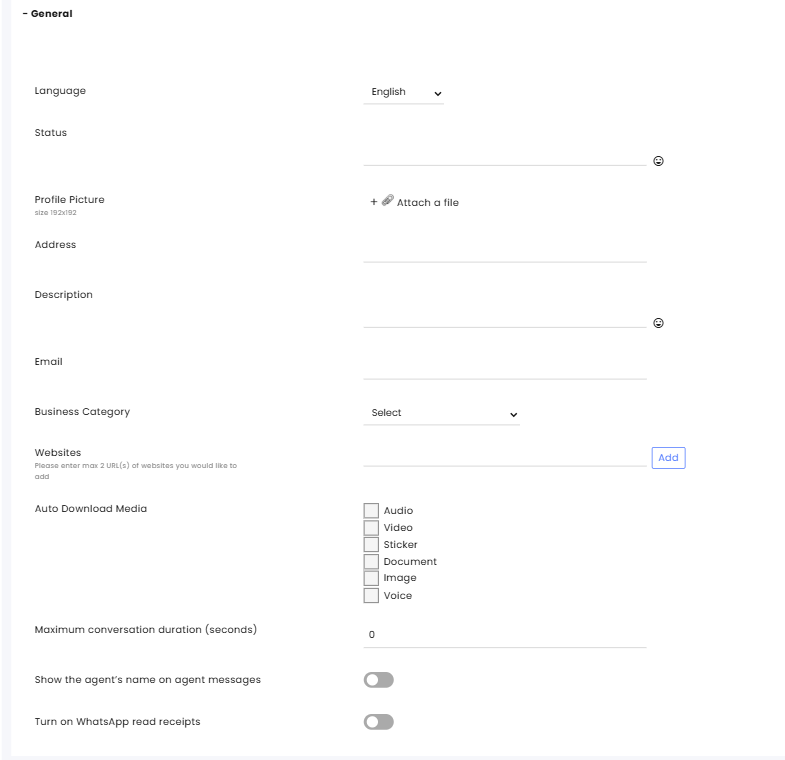
Language - The general Language used in the channel
Status - The WhatsApp Status of the brand
Profile Picture - The WhatsApp profile image of the brand - Ideal size: 192x192 pixels
Address - The Brand's Address
Description - A short description of the brand
Email - Brand’s email address
Business Category - Brand’s category
Websites - Enter the URLs of the Brand’s websites (Maximum of 2 websites).
Auto Download Media - Media types that can be used with WhatsApp communication. Overrides the Privacy and Security module.
Maximum conversation duration (seconds) - Closes open conversation once it reaches the max time.
Show the agent’s name on agent messages - Toggle on to display the agent’s name above the message
Turn on WhatsApp read receipts - Toggle on to display the read receipts marking below the message
SLA

Service Level Agreement determines the acceptable waiting time for customers before they receive service from the service provider. Once that time passes and the agent does not reply to the customer, there is an SLA breach.
SLA target for first replies (in seconds) – The time within which the agent must respond to the customer's first message to avoid an SLA breach.
SLA target for next replies (in seconds) – The time within which the agent must respond to subsequent customer messages to avoid an SLA breach.
The channel settings override the main SLA settings.
Click here for more information about this capability.
Message Template
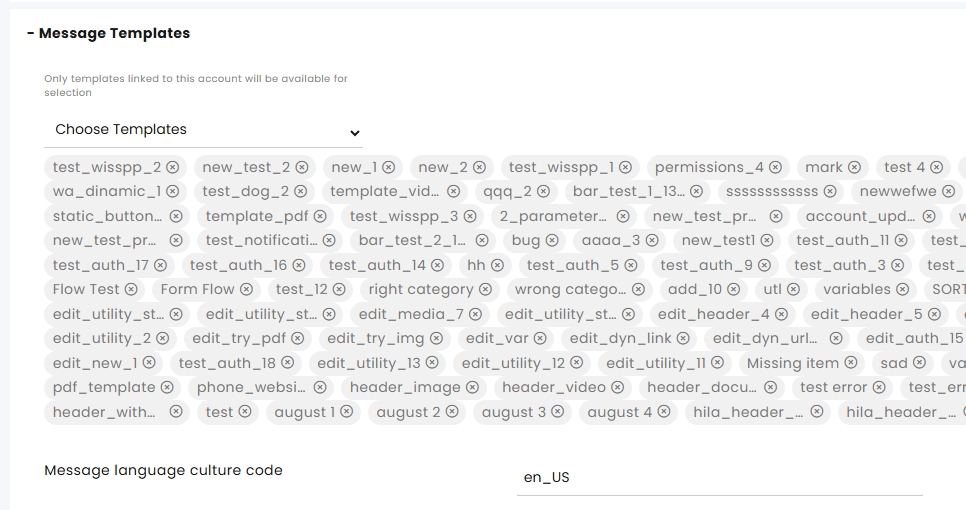
Select the templates that are available for this channel. Remove from the list by clicking the circled x next to the template name.
Message language culture code - The default WhatsApp Language Code for the channel.
Business Hours

Business Hours profile - Select the Business Hours settings to determine when this channel operates and what auto-messages should be displayed after hours.
Click here for more information about Business Hours.
Auto Messages

Automatic response – The automated message sent in response to the customer’s first message.
Overload message – A message that will be sent to the customer when all available agents are busy.
Confirmation message for unsubscribing - A message that will be sent to the customer when unsubscribed.
Auto Assign
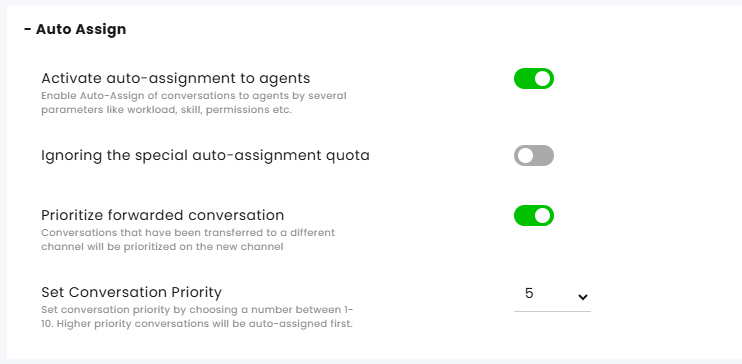
Activate auto-assignment to agents – Enable automatic assignment of conversations to agents based on parameters such as workload, skills, and permissions.
Ignoring the special auto-assignment quota – When enabled, the auto-assignment mechanism will bypass the agent’s maximum load and assign special conversations, such as ‘agent in charge’ or snoozed conversations.
Prioritize forwarded conversation – When enabled, conversations transferred to another channel are prioritized in the new channel.
Set Conversation Priority – Assign a priority level to conversations (1 = highest, 10 = lowest). Higher-priority conversations are automatically assigned first.
Customer Satisfaction Survey

Activating the Customer Satisfaction Survey – Enables sending surveys to customers once their conversation status is set to Resolved.
Enable interactive surveys – Use WhatsApp interactive buttons in the surveys.
Display text when a selection menu appears -Add the text displayed with the WhatsApp buttons.
Survey for the conversations when their status is resolved – Select the survey for this channel.
Survey Response Expiry Time (Minutes) – Specify the duration (in minutes) during which a customer's reply is considered a valid response to the Satisfaction Survey. After this period, any new reply will initiate a new conversation.
Intents

The Intents capability identifies key words or phrases during the dialog with the customer.
Click here to learn more about this capability.
Split Conversations
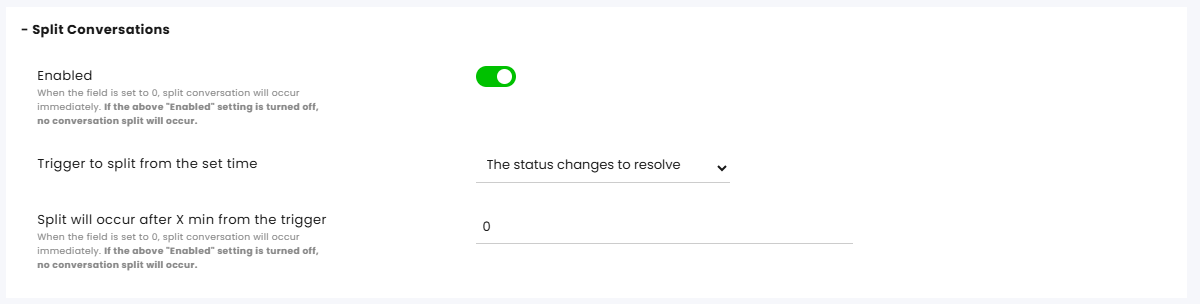
Enabled – When enabled, a new conversation will open for the same customer. When disabled, conversations with the customer continue in the same thread.
Trigger to split from the set time – Determine what causes the split to occur—the customer's last message or the conversation's change of status.
Split will occur after X min from trigger – Enter the number of minutes. When entering 0, the split is immediate.
Maintenance
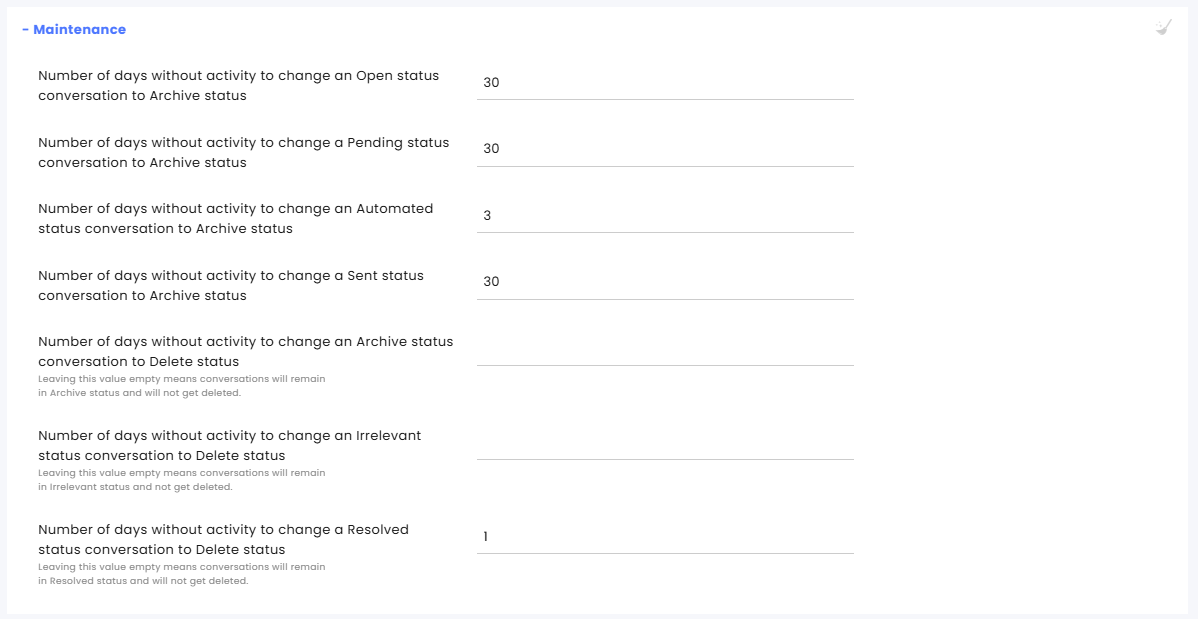
Number of days without activity to change an Open status conversation to Archive status
Number of days without activity to change a Pending status conversation to Archive status
Number of days without activity to change an Automated status conversation to Archive status
Number of days without activity to change a Sent status conversation to Archive status
Number of days without activity to change an Archive status conversation to Delete status - Leaving this value empty means conversations will remain in Archive status and will not get deleted.
Number of days without activity to change an Irrelevant status conversation to Delete status - Leaving this value empty means conversations will remain in Irrelevant status and not get deleted.
Number of days without activity to change a Resolved status conversation to Delete status - Leaving this value empty means conversations will remain in Resolved status and will not get deleted.
Set additional aspects of maintenance including permanently deleting conversations at the Maintenance settings page.
Click here for more information about this capability.
Participants

Allow agents to invite an external participant to a conversation on this channel – Toggle on/off to enable agents to add additional people to the conversation with the customer.
AI Assistant
.png)
The AI capabilities require a set-up of the ERA AI at the module settings and setting up a replenishment account.
If you have an active AI account with us, you may turn the AI capabilities for this channel here:
Activate AI Powered Assist – Enable the AI capabilities in the inbox for the agents.
Automatic conversation summary – Have all conversations with a Resolved status be automatically summarized in the remark section of the inbox.
Enable agents to generate AI-powered summaries upon routing conversations
Enable auto-generated summary upon bot transfer to an agent
Click here for more information about this topic.