
Overview
The Business Hours module enables organizations to centrally create, manage, and maintain multiple business hours configurations that can be applied across different communication channels as needed. This centralized approach ensures consistent scheduling management while allowing flexibility between channels and services.
When a business is outside of operating hours, automated customer messages can be triggered to inform customers when service will resume, provide alternative or emergency contact options, or set expectations for response times. Business hours configurations are organized by “channels” and can be activated or updated by administrators when required.
Key Considerations
A. To enable automations and other CommBox features to use the Business Hours module, the relevant channel must be active both within the Business Hours module and in the corresponding communication channel settings.
B. Multiple Business Hours configurations can be created to support different organizational needs, such as separate schedules for weekdays, weekends, holidays, or special events, as well as different service availability by communication type (for example, Voice calls until 4 PM and WhatsApp support until 6 PM).
C. Automated business-hours-related responses can be configured to notify customers when the business is unavailable.
D. The Next Business Day SLA configuration allows administrators to define a late-day time window that is treated as the next business day for SLA calculations. This helps prevent conversations initiated near the end of the workday from being incorrectly marked as SLA breaches, improving SLA accuracy during peak end-of-day traffic periods.
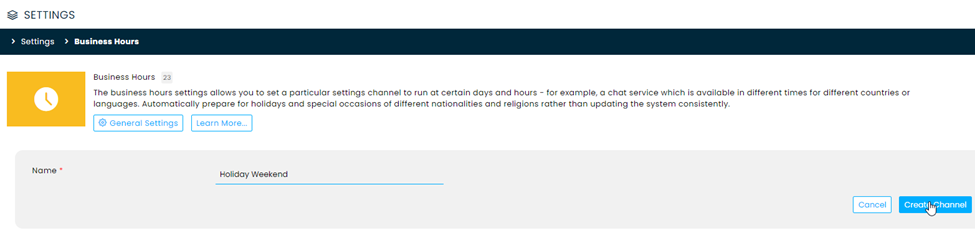
Creating a New Settings Channel
- At the CommBox console, navigate to Settings and select Business Hours from the Settings & Tools section.
- Click the + Business Hours Channel button at the top.
- Enter the desired name and click Create Channel.
Set the Business Hours when the business will be open for this period, and the automatic messages to the customers.
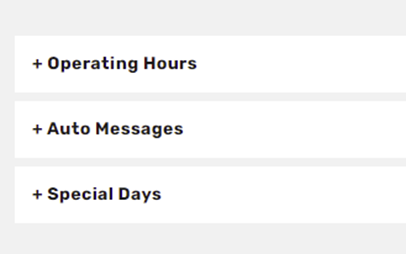
4. Operating Hours:
- Enter the days the business is operating by toggling on the appropriate days. Select the Start time and End time for each day the business is open.
- Set additional periods during the day (if business is closed for a break mid-day) by clicking Add another period (optional) and setting the hours.
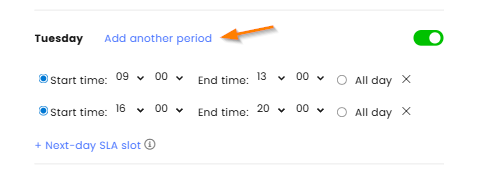
- Click Save in the bottom corner of the screen.
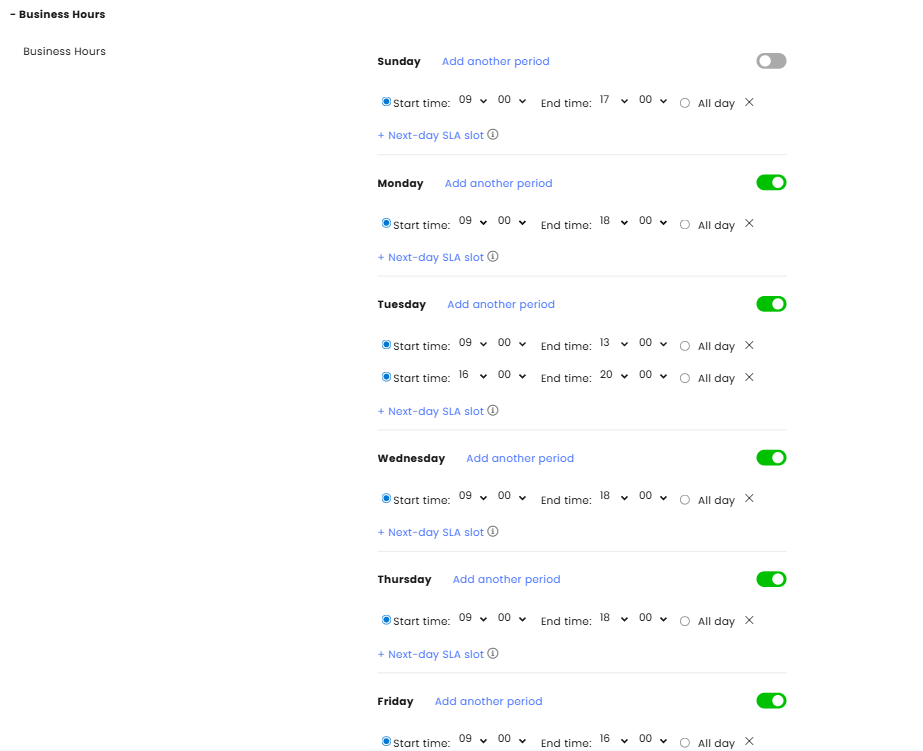
5. Next-day SLA slot (optional):
Set the Next-day SLA slot, which will enable your organization to define a late-day window that is treated as the next business day for SLA calculations. This helps ensure that conversations initiated near the end of the workday are not unfairly marked as SLA breaches, improving SLA tracking accuracy during end-of-day traffic peaks.

Note: The configuration allows defining a single SLA window per business day, strictly within existing business hours.
6. Enter the different auto messages for the customers. When done, click Save.
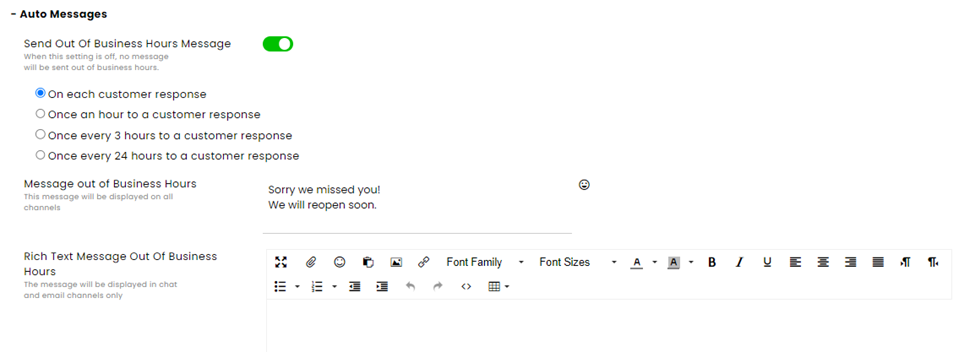
Message outside business hours - A message will be sent to the end customer when they reach out outside the set business hours/days.
Rich Text Message Outside of business hours - a message sent to the end customer when they contact us outside the hours and days we have defined as business hours (you can send this message on channels that support design, such as email and chat)
Message during Business Hours - a message sent to the customer when they write to us within the hours and days we have set.
Rich Text Message during Business Hours - a message sent to the customer when they write to us within the hours and days defined as business hours.
You can send this message through integrated communications channels, such as Email and CB chat.
7. Enter a Special Day (optional) by clicking +New.
A Special Day is a day that, due to special circumstances (holiday, elections, etc.), you want to set a one-time special schedule for a particular day(s).
To add a special day, click on New under special days and choose whether a single day is required or a range of dates.
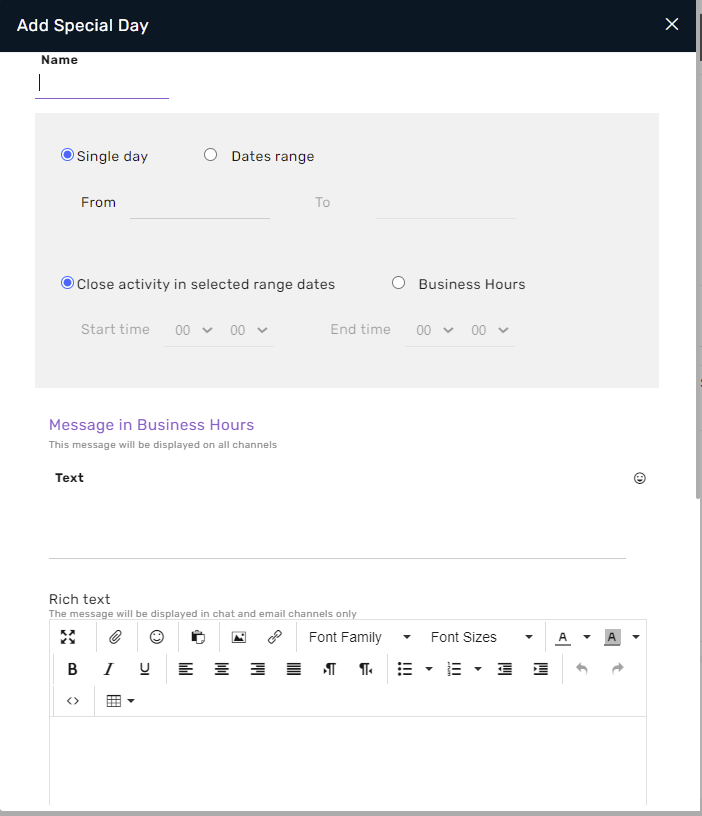 Name - The assigned name of the special day.
Single-day/date range - you can input the date(s) when the event takes place within the time frame selected.
Close activity during selected date range/Business hours - on the dates chosen with the specific channel(s) defined, the Business Hours channel will be closed (or during specific regular business hours).
Message during/outside business hours - a message displayed to the customer during or outside business hours during the special day. You may save a message in both Plain text and Rich text (only for chat and email channels) formats.
Note: Ensure that the Special Day settings have been saved, and then save the module settings themselves.
Activation
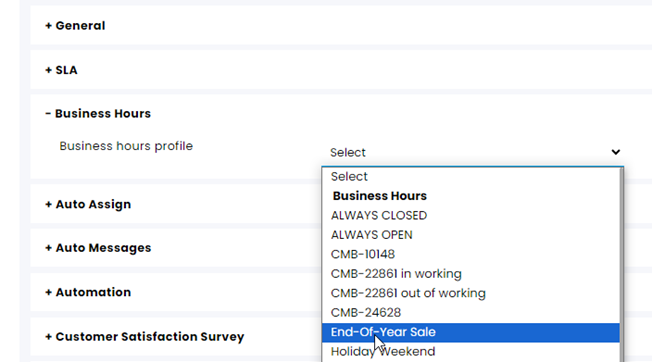
Activation is done at the specified communication channel.
- Navigate to Settings and select the relevant communication mode and channel.
- At the channel’s settings, click on the Business Hours extendable menu and select the Business Hours settings of your choice.
- Click Save at the bottom of the screen.
Automation
The most common use of the Business hours functionality is in AI Agent flows. AI Agents respond differently based on the status of the channel:
• Active - The channel is active and has available agents ready to receive calls.
• Busy - The channel is active, but there are no available agents to receive calls.
• Inactive - The channel is inactive.
• Off business hours - There are no agents present.
Learn more about this topic in the Entry condition in the Flow builder guide.