Overview
Inbox filters filter conversations based on assignment state and related statuses.
Besides the Teams page, inbox filters can be managed at the Organization Settings page in the sidebar settings menu.
To learn more about how the Teams assets operate, click on Understanding Teams Assets.
Managing Inbox Filters
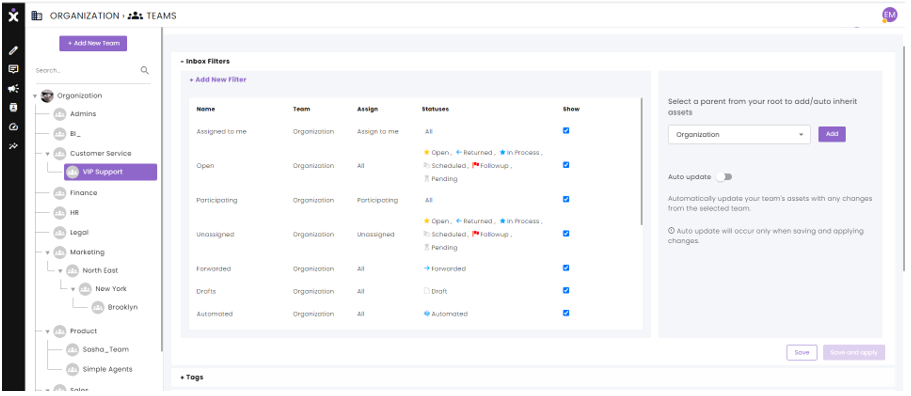
- On the Teams page, select the desired team, and open the Inbox filters tab.
- Check the checkboxes you want the agents of this team to view.
- At the right pane, select from the team’s roots the team that will give over their
assets to this team. - Click Add to add immediately filters from the root team.
- To automatically update the Inbox filters from the selected source team, enable the
Auto-update Toggle. - Save changes made or Save and apply to enable sharing the updates with inheriting teams.
Creating New Inbox Filters
New filters within a team automatically belong to the creating team, so there's no need to select the team from the ownership dropdown menu.
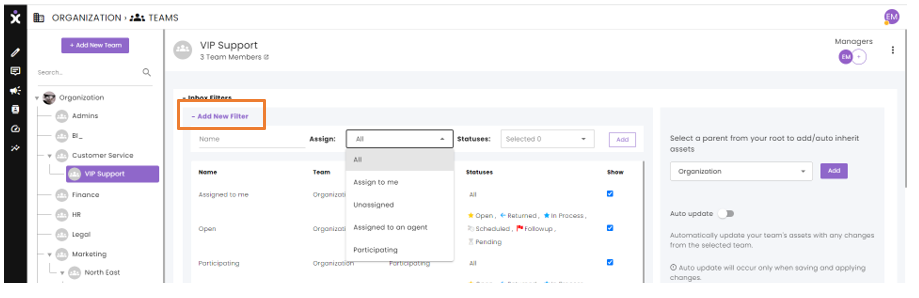
- To create a new filter for this team, click Add New Filter.
- Enter the new filter’s name, assignment state, and related statuses.
- Click Add.
- Save changes.
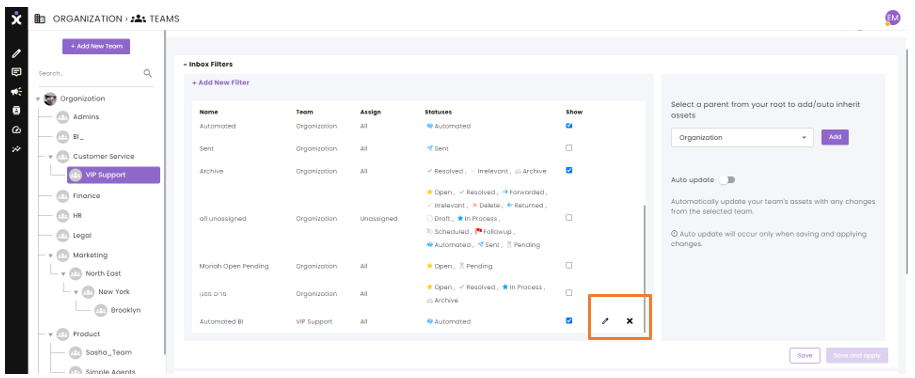
Editing / Deleting Inbox Filters
Inbox filters are usually managed at the organizational level. However, for filters that are team-specific, you’ll need to select that team to view the filter.
- Select the desired team, and click the Inbox Filters tab.
- Click the pencil icon to edit the filter or the X to delete it.
- Save changes.