Overview
Tags are used to label customers (“VIP Customer”, “New Customer”, etc.) or conversations (such as “customer retention”, sales call”, “104”, etc.) and can bunched together into Tag Groups. Topics are special tags available to label knowledge base items to help with the organization and cross reference of the content.
Key Considerations
A. There are 6 types of tags:
- Tags – Generic tags for conversations and customers
- Goal – Generic tags for conversations and customers
- Miss – Generic tags for conversations and customers
- Topics – Reflected at the Knowledge base as well as in the Inbox. Designed to help organize related items to specific conversations or customers.
- Satisfaction – Configured at the Customer Satisfaction settings. Tags are automatically added to the conversation tags with an optional emoji when the customer replies to the survey. See Satisfaction guide.
Note: Agents can’t delete Satisfaction tags - Intent tags – Intent tags are automatically added to a conversation when an intent was identified. See Intents guide.
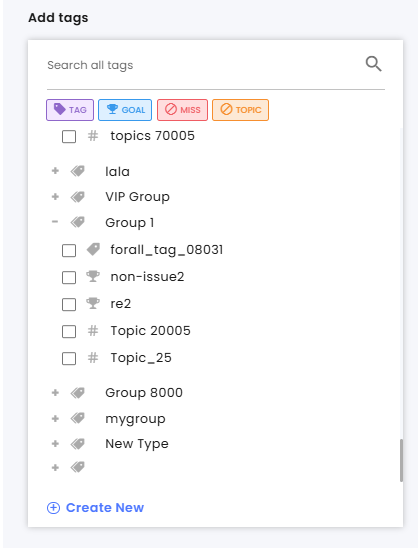
B. Tags group are listed separately in the tag selection menu.
C. Valued tags can be set with a range of values and a default value at time of creation. This capability focuses on the tag’s message and can help with filtering conversation based on tags.
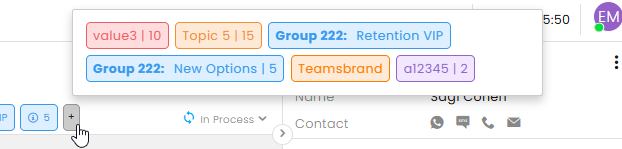
D. Tag display includes the tag’s group (in bold), the tag’s name, and value (where applicable). When a tag has a value, only the value is displayed. When hovering over the tag, complete information appears.

E. When additional space is needed, not all tags are visible. By clicking the + icon next to the displayed tags, a complete listing of tags appears.
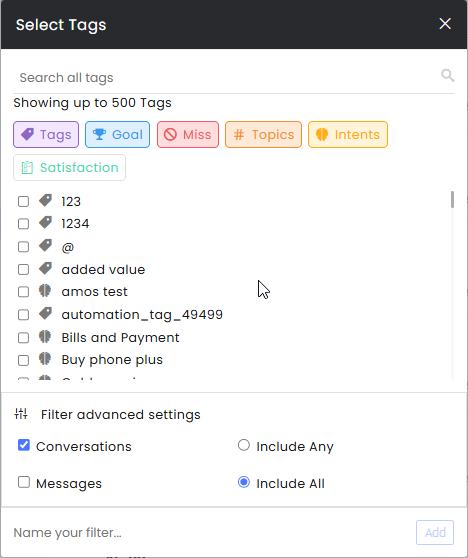
F. You can filter conversations based on the tags by clicking Tag Filters at the main sidebar. Select the desired tags from the list. Select Include Any for conversations/messages that have some of the selections or select Include All to only list items that contain all selected tags. Name your Filter and click Add to save it.
G. Tags can trigger Rules and Rules can add a tag to a conversation or a customer. See the Rules guide for more information.
H. Tags are managed in the Team’s Assets section of the Organization Settings and on the Tags management page in the Settings menu. To learn more about how the Teams assets operate, click on Understanding Teams Assets.
I. Automation Bots can add a tag to the conversation or customer at any step of the Flow. At the relevant step, select Set Tags at the step properties and click +Add Tag. After selecting the desired tag(s) from the dialog box, click OK.
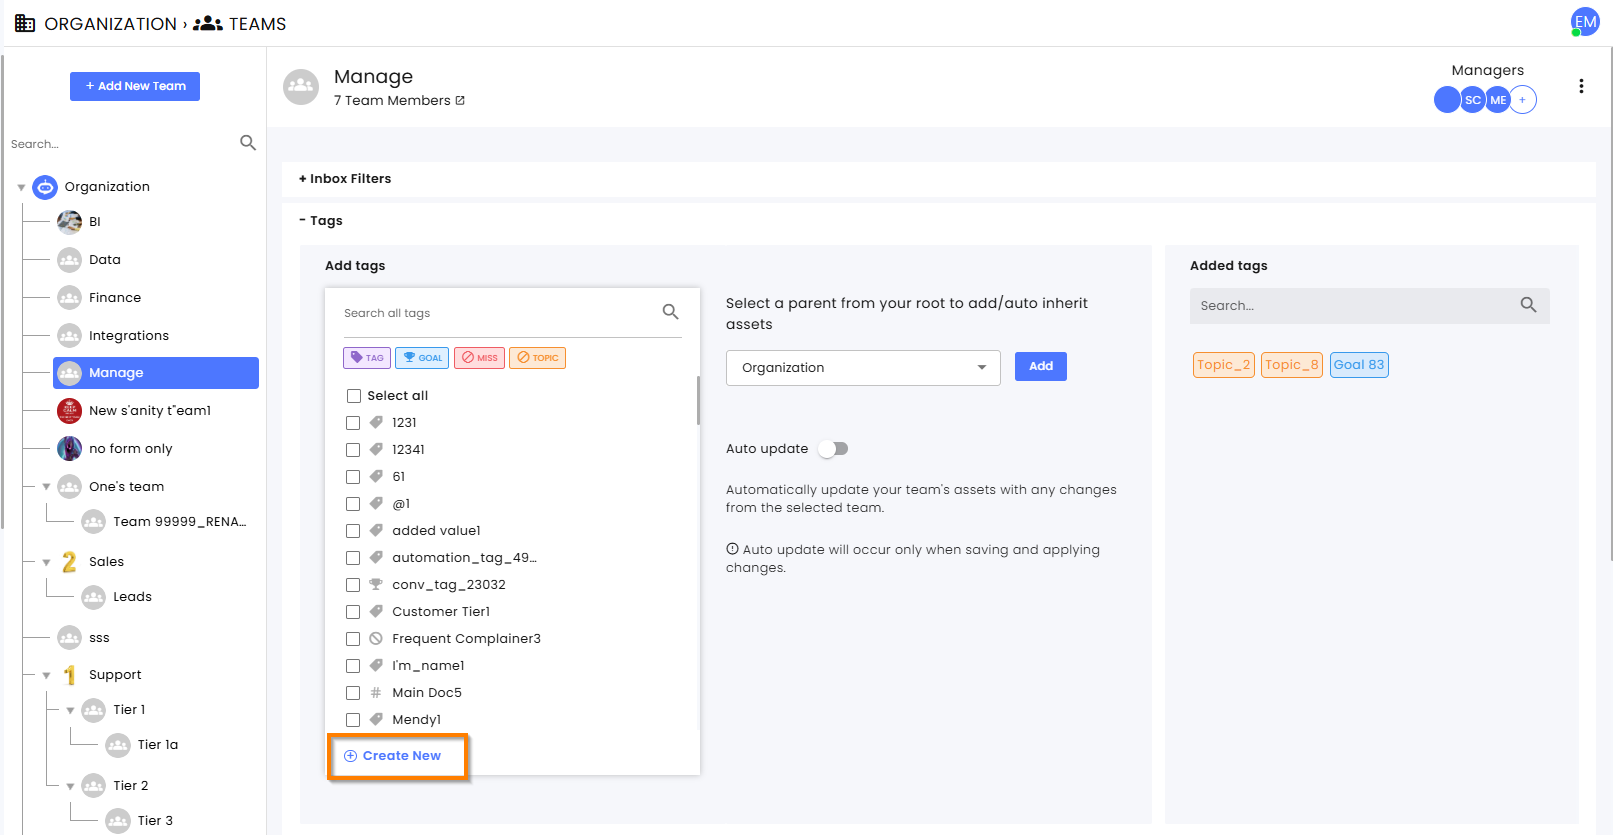
Managing Tags at the Teams Section
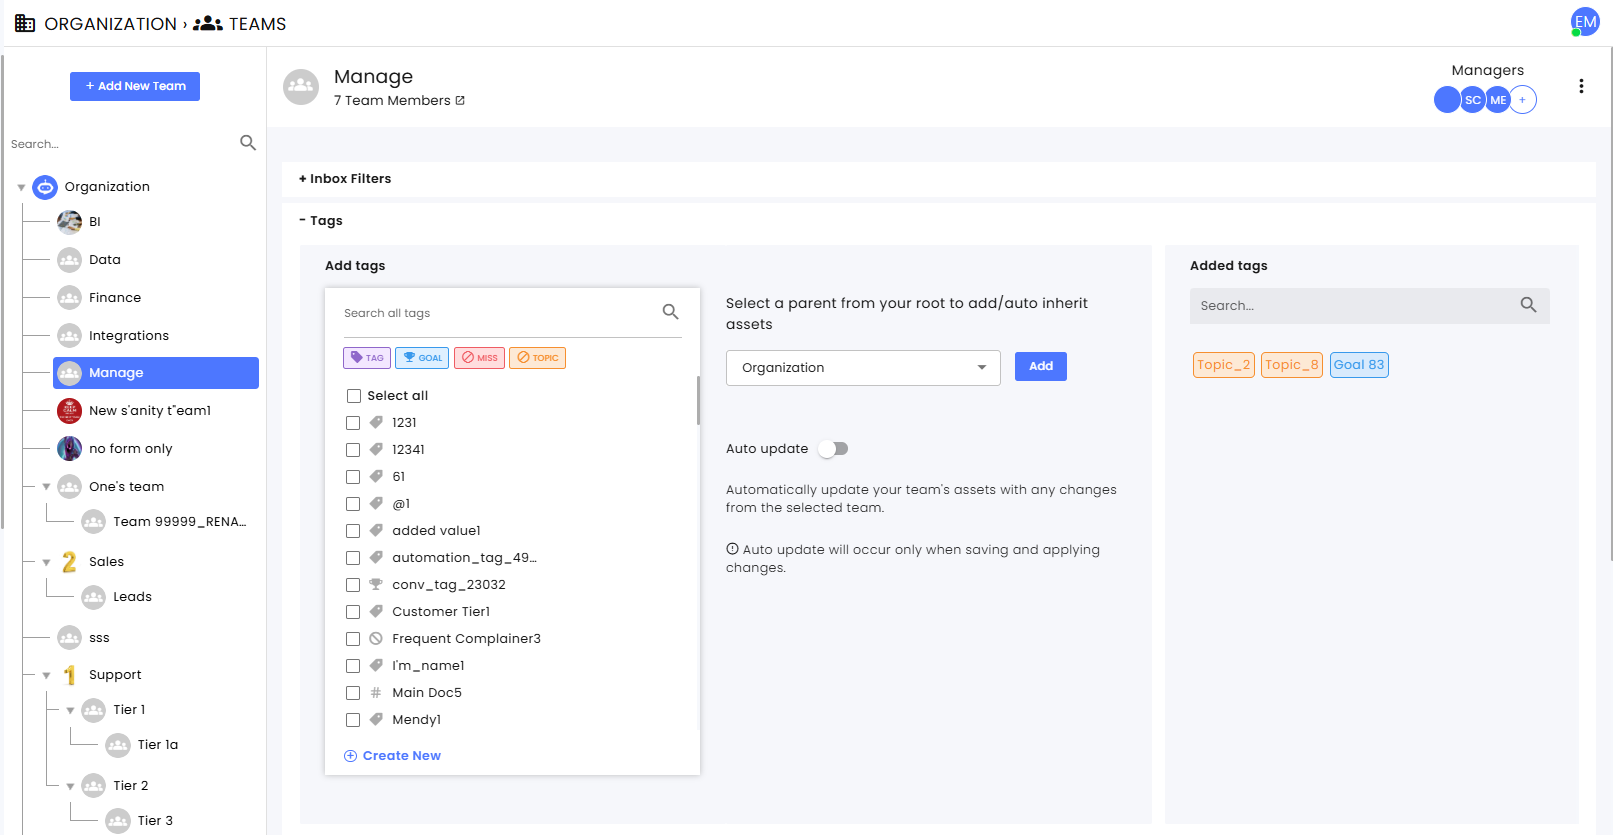
Navigate to the desired Team on the Settings page (main side-bar).
-
Under Add tags are all the available tags that can be added to the team’s members by checking the box next to their name. You can click on the type to turn it off and limit the display to only certain types.

-
At the center pane, select from the hierarchical team that can give over their tags to this team.
-
Click Add to immediately add tags from the root team to this team.
-
To automatically update the tags from the selected source team, enable the Auto-update toggle.
-
Save settings.
Tags Group
Tags groups are listed at the after all the non-group tags and can be filtered by turning off the tag’s type.
Managing Tags at the Tags Settings
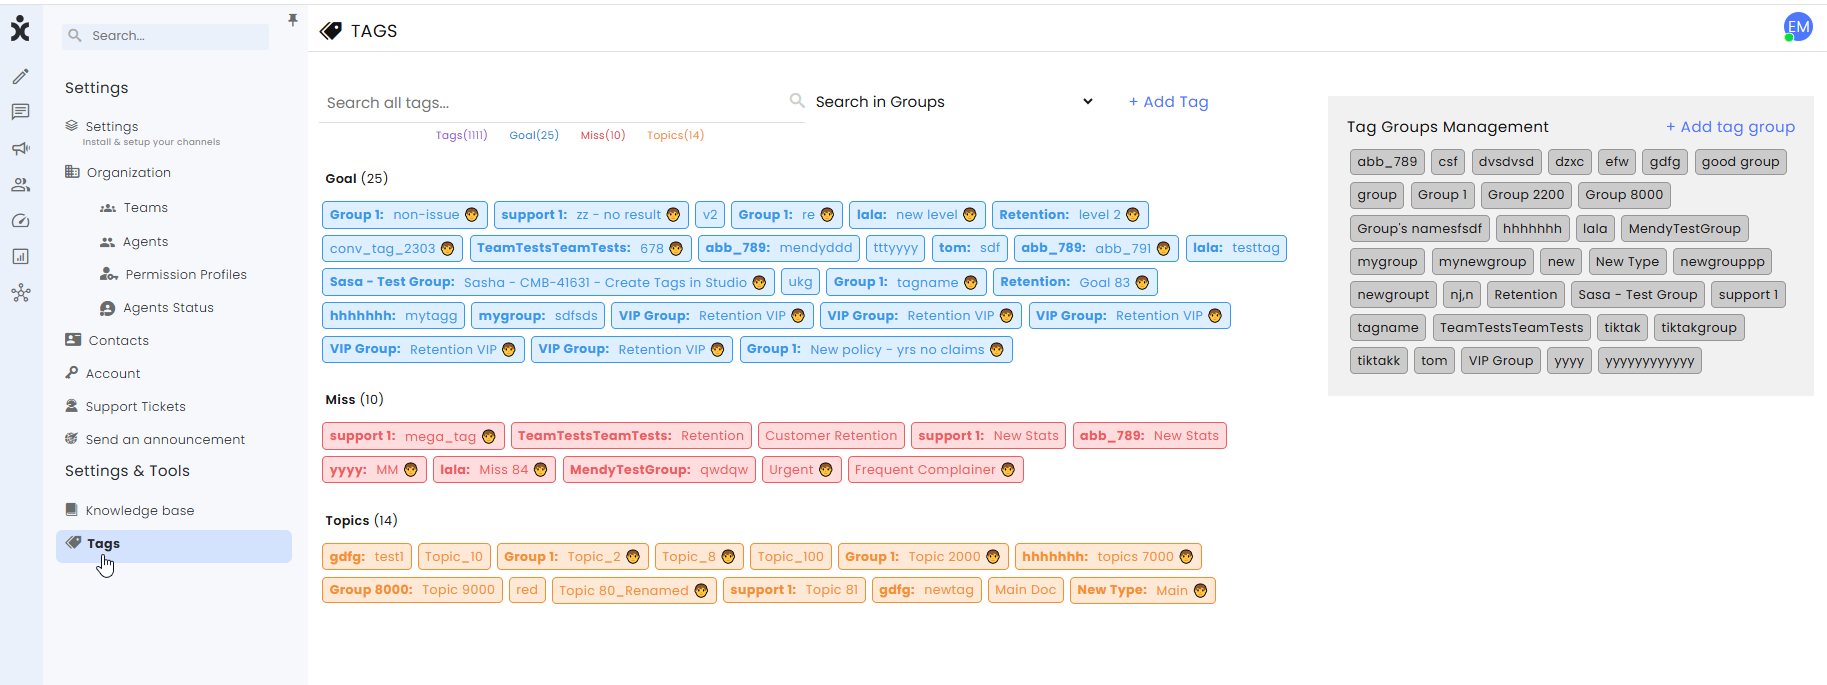
Navigate to the Settings page and select Tags at the sidebar.
Note that you can only see up to 500 tags. Limit the tag type to maximise the relevant tags you want to see or use the search capabilities to find what you are looking for.
Creating New Tags
Tags are created in the Tags section of the Teams assets, in the Tags settings in the main Settings sidebar, as well as in the Flow builder.
Teams Assets
-
To create tags for a specific team, click the desired team in the tree diagram.
-
Expand the Tags section and click Create new at the bottom of the list of available tags.
-
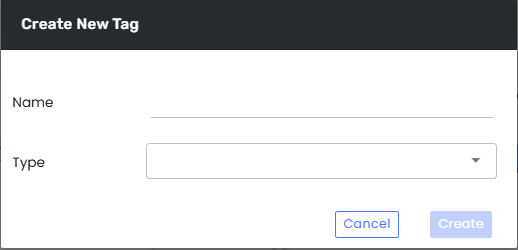
At the new tag dialog box, enter a name for the tag and select the following:
a) Select the tag type. Selecting “Tag group” will create a new group of tags.
b) Select the applicable Target (Conversation and/or the customer).
c) Select a Group associated with this tag.
d) Select Unit (if applicable)
• Non-Value is a tag classified by name and type only.
• Valued tag requires entering the range of acceptable values, and the default value. For example, years with no insurance claims can have the following values:
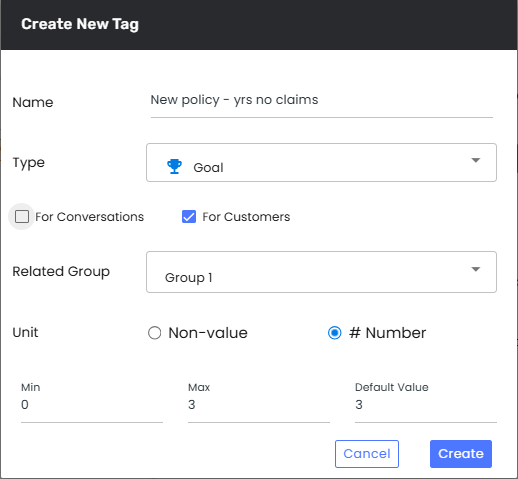
-
Click Create.
Tags Settings Sidebar
To create a new tag:
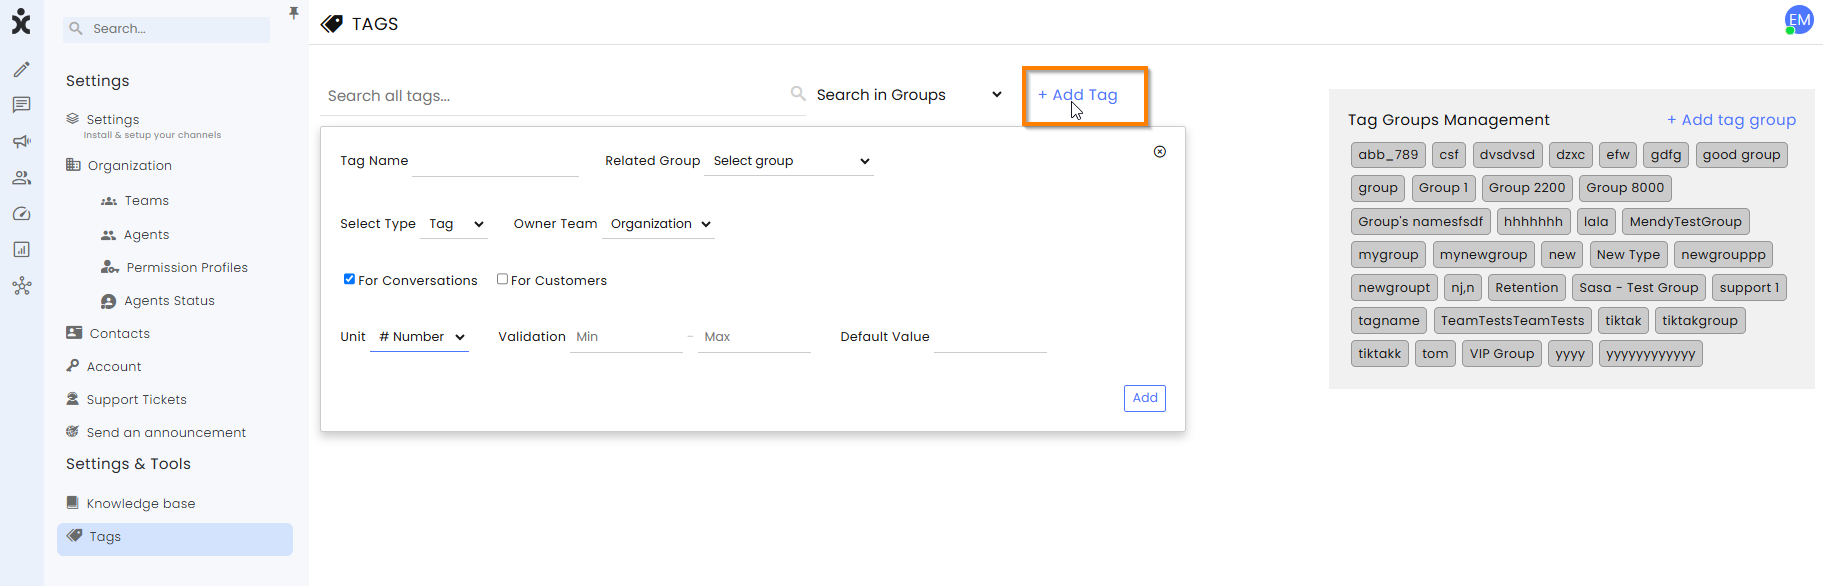
- Click +Add Tag to open the dialog box.
- Enter the name, type, team’s ownership, target (conversations and/or customers), and value (optional).
- To add this tag to an existing group, select the group next to the name.
To create a new group:
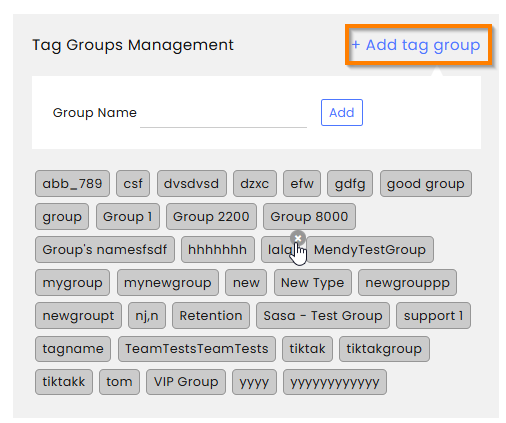
Click +Add tag group, enter the name of the new group and click Add.
Note: To delete a tag or a group of tags, hover over the item you want to delete and click the small X at the corner.
Automation Tags
Automation Bots can add a tag to the conversation or customer at any step of the Flow.
- At the relevant step, select Set Tags at the step properties and click +Add Tag.
- Select Customer or Conversation type
- At the new dialog box, click +Create new tag at the bottom.
a. Enter the new tag’s name, type, group (optional), and related team (optional).
b. Enter Value range and default value (optional)
c. Click Create & Add Tag