Overview
The Intents module enables the system to detect predesignated concepts from the customer's interactions with the bot or the agent. Once an intent is recognized, the system can tag the conversation, suggest a knowledge-base item in response, or direct the bot to a specific step.
In general, the more feedback you give the system about what is relevant to the intended concept and what is irrelevant, the more accurate the detection of the Intent will be.
Create a New Intent
After activating the Intents module on the Settings page, you will be able to create new Intents that the system will need to learn. In the first stage of the Intent creation, the user is asked to enter ten sentences that reflect the new Intent. In later stages, the system asks users to accept relevant customers’ communications and reject irrelevant ones. This process guides the system in fine-tuning its recognition capabilities.
-
Navigate to Settings > Intents and click the + New Intent button.
-
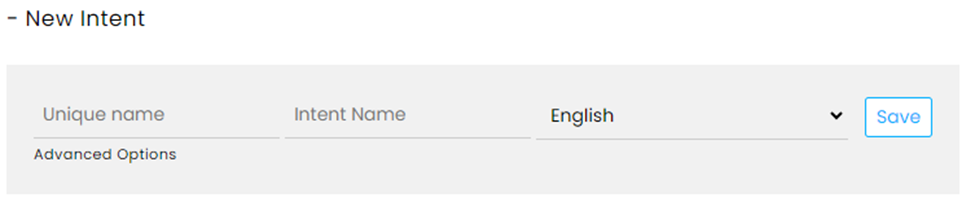
Enter the Unique name of the Intent (English letter only, no spaces), the Intent Name, select a language, and click Save.
-
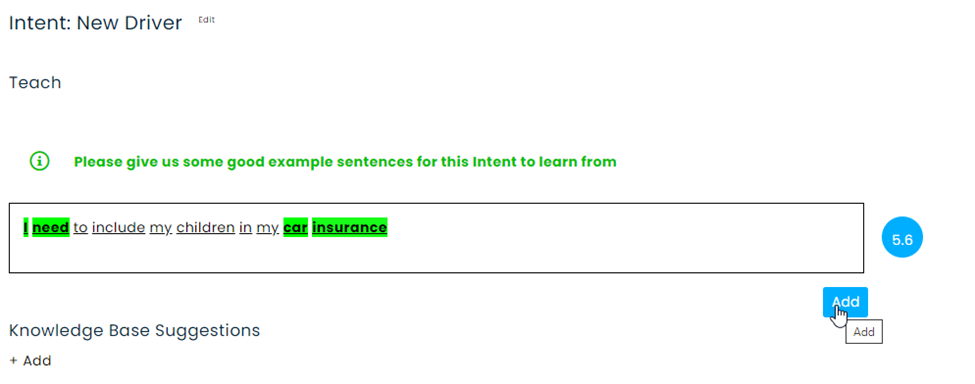
Enter ten sentences that customers may say that reflect the new Intent using keywords that are relevant to the Intent.
Example: For the intent New Driver (car insurance policy), add sentences such as “How much does it cost to add my son to my car insurance policy?”, “My daughter is 18 and just got her driving license. Can I add her to my policy?” etc.
-
The system's ongoing learning process does not require immediate attention. Visit the module from time to time to see different suggestions the system came up with and verify or reject the relevancy.

After selecting New Driver (our example) from the list of Intents, you may see a customer’s communication related to this intent. Click the Thumbs-Up icon if the statement is relevant or click the Thumbs-Down icon to mark it as irrelevant.
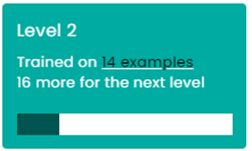
As the system learns to recognize the intent, the level of the intent increases, as indicated in the 3rd column of the Intents board.
5. Optional: Add a knowledge-based item that will be suggested to the agents once the Intent is triggered. Click on +Add to open the items menu (screenshot above) and click on the desired items.
Using Intents to Tag Conversations
Once the specific Intent reaches level 3 (Out of 4) of training, the system can tag conversations every time the Intent is identified.
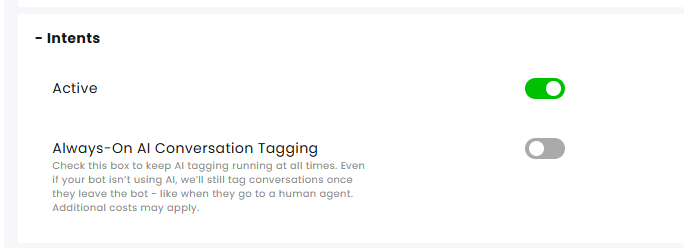
To activate the tagging of the Intents, navigate to the specific channel and activate the Intents section.
Note that not all types of communication channels have the Intents capability and that only after activating the module will you be able to see the Intents Tagging activation toggle in the channels (where available).
Using Intents in Flows (Scripts for Bots)
When the bot recognizes that the customer belongs to a specified group or is looking for a service or product that was set as an intent, the flow will automatically go to the step with the preceding Intent settings. After setting the intent, note the Brain icon appearing before the Step.
Add an Intent in the Flow Builder
- At the Flow Builder, open the relevant Flow or create a new one.
- Add a Say step to the Flow and call it “Intents”.
- Expand the Intent & Keywords section in the Properties panel and click Add Intent.
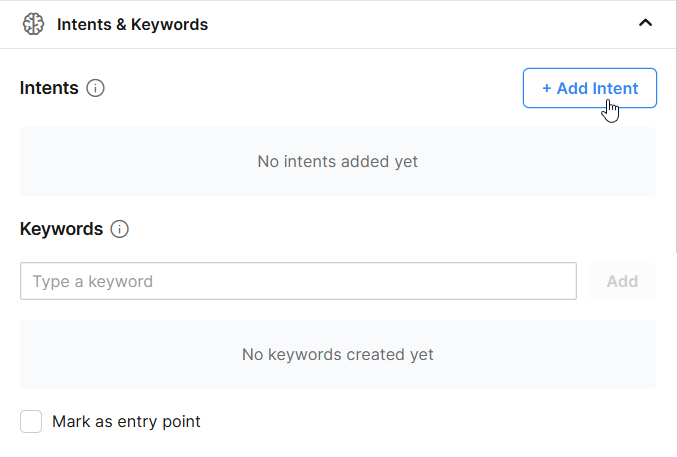
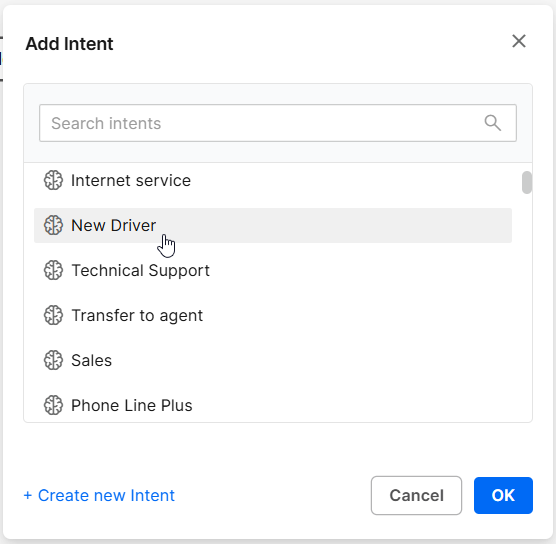
- At the dialog box, select the relevant intent and click Ok.
The Intent will be listed in the pane.
AI generated intent:
When CommBox AI is enabled, the system can automatically identify intents and redirect the flow to the appropriate step without requiring additional training, saving time and effort for system administrators.
To enable the AI Intents capability, toggle on Always-On AI Conversation Tagging option at the channel settings of the relevant channel. Click Save at the bottom of the page to save the settings.
Click on Create new Intent at the same dialog box, enter a name, a unique name, select a language, and click Create Intent.

Note:
The Intent Name should describe the customers’ entries you expect the system to send to this step. The language selected must match the language used in the Intent’s Name.
We advise adding a tag to the user at this step so that agents will be aware of the recognized intent.
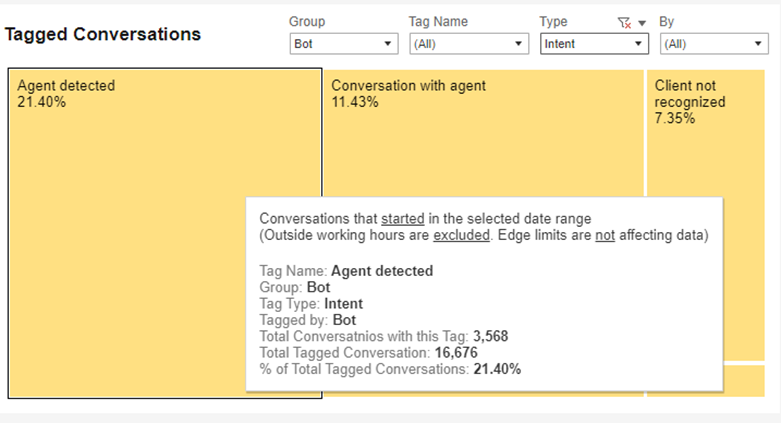
Using Intents in BI Reports
Clients that have the Custom BI Dashboards capabilities can identify intent tags in the Conversations board to learn how many customers belong to the specific intended group.