
Overview
The Dynamics 365/CommBox integration combines the business resources management tools of Dynamics with the communication capabilities of CommBox. With this integration, CommBox is embedded into the CRM Dashboard to provide seamless access to communicating with customers while viewing the CRM data.
The integration process involves setting CommBox as a recognized channel within the CRM, accessing and copying security keys, and configuring both platforms. Proper admin credentials for both platforms are required, and once the general settings are activated, admins need to activate the integration on each CommBox communication channel separately.
Reference:
https://learn.microsoft.com/en-us/entra/identity-platform/quickstart-register-app
Stage I: Dynamics 365 Platform Configuration
Step I: Verify Environment & Install Channel Integration Framework
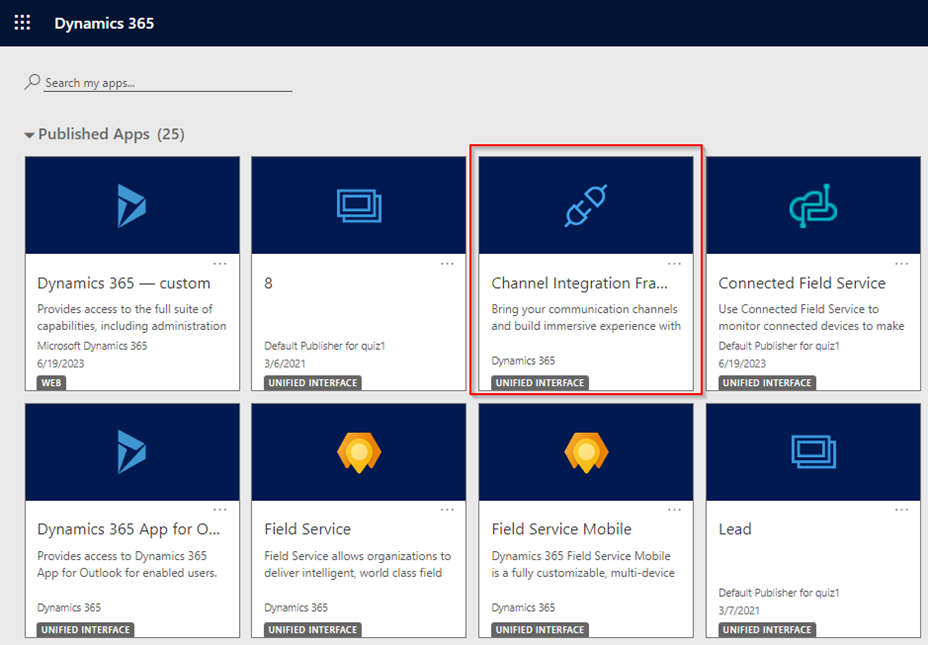
- At the Dynamics 365 platform, navigate to Settings > Customization > Dynamics Marketplace, and open the Microsoft AppSource.
- In the search box, enter Channel Integration Framework, and once the application solution appears, select GET IT NOW.
- In the One more thing window, select Continue.
- Agree to Microsoft’s Legal Terms and Privacy Statement by checking the boxes and clicking Agree.
The Dynamics 365 Channel Integration Framework application (solution) importing happens in the background.
Step II: iFrame Installation (Optional)
Configure the Channel Integration Framework (CIF) to enable the CommBox inbox to open as an iFrame within Dynamics.
-
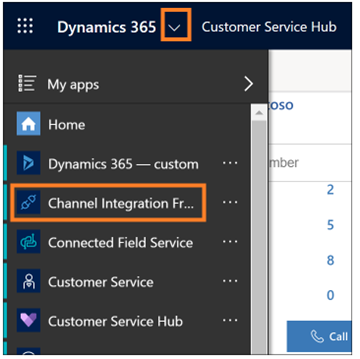
At the Dynamics 365 platform, search for and select Channel Integration Framework, or use the following link: https://quiz1.crm4.dynamics.com/apps
-
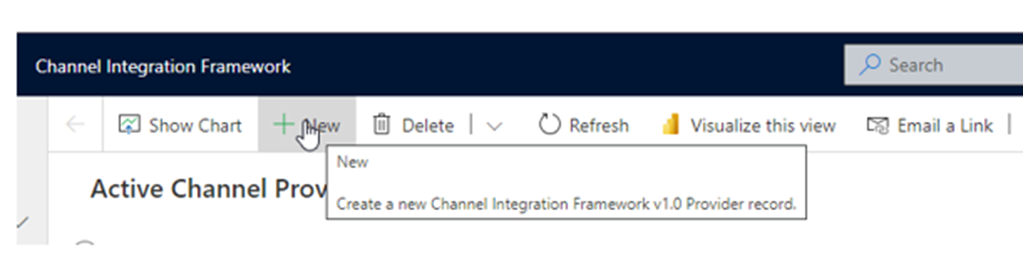
Select the +New tab at the top to create a new Channel Integration Framework v1.0 Provider record.
-
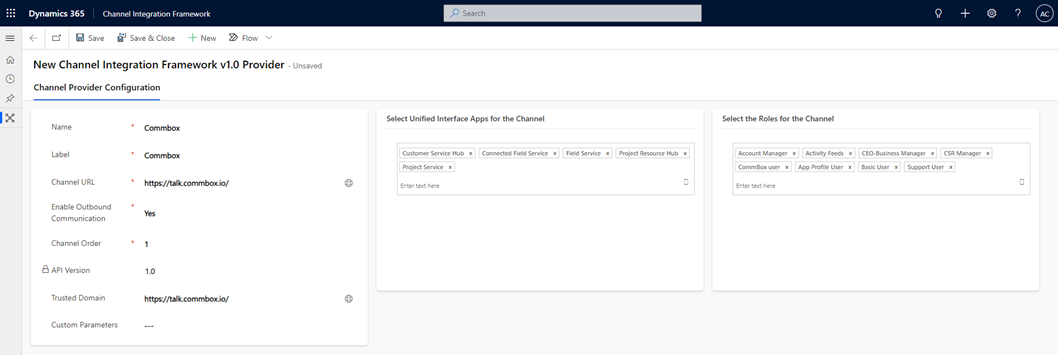
Configure the new CIF record for CommBox (See the screenshot below as an example).
- At the left pane, enter CommBox for both the Name and the Label fields.
- Enter your CommBox brand URL in both the Channel URL and the Trusted Domain fields.
- At the center pane, select the Microsoft Apps that run in Dynamics 365, which will now have an active CommBox iFrame.
Click on the App Launcher (the button at the left of the Dynamic emblem at the top) to open a list of all applications. - At the right pane, select the Organizational Roles that will have access to this integration.
-
Click Save & Close at the top.
-
To verify that the CommBox Manage Window appears on the right, click on the Channel Integration Framework link (to the right of the Dynamics logo) and select one of the apps listed earlier in the center pane. Make sure you have one of the permission roles listed on the right pane.
Stage II: Service-Side Integration
This aspect of the integration will enable CommBox to create entities within Dynamics and populate different fields.
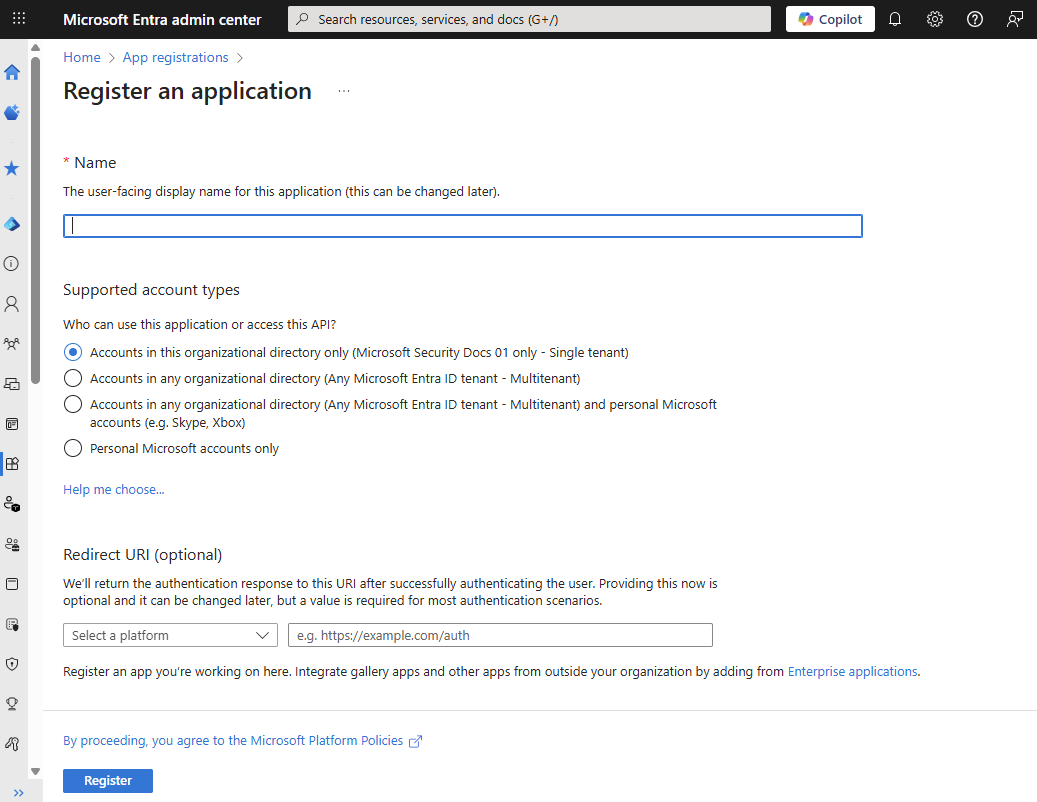
Step I: Register a New Azure Application
-
At the Microsoft Entra admin center, navigate to Entra ID > App registrations and select New registration.
-
Name your App. “CommBox integration”
-
For the “Supported account types” section, select "Accounts in this organizational directory only” (the first option).
-
Click Register at the bottom of the page.
-
At the new application’s Overview page, copy the Application (client) ID to your device.
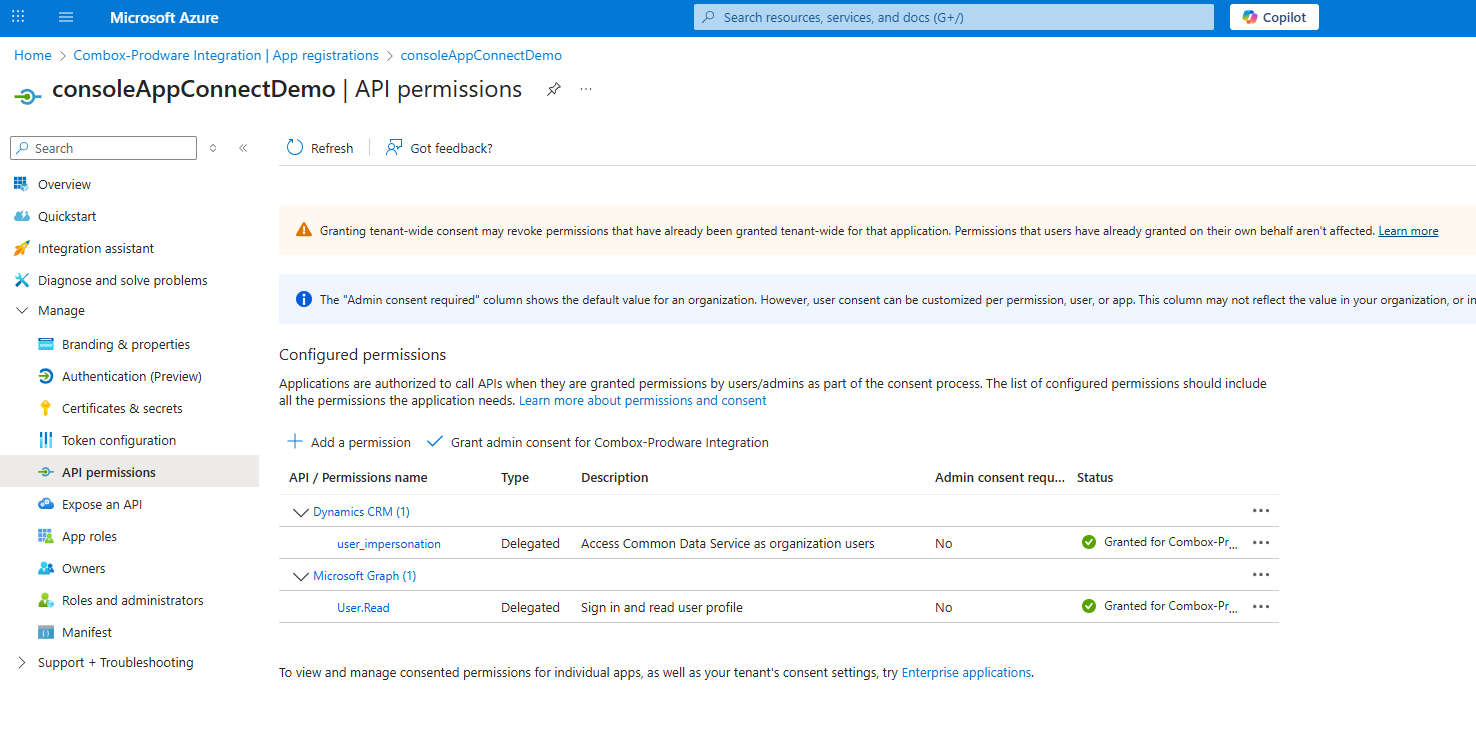
Step II: Assign API Permissions
- At the Overview page, navigate to Manage > API permissions and click the + Add a permission button.
- Add the following API Permissions to your application:
- Dynamics CRM -> user_impersonation
- Microsoft Graph -> User.Read
Step III: Generate Client Secret
-
At the App Overview page, navigate to Manage > Certificates & secrets.
-
Click on + New client secret .
-
In the new dialog box, select the lifespan of the secret (e.g., 730 days).

-
Copy the Secret Value immediately to your device.
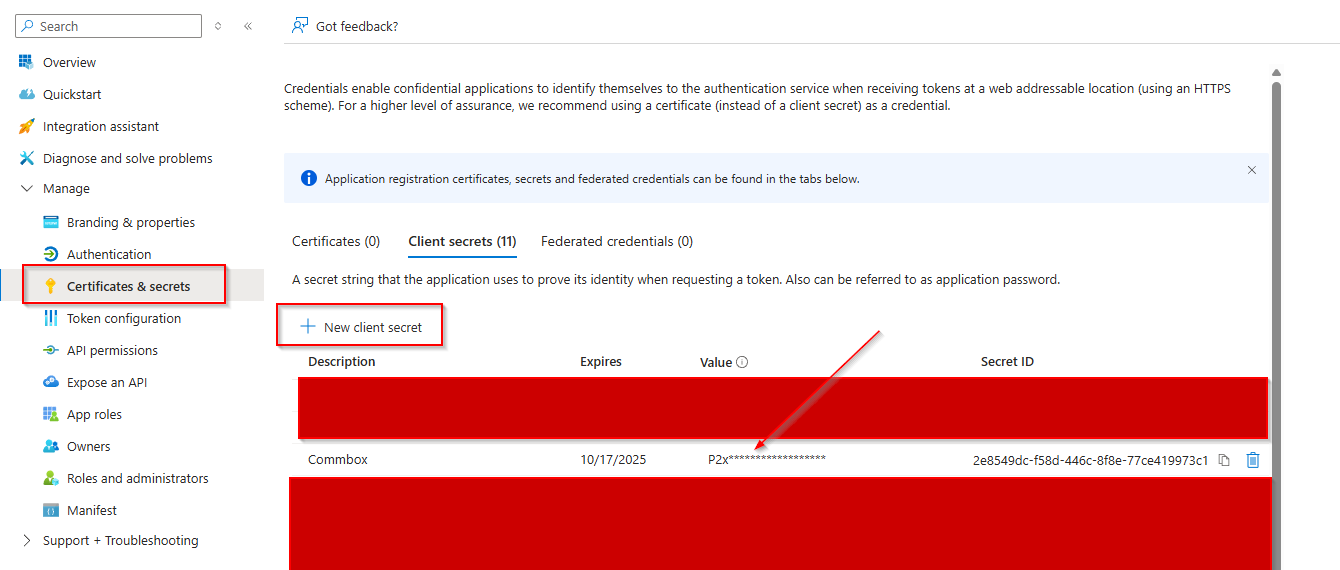
⚠️ Important: You can only copy the secret once. Store it securely.
Stage III: Create and Configure Applicative User
As part of the integration, you’ll need to create an Application User – the technical component that accesses the data in your environment for the users of the application.
Step I: Create Applicative User
-
Sign in to the Power Platform admin center as a System Administrator.
-
Select Environments, and then select the relevant environment from the list.
-
Click the Settings tab at the top.
-
Select Users + permissions > Application users and click + New app user to open the Create a new app user page.
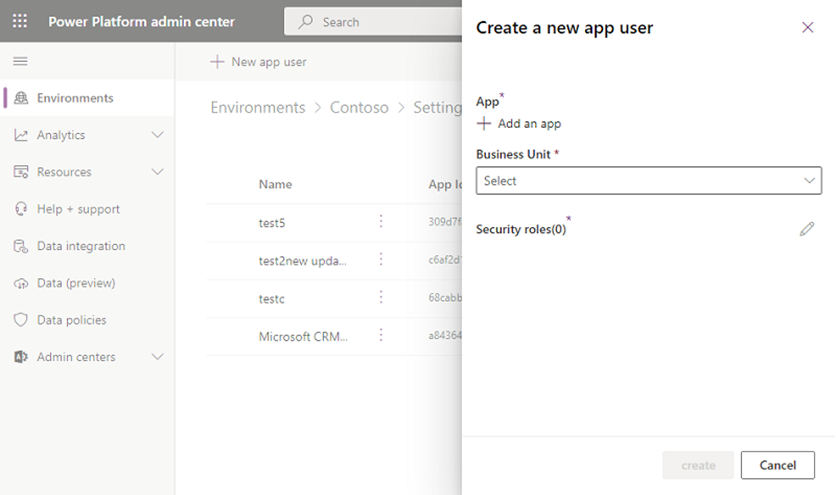
-
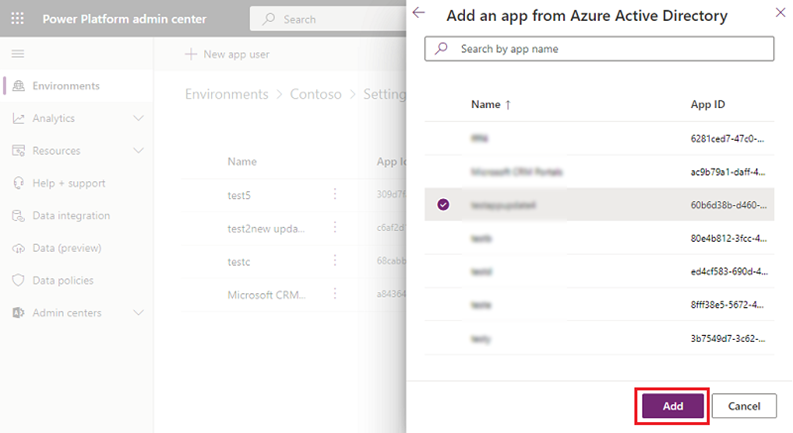
To connect the Application User to the application, select + Add an app to choose the registered Microsoft Entra application that was created for the selected user, and then select Add.
-
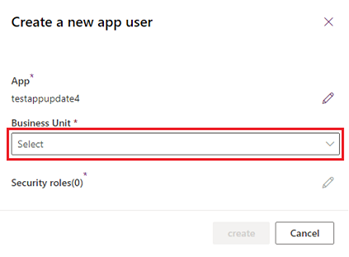
The selected Microsoft Entra app is displayed under App. Select the Business Unit from the dropdown list.
-
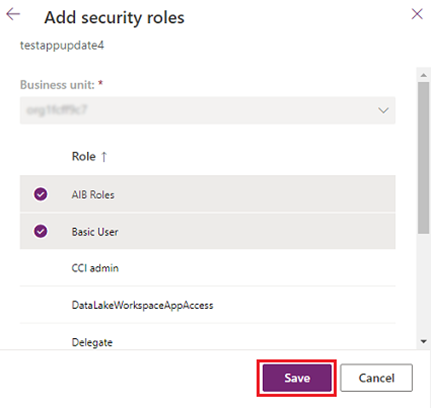
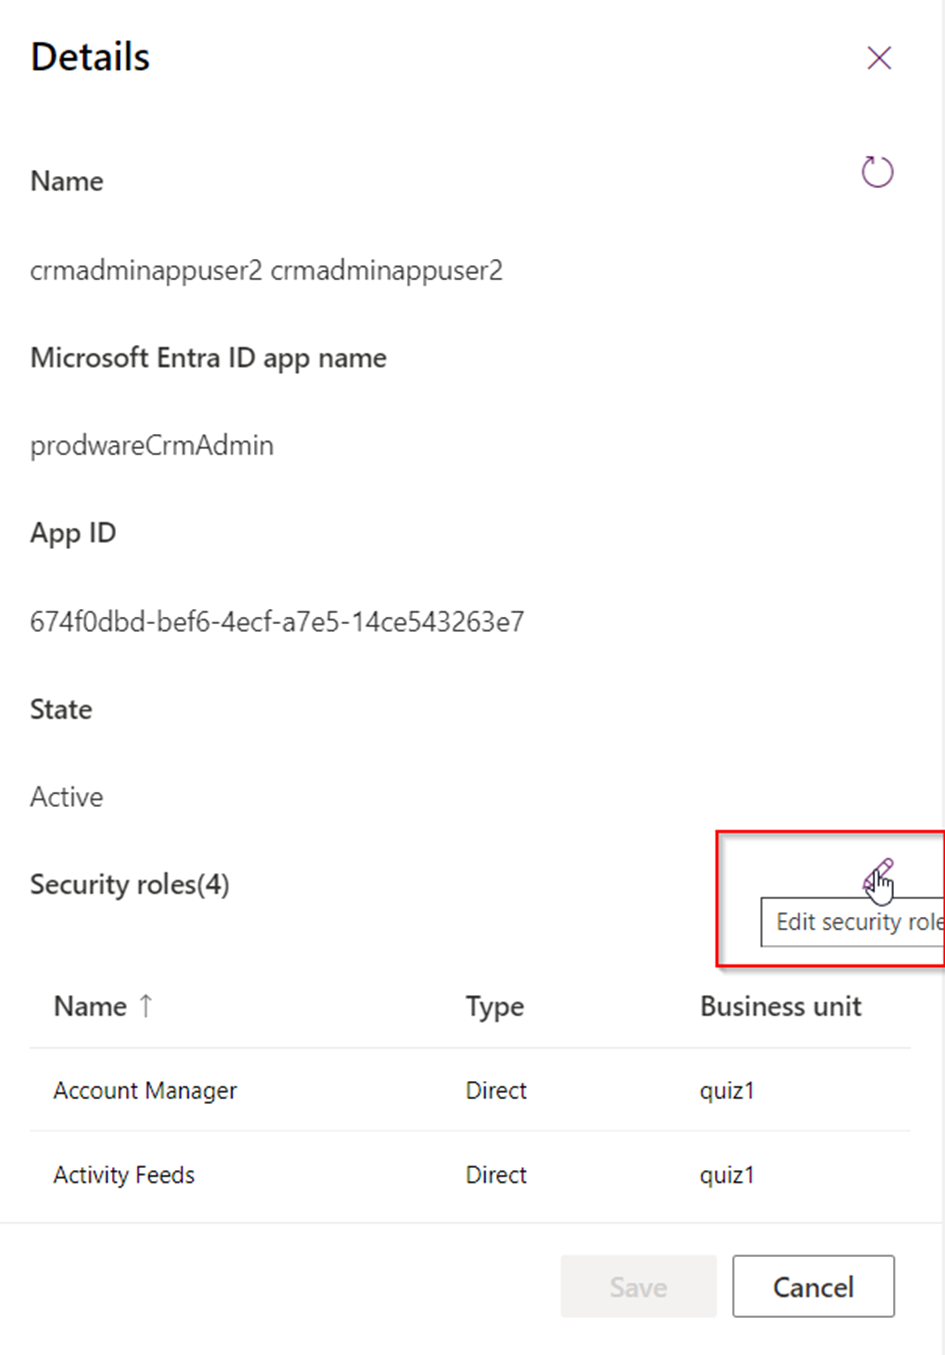
For the Security roles, click the pencil icon and select the chosen business unit to add to the new application user. When done, click Save.
-
Finish the process by clicking Create.
-
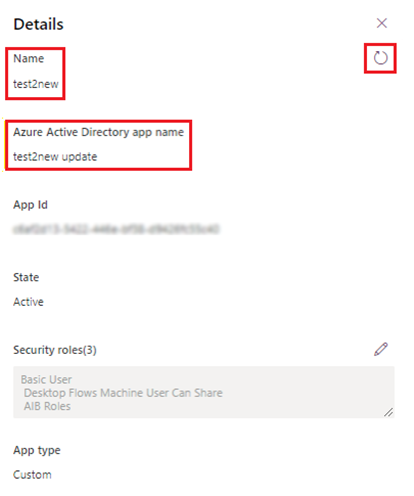
When an application user is first created, the username is the same as the name of the registered Microsoft Entra application. The two names can get out of sync when the name of the Microsoft Entra application is changed. Sync the Application User’s name with the Microsoft Entra application name by clicking the Refresh icon on the Details page.
Step II: Configure the Application User
-
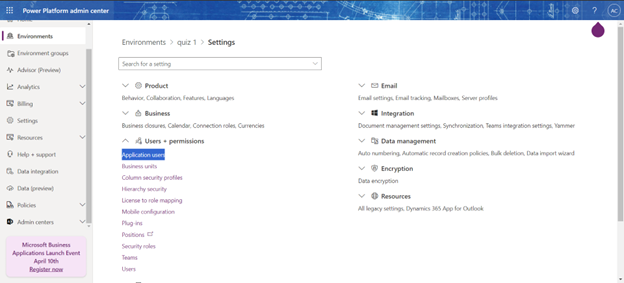
Sign in to the Power Platform admin center as a System Administrator.
-
Navigate to Admins.powerplatform.microsoft.com/environment and select the relevant Environment.
-
At the new page, at the top tabs click Settings followed by selecting Users & permissions > Application User.
-
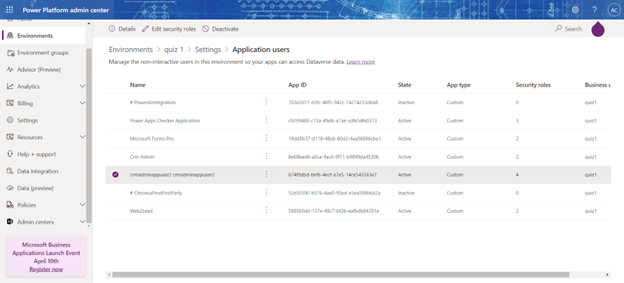
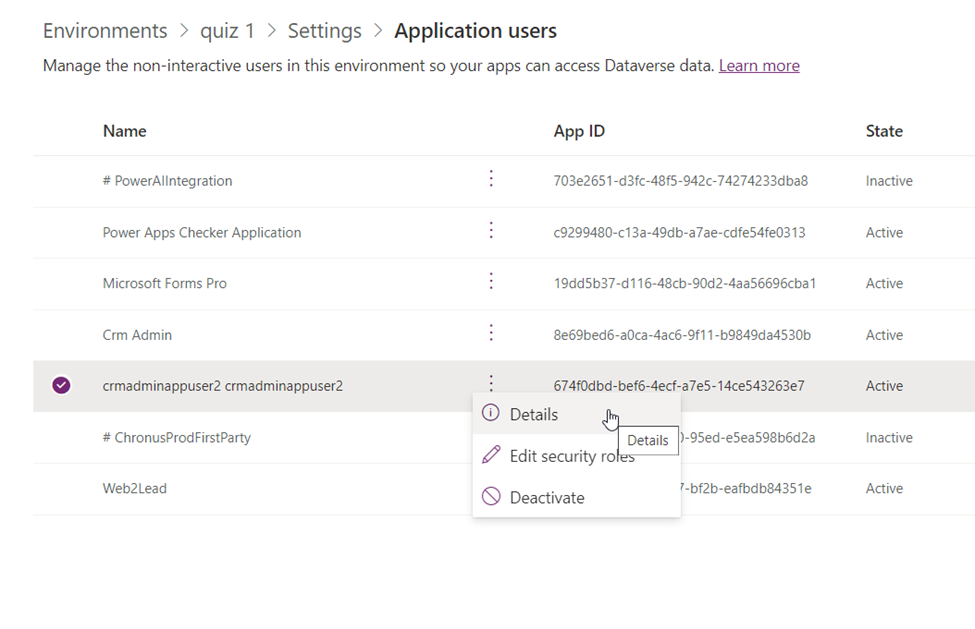
At the list of Applications Users, select the relevant item you want to edit and click the 3-dot menu.
-
Select Details to see the relevant information for that Application User.
-
Click the pencil icon opposite the security role heading to add or delete roles.
-
Save changes.
Stage IV: CommBox Platform Configuration
Activation of this integration happens both at the general settings level as well as direct activation for each communication channel.
Step I: General Activation
-
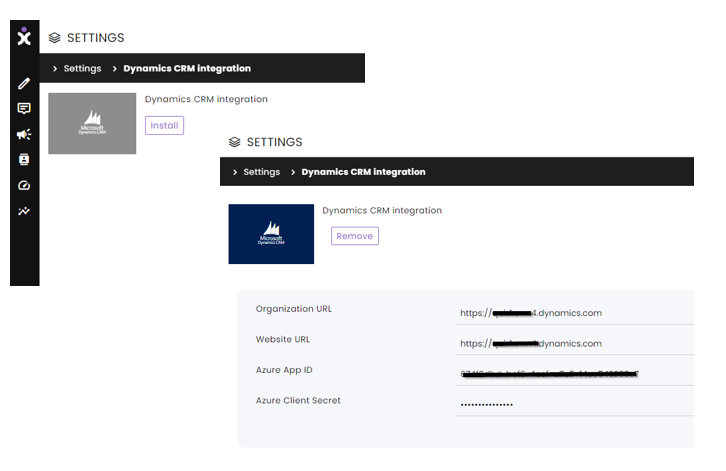
At the CommBox platform, navigate to Settings > Dynamics 365 integration, and click Install.
-
Enter your organizational URL with Dynamics 365.
-
Paste the App ID you obtained into the Azure App ID field.
-
Paste the Client Secret value into the Azure Client Secret field.
-
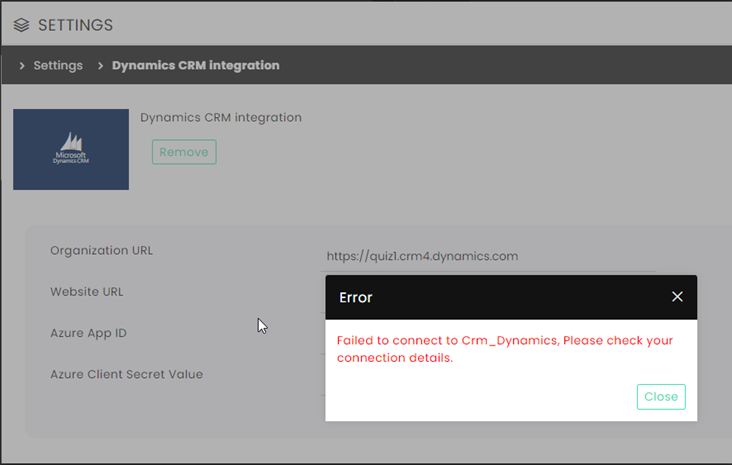
Click Save.
-
An instant validation of the credentials will now take place. If the validation fails, a pop up notice will advise that the information entered is incorrect.
-
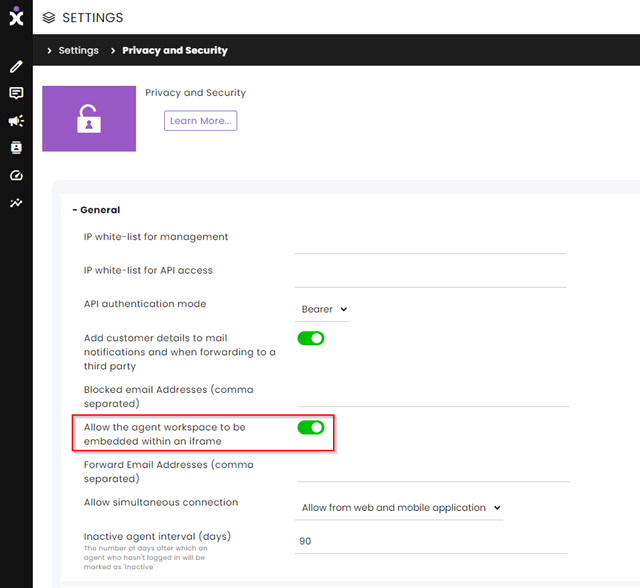
Navigate to Settings > Privacy and Security module and expand the General settings.
-
Enable the iFrame for the agents by switching the toggle on.
-
Click Save at the bottom corner of the screen.
Step II: Channel-Level Activation
The integration can be customized for each channel or subchannel, catering to the unique needs of different teams within the organization. Additionally, each toggle includes a viewable JSON file, allowing for the customization of CRM fields to seamlessly work with CommBox.
- Navigate to Settings and select the applicable communication module for this integration.
- Select the specific channel and open the Dynamics CRM section.
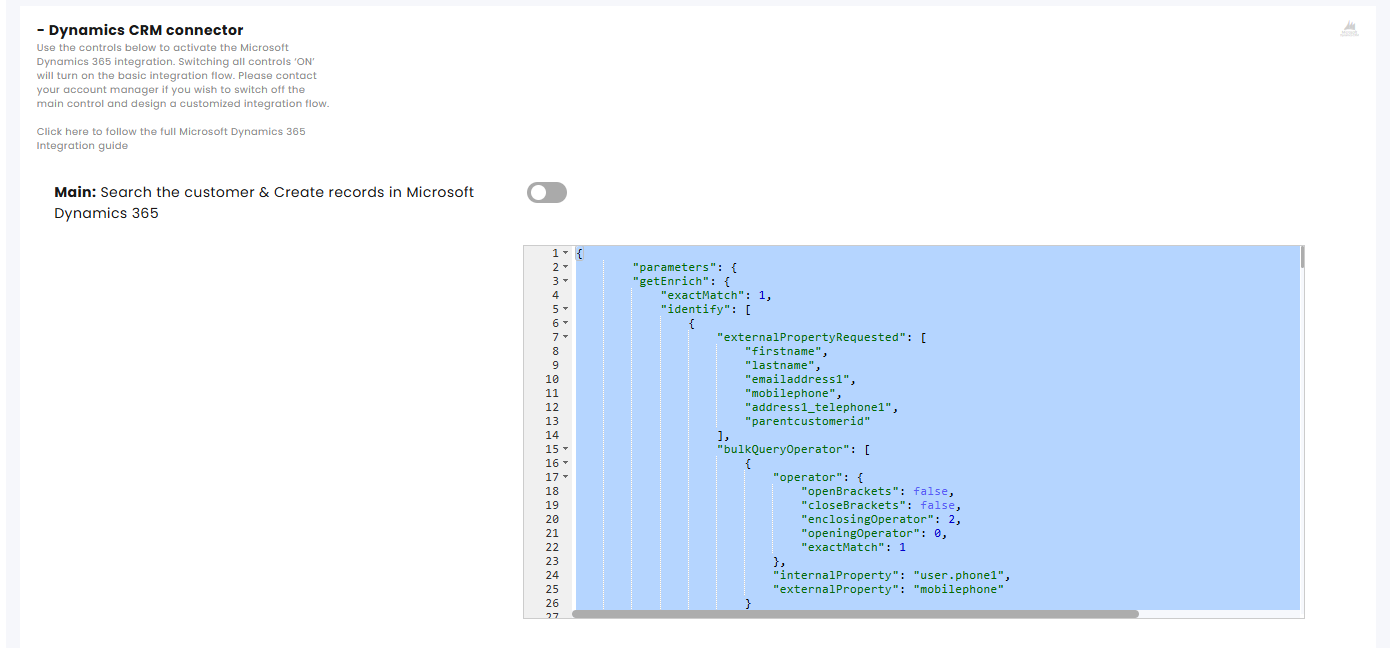
- Toggle on the desired features:
-
Main: Search the customer & Create records in Microsoft Dynamics 365 – The main server side of the integration. Contact us if you want to have it turned off while other toggles remain on.
-
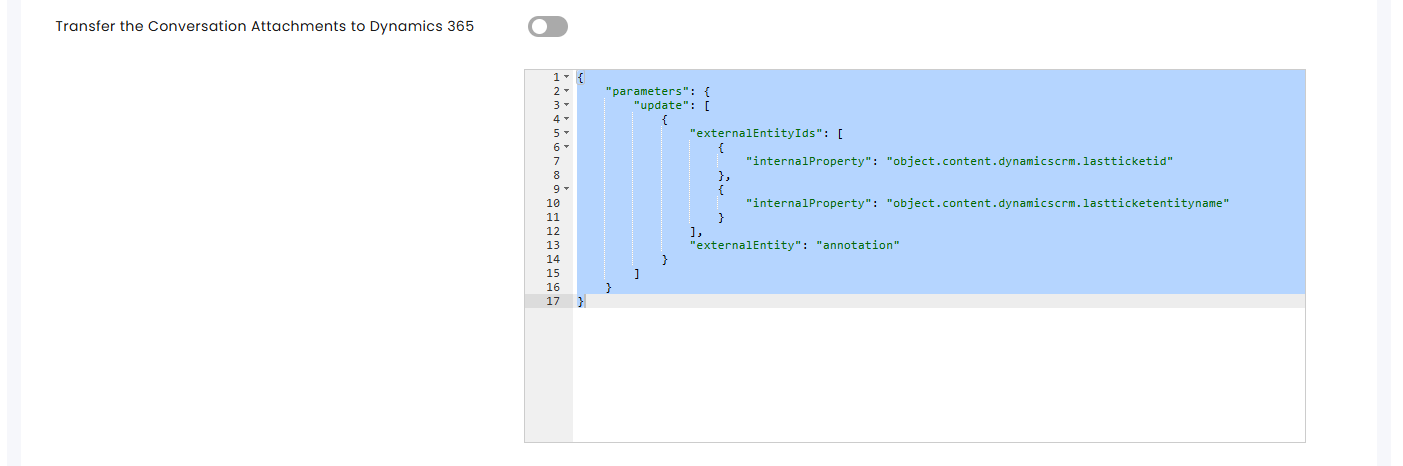
Transfer the Conversation Attachments to Dynamics 365 – Note that the remarks in CommBox are clickable links.
-
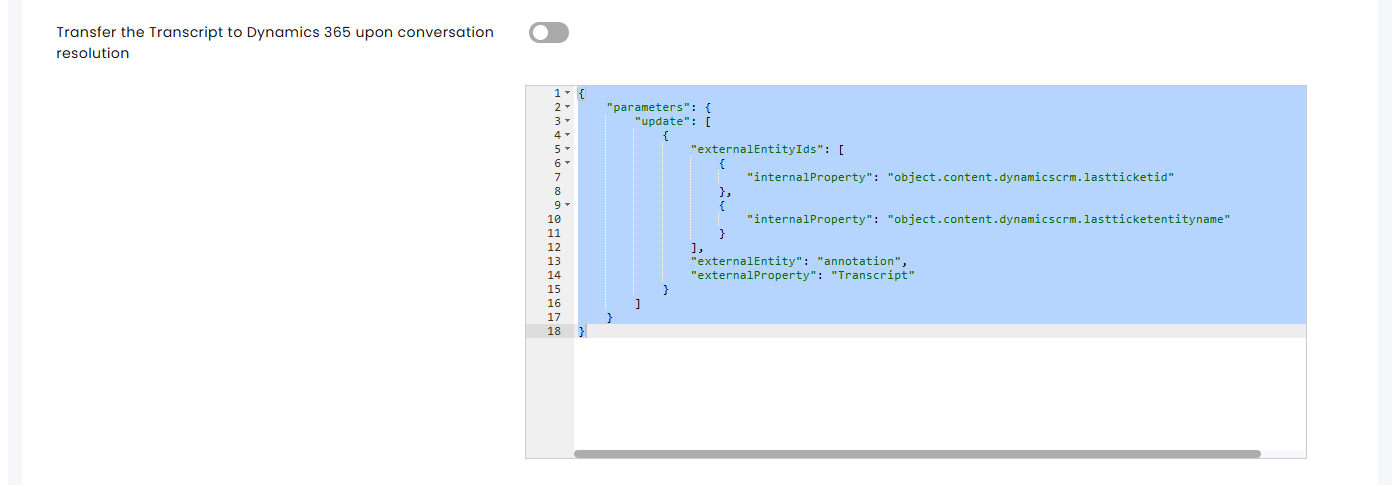
Transfer the Transcript to Dynamics 365 upon conversation resolution – Note that the remarks in CommBox are clickable links.
-
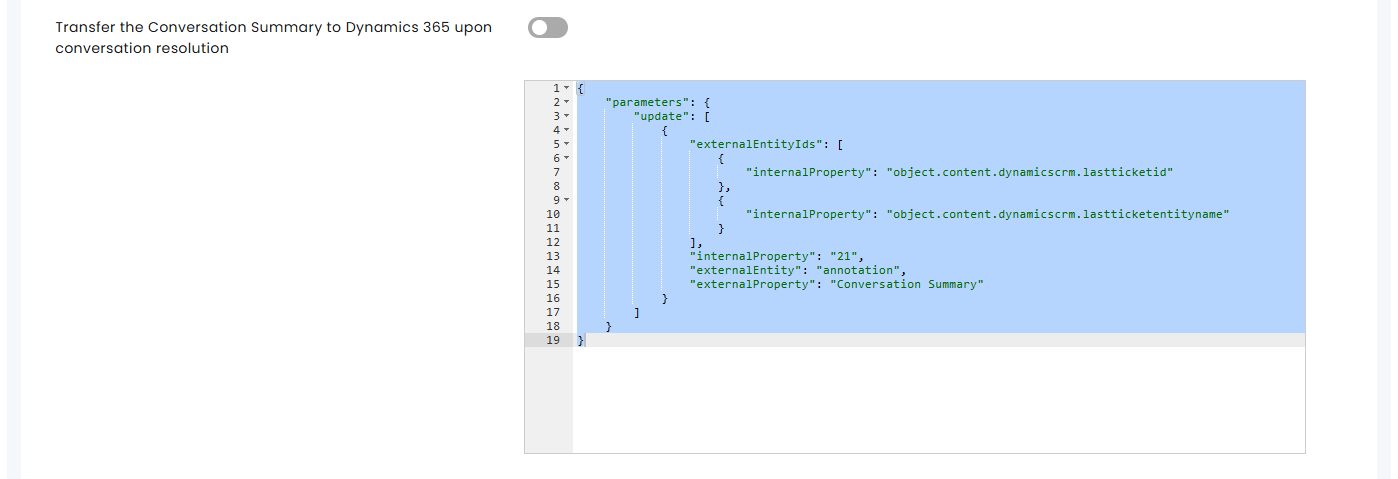
Transfer the Conversation Summary to Dynamics 365 upon conversation resolution – AI summary requires toggling on that feature in the AI Assistant section. Note that the remarks in CommBox are clickable links.
-
Set the iFrame behavior:
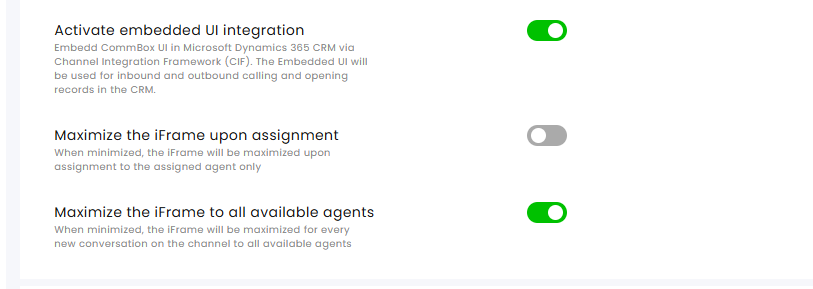
- Activate embedded UI integration – enables the CommBox iFrame to be seen in Dynamics CRM and activate items within it.
- Maximize the iFrame on assignment to the assigned agent only – When the specific agent is assigned to the conversation, the minimized iFrame will expand.
- Maximize the iFrame on new conversations for all available agents – All available agents will have the minimized iFrame expand on the CRM screen when a new conversation enters the system.
-
Click Save.
-
Repeat this process for all relevant channels.
Stage V: Advanced Configuration (Optional)
Adding Case Title and Origin in Dynamics
The CommBox integration with Dynamics CRM can include the Case Title with the customer’s name and the Case Origin that includes the communication channel listed in CommBox. This enhancement enables the CRM to better reflect the information found in the CommBox platform, saving the agents the need to cross-reference between the two platforms.
-
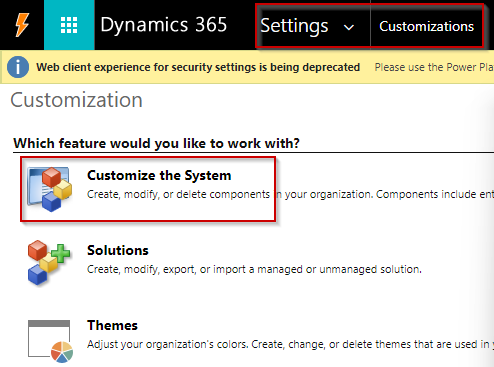
At the Dynamics platform, navigate to Settings > Customizations and select Customize system.
-
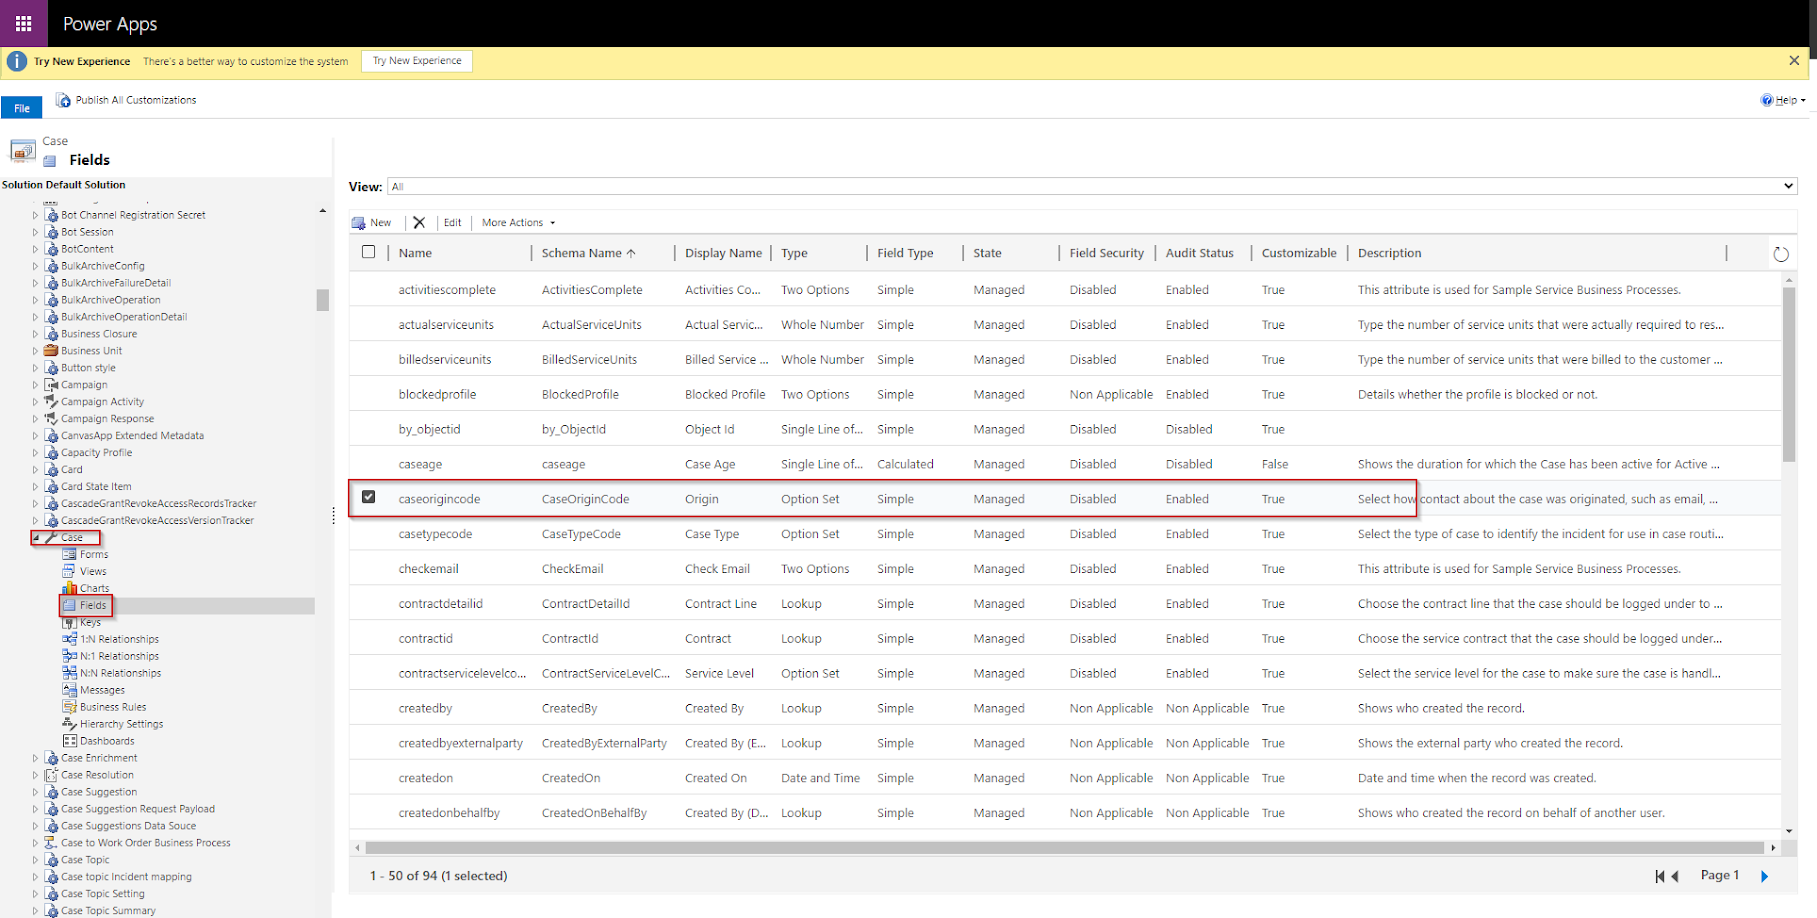
At the left menu bar, navigate to Entities > Case > Fields, and double-click on caseorigincode.
-
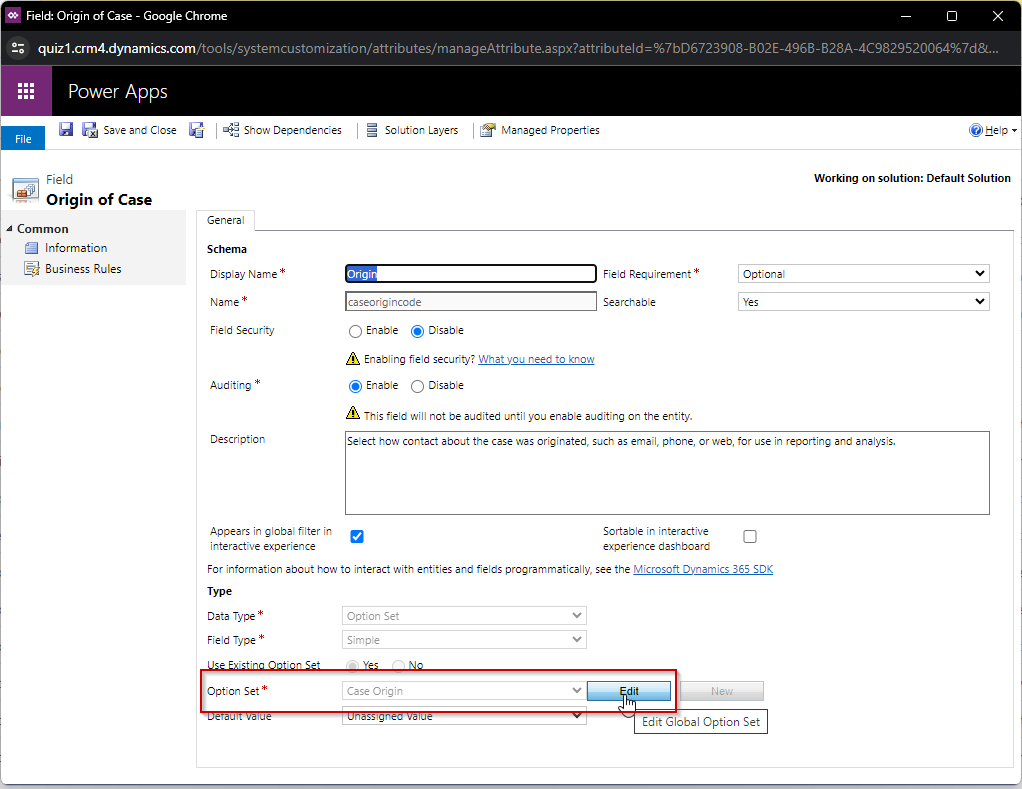
At the new dialog box, navigate to the Option Set field and click Edit next to it.
-
The default channels are in the Options box. Using the plus sign icon, add to the list of values the different communication channels available in CommBox that are not currently in Dynamics. Make sure the Label and Value correspond to the list below.

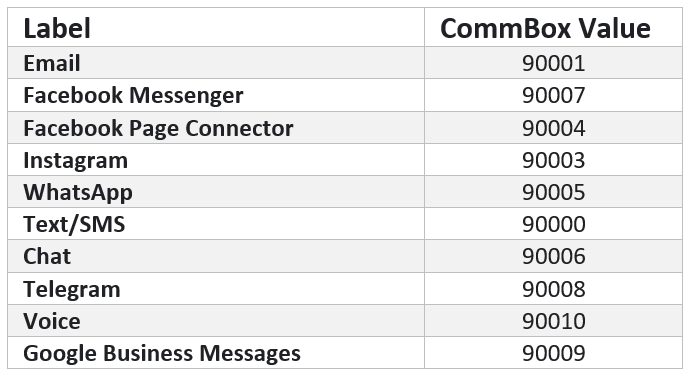
- Save and Close at the top of the screen in every open dialog box (should be 2).