Overview
Oracle Service Cloud (formerly RightNow CRM) enables agents to seamlessly access the CommBox inbox as a CRM tab and streamline customer information between the two platforms. Customizations are done using the installed Oracle Service Cloud Desktop Windows Application. Once integrated, the Oracle CRM is to be configured at the channel settings of each communication channel (see below).
Steps for Integration
- Install Oracle Service Cloud
- Create CommBox fields within the Oracle platform
- Create CommBox Contact within the Oracle platform
- Customize UI Layout
- Activate Oracle at the CommBox Console
Step 1: Install Oracle Service Cloud
- Open your ORACLE URL in the Edge browser (all other browsers will not work properly).
- Enter the following link:
http://{your_hostname}.custhelp.com/cgi-bin/{interface}.cfg/php/admin/launch.php
Example: http://test-1.custhelp.com/cgi-bin/test_1.cfg/php/admin/launch.php
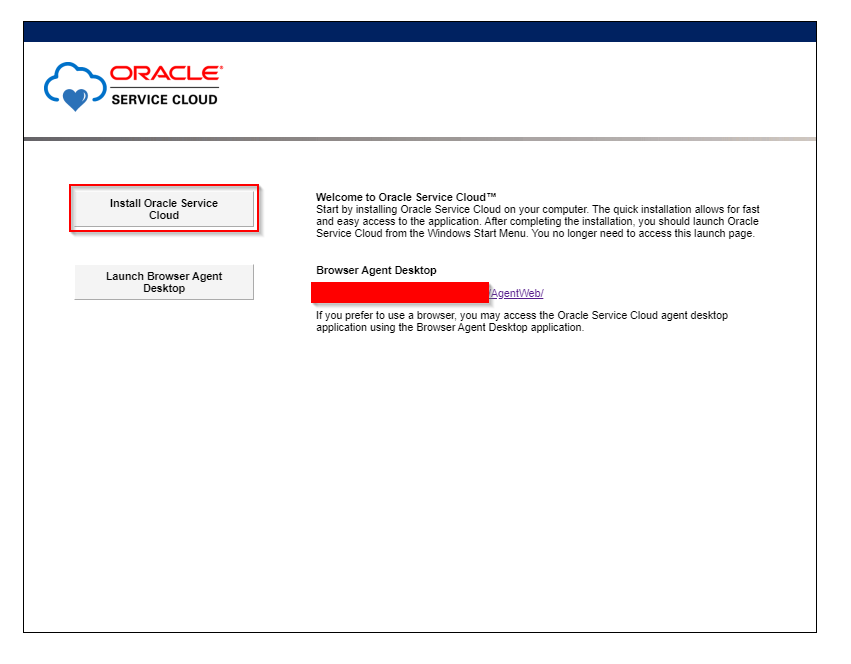
- Click the Install Oracle Service Cloud button.
More information at https://cx.rightnow.com/app/answers/detail/a_id/578/~/url-for-installing-and-logging-into-the-oracle-b2c-service-application
Step 2: Create CommBox Fields within the Oracle Platform
-
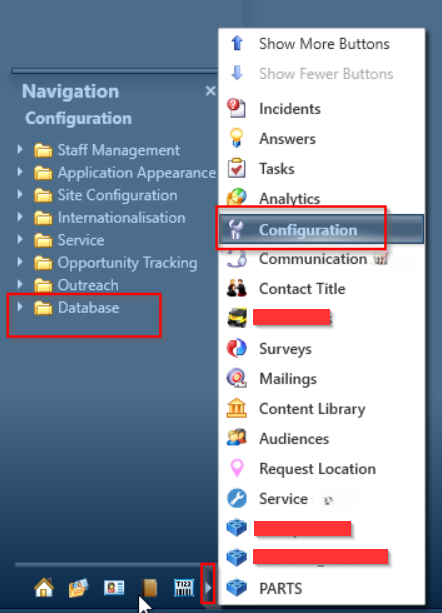
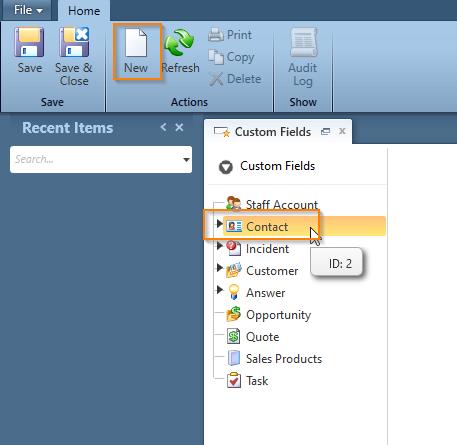
At the Oracle platform, navigate to Configuration > Database and double-click on Custom Fields.
-
At the new screen, click Incidents and then click New at the top bar.
-
Based on the table below, create four (4) new custom fields and save your work after each incident.
| Name | Column Name | Data Type | Usage | Hint | Size |
|---|---|---|---|---|---|
| CommBox Conversation Channel | channel | Text Field | Plain Text | Object Stream Name in CommBox | 255 |
| CommBox Subchannel | subchannel | Text Field | Plain Text | Conversation Sub-Channel in CommBox | 255 |
| CommBox Conversation URL | url | Text Field | URL | Link to CommBox Conversation | 255 |
| CommBox Object Id | objectid | Text Field | Plain Text | Object Id in CommBox | 255 |
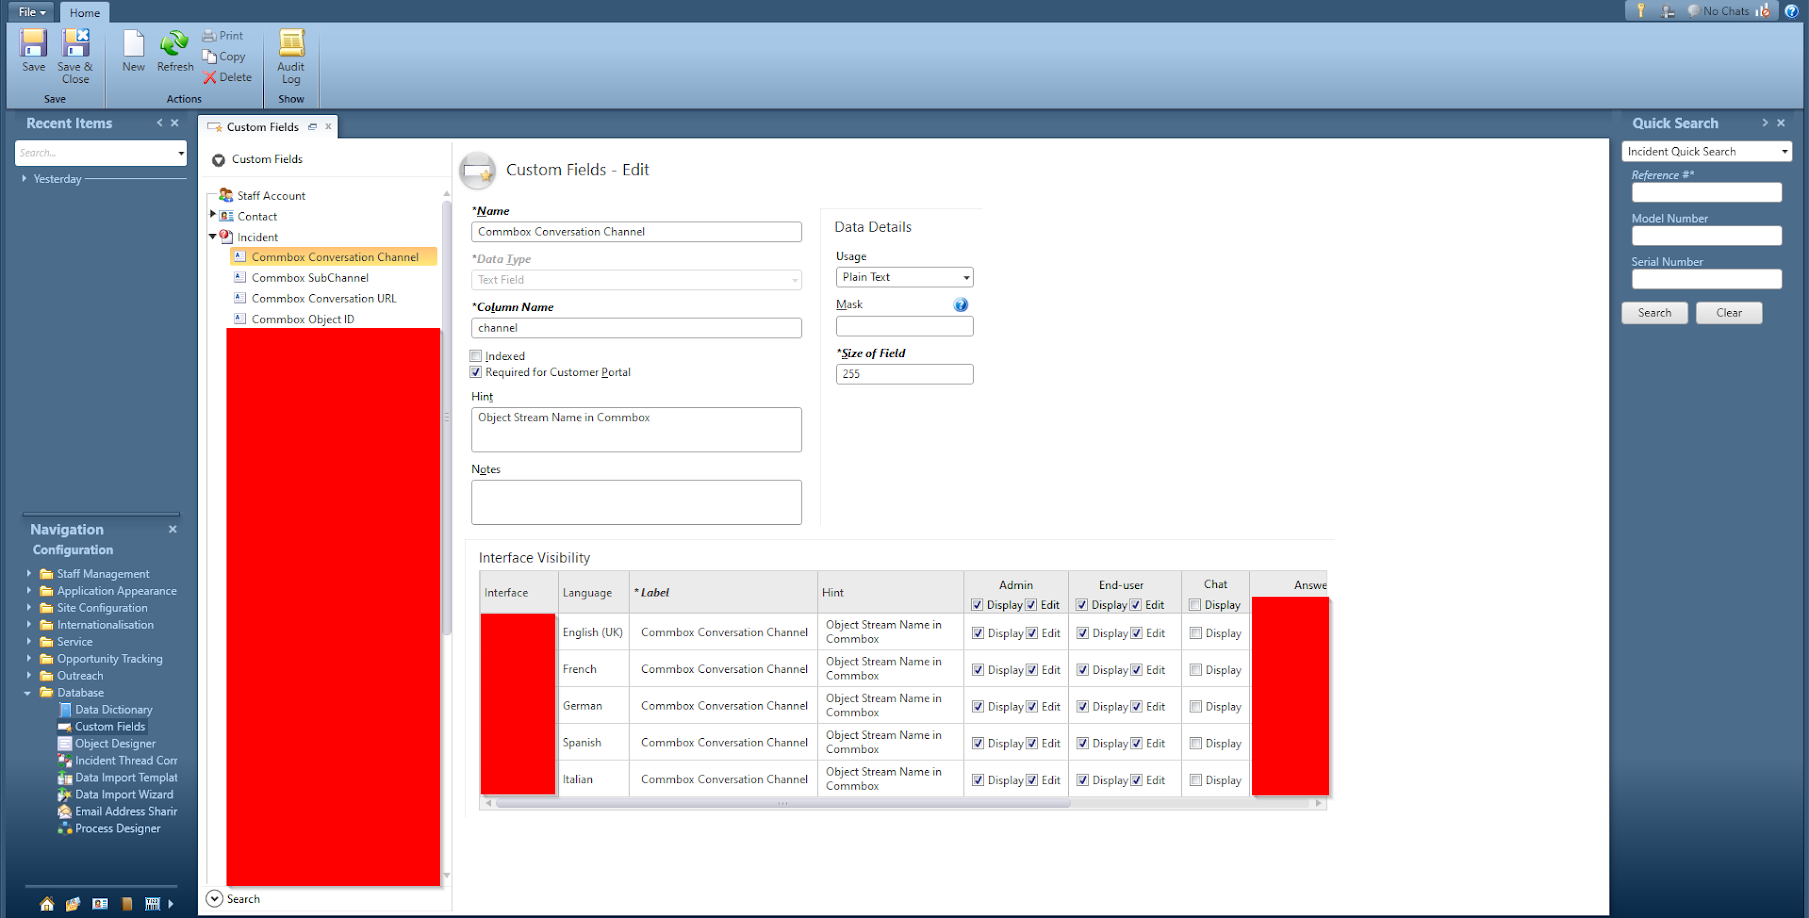
- Click Save at the top to save your work.
Step 3: Create CommBox Contact within the Oracle Platform
-
At the same menu, navigate to Contacts to create new user fields.
-
Click New and create two (2) new user fields based on the information in the table below:
| Name | Column Name | Data Type | Usage | Hint | Size |
|---|---|---|---|---|---|
| CommBox User ID | commbox_user_id | Text Field | Plain Text | User ID in CommBox | 255 |
| CommBox User Unique ID | unique_id | Text Field | Plain Text | User's Unique ID in CommBox | 255 |
- Click Save at the top after creating each field.
Step 4: Customize UI Layout
-
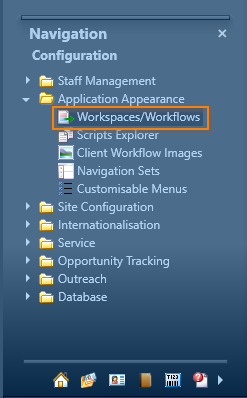
Navigate to Configuration > Application Appearance and double-click on Workspaces/Workflows.
-
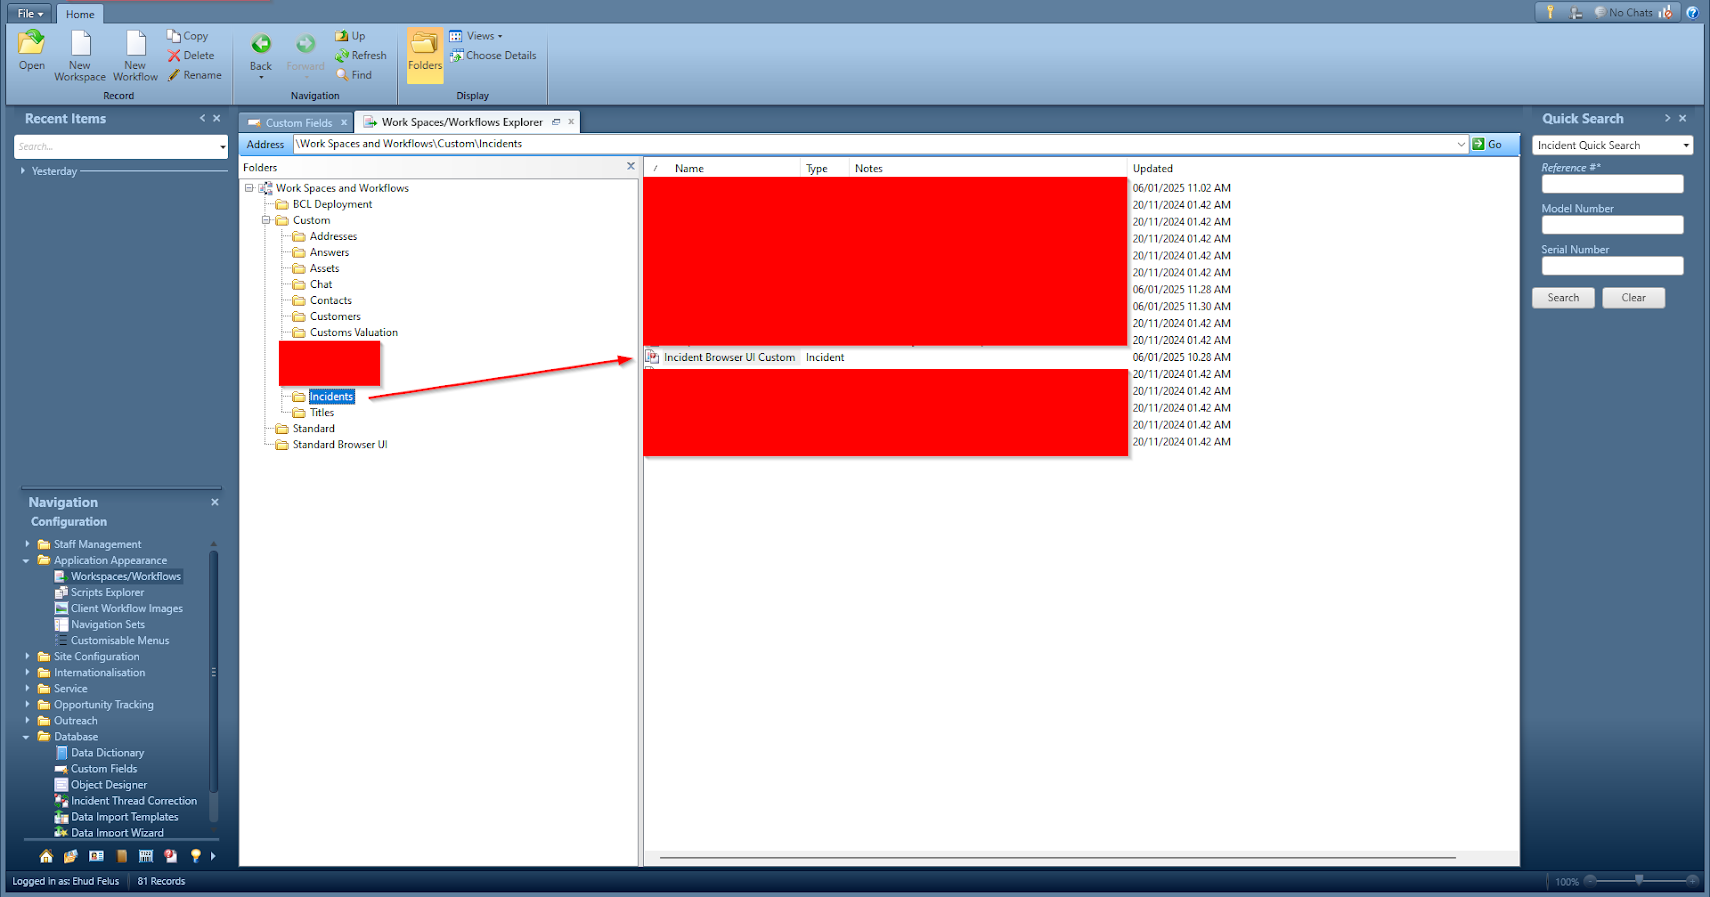
Click the Custom folder, followed by the Incidents folder.
-
Create or edit your custom view for Incident (in our example, it is called Incident Browser UI Custom)
-
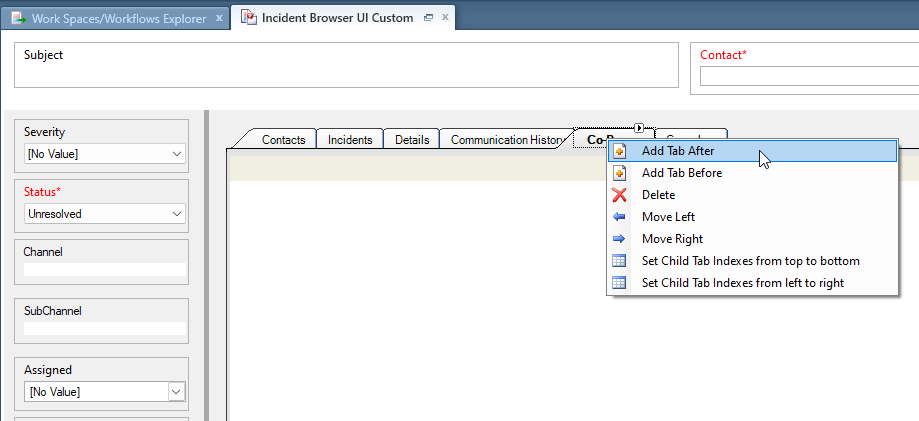
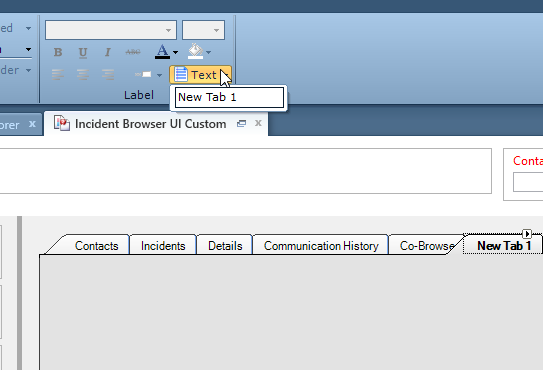
Right-click while hovering on the last tab and select Add Tab After.
-
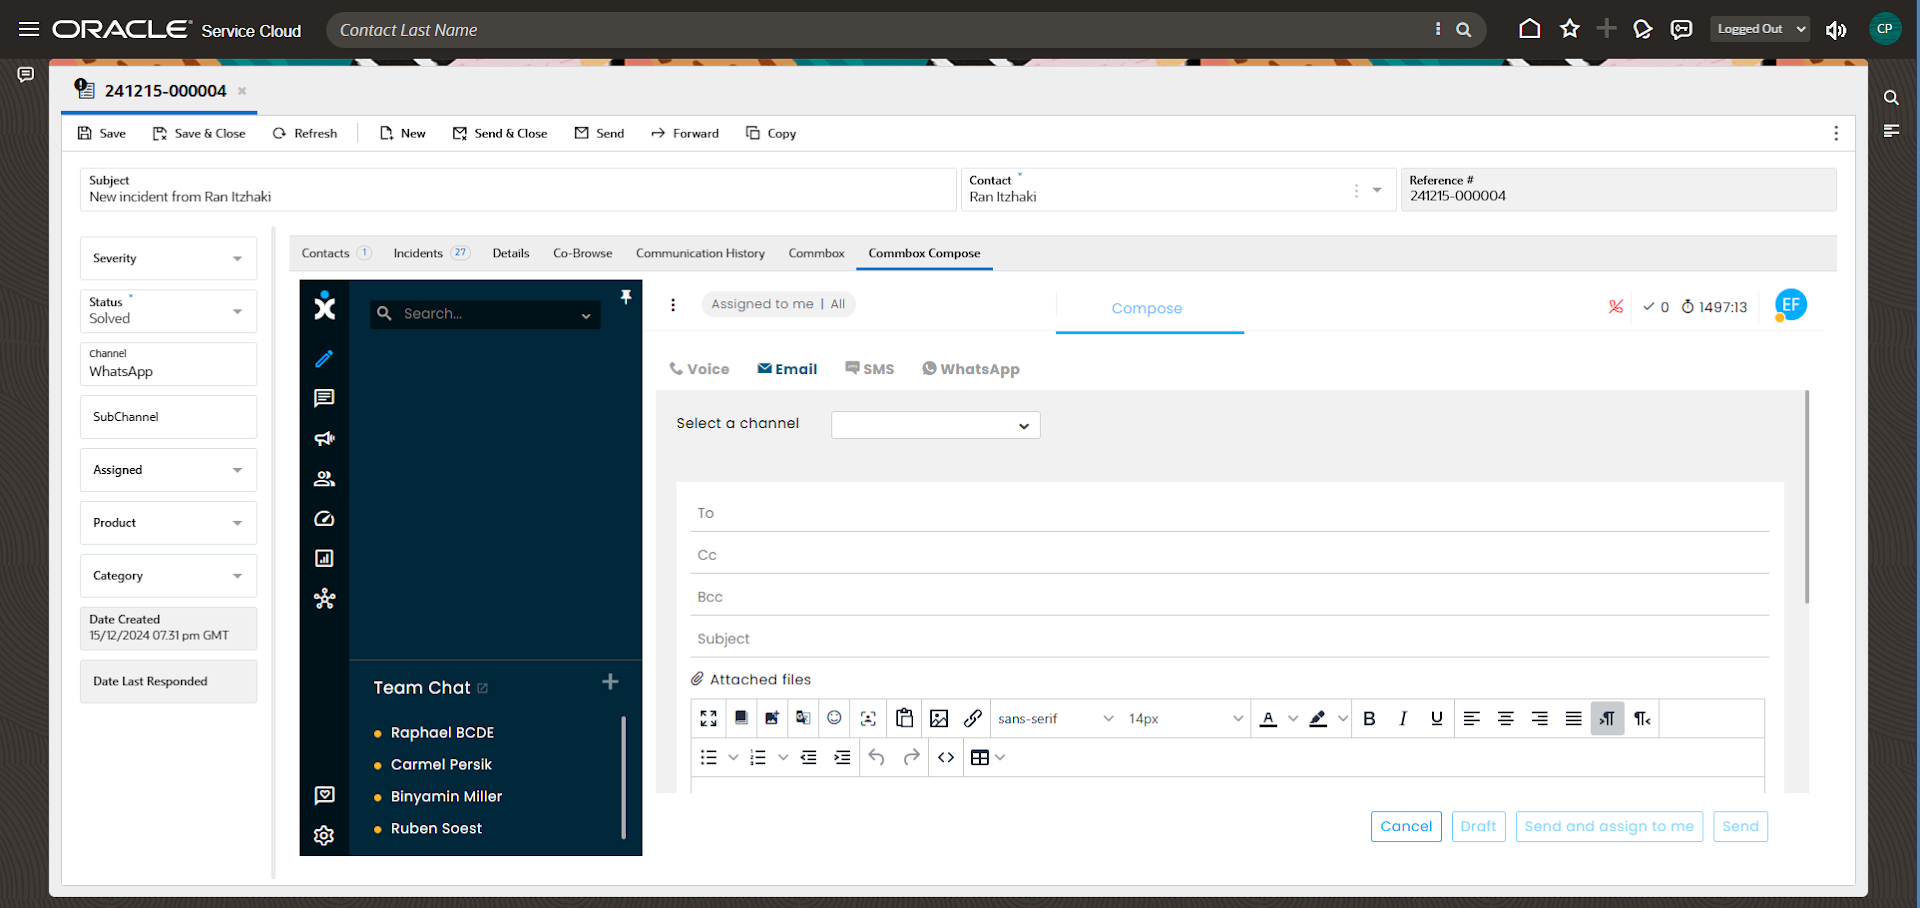
Edit the tab's name by clicking the document icon in the label section at the top bar. Name the new tab (“CommBox” in our example).
-
At the top bar, click the Insert Control tab and drag the ‘Browser’ control to the center of the ‘CommBox’ tab.
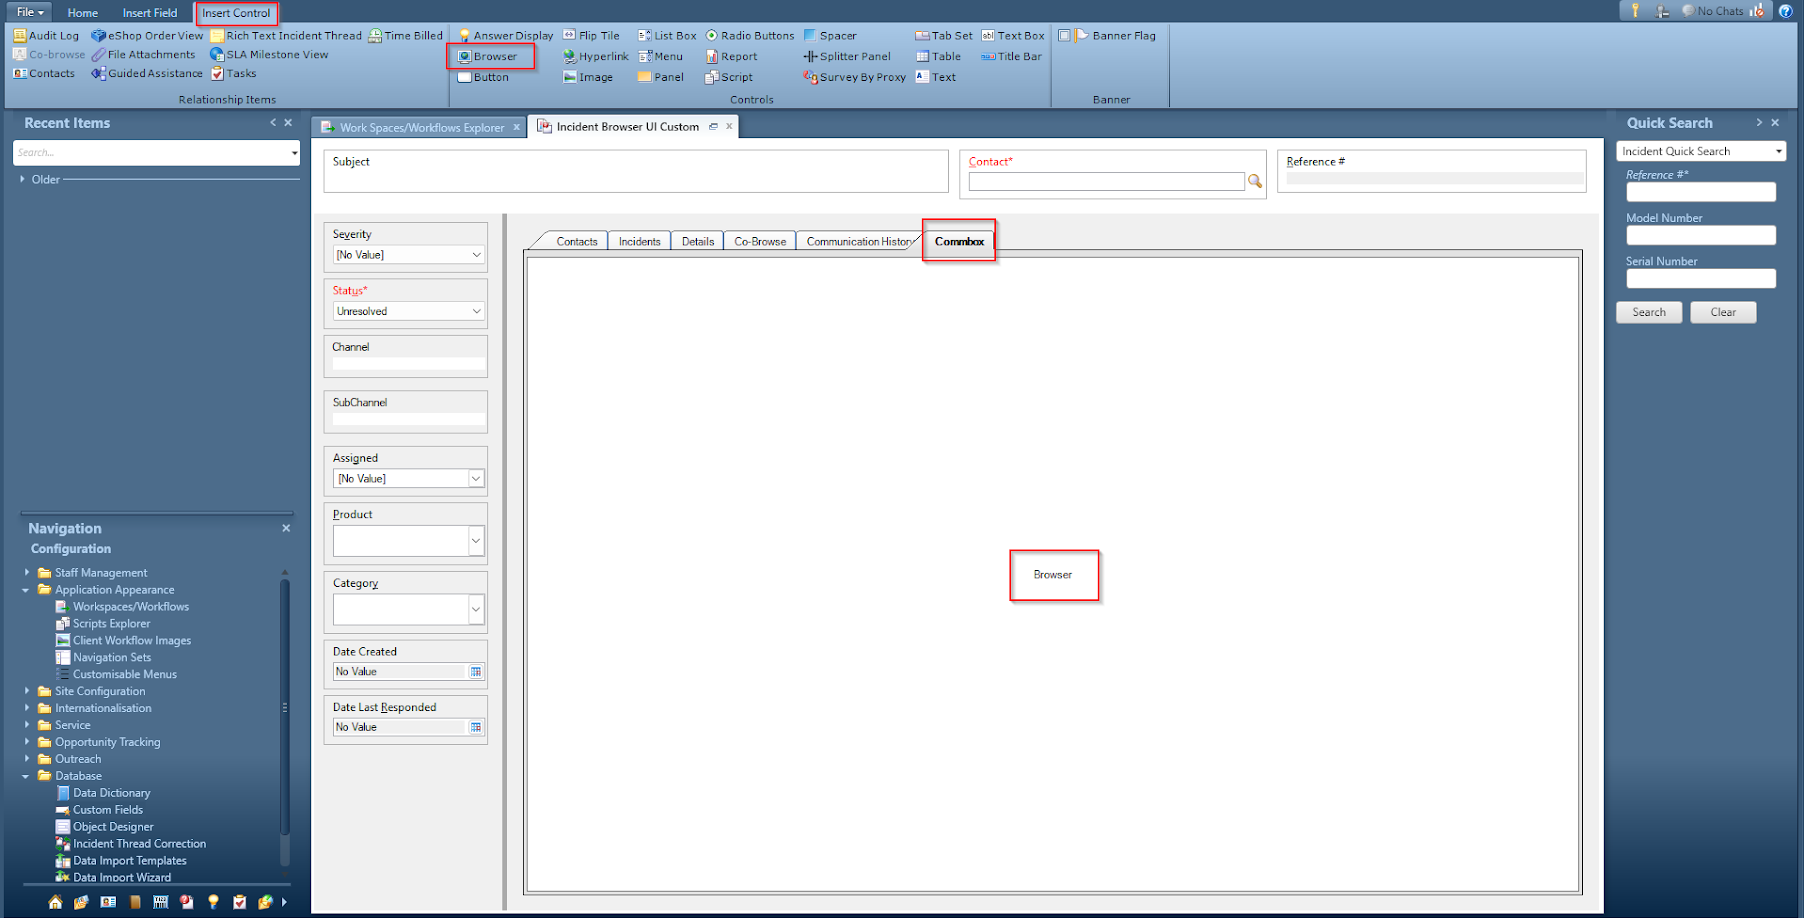
-
Double-click on the Browser control in the CommBox tab to open the Design tab at the top of the page.
-
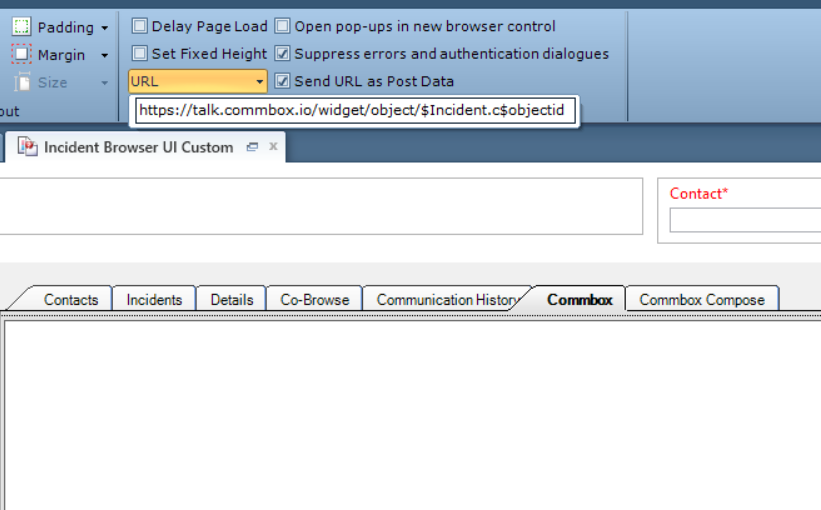
Insert the following link with your brand name into the URL field and click Save.
https://<brand>.commbox.io/widget/object/$Incident.c$objectid
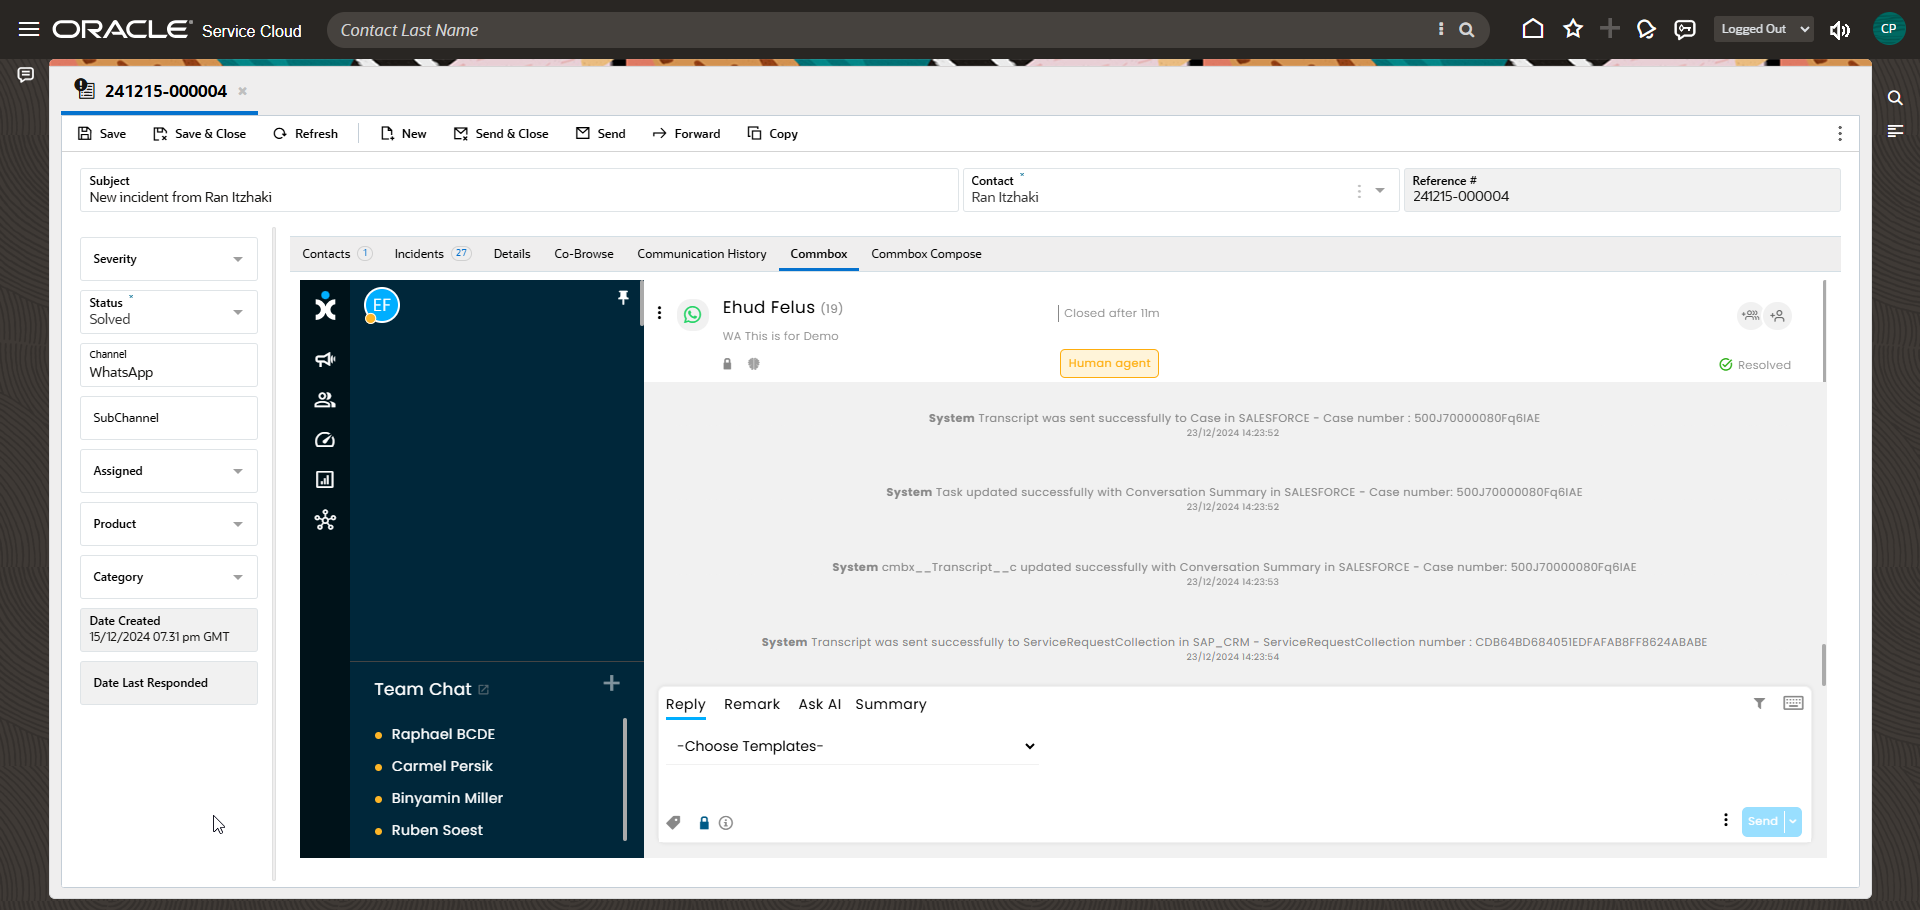
See the example below for the “talk” brand.
Note: After completing this step, every agent who sees this Incident view will be able to click on the Commbox tab. Agents need to log in using their CommBox username and password.
- From the Insert Fields tab at the top, drag the Commbox Channel and Subchannel fields to the Incident View sidebar, where you see the Severity, Status, etc.
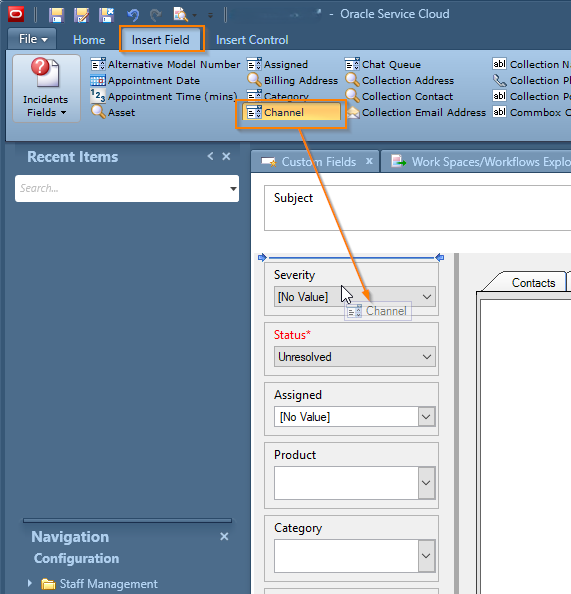
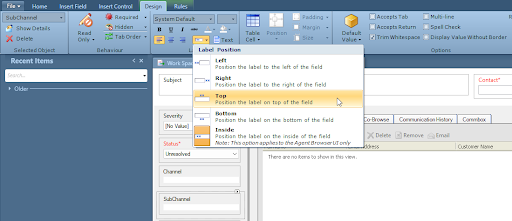
Note: To optimize the field view, select the Design tab at the top, click the label icon, and select the Top label position. If you don’t see the Design tab, double-click on the button you want to edit.
- Click Save.
Optional step: Compose Tab
You can add another tab dedicated to the CommBox Compose screen to enable agents to quickly send messages.
To accomplish this, repeat steps 4-8 in this section.
-
At step 5, edit the tab to say “CommBox Compose”
-
At step 8, enter the following link with your actual brand name:
https://<brand>.commbox.io/compose
- Save all your changes.
Step 5: Activate Oracle at the CommBox Console
Module Settings
On the main settings page, select Oracle CRM from the Integration section and click the Install button.
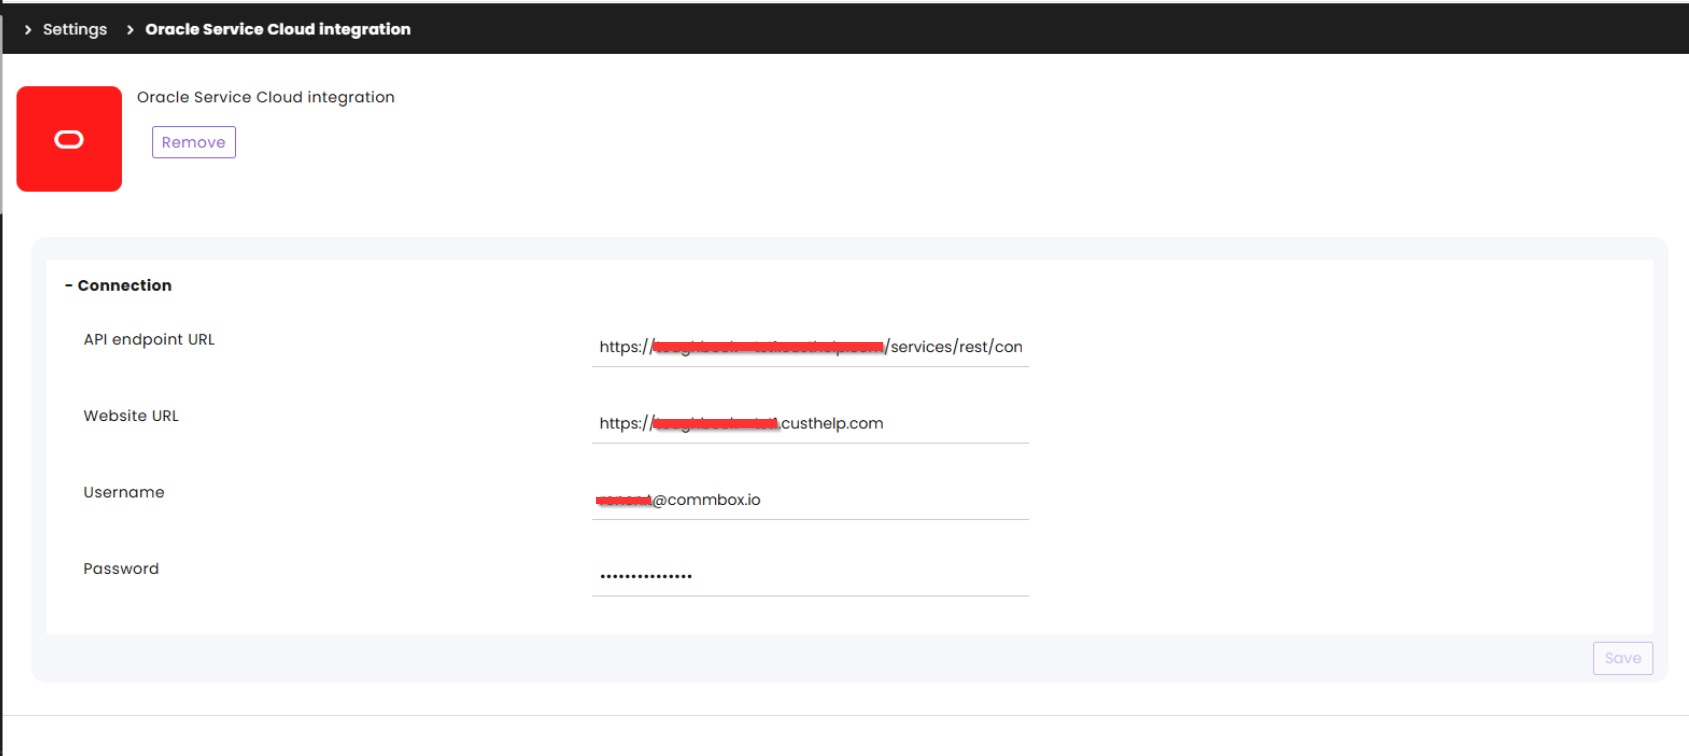
Enter the following parameters:
a. Your API endpoint URL (ending with the Oracle version used)
b. Your brand’s Website URL
c. Admin’s username (authorized to both platforms)
d. Admin’s password
Channel Settings
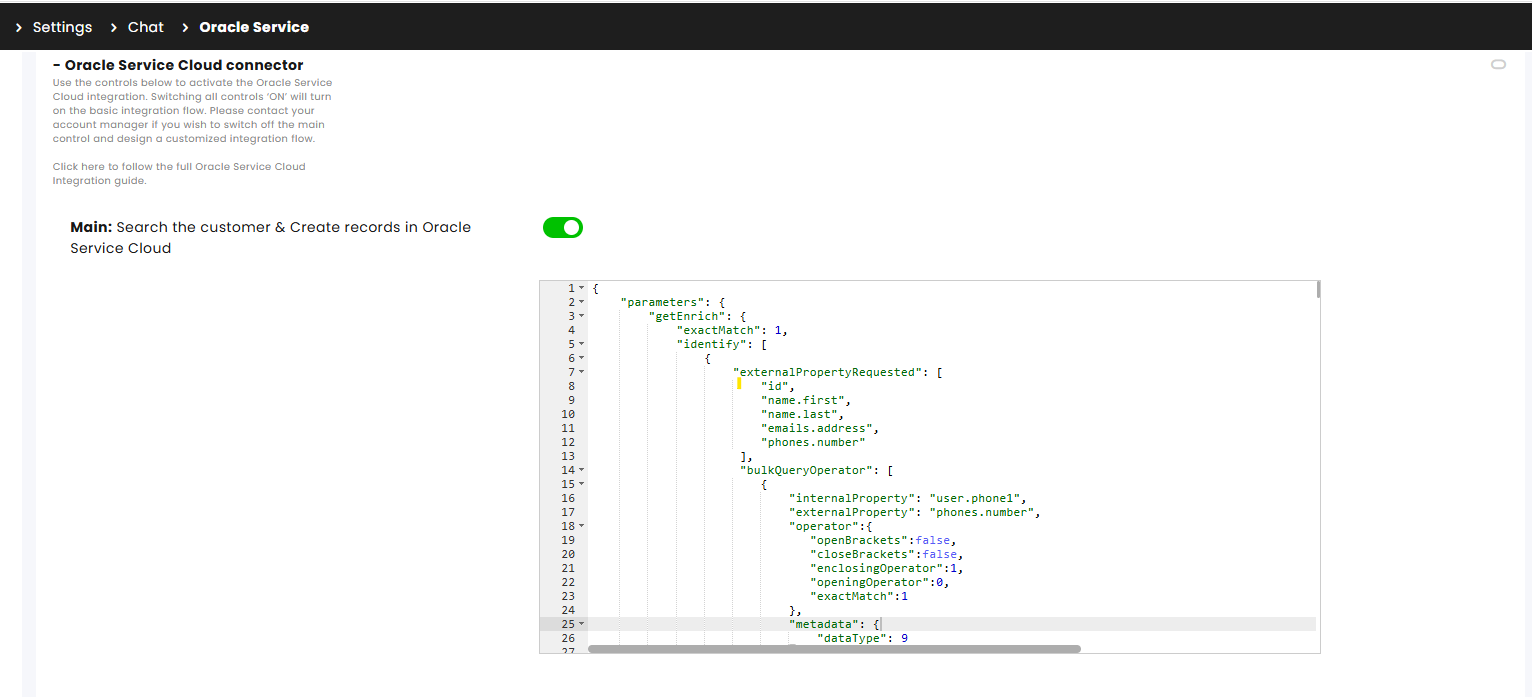
Each relevant channel needs to have the applicable aspects of the connector toggled ON.
Note that the open JSON code allows developers to alter the connector. At the time of creation, default settings will appear for every channel and subchannel.
Main
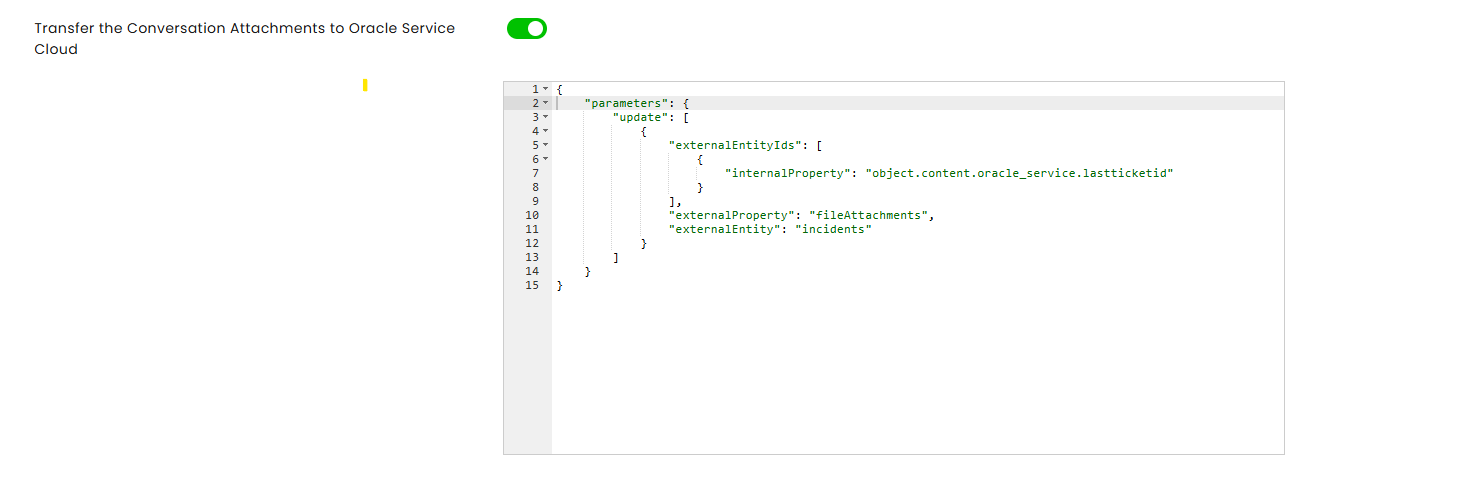
Transfer Attachments
Transfer Transcripts
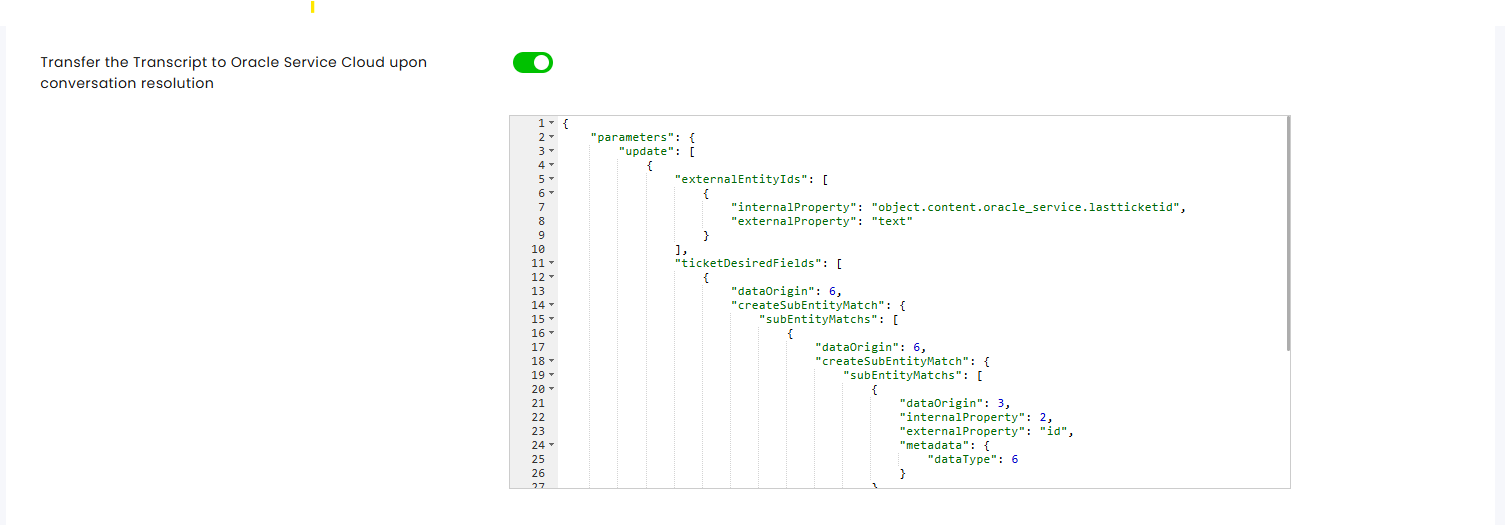
Note: This action also updates the incident’s status.
Transfer Conversation Summary
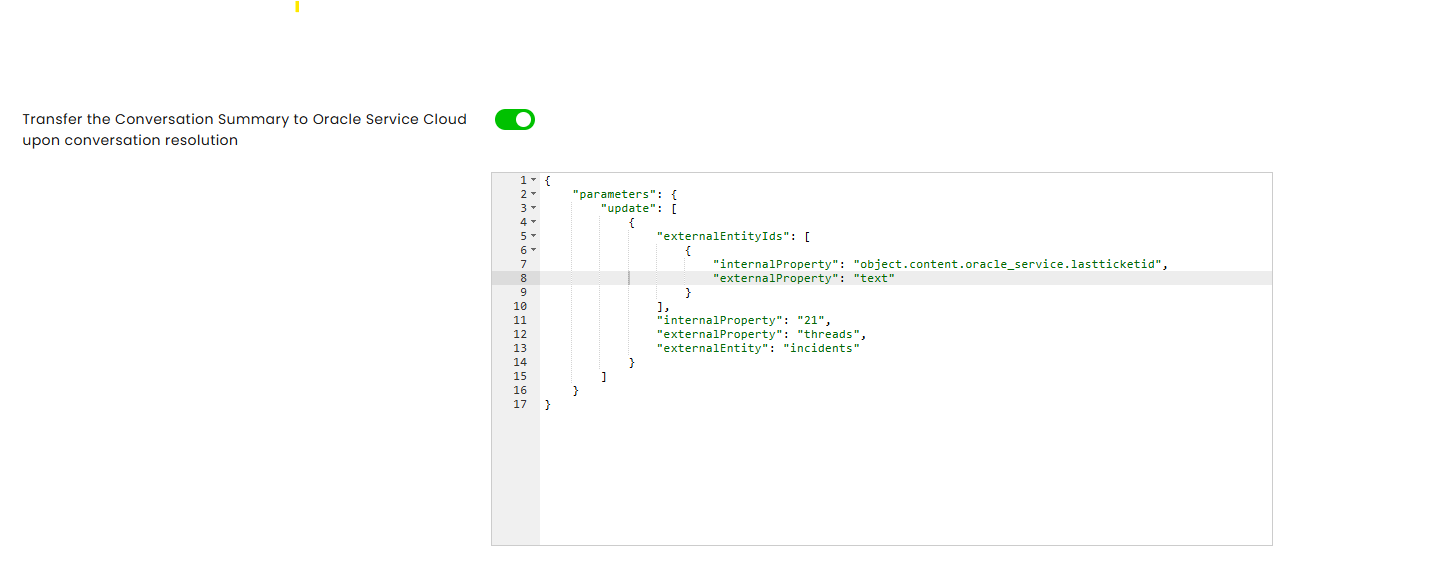
Note: This action also updates the incident’s status.