Overview
Permission Profiles are predefined sets of general permissions assigned to agents, combined with specific channel and sub-channel access levels. By grouping permissions into profiles, administrators can save time by assigning a single profile to an agent instead of configuring individual permissions one by one.
Key Considerations
-
Assigning permissions to an agent
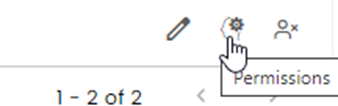
To assign permissions to a specific agent, click the Permissions icon at the end of the agent’s row (visible on hover) and select the relevant permissions and channel access levels.
-
Channel permission levels
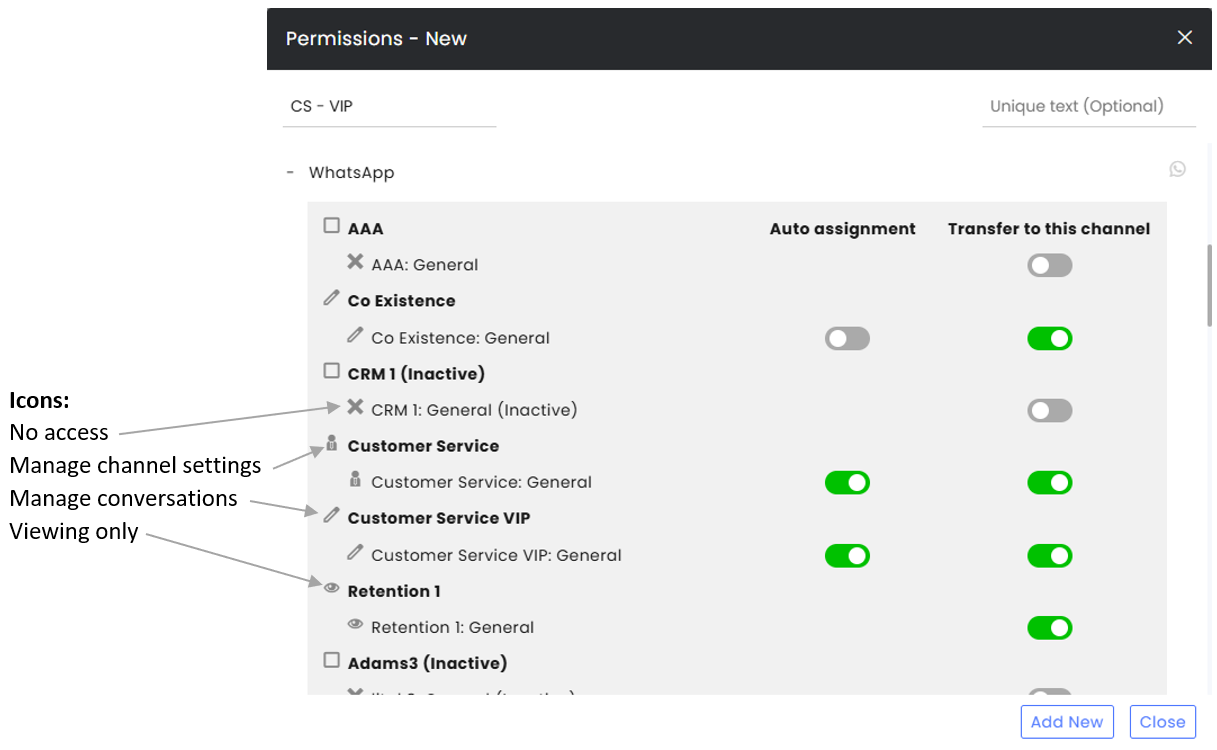
Each channel supports the following permission levels:- View only
- Manage Conversations
- Manage Settings
- No Access
-
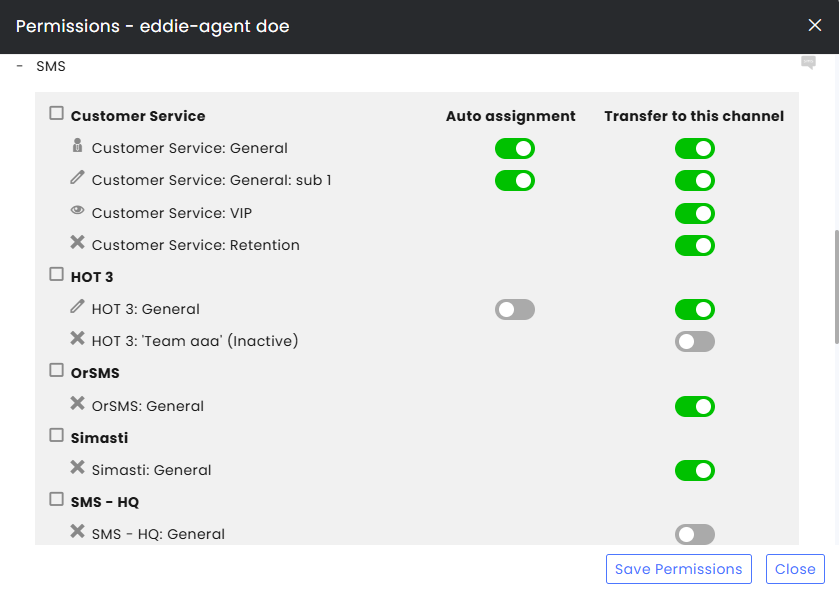
Auto assignment
Agents with Manage Conversations or Manage Settings permissions can be assigned conversations in those channels when auto-assignment is enabled.
Admins can grant agents editing permission to a channel while blocking the auto-assignment mechanism from assigning conversations to them. The agent can still manually assign others or themselves to the conversation, enabling team managers to keep track of ongoing conversations, and add themselves when needed, without receiving an additional caseload.
-
Conversation transfer
By default, agents can transfer conversations to any channel, including channels they do not have access to. Administrators can restrict which channels are available as transfer destinations by toggling off the transfer capability for specific channels. This can be done either through permission profiles or via individual permission settings (see image above). -
Admin permissions by area
Administrators can grant agents admin-level permissions for specific areas.
These permissions appear as: Admin permission > [CommBox functional area]. -
Levels of control across system users
Permission profiles may include control over the users of the system:- Inbox > Edit Customer Details – Allows editing end-customer details.
- Admin permission > Customers – Allows access to the Customers section.
- Admin permission > Agents – Allows editing agent roles, teams, permission profiles, and expertise.
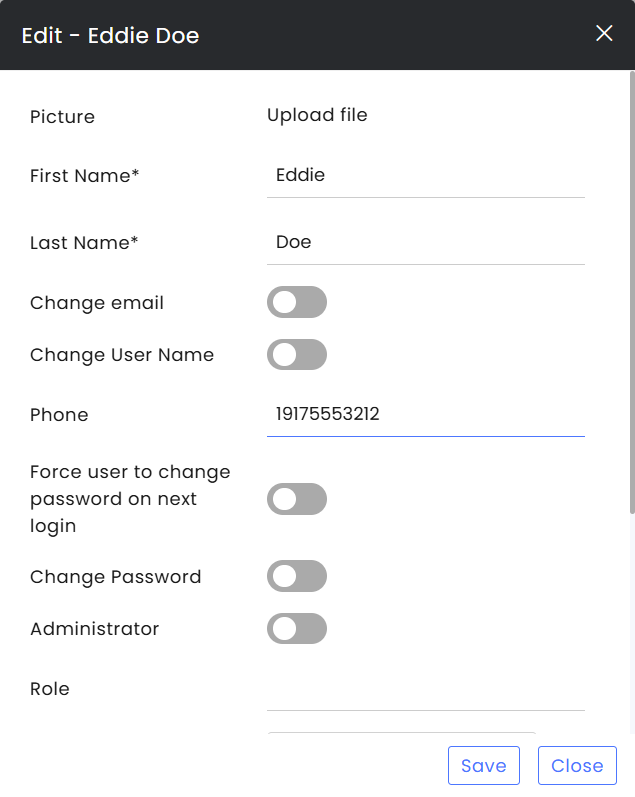
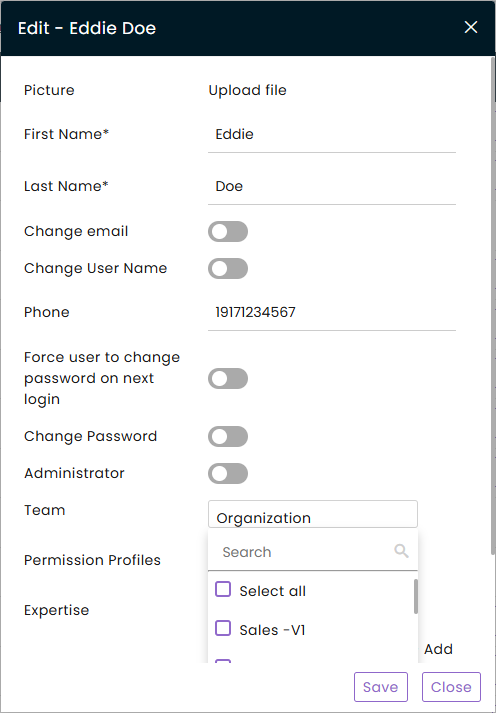
- Edit User Details – Allows editing the user’s profile information, including picture, name, email, username, phone number, password reset, and forcing a password change on next login.
Note: Only an Admin can promote an agent to an Admin role in the system.
Creating a New Profile
-
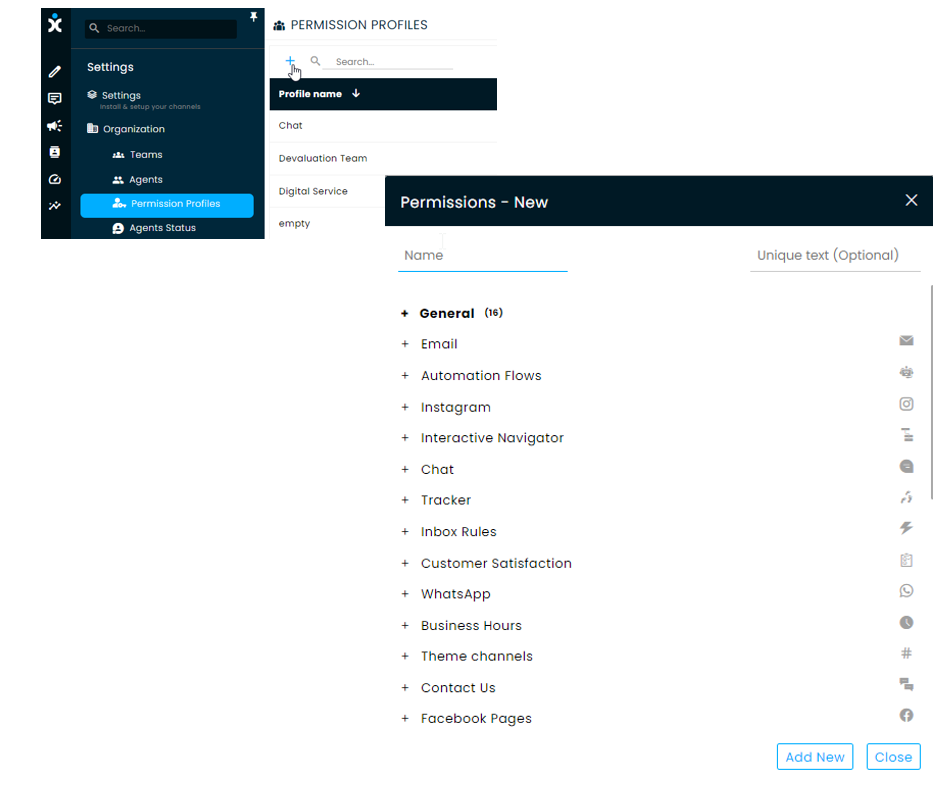
Navigate to Settings > Permissions Profiles and click the + icon.
-
Enter a name for the profile, preferably one that indicates of the users associated with it.
-
You may enter a Unique text (optional) for the new profile that can be referred to in APIs. The text should be lowercase, and underscore (_) should be used instead of spaces.
-
In the General Permissions section, select the areas that agents can access and the actions they can perform.
-
In each of the relevant Channels and Channel Settings, check the appropriate permission. Click multiple times until you see the needed icon. Checking the main channel (in a box) will to all subchannels under it.
-
Click Add New to create the new profile.
Editing an Existing Profile
- Navigate to Settings > Permissions Profiles and select the profile you want to edit.
- Make changes as desired.
- There are three options to finish the process:
- Click Save and apply to update the permissions for agents that have this profile.
- Click Save without updating the permissions for the agents that have them. Only new agents will gain the changed profile.
- Click Close to close the permission profile without saving the changes.
Assigning Profiles and Adding Permissions to Agents
-
Navigate to Settings > Agents and click on the desired agent initials icon.
-
At the agent profile, click the Permission Profile box and select the profile appropriate for this agent.
-
Click Save.
-
To add specific permission, click on the Permissions icon at the end of the line (it will appear after hovering on the specific line) and select the appropriate channels/permissions for that agent.
Related Topics:
Click here to learn about the Flow Builder (studio) permissions.