Overview
Agent Statuses indicate whether agents are available to receive calls and are grouped into three main categories: Active (green), Busy (red), and Away (yellow).
Organizations can create additional, customized statuses within these categories to better reflect real business situations. This allows operations managers to gain clearer insights and produce more meaningful reports. For example, you might add an Away status like “On break” or a Busy status like “In a meeting” to more accurately describe an agent’s activity and improve reporting on agent time.
Admins can create these statuses and assign them to users. Agents can then view and select their relevant status from their Personal Settings menu (the circle with their initials).
These statuses also influence auto-assignment behavior, which will be explained later in this guide.
Viewing / Changing Statuses
As an agent:
The Personal Settings icon includes a small, colorful circle indicating the current status category.
To change the status, click on the Personal Settings, expand the category, and click on the desired status.
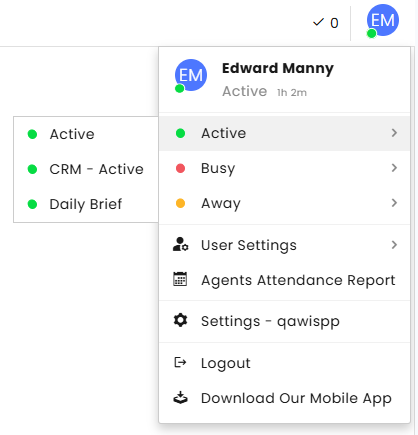
By clicking on the Agents Attendance Report, one can see a monthly calendar that lists the statuses and times of activation.
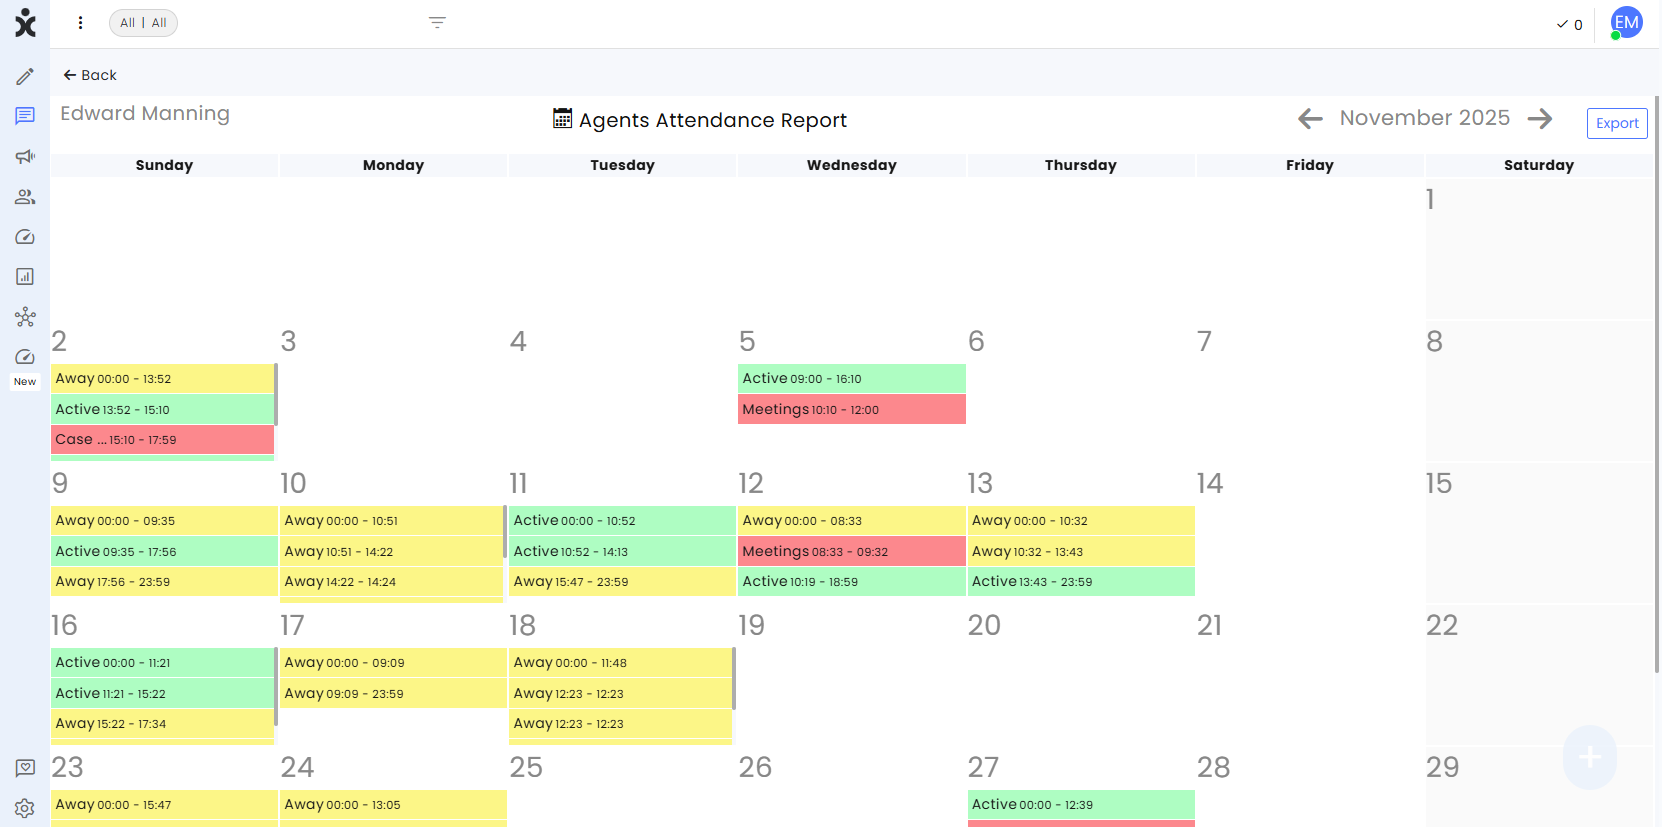
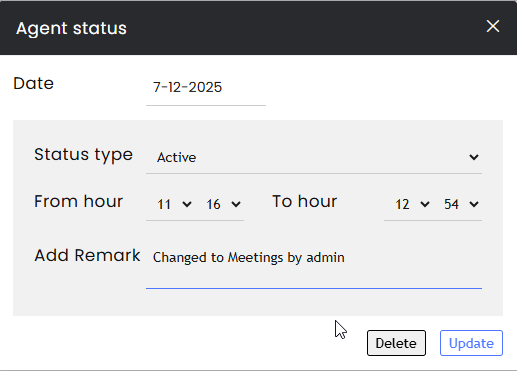
By clicking on any status, the agent can modify the time and status.
As a team manager:
Admins and managers with relevant permissions can view and edit the agents’ statuses.
On the main sidebar menu, click the Dashboard icon.
At the Agent Table, you can see all agents with their current status, and how long they have been at that status.
To change the displayed Status of a specific agent, click on the current status, and select the desired status from the list. The new status will start at that point.
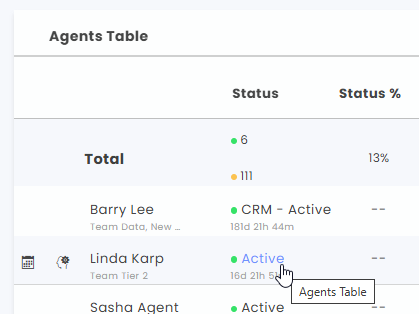
By clicking on the calendar icon, admins can edit the agent’s attendance report and add remarks to the entries.
Alternative way: Navigate to Insights > Agents, select the desired agent from the list, and click on the Agents Attendance Report.
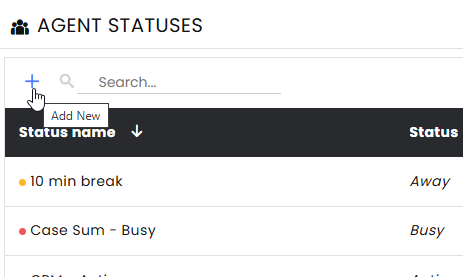
Adding or Editing Agent Statuses
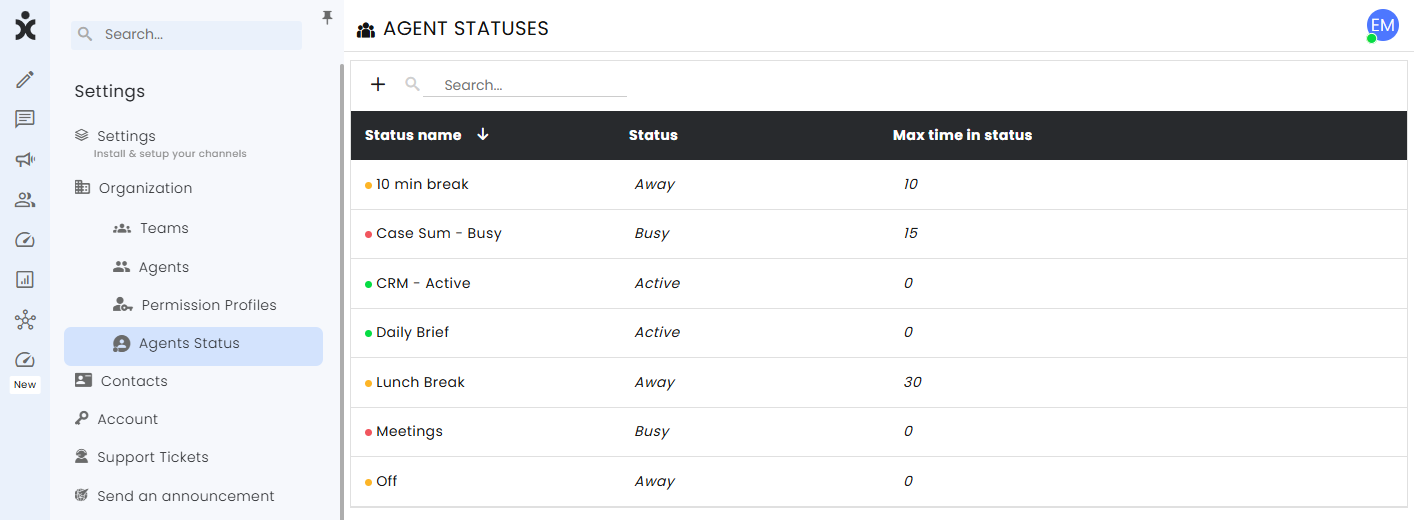
To add a new status:
-
Navigate to Settings > Agent Status and click the + sign at the corner.
-
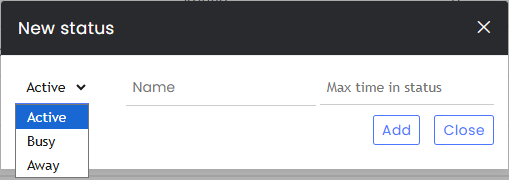
Select the Category, enter a short name for the status, and click Add.
Optional: Enter max time for the status to be active.
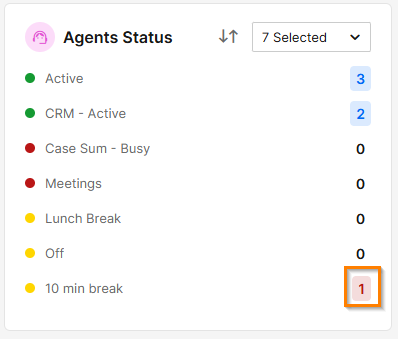
Note: In the Agent Status section of the Real-Time Dashboard, if an agent exceeds the allotted status time, the KPI will be highlighted with a red background.
To edit or delete an existing status:
- Navigate to Settings > Agent Status and hover over the desired status.
- Click on the Pencil icon at the end of the line, edit the status, and click Save.
- To delete the status, hover over the desired status, click the Delete icon at the end of the line, and click OK in the dialog box confirming your decision.
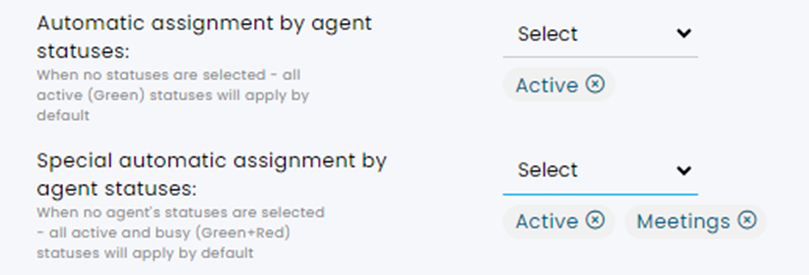
Agent Statuses and Automatic Assignment
The Automatic Assignment module delegates the incoming traffic to the different agents. By default, Active (green) statuses get regular and special automatic assignments, and Busy (red) statuses only receive special assignments. Team managers can add additional statuses to specify further which agent statuses are needed to be in place to receive incoming traffic. Remove a status from the list by clicking the X next to it.
For further explanation, see the Auto-Assignment article.