Overview
The Priority ERP/CommBox integration complements the business resources management tools of Priority ERP with the customer-facing communication solutions of CommBox. To activate the integration, admin privileges are required on both platforms. Priority clients must be able to obtain an API user with proper credentials that will be placed on the CommBox setting page. Once the general settings are activated, admins need to activate the integration on each communication channel separately.CommBox enables agents to create a Service Call in Priority directly from the CommBox interface, eliminating the need to manually transfer data between platforms. See Step III to learn more about how to implement this feature.
At the Priority ERP Platform
Step I: Authentication Credentials
-
At the Priority ERP console, navigate to System Management > System Maintenance > Renew License and update the license.
-
Open an API user by navigating to System Management > System Maintenance > Users > Add New User.
-
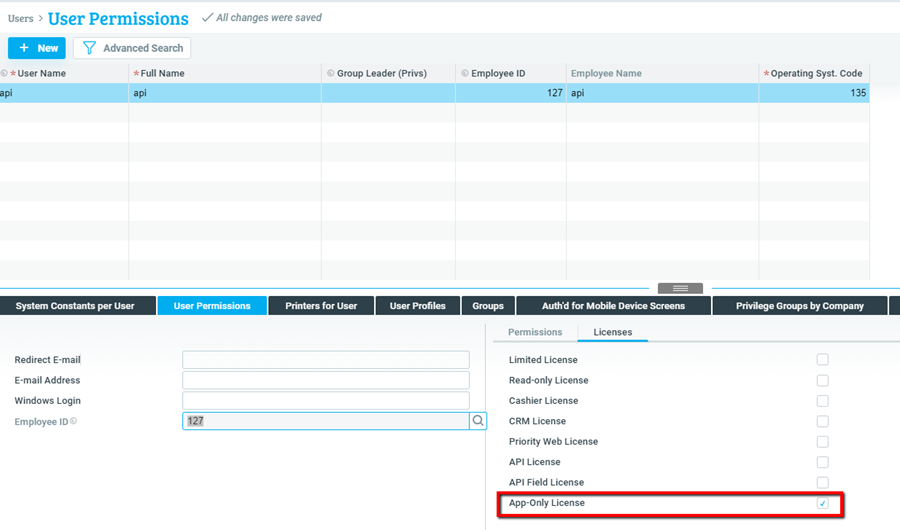
On the User Permissions page, select the User Permissions tab in the mid-section of the screen, and check the App-Only License. This will prevent the API users from being counted in the license-users number.
-
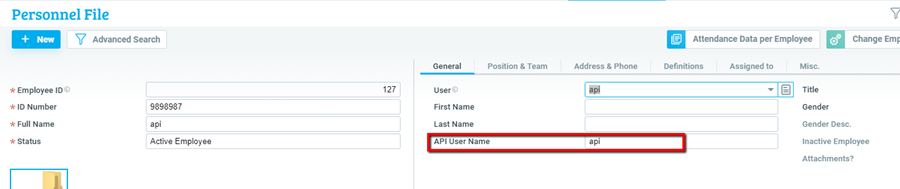
On the Personal File page, define an ‘API User’ to access the system. We recommend using the same username to avoid confusion.
-
Navigate to System Management > System Maintenance > Users > Assign Password to set the user password.
-
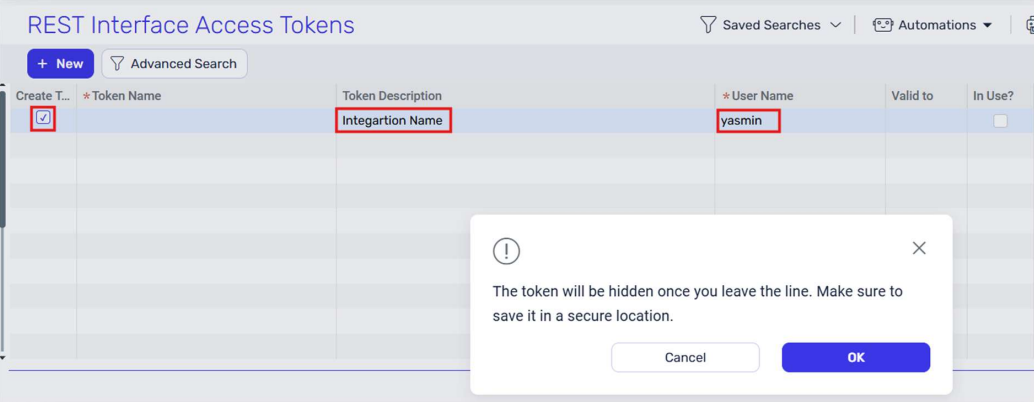
Navigate to System Management > System Maintenance > Users > REST Interface Access Tokens.
Enter a Token Description (e.g., "CommBox_Integration"), select the User Name for this integration, check the Create Token checkbox, and click OK to generate the token.
Note: Copy and securely store this PAT immediately as you may not be able to view it again.
-
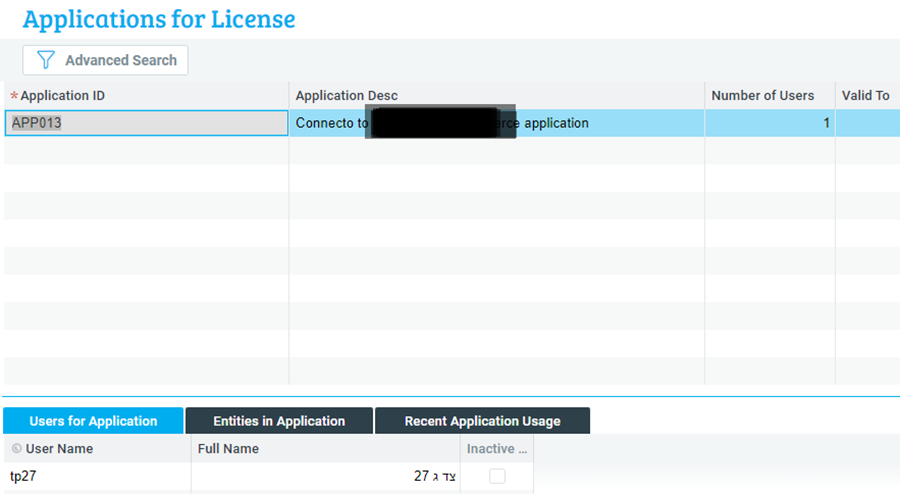
Navigate to System Management > System Maintenance > Software Licenses > Applications for License to connect the user to the specific integration.
-
Look for the relevant Application ID (e.g. APP013) and select the User Name for this integration.
-
Update the user credentials in the ISV application:
• Username – Enter the Token Name previously generated
(Example: 223942EB76A6B7DCDE9E073251D2)
• Password – Enter the PAT (fixed Password) -
Navigate to System Management > System Maintenance > Privileges > Privilege Explorer to define the user’s privileges required for setting up the integration.
At the CommBox Platform
Step II: General Activation
-
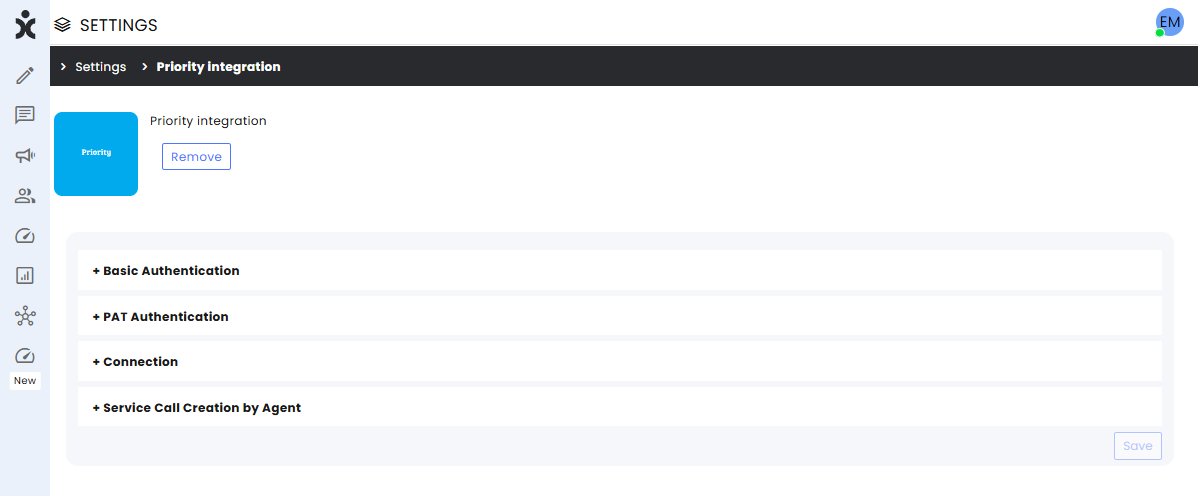
At the CommBox console, navigate to Settings > Priority integration, and click Install.
-
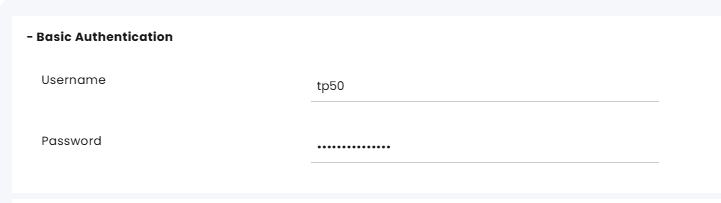
At the Basic Authentication section, enter the admin Username and password used in the administrative actions in the Priority platform.
-
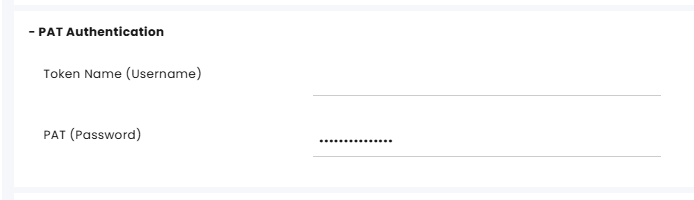
At the PAT Authentication section, enter the Token Name (generated code) and PAT.
-
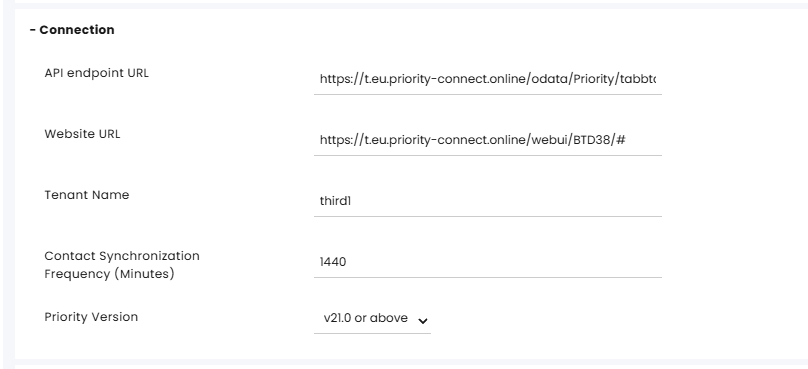
At the Connection section, enter your company's API endpoint URL as found in the Application for License form at the Priority ERP platform.
General Structure: https://{host name}/ui/odata/Priority/tabmob.ini/{account name in Priority}/
Example: https://www.eshbelsaas.com/ui/odata/Priority/tabmob.ini/tp/ where "eshbelsaas.com" is the host name, and the "tp" endpoint is the account name in Priority. -
Add the Tenant Name to ensure the system generates valid and accurate links to specific records in Priority.
General Structure: {Website_URL}/webui/openmail.htm?tenant={Tenant_Name}&priority:priform#{Entity}:{ID}:{Company}:{INI_File}
-
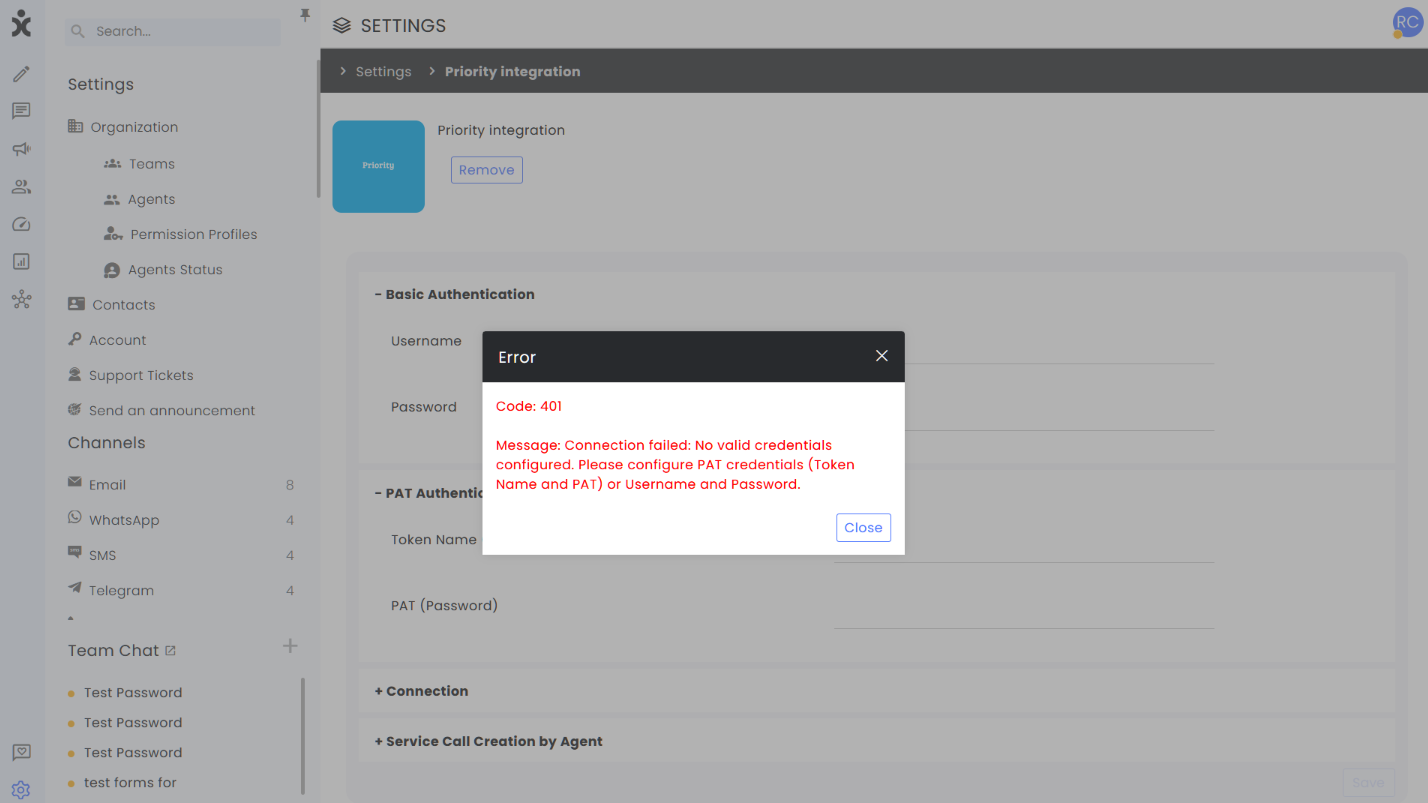
Click Save.
Note: In the event the credentials are incorrect, an error message will appear.
Step III: Channels Activation
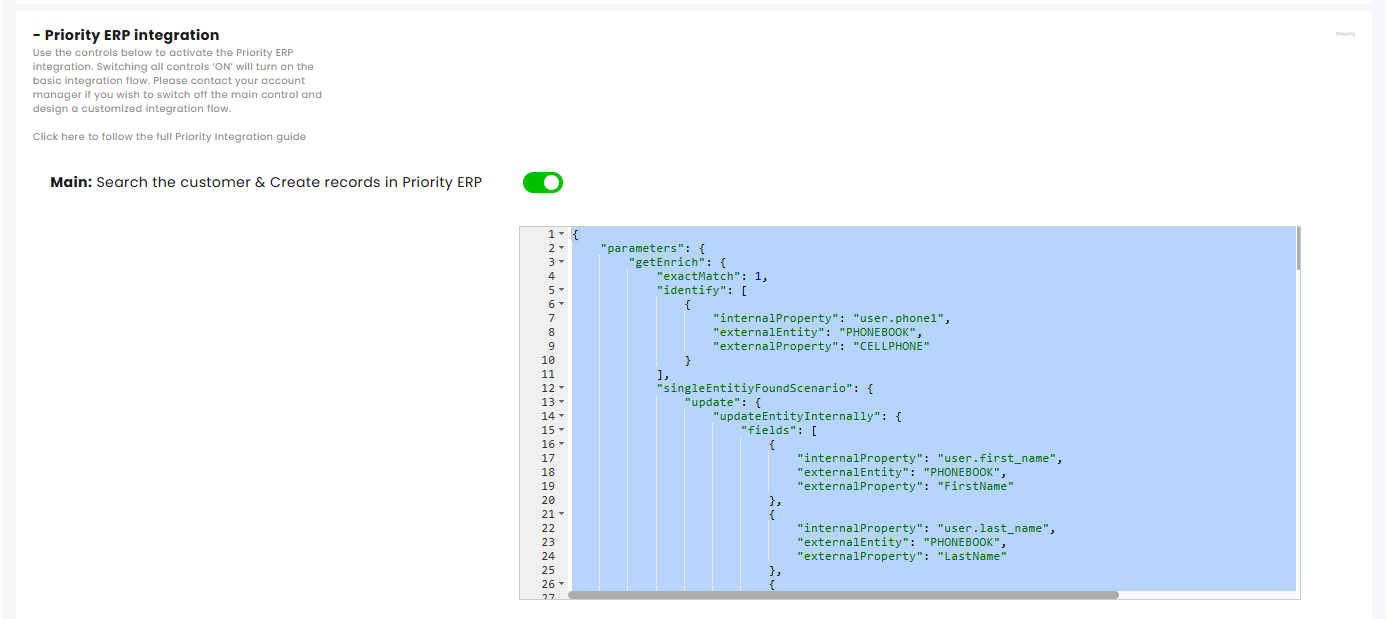
The integration can be customized for each channel or subchannel, catering to the unique needs of different teams within the organization. Additionally, each toggle includes a viewable JSON file, allowing for the customization of CRM fields to seamlessly work with CommBox.- At the CommBox console, navigate to Settings, and open a channel that needs to be used with the Priority ERP integration.
- At the settings of that channel, click the Priority ERP integration section, and activate the integration for that channel (enable).
a. Main: Search the customer & Create records in Priority ERP – The main server-side of the integration. Contact us if you want to have it turned off while other toggles remain on.
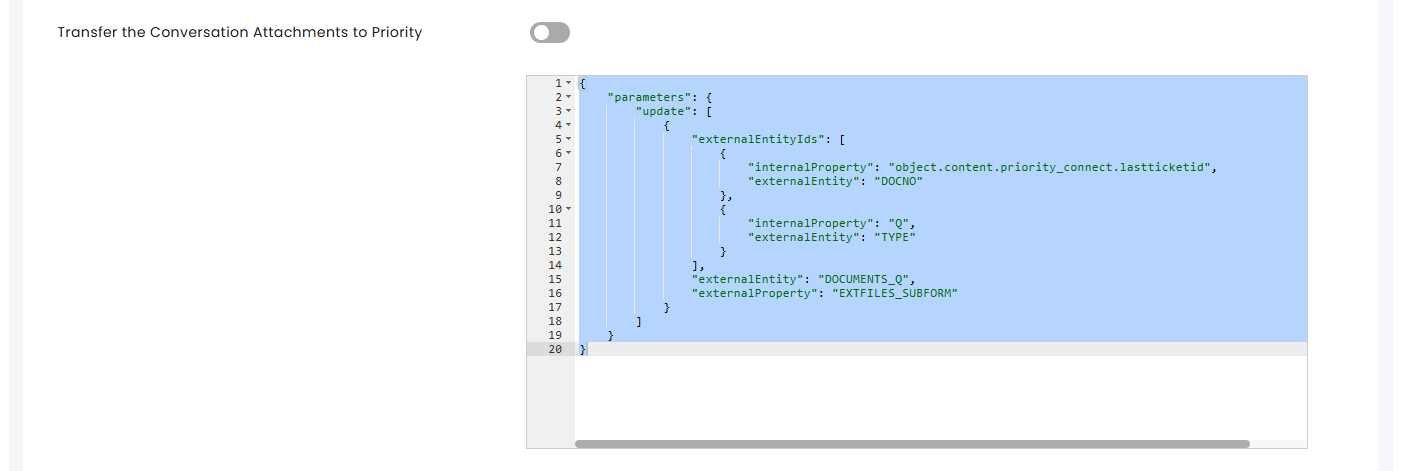
b. Transfer the Conversation Attachments to Priority ERP – Note that the remarks in CommBox are clickable links.
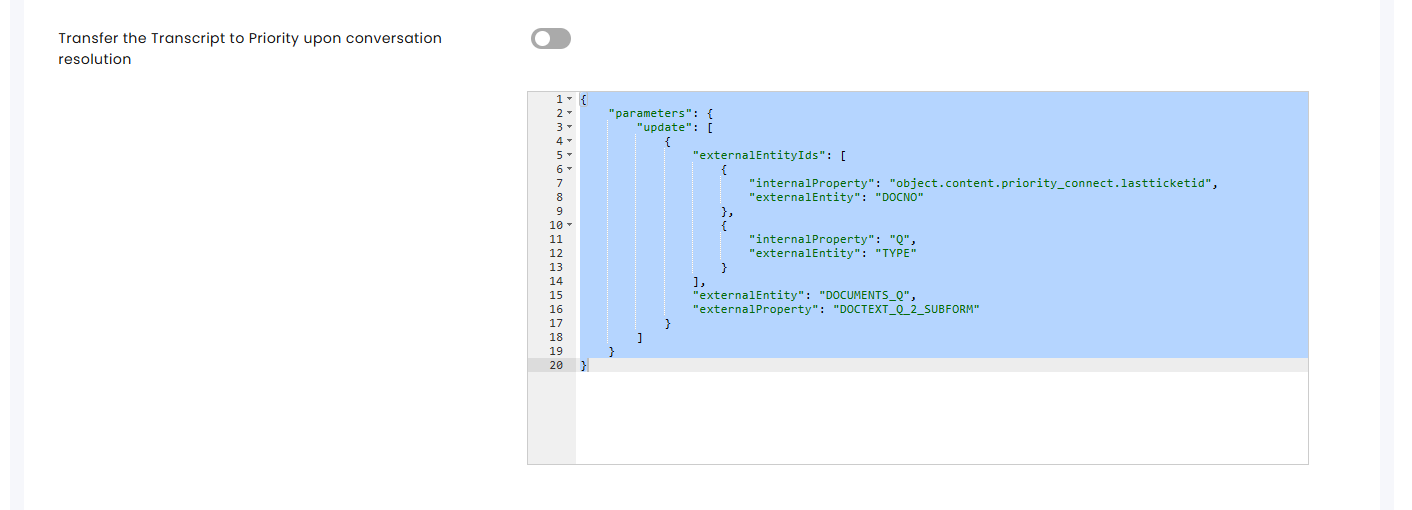
c. Transfer the Transcript to Priority ERP upon conversation resolution – Note that the remarks in CommBox are clickable links.
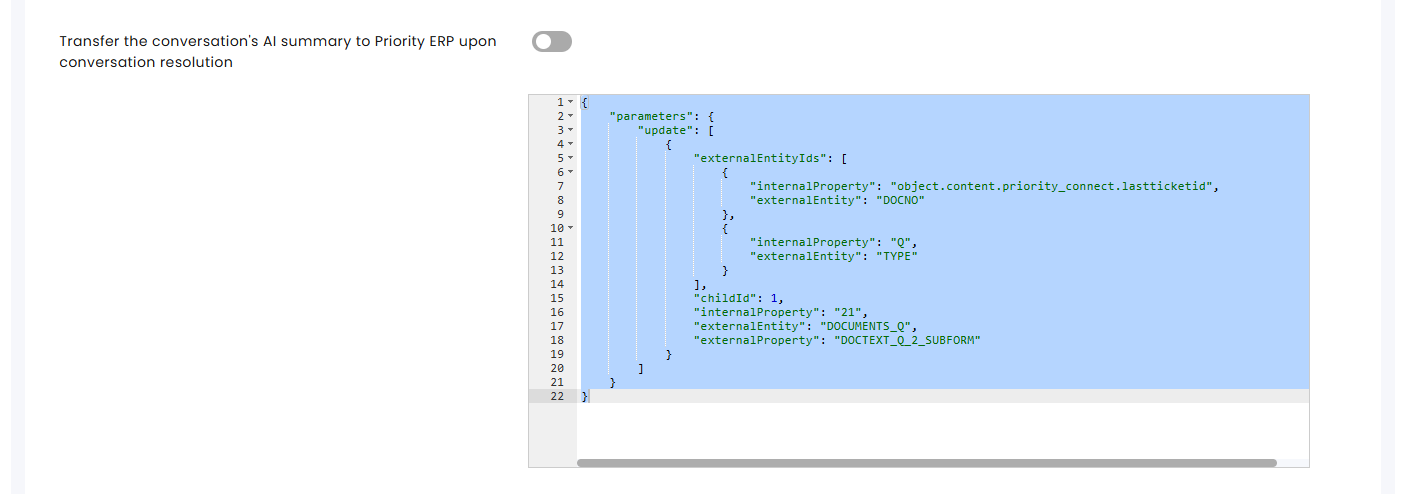
d. Transfer the Conversation AI Summary to Priority ERP upon conversation resolution – AI summary requires toggling on that feature in the AI Assistant section. Note that the remarks in CommBox are clickable links.
e. Activate the AI Assistant:
.png)
- Click SAVE at the bottom of the screen. Repeat this process for all relevant channels.
Step IV (optional): Agent-Triggered Service Calls
Admins can choose whether service calls are created automatically, as shown earlier, or manually by the agent, giving businesses the flexibility to tailor the workflow.
To enable agents to manually create Service Calls in Priority directly from the CommBox interface, the following steps are required:
- In the Priority ERP module, select the relevant priority fields you want the agents to fill in when creating service calls.
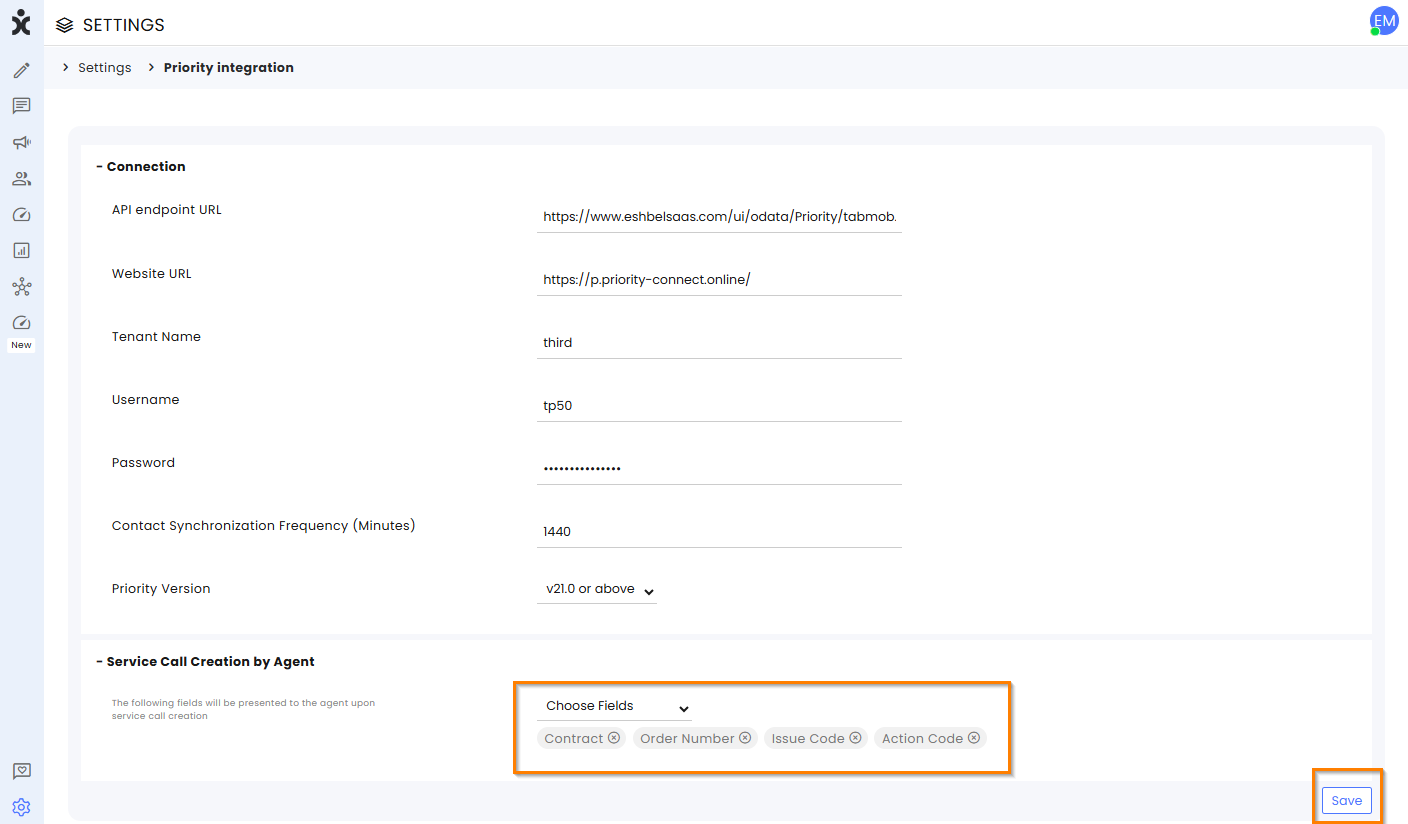
Click Save at the bottom of the page.
2. At the relevant channels, navigate to the Priority section and replace the existing JSON in the Main section (first toggle) with the following code:
{
  "parameters": {
    "getEnrich": {
      "exactMatch": 1,
      "identify": [
        {
          "internalProperty": "user.phone1",
          "externalEntity": "PHONEBOOK",
          "externalProperty": "CELLPHONE"
        }
      ],
      "singleEntitiyFoundScenario": {
        "update": {
          "updateEntityInternally": {
            "fields": [
              {
                "internalProperty": "user.first_name",
                "externalEntity": "PHONEBOOK",
                "externalProperty": "FirstName"
              },
              {
                "internalProperty": "user.last_name",
                "externalEntity": "PHONEBOOK",
                "externalProperty": "LastName"
              },
              {
                "internalProperty": "user.email",
                "externalEntity": "PHONEBOOK",
                "externalProperty": "Email"
              },
              {
                "internalProperty": "user.company",
                "externalEntity": "PHONEBOOK",
                "externalProperty": "CUSTDES"
              },
              {
                "internalProperty": "object.content.priority_connect.customercreatedid",
                "externalEntity": "PHONEBOOK",
                "externalProperty": "CUSTNAME"
              }
            ]
          }
        }
      },
      "notFoundScenario": {
        "create": [
          {
            "ticketDetailsToSaveInternally": [
              {
                "internalProperty": "object.content.priority_connect.customercreatedid",
                "externalEntity": "CUSTOMERS",
                "externalProperty": "CUSTOMERS"
              }
            ],
            "externalEntityIds": [
              {
                "externalProperty": "CUSTNAME"
              }
            ],
            "ticketDesiredFields": [
              {
                "dataOrigin": 2,
                "internalProperty": "user.first_name",
                "externalProperty": "CUSTDES"
              },
              {
                "dataOrigin": 2,
                "internalProperty": "user.last_name",
                "externalProperty": "CUSTDESLONG"
              },
              {
                "dataOrigin": 2,
                "internalProperty": "user.phone1",
                "externalProperty": "PHONE"
              },
              {
                "dataOrigin": 2,
                "internalProperty": "user.email",
                "externalProperty": "EMAIL"
              },
              {
                "dataOrigin": 2,
                "internalProperty": "user.id",
                "externalProperty": "CUSTNAME"
              }
            ],
            "externalEntity": "CUSTOMERS"
          },
          {
            "displayEntityPath": "PHONEBOOK",
            "externalEntityIds": [
              {
                "externalProperty": "PHONE"
              }
            ],
            "ticketDesiredFields": [
              {
                "dataOrigin": 2,
                "internalProperty": "user.first_name",
                "externalProperty": "NAME"
              },
              {
                "dataOrigin": 2,
                "internalProperty": "user.phone1",
                "externalProperty": "CELLPHONE"
              },
              {
                "dataOrigin": 2,
                "internalProperty": "user.email",
                "externalProperty": "EMAIL"
              },
              {
                "dataOrigin": 2,
                "internalProperty": "user.first_name",
                "externalProperty": "AGENTNAME"
              },
              {
                "dataOrigin": 2,
                "internalProperty": "user.first_name",
                "externalProperty": "FIRSTNAME"
              },
              {
                "dataOrigin": 2,
                "internalProperty": "user.last_name",
                "externalProperty": "LASTNAME"
              },
              {
                "dataOrigin": 9,
                "internalProperty": "object.content.priority_connect.customercreatedid",
                "externalEntity": "CUSTPERSONNEL_SUBFORM"
              }
            ],
            "externalEntity": "CUSTOMERS"
          }
        ]
      }
    }
  }
}
Note: The new JSON will prevent the automatic creation of Service Calls. However, it will still perform customer identification, enrichment in Commbox, and creation if the customer is not found. All other automated processes that occur after the call ends will remain unaffected.
3. Verify that the toggle is on and click Save at the bottom of the page. Repeat these steps for all relevant communication channels.
Using the Manual Service Call
To manually create a service call in Priority, the agent needs to:
-
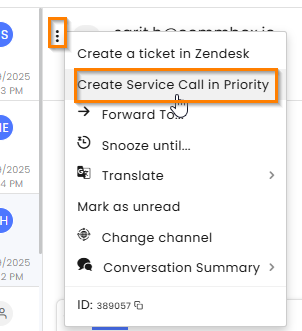
Click the 3-dot menu at the top corner of the conversation, followed by Create Service Call in Priority.
-
Fill in the details of the service call and click Create Service Call.
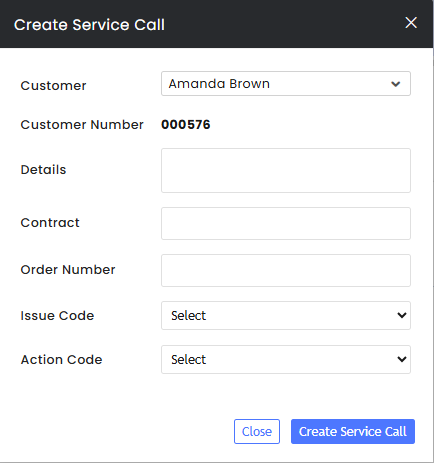
The system notes the service call as a remark with a direct link to Priority.

Note: Admins can reorder the fields in the dialog box by dragging their names into the preferred order in the Priority module.
