Overview
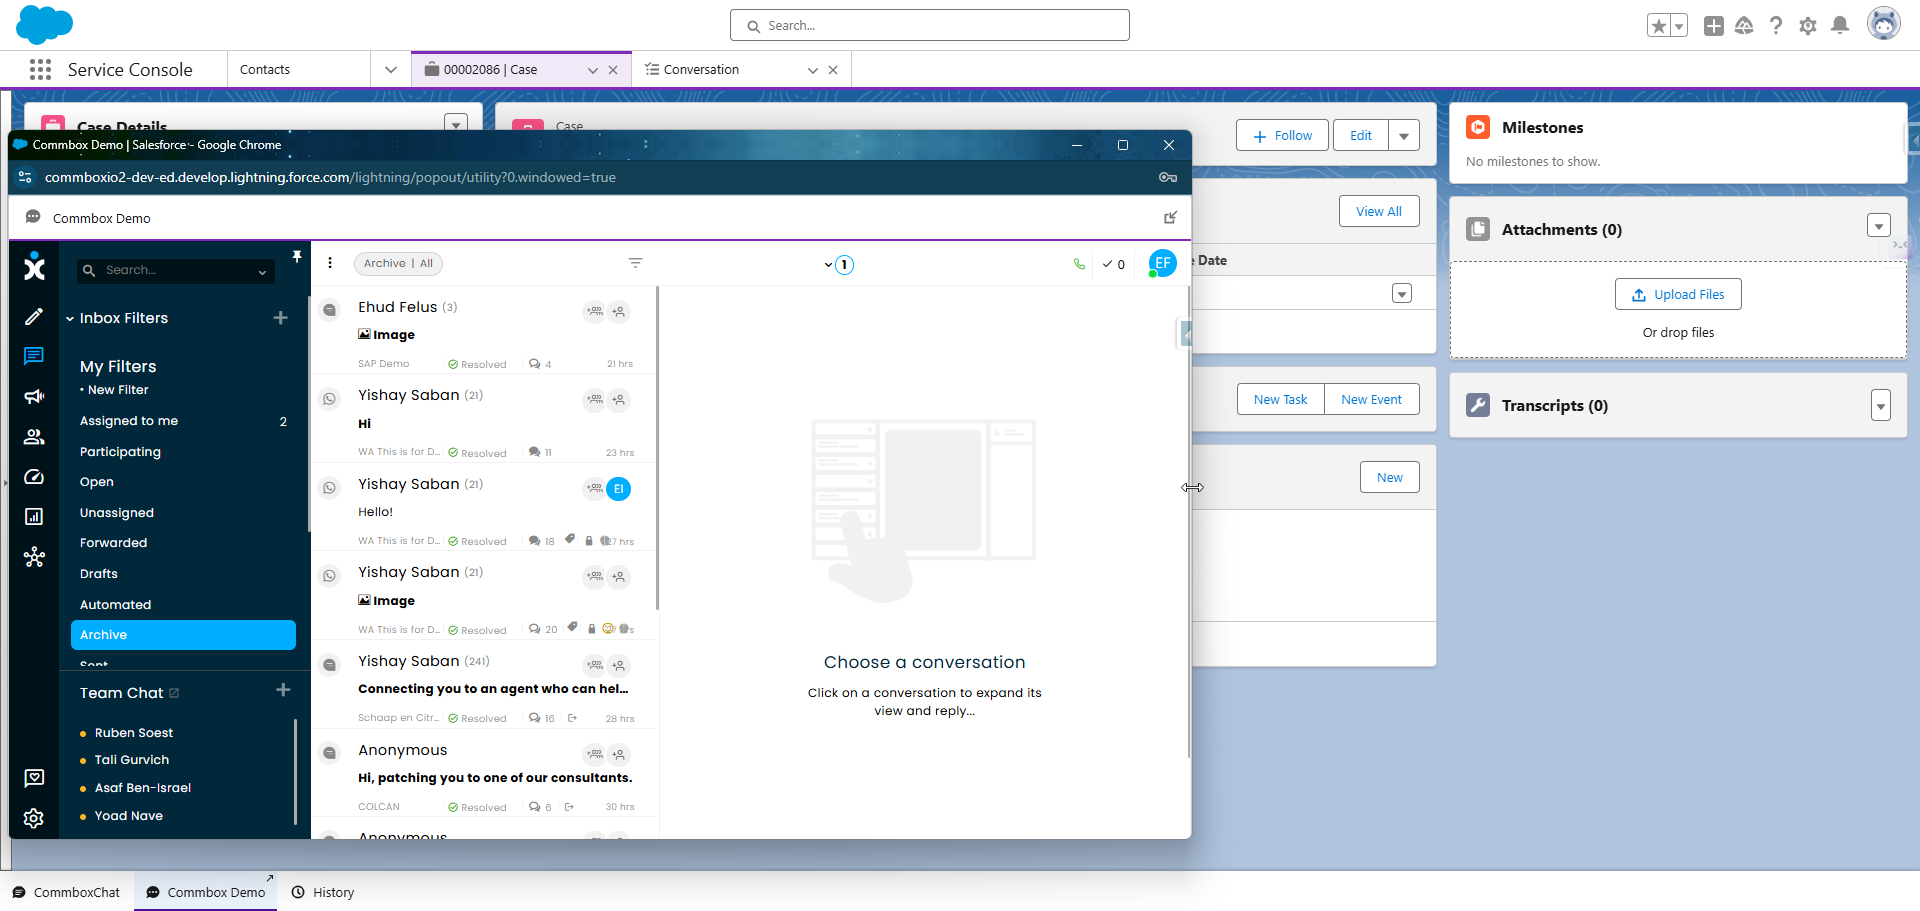
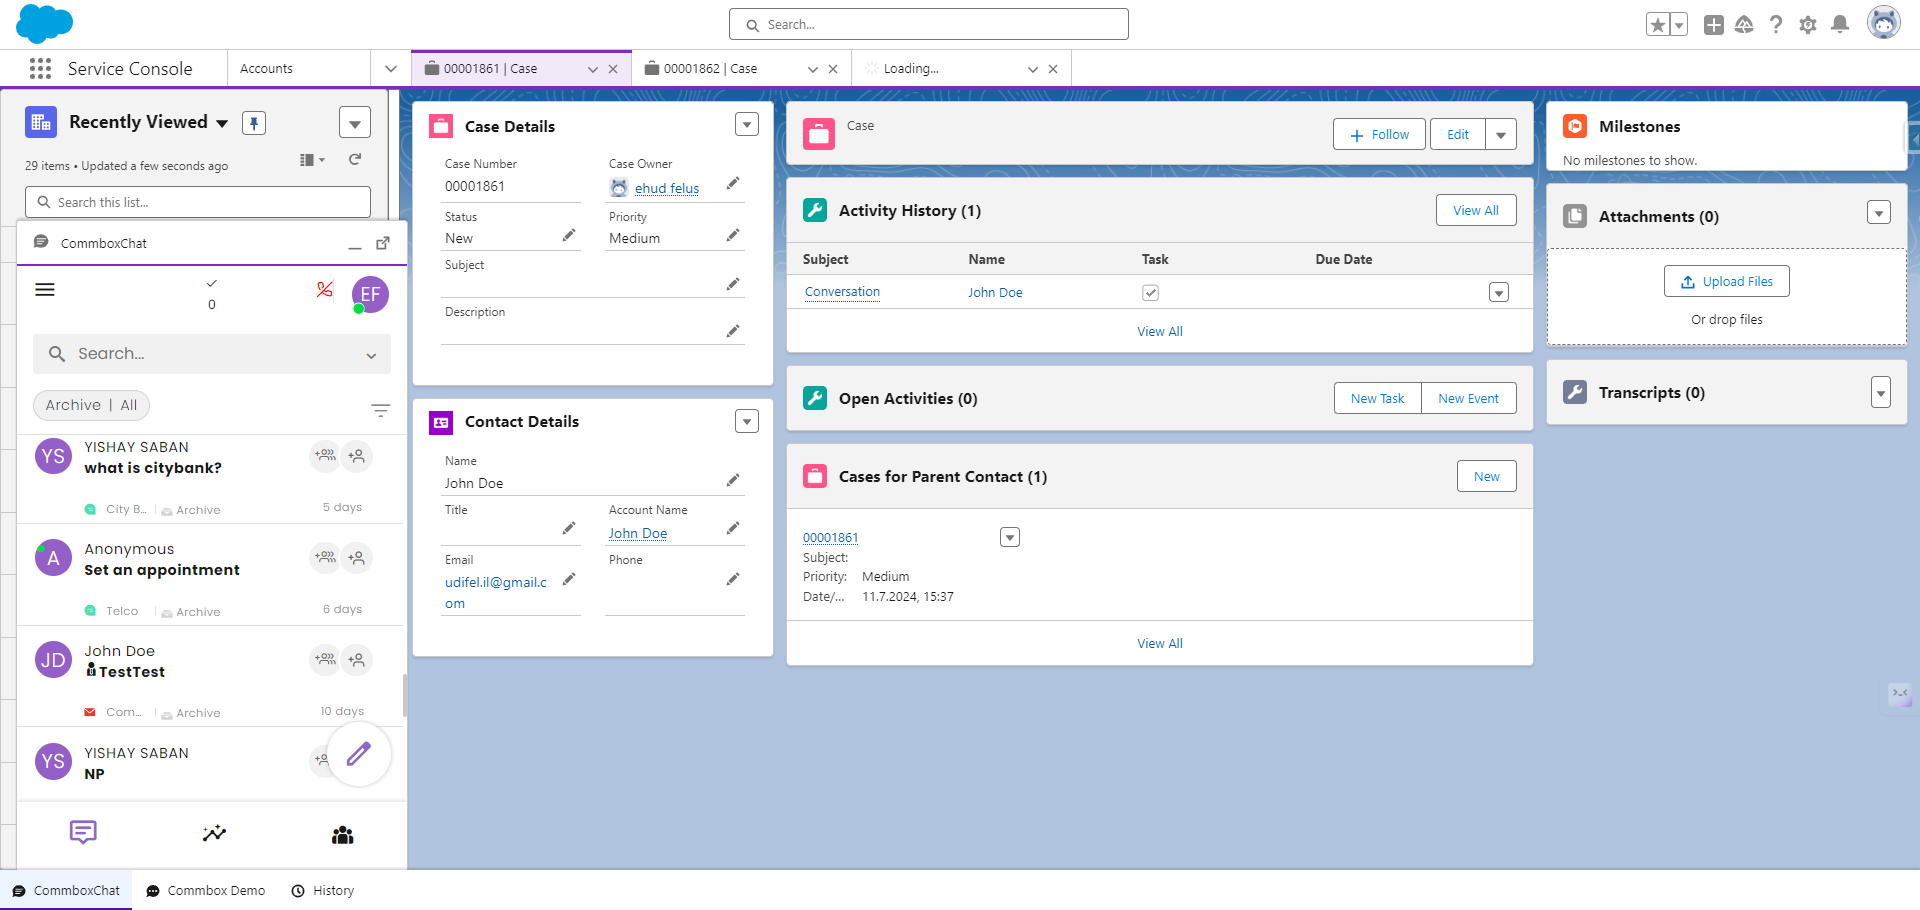
The Salesforce integration for CommBox enables users to seamlessly use Salesforce’s powerful CRM to manage day-to-day sales and service interactions while managing the communication channels through CommBox. With this integration, CommBox becomes a call center in an iFrame on the Salesforce platform. Input received from the bot or agent automatically merges into the Salesforce CRM, and users communicate with customers after viewing the call history and case data.

Key Considerations:
-
CommBox platform can be added as an iFrame to the Salesforce display. Agents can manually expand the CommBox iFrame to their liking (displayed fully with widths higher than 1000 pixels). Admins can set the iFrame initial size as part of this integration (Call center set up).
-
To edit the size of the iFrame window, navigate to Feature Settings > Service > Call center > Call centers and set the width and height of the window. For the iFrame to popup when a new message comes in, that channel must be activated in the CRM section of the channel settings.
-
Developers can customize the integration workflow using the JSON files at the module interface by adding or removing fields as needed. See the Configuration option at the last step of the integration.
-
Default settings are applied to all new channels and subchannels, which enables configuration of the Teams specifications.
Steps for this integration:
- Install the CommBox package.
- Connect Salesforce to your CommBox business account.
- Set Access Permissions to CommBox.
- Set up the call center.
- Add call center to CommBox.
- Activate Salesforce in the CommBox Platform.
- Verify the integration is working properly.
Note: The integration process requires admin privileges for both Salesforce and CommBox.
Step 1: Install The Package
- To begin the installment of the package, use the following URL:
https://login.salesforce.com/packaging/installPackage.apexp?p0=04tJ7000000xAHP
Another option for installation:
Add the following URL path to your Salesforce domain:
https://<Salesforce_Doamin>/packaging/installPackage.apexp?p0=04tJ7000000xAHP
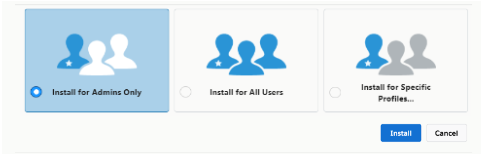
- When the Installation page appears, select Install for Admins Only, then click Install.
Note: THIS SELECTION IS VERY IMPORTANT - Selecting the wrong option will lead to agents gaining unauthorized access.
While the CommBox Connector installs (it may take a few minutes), you will be presented with the following message: This app is taking a long time to install. - After the installation is complete, click Done.
- Return to the browser after receiving confirmation that the installation has been completed via email.
- Close the CommBox Connector detail page (if it is still open)
- In Quick Find, enter Installed, and then select Installed Packages.
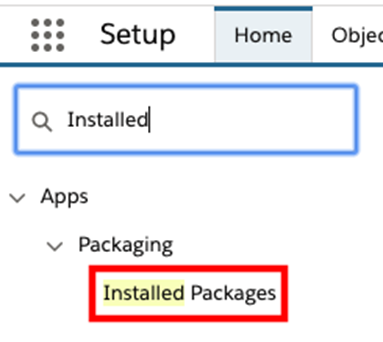
- Once the Installed Packages page opens, validate that the CommBox Connector is installed.
Step 2: Connect Salesforce to your CommBox corporate account.
Note: The terms Brand and Corporate Name refer to the same business entity which is used to identify the business in APIs and platforms installations.
Create a connected app
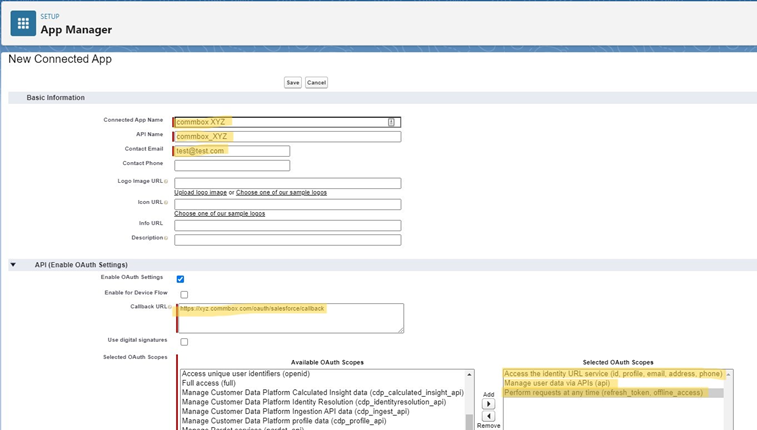
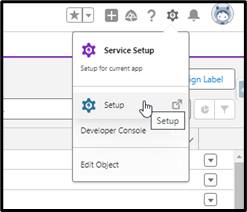
- At the Salesforce console, navigate to GOTO > Setup > Apps > App Manager and click New Connected App.
- Enter the following Basic Information in the appropriate fields:
a. Connected App Name: Commbox {{CORPRATE_NAME}}
b. API Name: commbox_{{CORPRATE_NAME}}
c. Contact Email
d. Logo Image URL - At the API (Enable OAuth Settings) section, enter the following:
a. Check Enable OAuth Settings
b. Callback URL: https://{{CORPRATE_NAME}}.commbox.io/oauth/salesforce/callback
c. Add the following to the Selected OAuth Scopes:

-
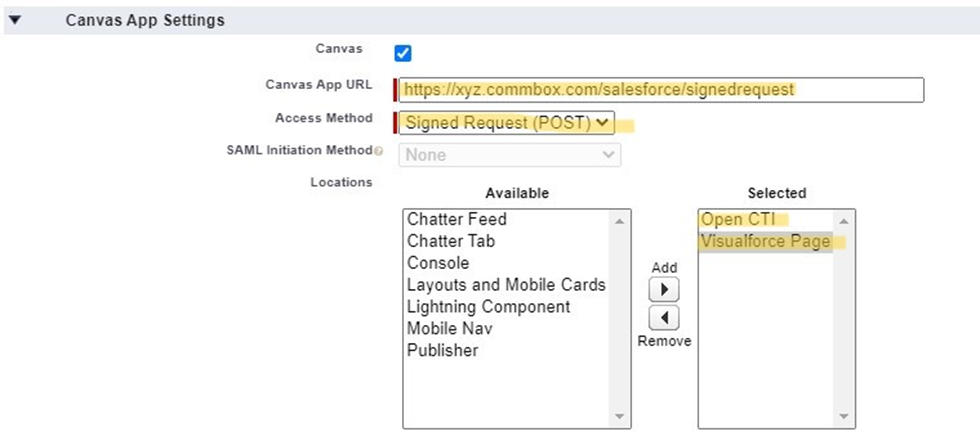
At the Canvas App Settings section:
a. Canvas: checked
b. Canvas App URL: https://{{CORPRATE_NAME}}.commbox.io/salesforce/signedrequest
c. Access Method: Signed Request (POST)
d. Locations: Visualforce Page, Open CTIYour screen should look similar to this:
-
Click Save.
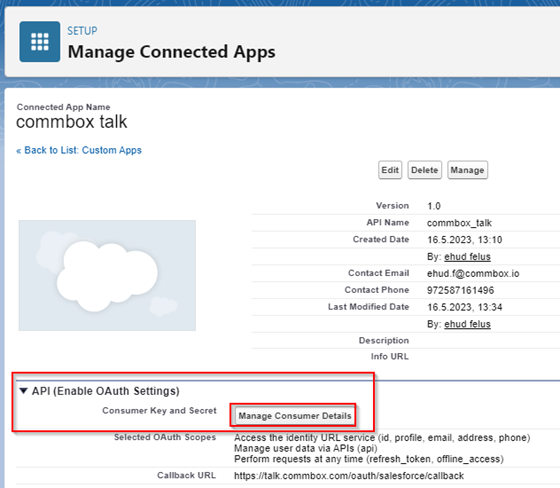
-
After clicking Save, the Manage Connected Apps page opens. Click the API (Enable OAuth Settings) section, followed by clicking Manage Consumer Details.
-
Get the Consumer Key and Secret:
a. Follow email verification instructions:
After receiving a “Verify your identity in Salesforce” email from Salesforce, enter the Verification Code and click Verify.
b. Copy the Consumer Secret to your device.
c. Click on the link Back to Manage Connected Apps.
Step 3: Set Access Permissions to CommBox
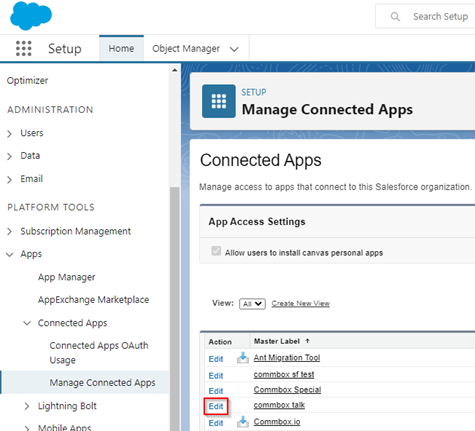
-
Navigate to GOTO > Setup > Apps > Connected Apps > Managed Connected Apps, and click Edit next to your app “commbox_{{CORPRATE_NAME}}”
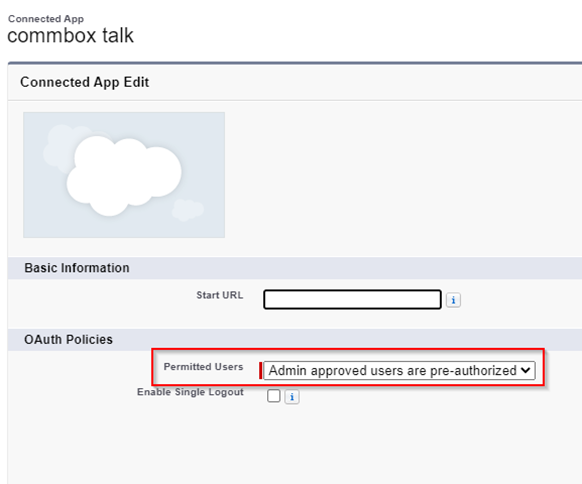
-
In the Permitted Users section, select Admin approved users are pre-authorized
-
Click Save.
-
Navigate again to GOTO > Setup > Apps > Connected Apps > Managed Connected Apps, and click on your app “commbox_{{CORPRATE_NAME}}”
-
Set relevant Profiles and relevant Permission Sets for your organization.
Step 4: Setup a Call Center (Client-Side Integration)
Note: Salesforce limits its clients to only assigning one call center per user. Clients who mostly use the call center from another provider (Voice provider, for example) for their agents and need to assign them CommBox as well, can add a CommBox as a custom application (a Visualforce page application). The CommBox Inbox will appear as a regular Call Center, enabling the agents to have the original call center and CommBox running side by side.
To set up CommBox as a regular call center, continue in this section. Otherwise, skip to the section called Alternative to Call Center Set Up (after Step 5).
Setup Call center
Set the connected app name:
-
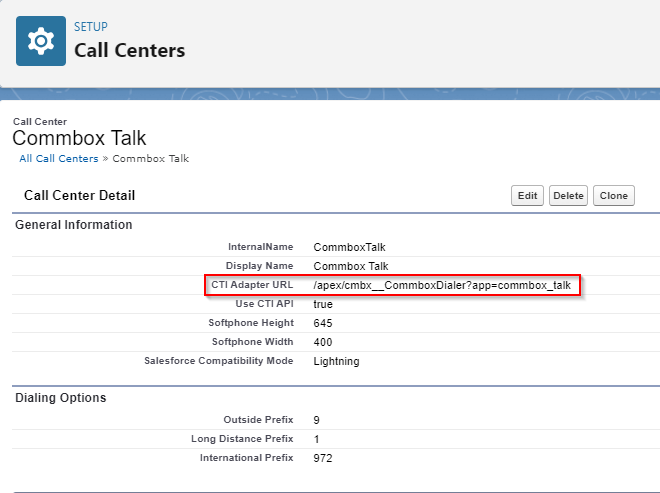
At the Salesforce console, navigate to GOTO > Setup > Call Center > Call Centers, and click the Edit button next to “CommBox.”
-
Update the field CTI Adapter URL:
/apex/cmbx__CommboxDialer?app=commbox_{{CORPRATE_NAME}}
Note: Double underscore after /cmbx. See screenshot below for the brand name talk as an example. To avoid errors, make sure the API name appears exactly as you set it up in Step 2 (commbox_talk). -
Click Save.
-
At the Call Center Users section, click the Manage Call Center Users button to set up agents in the call center.
-
Add relevant users to the call center (Permission to use), following instructions from this link: https://help.salesforce.com/s/articleView?id=sf.cti_admin_manageagents.htm&type=5
-
Setup the inbound call actions (what will happen when a call enters Salesforce), following instructions at this link: https://help.salesforce.com/s/articleView?id=sf.cti_admin_phonelayouts.htm&type=5
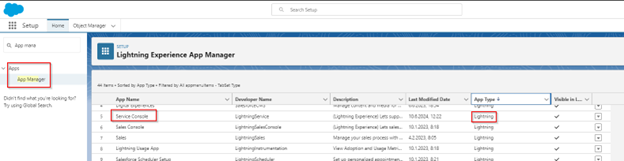
Step 5: Add call center to Apps
- At the Salesforce console, navigate to GOTO > Setup > Apps > App Manager, and select the desired app of the “Lightning” type.
- Click the Edit button next to the app.
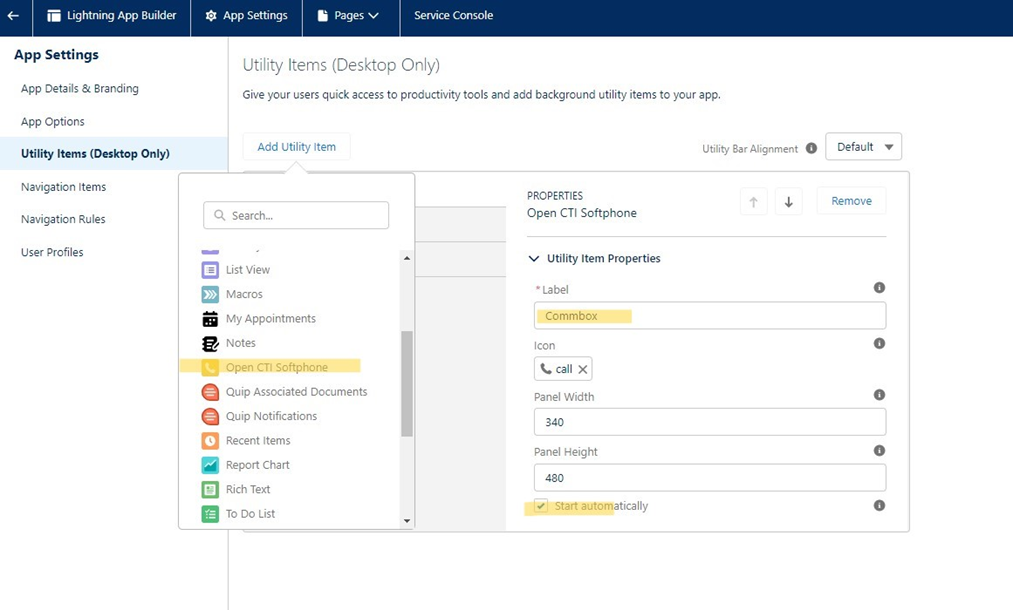
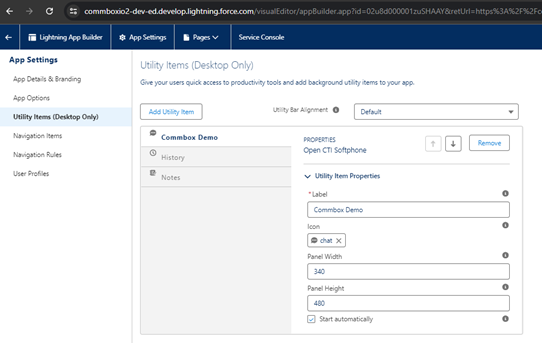
- Under the Utility items section, click Add Utility Item, and select Open CTI Softphone.
- Under Utility Item Properties, change the Label to Commbox {{CORPRATE_NAME}}, check the box Start automatically, and click Save.
Alternative to Call Center Set Up (Step 4)
Note: Skip this section if you set up a Call Center in the previous steps.
To use the CommBox Visualforce page application (Called CommboxChat) instead of a call center, follow the following steps:
-
Go to Setup > App Manager
-
Select the Lightning App you would like to integrate CommBox in (Example: Service Console) and click EDIT on the right-hand button next to the app.
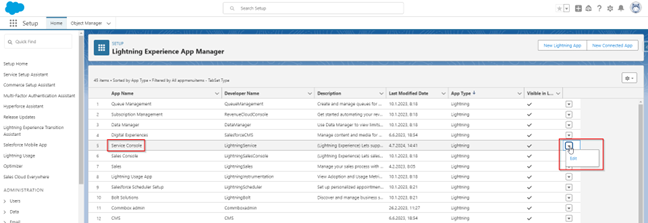
-
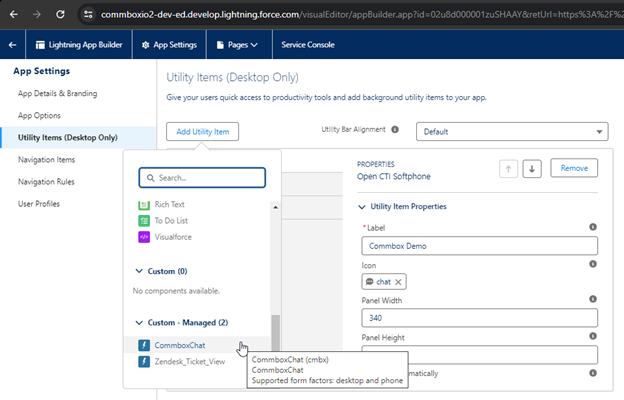
Navigate to the Utility Items section.
-
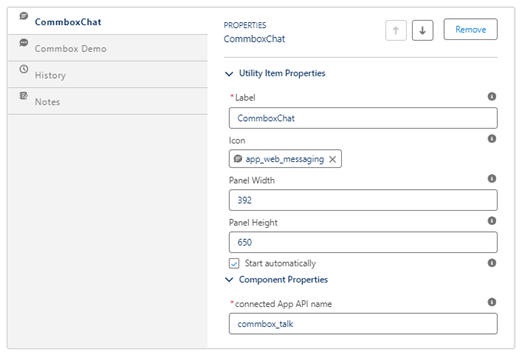
At the Add Utility Item section, select Custom CommboxChat. If you don’t see this option, contact your CommBox account manager to verify you have the latest CommBox package installed on Salesforce.
-
Set the following Parameters:
a. Choose Icon as desired and set Panel Width to 392 and Panel Height to 650.
b. Check on ‘Start Automatically’.

c. On the Component Properties, set the Connected App API name to your App API name & SAVE.
Step 6: Activate Salesforce at the CommBox Console
The Salesforce configuration is done at the general setting level as well as on each specific communication channel.
Note: Every CommBox account has only one Salesforce admin account.
General Activation
-
At the CommBox platform, navigate to Settings, click the Salesforce CRM icon from the Integrations sections, and then click Install.

-
Select New Salesforce Account in the Salesforce Account section. You will be redirected to select your username.
-
Enter your Salesforce username and credentials (as an Admin).
-
Paste the consumer secret obtained from Salesforce at the top section.
-
Click Save.
-
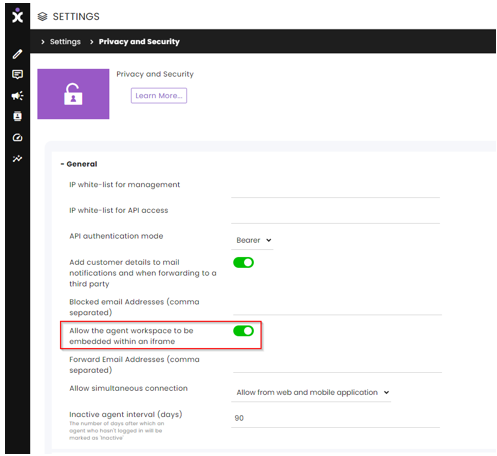
Go back to the Settings page, select the Privacy and Security section, and click on General settings.
-
Enable the iFrame for the agents by switching the toggle on, and click Save at the bottom of the screen.
Channel Activation
The final step involves activating specific communication channels.
Note: Every CommBox account has only one Salesforce admin account.
-
At the CommBox platform, navigate to Settings and select the communication type module (Chat, WhatsApp, etc.).
-
Select a specific channel or subchannel.
-
Scroll toward the bottom of the screen and select Salesforce CRM Connector.
-
Switch the different toggles to activate the integration with this channel to your specifications. (Contact us if you would like to have the Search and Create off while having others on).
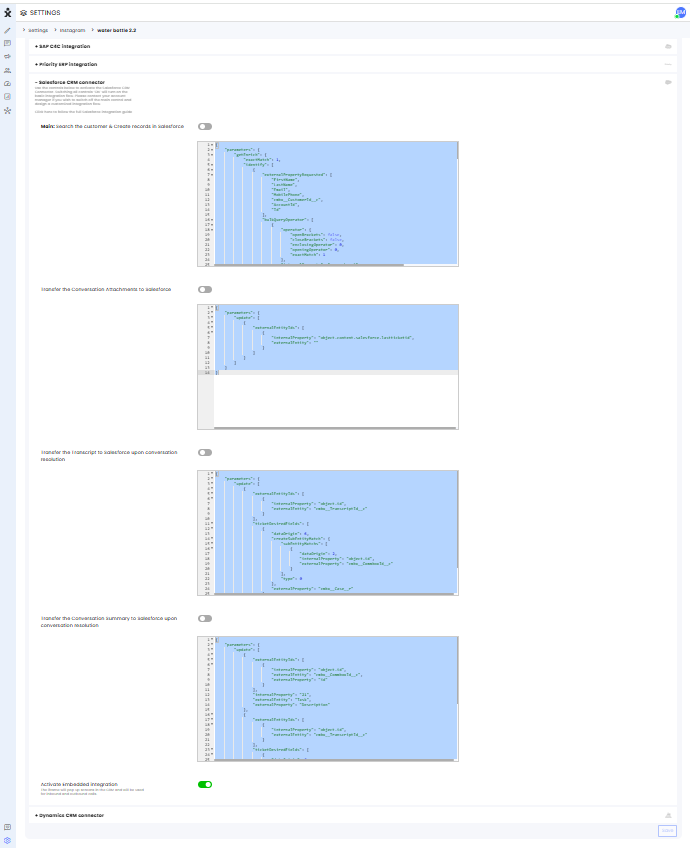
Note the open JSON files that trigger API calls to the CRM and enable developers to edit the retrievable fields. Every new channel and subchannel will have the default content at creation time. -
Unique Settings:
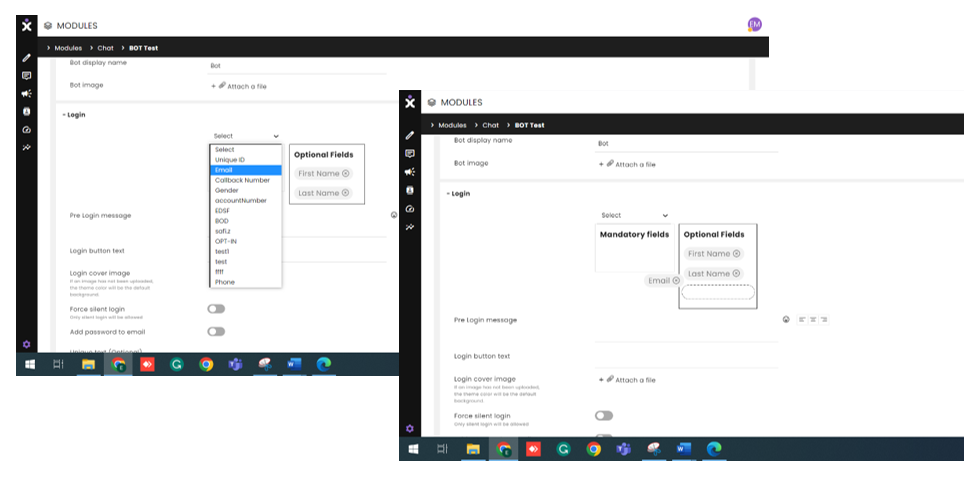
For web Chat channels (Chat, Voice Chat, Video Chat) only:
a. Open the Login section to set the Mandatory fields for the channel: First Name, Last Name, Phone, and Email. Note that when using the Chat channel, all fields must be populated for the channel to work.
b. Select the fields from the drop-down menu.
c. Drag the field tags from the Optional box to the Mandatory fields box.
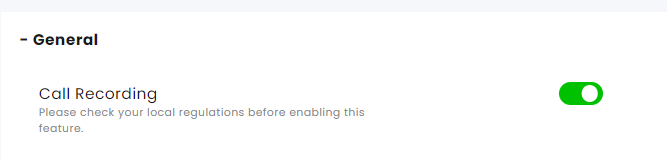
For Voice Channel only:
Enable the following Channel Settings:
a. At the General section of the channel turn on the recording option.
b. At the Salesforce connector section, toggle On the Transfer the call recording to Salesforce after the call ends. Recording logs remain secure with the required CommBox’s API token.
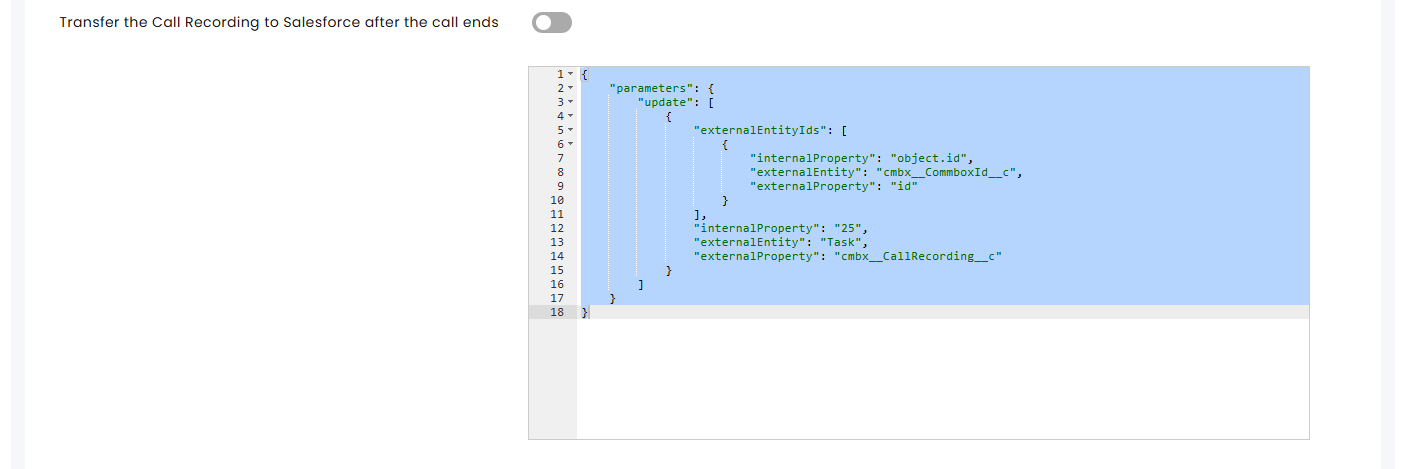
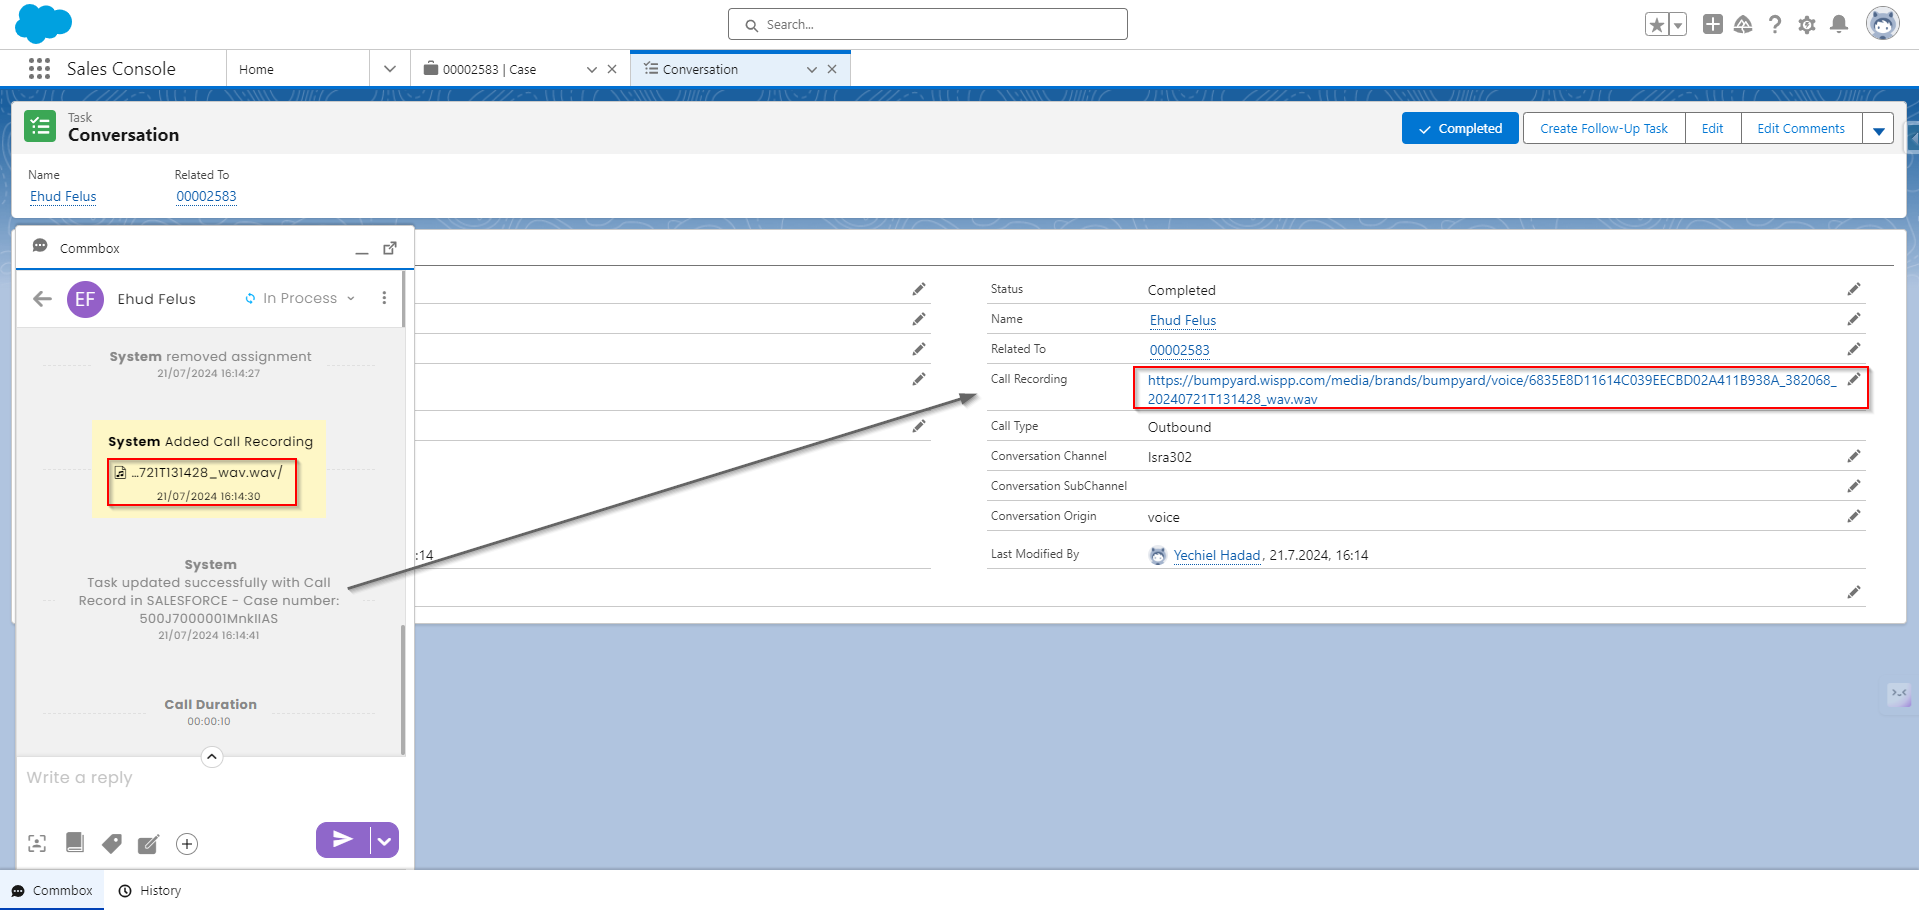
c. When recorded calls end, the link appears in the Remarks section of the CommBox Inbox and in the Task section at the CRM.

- Click Save at the bottom of the page.
Step 7: Verify that the Integration is Working
- In the App Launcher, go to the app you added to the softphone.
- Look for the CommBox {{CORPRATE_NAME}} tab in the footer.
- Click it to see if you get a login page.
