Overview
This integration creates a seamless connection between CommBox's customer-facing communication and SysAid's internal IT service management processes. This integration guide includes setting up CommBox as an iFrame within the SysAid platform, enabling agents to see the inbox when needed while they are on the platform.
Step I: Setting up the connection
-
At the CommBox platform, navigate to Settings > SysAid.
-
Enter your organizational URL at SysAid. (e.g. https://sysaid10837574687.sysaidit.com)
-
Enter the admin’s username and password used with the SysAid system.

-
Save the settings at the top of the page.
Step II: Set up CommBox iFrame within SysAid
-
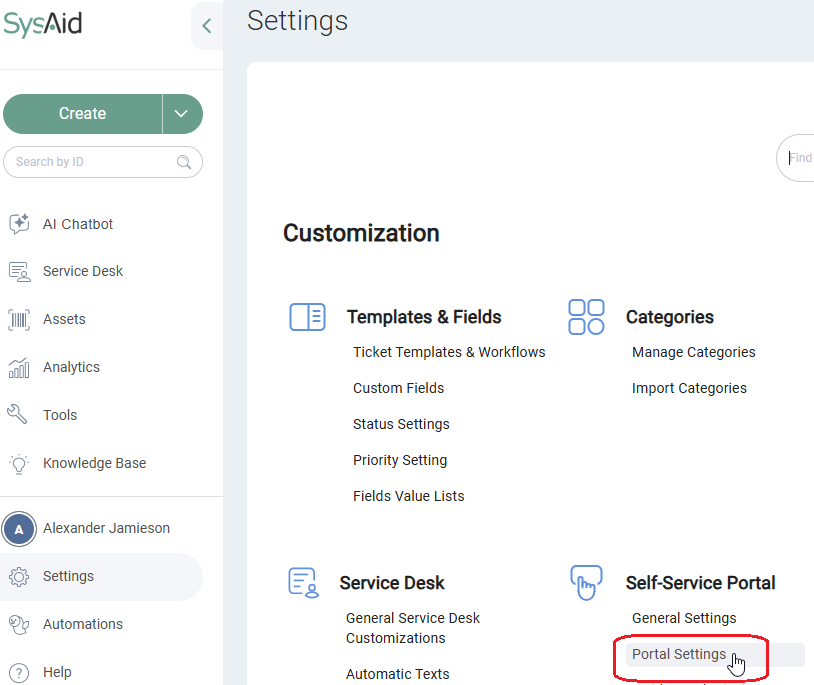
On the SysAid platform, navigate to Settings (sidebar) and click Portal Settings under the Self-Service Portal section.
-
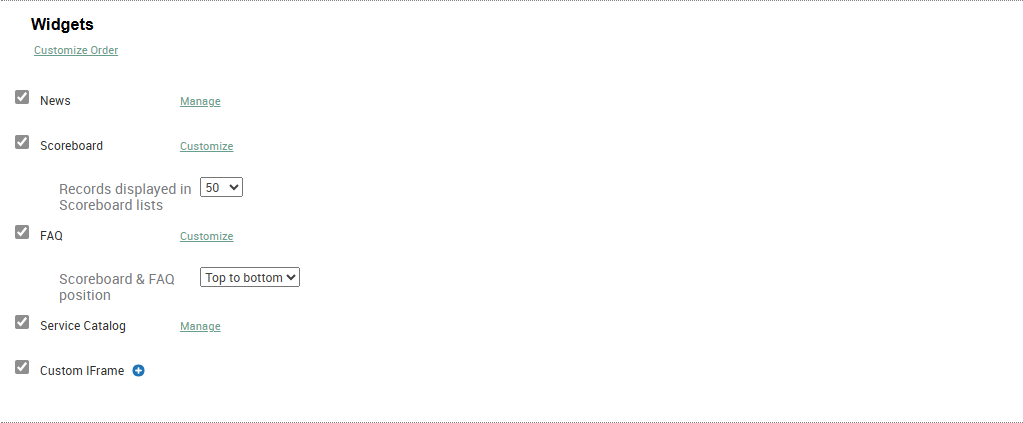
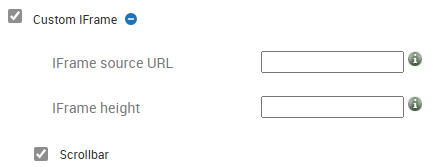
At the Widgets section, check the Custom iFrame box and expand that section by clicking the plus icon.
-
Enter the following:
a. For the iFrame source URL, enter the CommBox's inbox URL of your brand.
b. Enter the iFrame height (we recommend 600 pixels).
c. Click Save at the bottom of this section.
-
At the top of the Widgets section, click the Customize Order link under the section’s heading.
-
At the dialog box that opened, drag the CommBox iFrame to the top of the list and click OK.
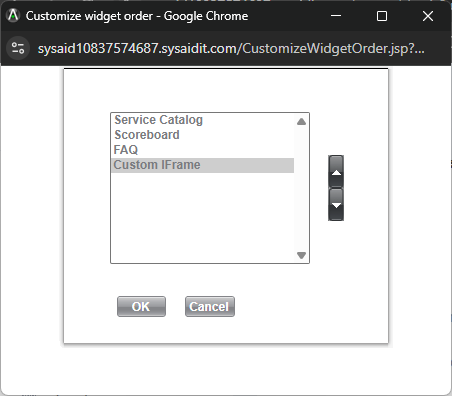
Note: If the Banner box is not in use, we recommend unchecking that box to grant additional space for the iFrame.
- Click Save at the bottom of the screen.
Step III: Channel Settings
The integration can be customized for each channel or subchannel, catering to the unique needs of different teams within the organization. Additionally, each toggle includes a viewable JSON file, allowing for the customization of the different fields to seamlessly work with CommBox.
-
At the CommBox console, navigate to Settings, and open a channel that needs to be used with SysAid integration.
-
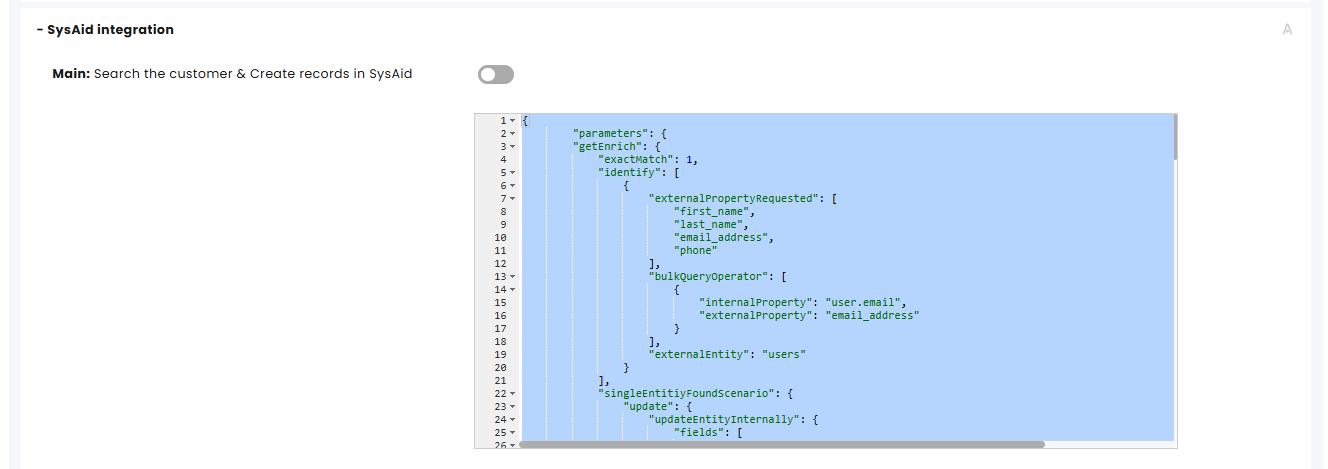
On the settings page that opens, select the SysAid integration section and activate the channel (toggle to on).
a. Main: Search the customer & Create records in SysAid – The main server side of the integration. Contact us if you want to have it turned off while other toggles remain on.
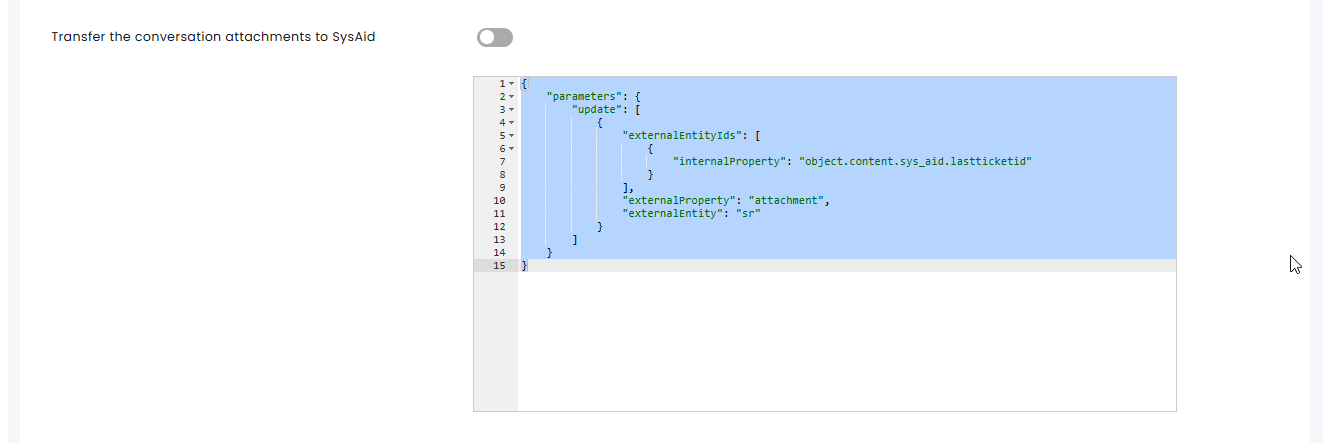
b. Transfer the conversation attachments throughout the conversation to SysAid – Note that the remarks in CommBox are clickable links.
c. Transfer the Transcript to SysAid upon conversation resolution – Note that the remarks in CommBox are clickable links.

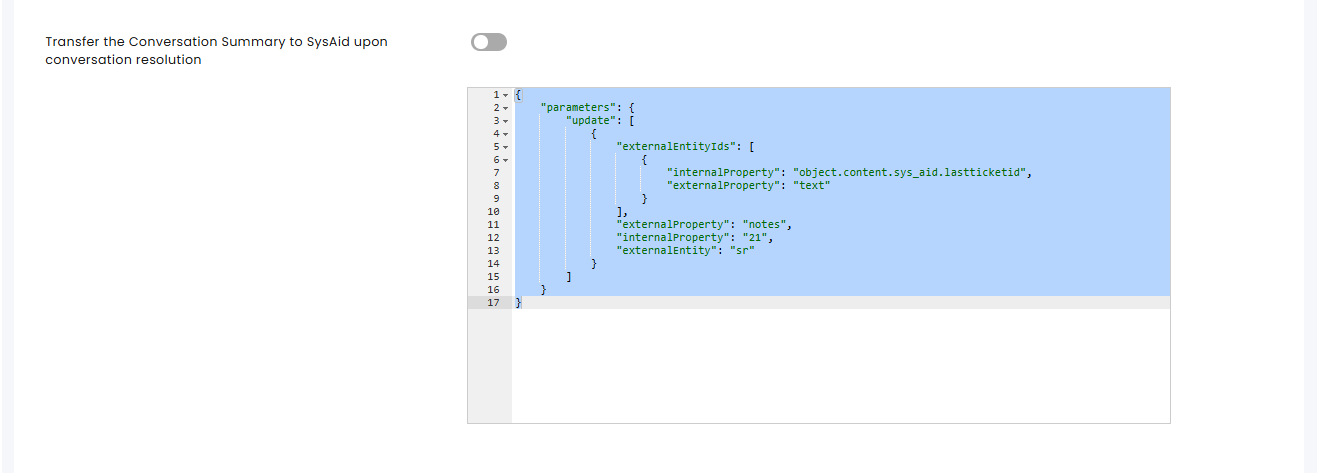
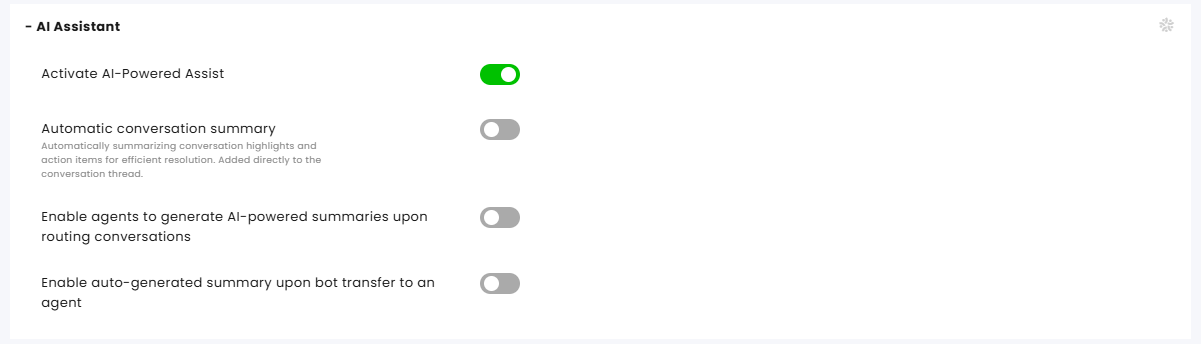
d. Transfer the Conversation Summary to SysAid upon conversation resolution – AI summary requires toggling on that feature in the AI Assistant section. Note that the remarks in CommBox are clickable links.
-
Activate the AI Assistant (if you have an active AI account)
-
Click SAVE at the bottom of the screen. Repeat this process for all relevant channels.
Integration Capabilities
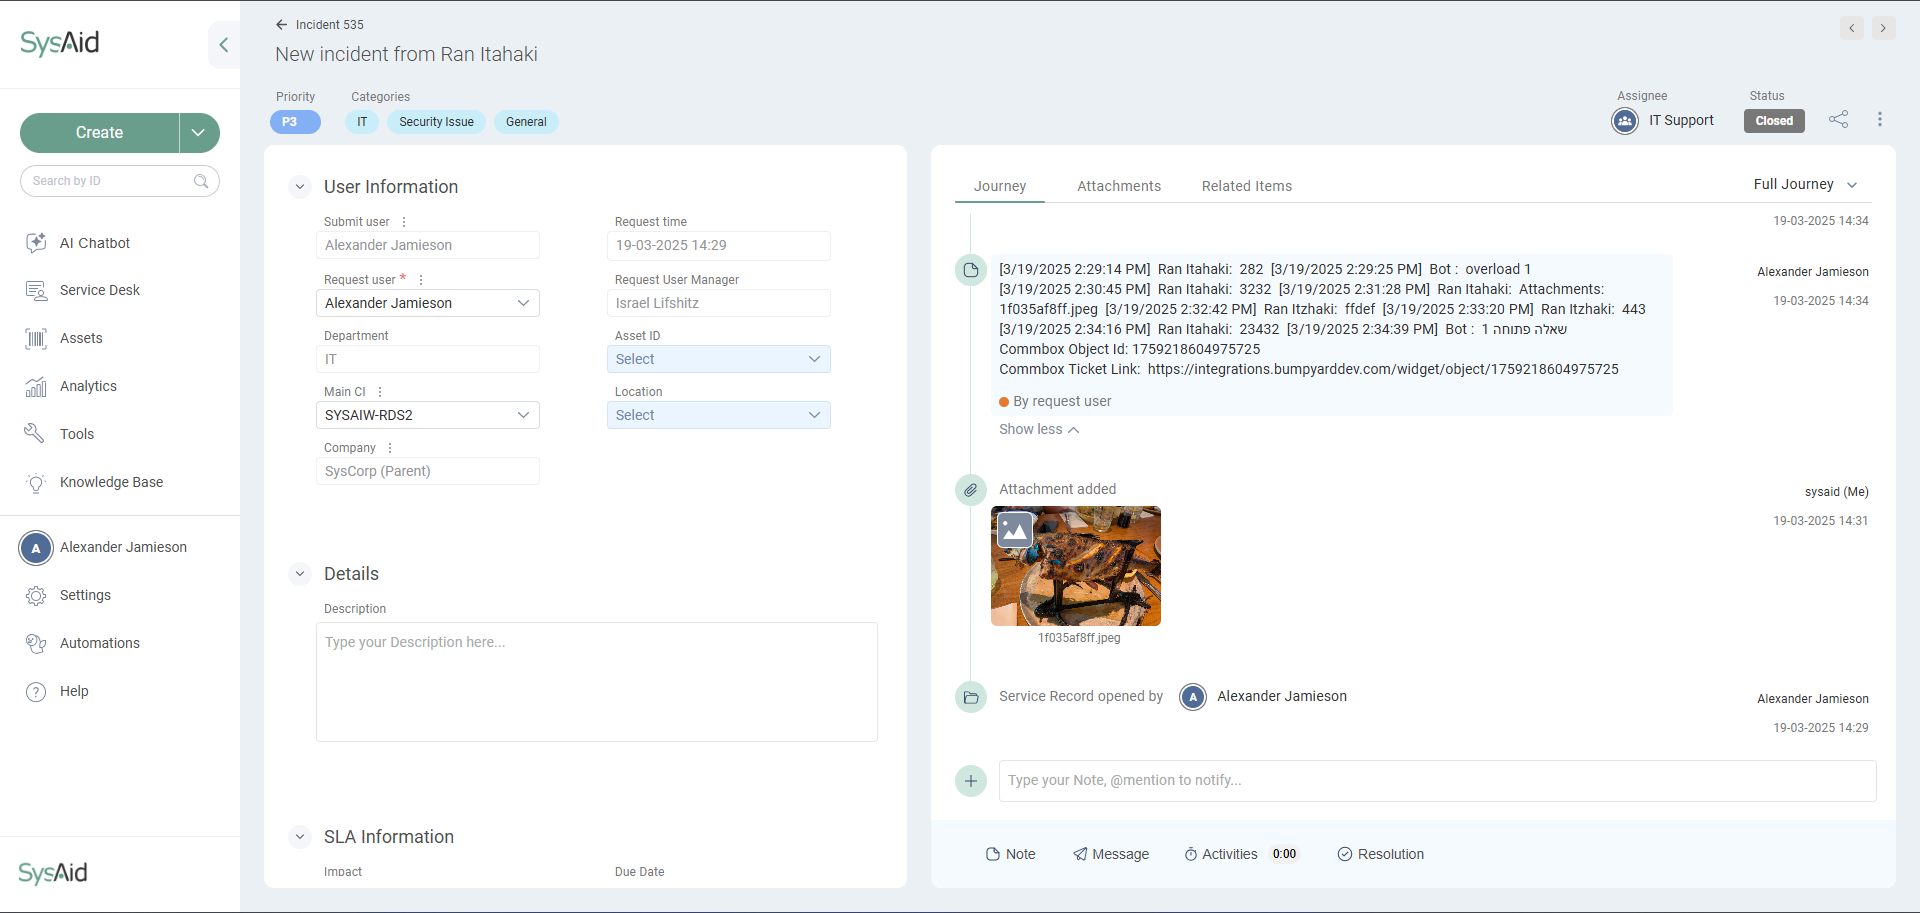
When agents change the conversation status to Resolved at CommBox, the Status in SysAid automatically changes to Closed.
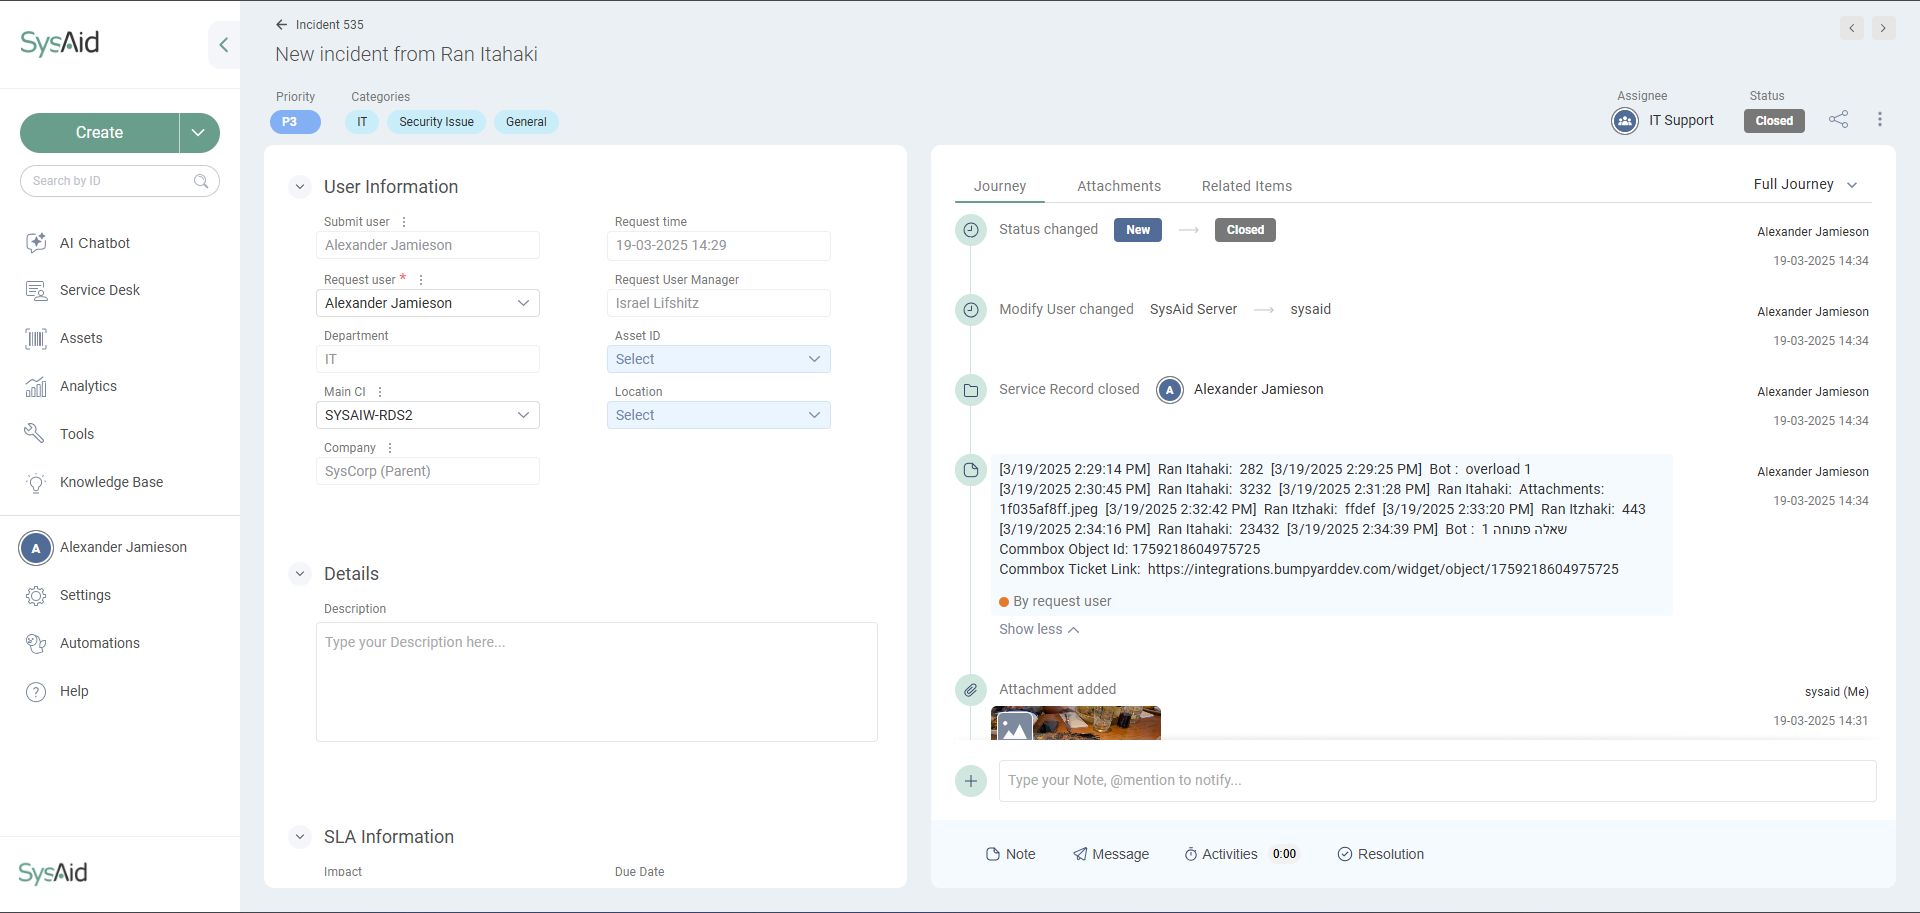
The integration can also automatically store conversation summaries (transcripts) and attachments.