Webhooks
Overview
Webhook subscriptions enable CommBox clients to receive notifications when selected events occur within the system and send those notifications to a designated webhook event listener within the client’s organization. For example, when a new customer is identified in CommBox, the information can be automatically reported and recorded in the organization’s CRM system.
Organizations can also view a centralized list of failed webhook events. The list includes the relevant error message, HTTP response code, timestamp, and payload details for each failed delivery attempt.
This visibility allows teams to identify and troubleshoot integration issues more efficiently, without searching through external logs.
For explanation of terms related to Webhooks, click here.
For a detailed explanation of the different webhooks we offer, click here.
For our Developer Center, click here.
Setting up a New Subscription
Follow these steps to create a new subscription:
-
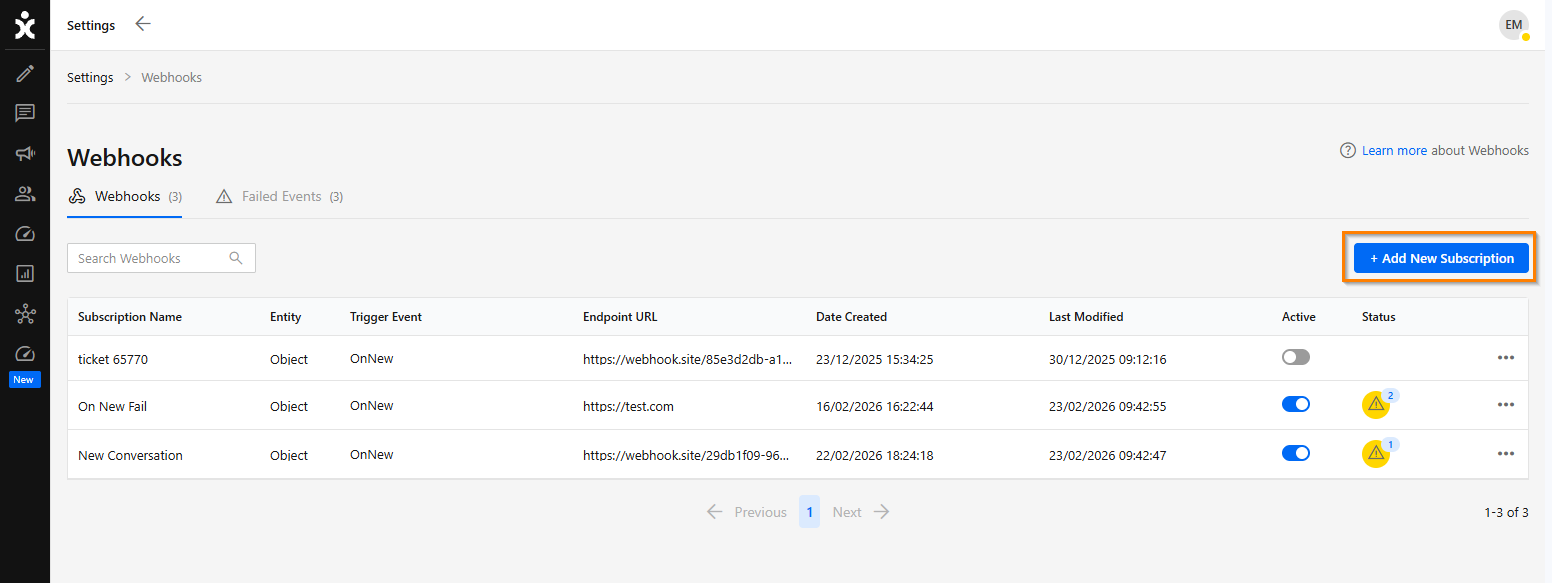
At the Settings page, select the Webhooks module (in the Integrations section), and click the Add New Subscription button at the top.
-
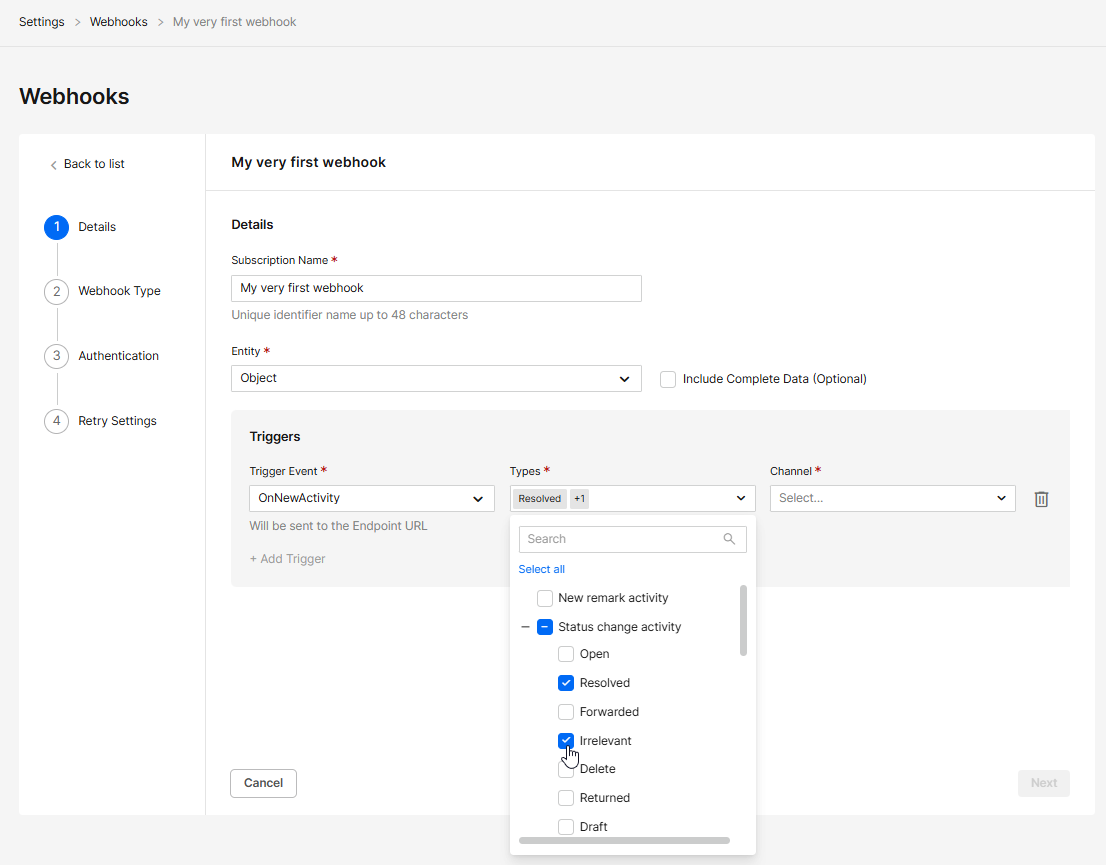
In the New Subscription form, enter the Details as follows:
a. Enter a meaningful name - a unique identifier name not previously used.
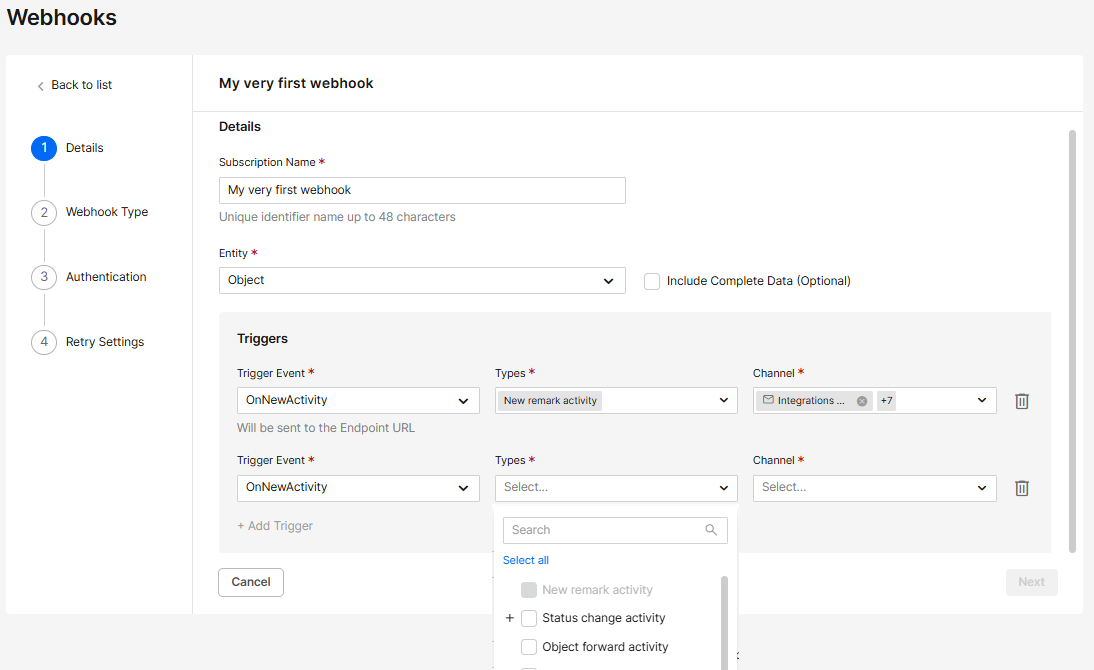
b. Select the Entity – the type of event subscriptions you want to subscribe to. Available Entities: Object, User, Satisfaction, Tag, Form, Chat, WhatsApp
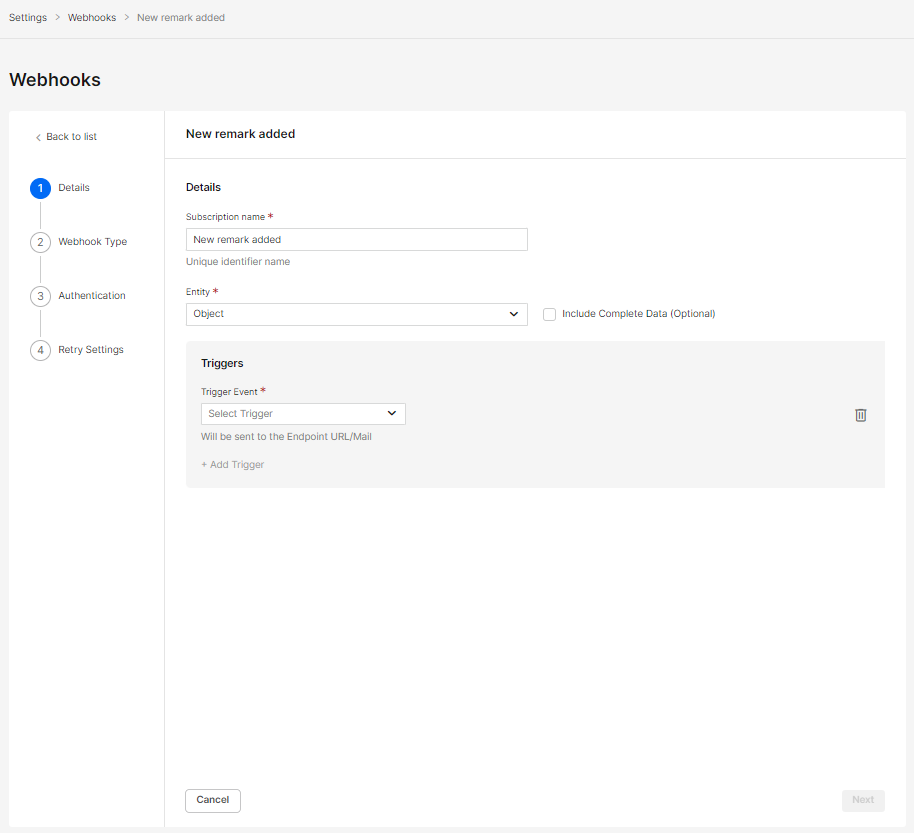
c. Select the specific Trigger Event and its components (where applicable).
Notes:-
When selecting OnNewActivity event types, the chosen types will be grayed out when adding additional triggers.
To include additional communication channels, configure them in the original trigger settings.
-
For the Object OnNewActivity trigger, you can define which status changes to track. Once a specific status change is selected, it cannot be reused in another trigger.
-
The WhatsApp entity is used to listen for WhatsApp message status events (sent (✓), delivered (✓✓), read (✓✓), and failed). Select the statuses you want to track for the chosen WhatsApp channels.
This setup does not require an object, allowing you to receive webhook events for WhatsApp messages sent via API.

d. Add additional triggers from this group as needed.
e. Checking the Include Complete Data (Optional) will send the entire payload when the webhook gets triggered. (Not recommended)
f. Click Next to continue.
-
-
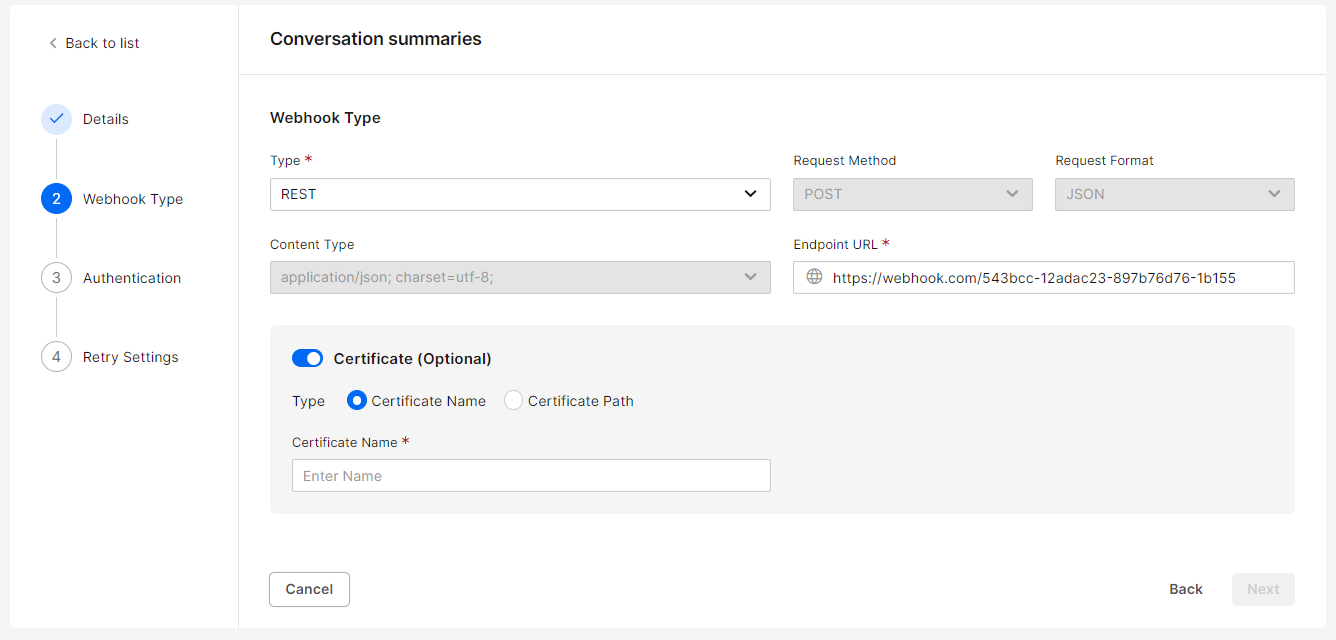
Select the Webhook type (REST protocol or SOAP protocol). Once selected, the method and format will be filled in automatically.
Enter a secured Webhooks URL (Starting with https://) that will receive the notifications from CommBox.
Note:
a. When choosing the SOAP protocol, you have the option to add the SOAP message parameters.
b. For Isolated customers only: If we already have a Certificate from your organization, you may select to add this security measure for sending your webhooks. Contact your CS for more information.
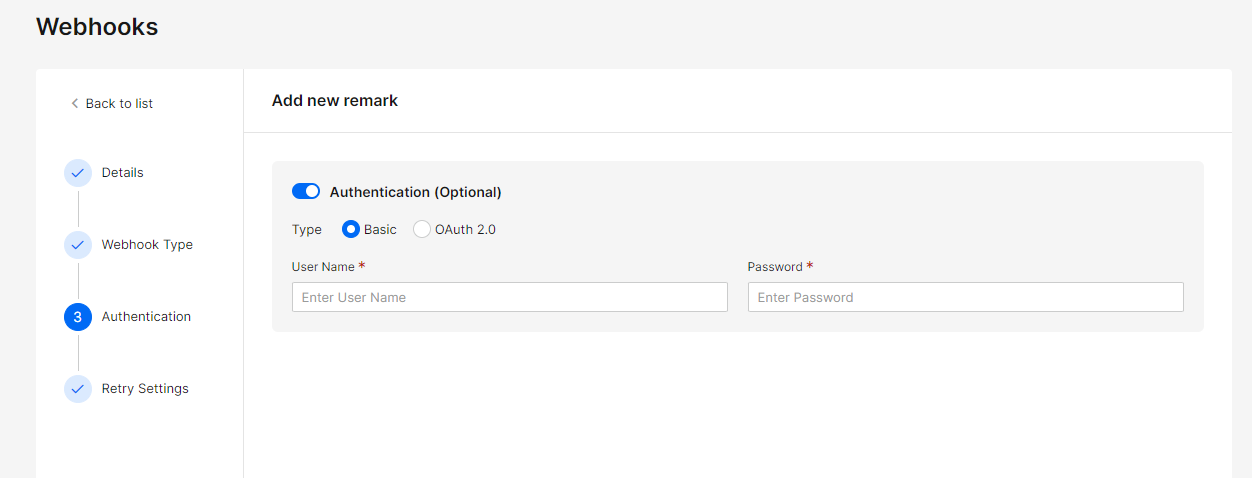
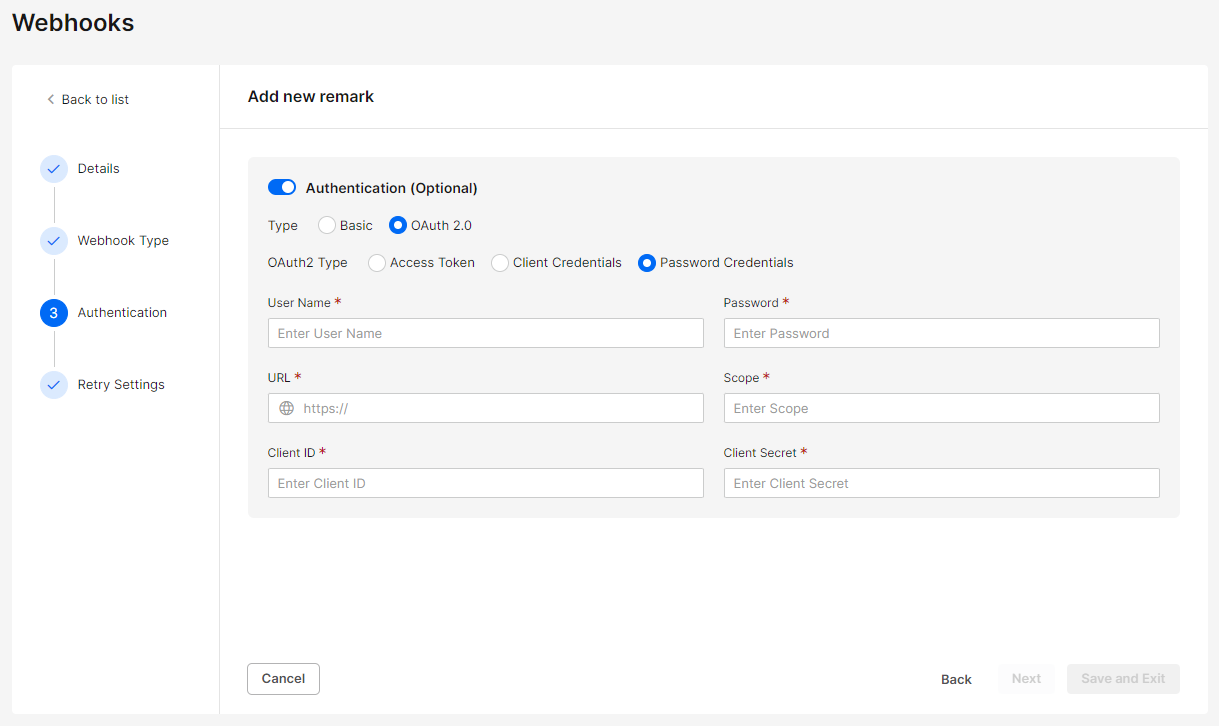
4. Authentication is an optional step to enable the subscription to pass the security credentials of your organization.
Select between the Basic and OAuth 2.0 authentication.
For basic authentication, enter a username and password.
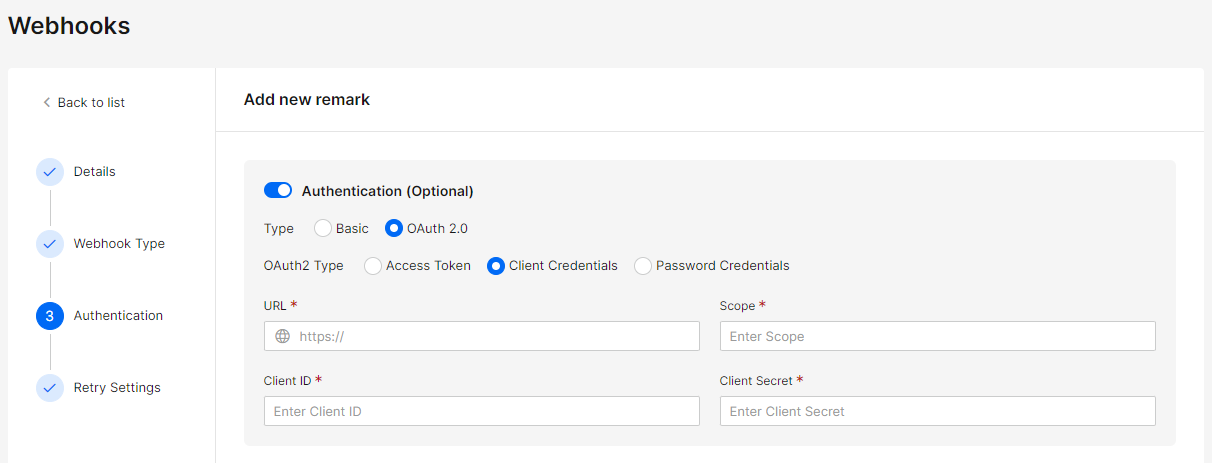
For OAuth 2.0 authentication, select and enter the desired type (access token, client credentials, or password credentials).
-
For Access Token, enter the Header Prefix (example: Bearer) and Access Token (key)

-
For Client Credentials, enter the following:
a. The URL where the information will go.
b. The Scope’s name (as it appears in your system) that will limit the access to the information. Learn more at this link: https://cloud.google.com/apigee/docs/api-platform/security/oauth/working-scopes
c. Client ID
d. Client Secret
-
For Password Credentials, all of the items mentioned above.
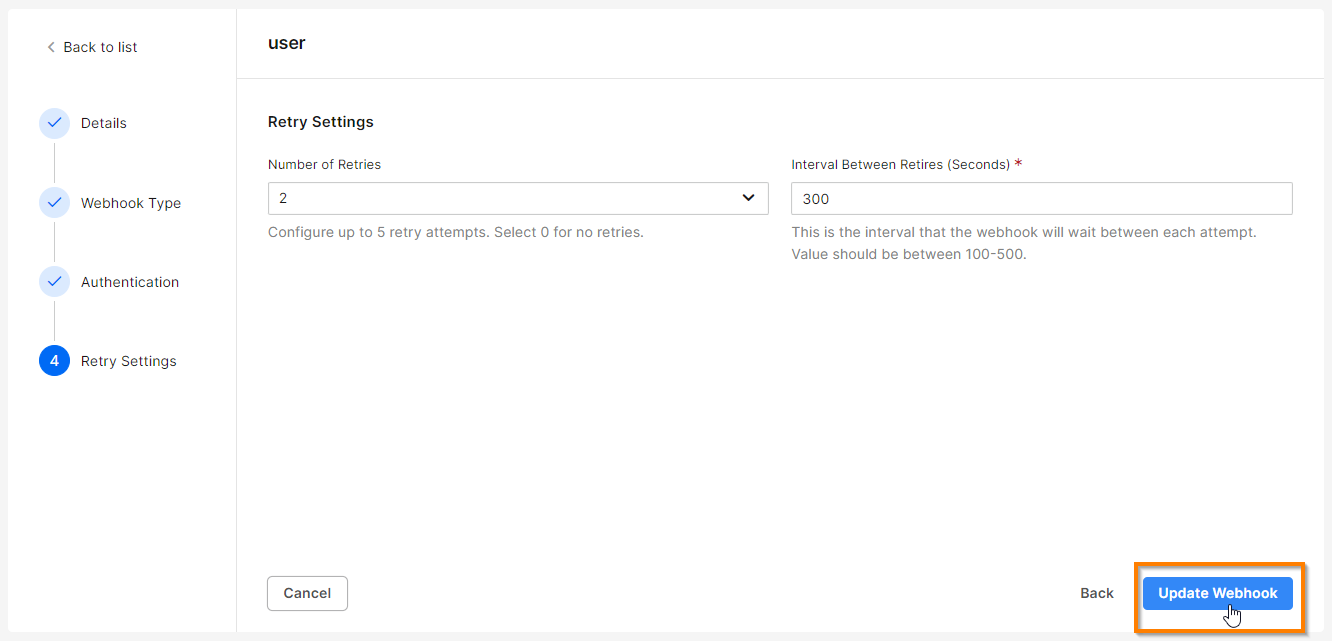
5. Select the number of retries (0-5) in case the webhook connection fails.
The default is set to 3 retries with 5-minute intervals in between.
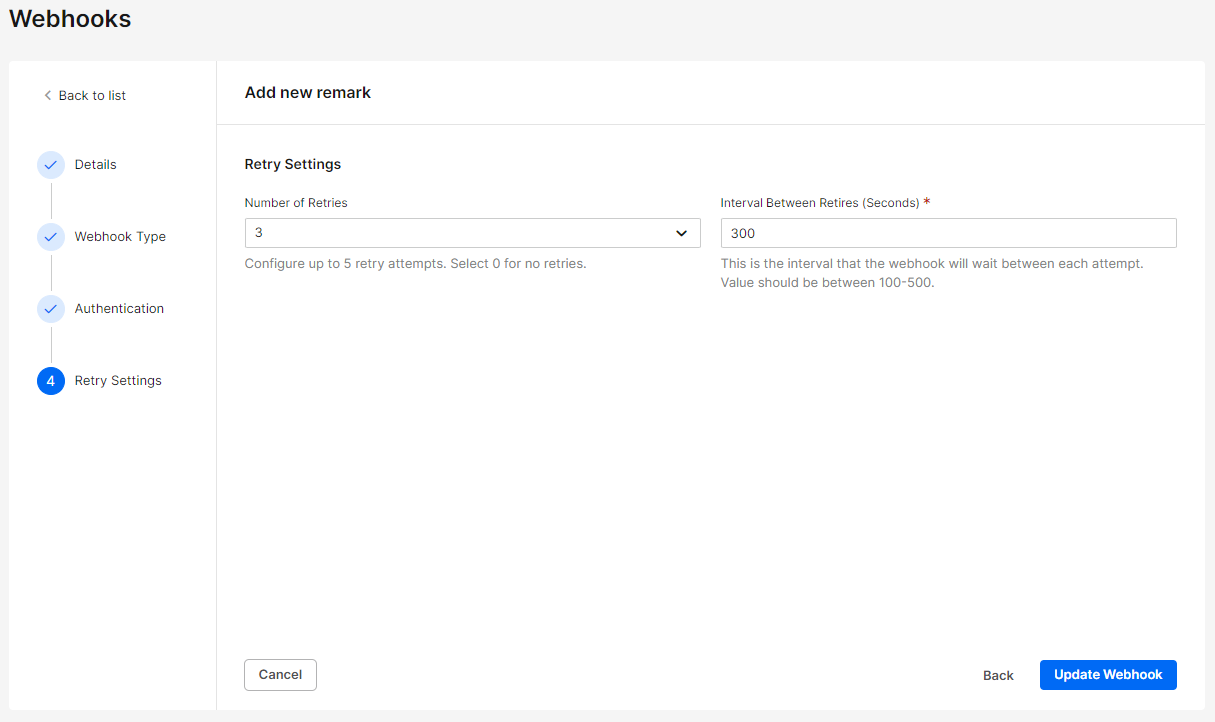
6. Click Create Webhook to complete the subscription process.
Failed Events
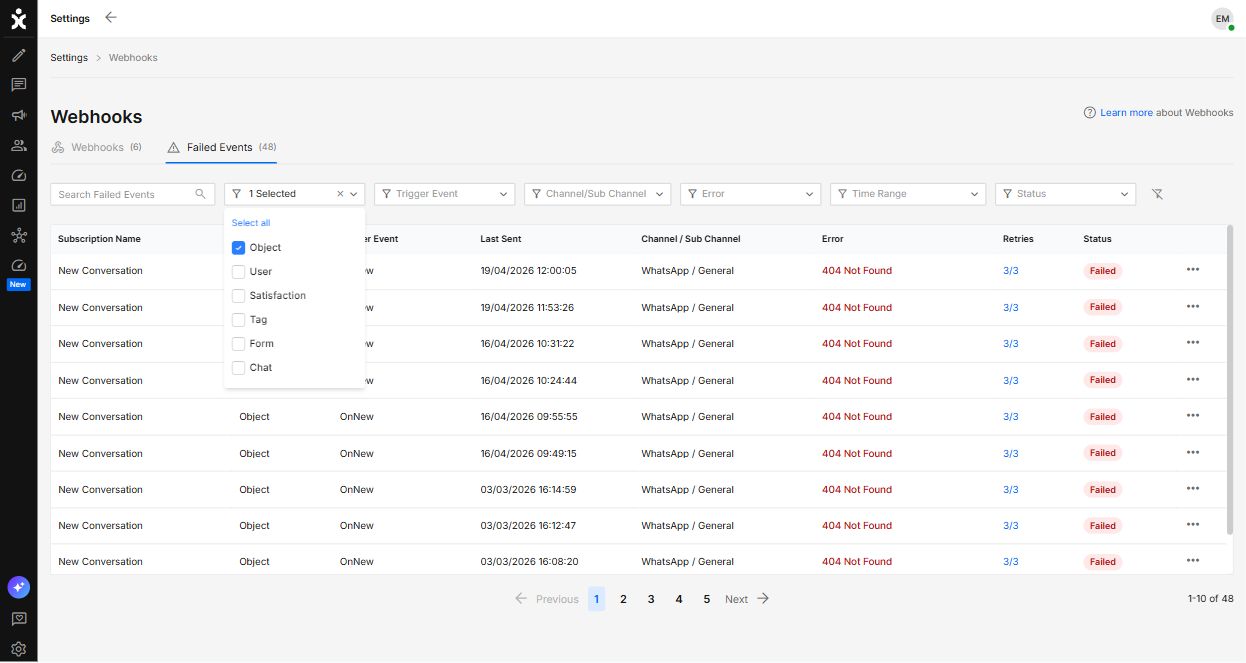
The Failed Events view displays the webhook name, associated entity, and trigger. It also shows the most recent attempt to send the payload to the destination, including the relevant channel and subchannel, the returned error code, and the number of retry attempts.
Use the filters above to locate and analyze specific failed events.
Click the three-dot menu to access Failed Event Details:
-
Overview – Summarizes the event
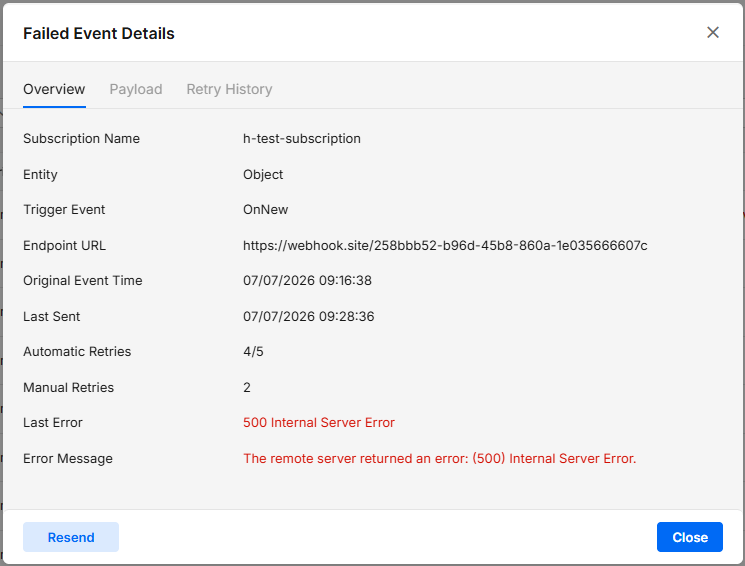
Admins can click the Resend button to manually resend failed webhook events on demand, without waiting for the automatic retry schedule. This enables faster recovery after fixing endpoint issues and helps ensure critical data is delivered successfully.
-
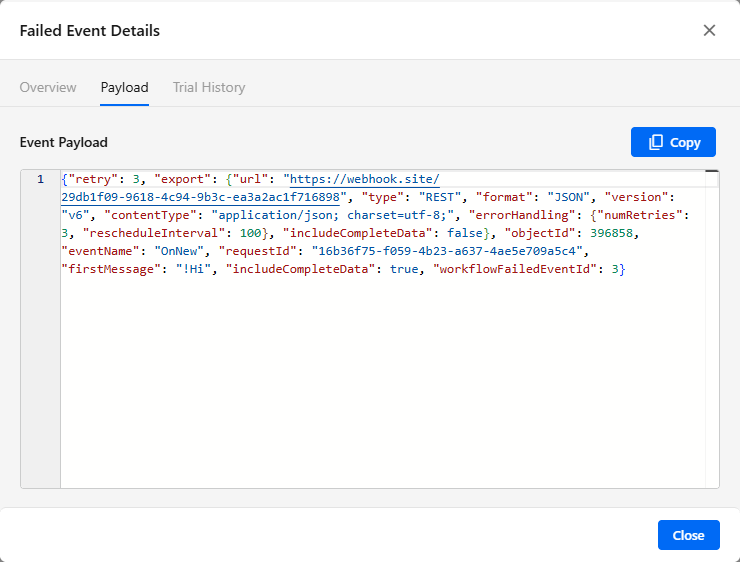
Payload – Displays the webhook JSON from the latest attempt
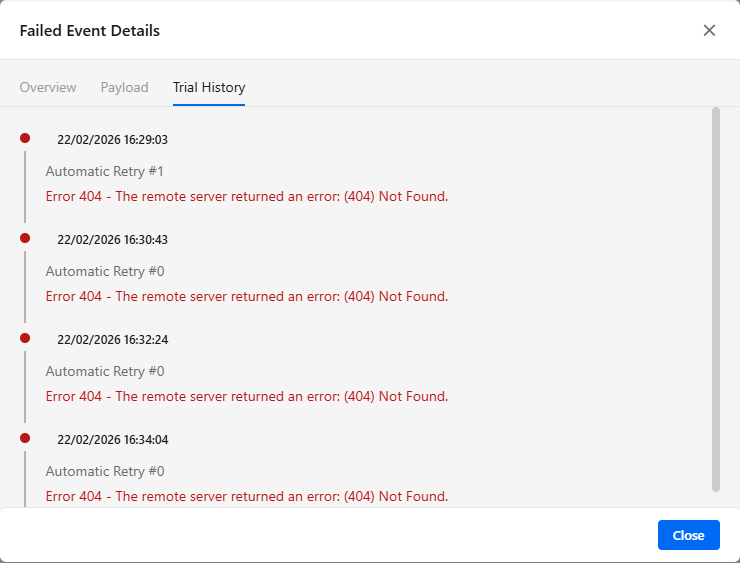
- Trial History – Provides details on retry attempts
Managing Existing Webhook Subscriptions
The module displays all active and inactive webhooks, including their name, entity type (such as object or user), trigger, listening URL, and the date and time they were created and last modified.
If a subscription fails, a warning icon appears in the status column, along with a number indicating the count of failed delivery attempts.
-
To suspend a webhook subscription, deactivate the relevant webhook by toggling it Off.

-
If the subscription fails, click the warning icon or select Details from the three-dot menu to view the failed event information.
-
To permanently delete the webhook, click the 3-dot menu at the end of the line and select Delete.
-
To edit information within an existing webhook, click on the Subscription name to open the subscription form. When you finish editing, click Update Webhook at the last step.