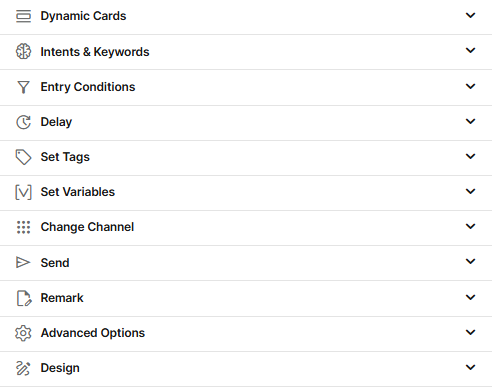
Overview
The CommBox Flow Builder introduces a powerful set of features that enable you to design intelligent, flexible, and highly automated customer journeys. These tools help you create smarter AI Agents, streamline operations, and improve the end-to-end customer experience.
This guide provides a clear explanation of each flow capability, including how to configure it, when to use it, and best practices for maximizing automation performance.
If you're new to the Flow Builder or want a quick refresher, take a moment to review the Flow Builder Overview guide. It covers the basics you'll need before jumping into the advanced tools explored in this article.
Dynamic Cards
Dynamic Cards integrate with the CommSite module to deliver personalized, data-driven content directly to customers during their interaction with the AI Agent.
Click here for further details.

Intents & Keywords
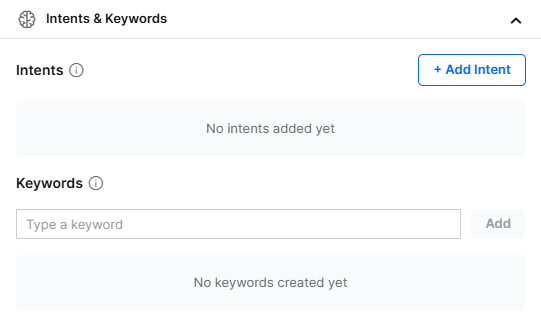
Intents
Intents enable the AI Agent to understand customer needs and route them to the most relevant step in the flow.
When the AI identifies that the customer’s message matches a predefined intent (for example: requesting a service, asking about a product, or belonging to a specific customer group), the flow automatically jumps to the step associated with that intent.
After assigning an intent to a step, a Brain icon appears before that step.
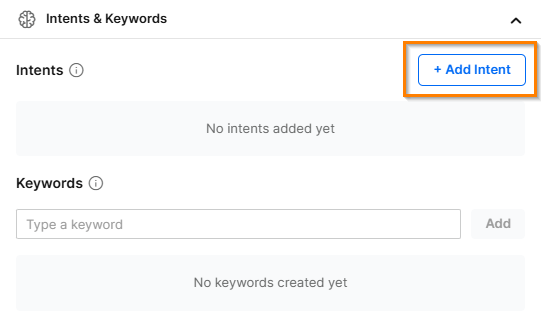
Adding an Intent
- Open the Flow Builder and select the relevant flow (or create a new one).
- Add a Say step to the Flow and call it “Intents”.
- Expand the Intent & Keywords section in the Properties panel and click Add Intent.
- At the dialog box, select the relevant intent and click Ok.
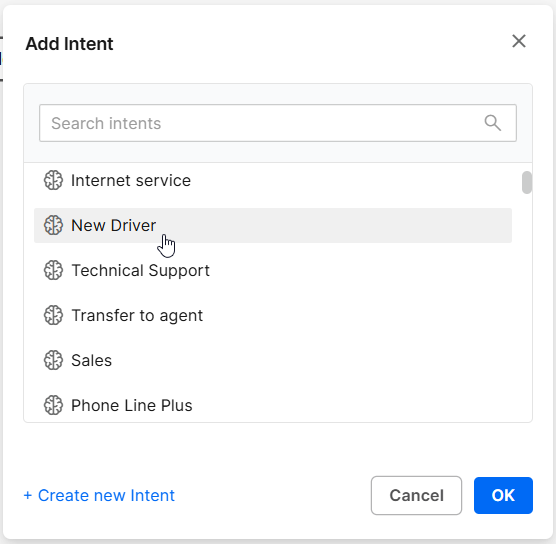
The Intent now appears in the pane.
AI-Generated Intents (Era AI)
When Era AI is enabled, the system can automatically recognize intents without needing manual training. This dramatically reduces setup time and improves accuracy.
To create a new AI intent:
- Click Create new Intent in the dialog box.
- Enter a name, a unique name, select the language, and click Create Intent.
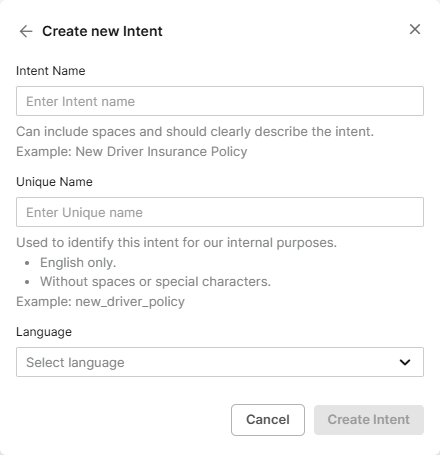
Notes:
● Intent names must reflect the type of customer input expected.
● The language selected must match the language used in the intent name.
● Best practice: Add a tag at this step to record the detected intent.
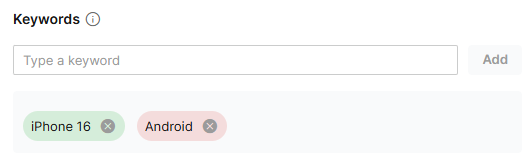
Keywords
Keywords with strong transactional or commercial intent are powerful for driving immediate results, especially in the later stages of the buyer's journey. For example, users searching with specific keywords, such as "iPhone 16" or "CRM software demo," are close to making a purchase or a commitment.
As with intent, once the customer types in those words, the Flow will come to this step.
To design a specific Intent or Keyword behavior, navigate to Settings > Intents.
To learn more, click here for the user guide.
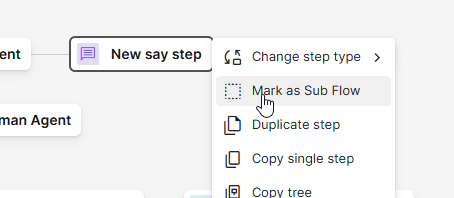
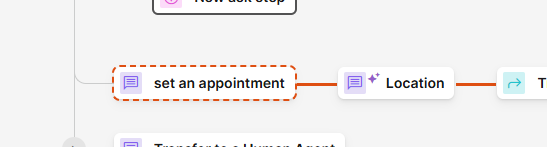
Sub Flows / Entry Point
Sub-flows enable builders to designate a section of the flow and add an Entry Point option, which enables the channel’s automation to start directly at the sub-flow. Each sub-flow features unique visual cues and a description that helps builders define its objectives, improving flow design and capability management.
-
Right-click on the desired step that will be the first step of the Sub Flow.
-
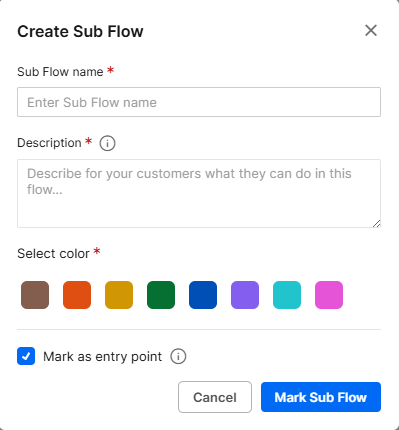
Enter a unique name and description for the Sub Flow.
-
Select a color for easy identification.
All connected steps in the Sub-Flow adopt this color, and the first step appears with a broken-line highlight.
-
Check Mark as entry point if you want this Sub-Flow to be available as a startup point for channels.
-
Click Mark Sub Flow.
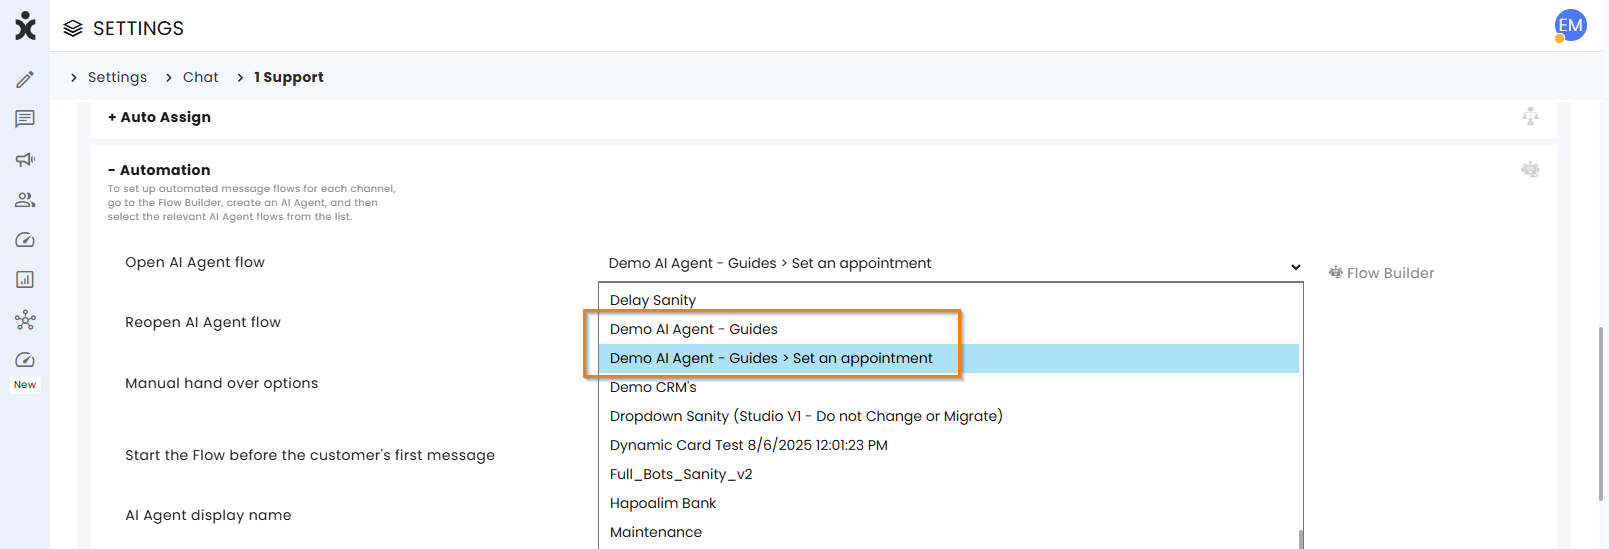
In the Automation section of any communication channel, the Sub Flow will appear as a secondary name of the larger Flow.
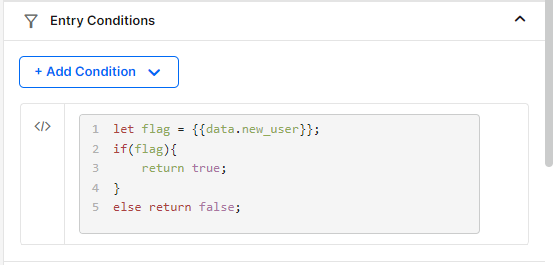
Entry Conditions
Entry Conditions function as gates. When the condition is met, the flow enters the branch; if not, it continues evaluating the next condition.
Every branch should have its own condition to ensure full coverage for all possible outcomes.
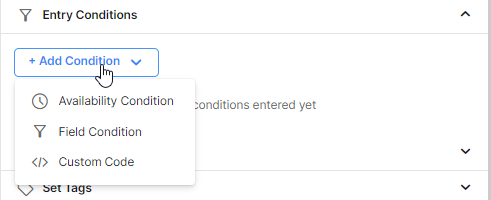
Availability Conditions
Availability Conditions are based on the specific availability status of the channel.
- Select the channel and subchannel (sub-stream) if applicable.
- Select the operator: IS (=) or IS NOT (≠)
- Select the Channel State:
a. Active – The specific channel is currently Active, within business hours, with available agents.
b. Inactive – The specific channel is currently Inactive.
c. Busy – The channel is Active, within business hours, but there are no available agents (all agents have maximum conversations assigned to them).
d. Off hours – based on the business hours module, the channel is currently after business hours.
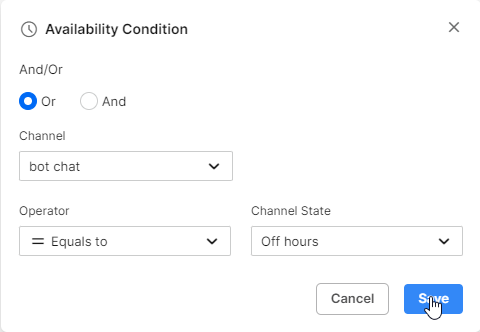
In the example above, the flow will enter this branch only if the conversation at "Bot Chat" happens to be after hours for that channel (as set in the business hours module). A logical step that may follow will be a message to the customer about reaching the business after hours.
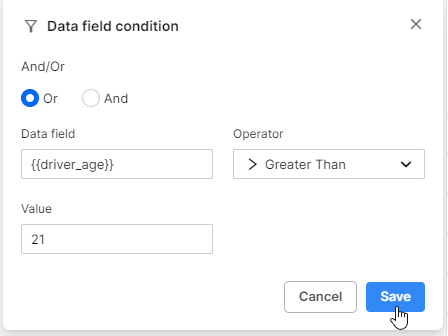
Field condition
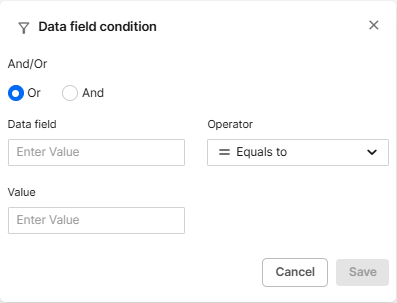
Data fields store information entered by the customer or system.
Fields are created in the Ask step (Add a question).
Note:
● Field names must be lowercase with underscores instead of spaces (e.g., driver_age).
● When referencing fields, use double curly brackets: {{driver_age}}
Example below:
The flow’s branch is activated only if driver_age > 21.
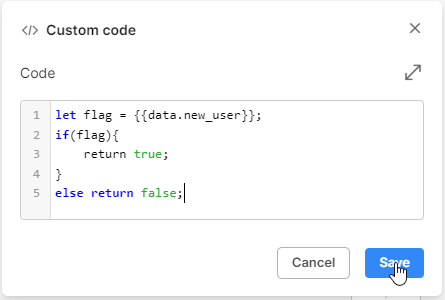
Custom code
Custom code enables the programmers to create their own conditions for the branch of the flow.
In the example below, the system verifies that a certain value is true before proceeding to the next step. Make sure that all same-level steps (“siblings”) of the branch should also have a custom condition to ensure complete coverage.
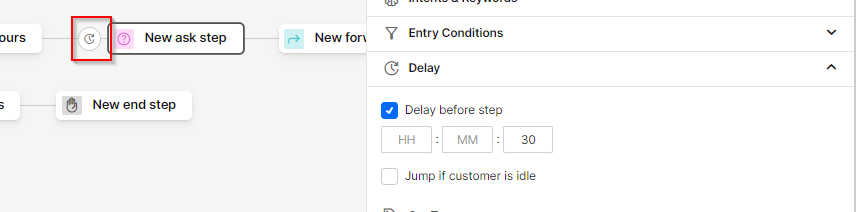
Delay
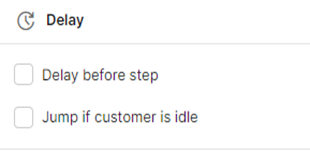
Delay before step
Adds a short delay before the step becomes active which can prevent rapid clicking or skipping.
Best practice to keep this delay short, to avoid the impression that the App is frozen.
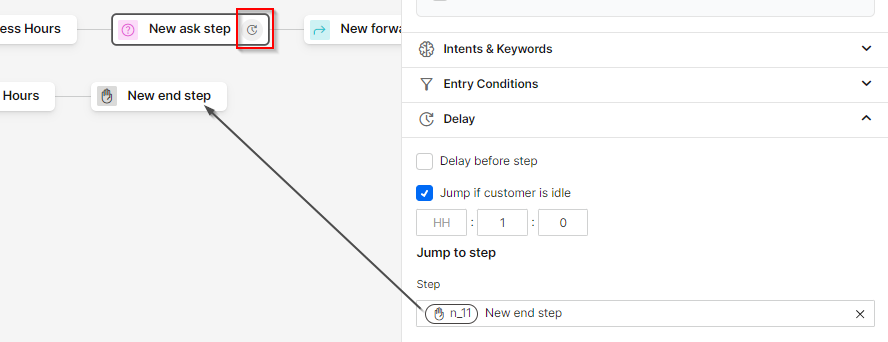
Jump if customer is idle
If the customer stops responding, this option redirects the flow after a set timeout.
You can route the conversation backward, forward, or end it entirely.
Enter the amount of idle time before the flow jumps, followed by the destination step.
Set Tag

Tags help classify customers and conversations. They are created and managed at the Tags tab of the general Settings sidebar menu in the CommBox console. You need to select between Conversational tags (added to the object) and Customer tags added in the customer’s info pane.
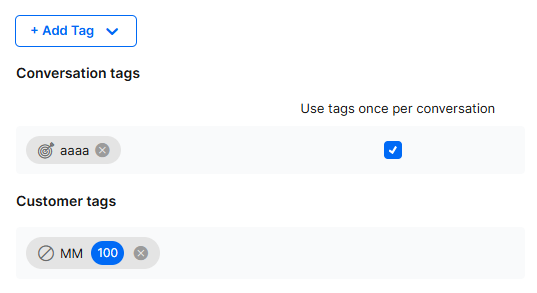
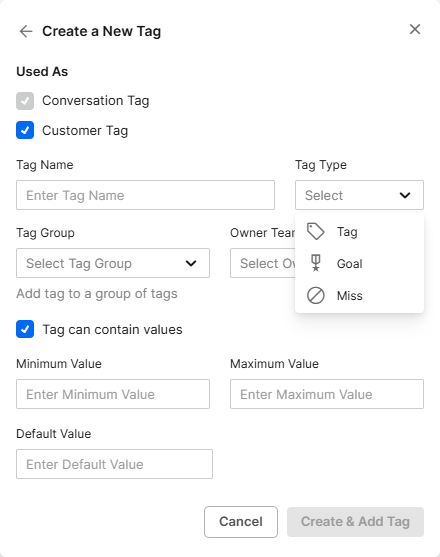
If you don’t see the tag that fits your needs, you can easily create a new one by clicking +Create new tag at the bottom of the dialog box.
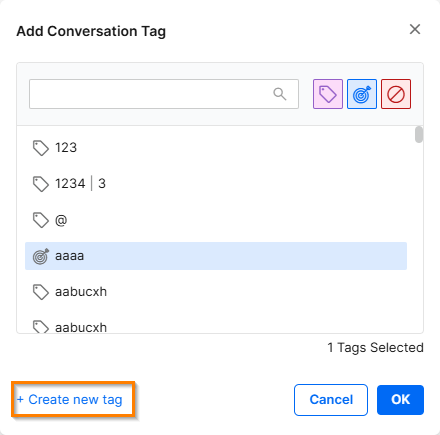
Select the tag usage (conversation only, or conversation and customer), name the tag, select its type (Tag/Goal/Miss), and whether or not to add it to a certain group or team (optional).
You can add a Value to the tag by selecting the minimum and maximum values, and the default value if the user does not enter one.
Click Create and Add Tag when done.
Set Variables
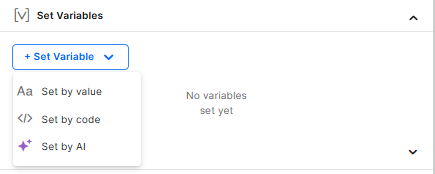
Variables enable you to store information and influence later stages of the flow.
Set by value
You can create a field whose value controls the direction of the flow.
Example: You can create a variable that marks a conversation as VIP priority, and later use it to decide whether to fast-track the customer to a premium support queue.
In an early step of the flow, you can manually set vip_priority = true when the system identifies the customer as VIP.
Later in the flow, a condition checks this value — if vip_priority is true, the customer is transferred to the VIP Support team; otherwise, they remain with standard support.
Set by code
Enter JSON into the step to accomplish the example mentioned above:
{
  "flow": {
    "id": "vip-priority-demo",
    "name": "VIP Priority Example",
    "steps": [
      {
        "id": "set_vip",
        "type": "setVariable",
        "variables": [{"name": "vip_priority", "setBy": "value", "value": true}],
        "next": "check_vip"
      },
      {
        "id": "check_vip",
        "type": "condition",
        "conditions": [
          {"variable": "vip_priority", "operator": "equals", "value": true, "next": "vip_team"}
        ],
        "defaultNext": "customer_service"
      },
      {
        "id": "vip_team",
        "type": "transfer",
        "target": "VIP_team"
      },
      {
        "id": "customer_service",
        "type": "transfer",
        "target": "customer_service"
      }
    ]
  }
}
Set by AI
Create custom variables as a data context or by instructing it to interpret customer input and convert it into structured data — all through simple prompts, rather than code.
Example: AI identifies the customer's location to offer the closest available clinics
- Field name: identifyCity
- Field Type: Text
- Prompt: “Identify the closest recognized city or district from the customer’s input and include it when responding to the customer.”
Example: (part of the prompt)
Customer: “I need a dentist near SoHo.”
AI Agent: “I found several clinics near SoHo, Manhattan. Would you like me to list them?”
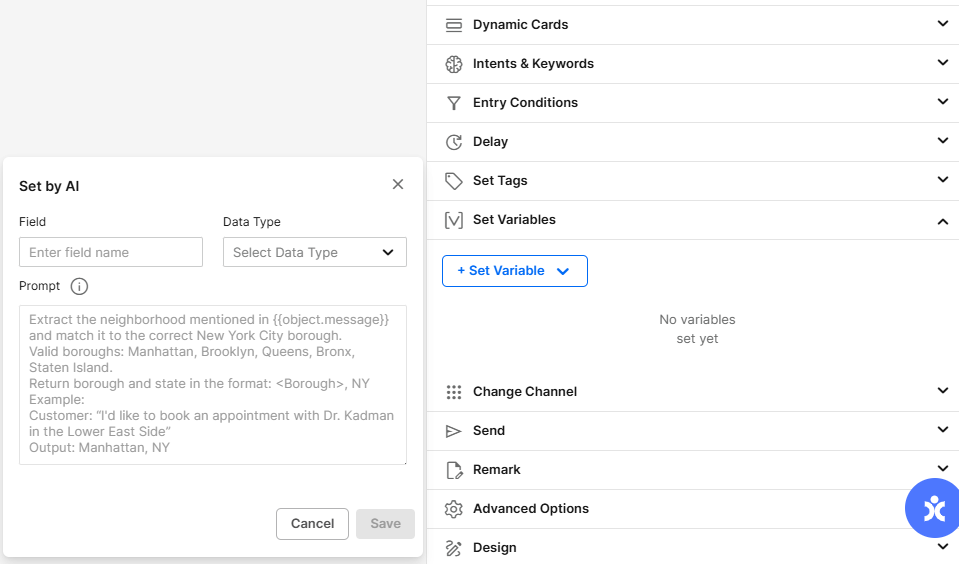
Note: The prompt must include an example of what the customer might say and how the answer should be structured.
Best practice: Use double curly brackets {{ }} to reference data context and improve prompt functionality. Adding {{user.message}} will allow the AI agent to use the message entered by the customer.
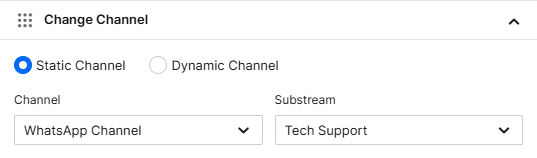
Change Channel
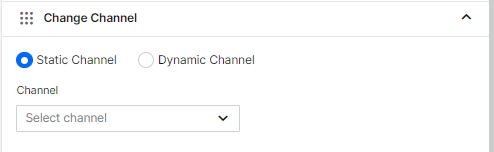
Changing channels enables the flow builder to transfer the conversation to a specific channel with specialized agents.
It is important to add that for large enterprises, changing channels within the flow can help collect data about customers based on geography or service requirements.
For example, the national general WhatsApp number can be changed in the flow to the regional number, and as the customer feeds information, the channel can be changed to the closest city with the available services. This can also help track the usage of the automated system, what services were requested, where, etc.
Choose between Static and Dynamic changes.
Dynamic channel forwarding will decide which channel to forward the conversation to during run time. The change is based on the values set in the fields “forwardStreamId” and “forwardSubStreamId”. You can set these fields using the Set variables property in any step of the flow. If these fields are not set, the conversation status will be set to “Open”.
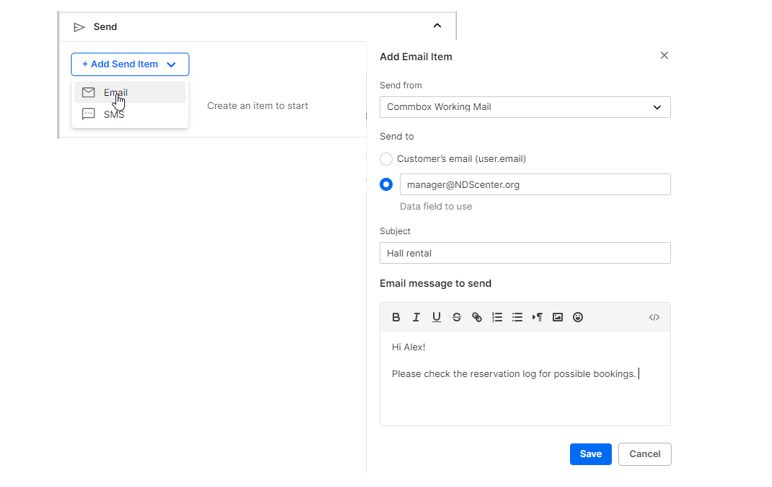
Send
When the flow reaches a step with an added Send, a premade email or a Text/SMS message is sent to a designated person. Note that email and/or Text/SMS messages have to be set up in the CommBox system.
- At the Send menu, click the +Add Send Item and select the form of communication.
- Enter all relevant fields, including the email address and message, and click Save.
Remark
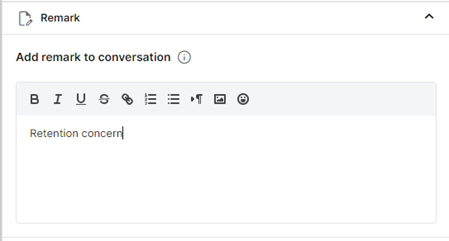
When the Flow reaches a step with an added Remark, the message entered here will be added to the conversation (Visible only to the agent).
Advance Options
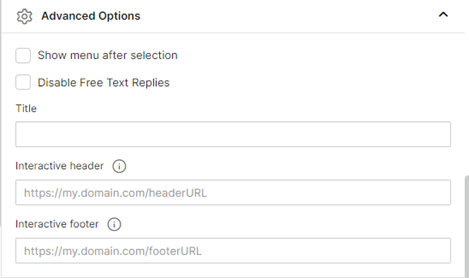
The advanced options are channel-specific.
Chat channels only:
- Disable Free Text Replies – Customer cannot type any free text.
WhatsApp channels only:
WhatsApp presents options for selections in the following manner:
- 1-3 choices as buttons
- 4-10 choices as a pull-down menu
- More than 10 options as a numbered list
When presenting a pull-down menu (4-10 steps from one leading step), users can add the following:
- A Title – WhatsApp titles for the buttons/options selection are limited to 20 characters (including space). Write the shortened title here in the event the title of the step is longer (or shorten the one at the top for uniformity in all channels).
- Interactive header and footer – Enter a simple text or an approved URL for an interactive message as part of the bot (header or footer)
Design
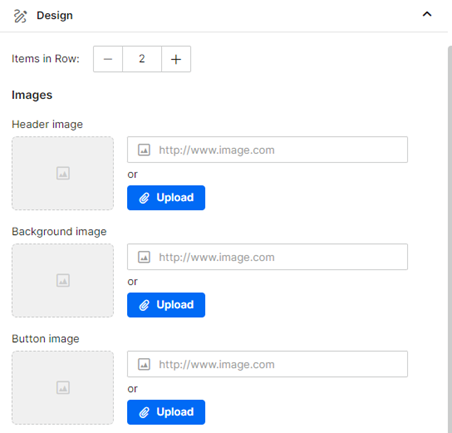
The Design capability is channel-type specific.
The Items in Row capability is only available in the CommBox Interactive Navigator App. It sets the number of options to choose from that will be displayed in one row.
The uploading of images as part of the flow is only available on Chat channels.
Accessibility
Working closely with the Business hours module, you can check every step to include a pre-set message regarding the availability of the agents.
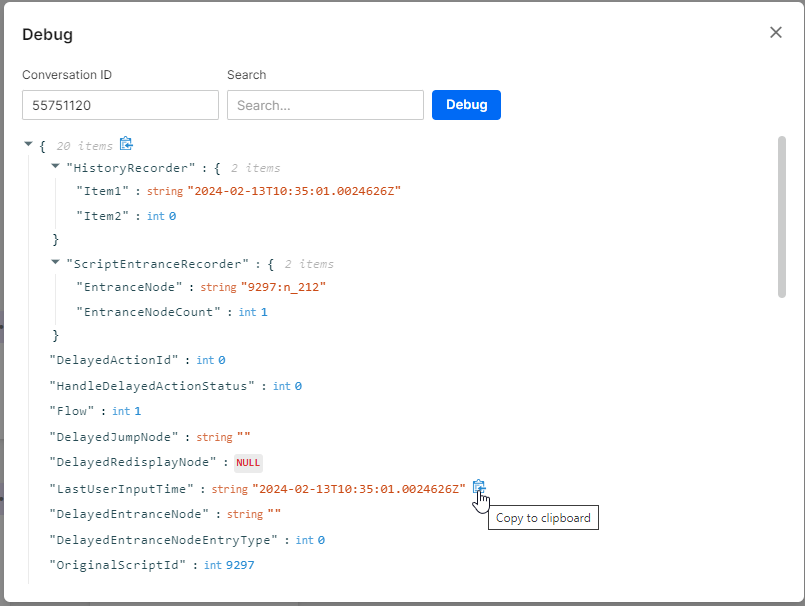
Debugger

The debugger enables admins to see the historical context of any conversation by entering the conversation ID.
Note that Context data is kept for 48 hours.
-
Locate the conversation ID by clicking the 3-dot menu at the conversation summary.
-
Click the copy icon at the bottom of the dialog box.
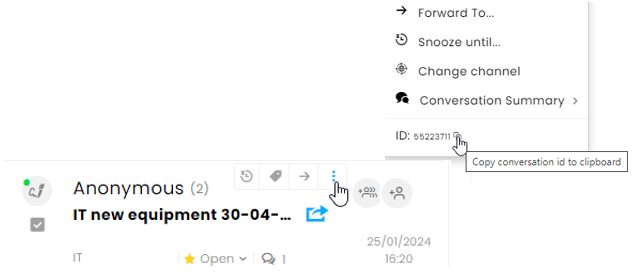
-
Open the Debugger by clicking Debug at the top of any Flow.
-
Paste the conversation ID and click Debug.
What’s Next?
Keep the momentum going!
You can dive deeper into the Flow Builder Step’s articles (see sidebar menu), or jump right in with the Creating a Basic Flow step-by-step tutorial. Want to learn more about CommSite?
Pick whichever path sparks your curiosity and start creating with CommBox!