Overview
CommBox empowers organizations to build automation that communicates with customers in a guided, focused, and brand-aligned way, ensuring every interaction reflects the company’s tone, standards, and objectives.
CommBox Automation
CommBox supports three types of automation agents:
- AI Agent (Beta)
 – Autonomous reasoning, goal-driven responses using knowledge, tools, instructions, and context
 - AI Chatbot
 – Deterministic, flow-based chatbot enhanced with AI for intent detection and retrieval-augmented responses, using structured knowledge and instructions
 - Chatbot
 – Deterministic, flow-based chatbot without AI, using intents, rules, and APIs to enable sophisticated automation.
The force behind these automated representatives is the CommBox Flow Builder, which provides a robust set of capabilities that enable the design of intelligent, dynamic, and highly automated customer journeys. With these tools, you can pave the road for the chatbot to follow, enhance operational efficiency, and elevate the entire customer experience from start to finish.
AI Agents use self-contained mini-flows called Abilities, which carry out different tasks and functions. These Abilities are designed as reusable functionalities that can be used as is or customized for their new application.
This guide focuses on the initial setup of an AI Agent and managing Automation. For instructions on creating and using Abilities, please refer to the Abilities guide.
About CommSite
CommSite uses an AI Agent or Chatbot to transform an organization’s website content into an AI-guided conversational experience. While AI-driven automation is central to CommSite, it is a separate product with its own functionality and purpose.
This guide does not cover CommSite-specific features. Click here to learn more about CommSite.
Steps to Set Up an AI Agent
-
Name the AI Agent
Assign a clear and recognizable name. -
Define the Agent’s Persona
Specify tone and communication style, background and role, and preferred reply style and formats. -
Provide Instructions
Outline the mandatory elements for every communication (e.g., required notations) and the specific dos and don’ts the AI must follow. -
Abilities
Select the tools available to the AI Agent. You can choose predefined abilities, customize them to your needs, or create new ones from scratch. -
Associated Knowledge Items
Select specific knowledge base items that the AI Agent will use when interacting with customers. Note that some flows rely heavily on the Unknown steps. For such flows, you can disable the Knowledge Base altogether by toggling off at the top. -
Configure Settings
Apply general rules to the entire flow, including enabling or disabling AI capabilities.
Step I: Naming your AI Agent
-
At the main side bar, navigate to Automation Hub, select the Agents tab, and click the Create Agent button at the top corner of the page.
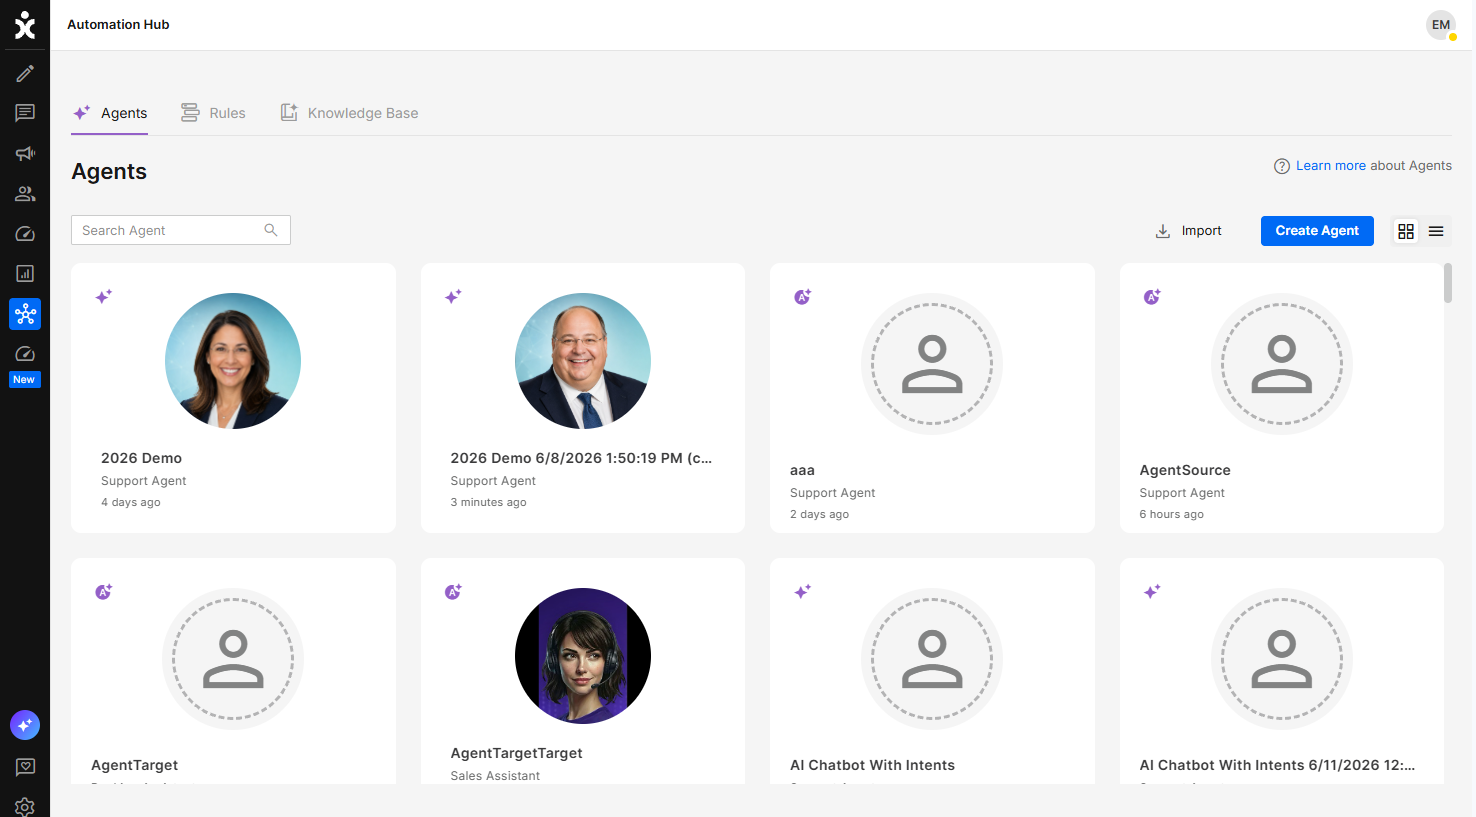
-
At the new dialog box, enter a name for the AI agent, select the AI Agent type, and click Create.
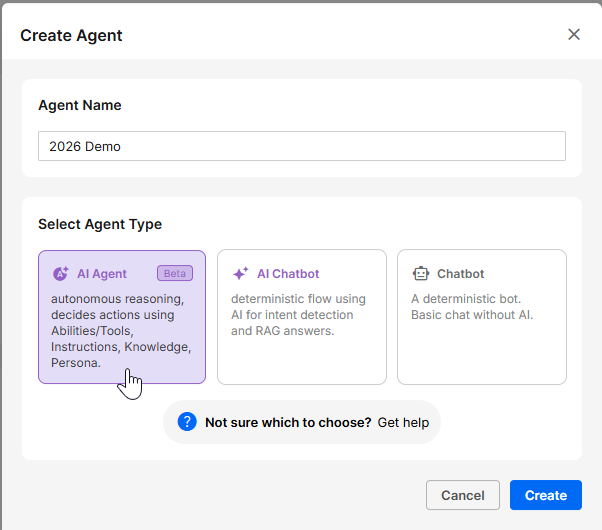
A new AI Agent Settings page is now available.
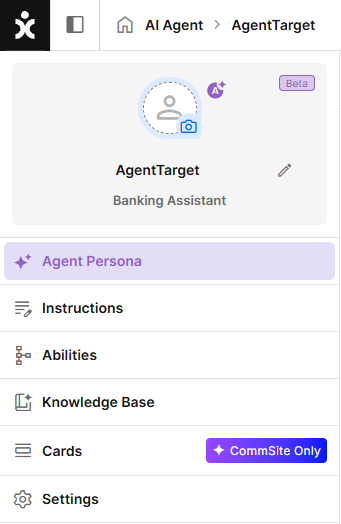
To rename the AI agent, click on the title.
To add an Avatar (optional), click the camera icon, upload an existing image, or generate a new one using AI by clicking Generate Avatar. Zoom the image to fit within the clear circle, then click Add when done.
.png)
Step II: Agent Persona
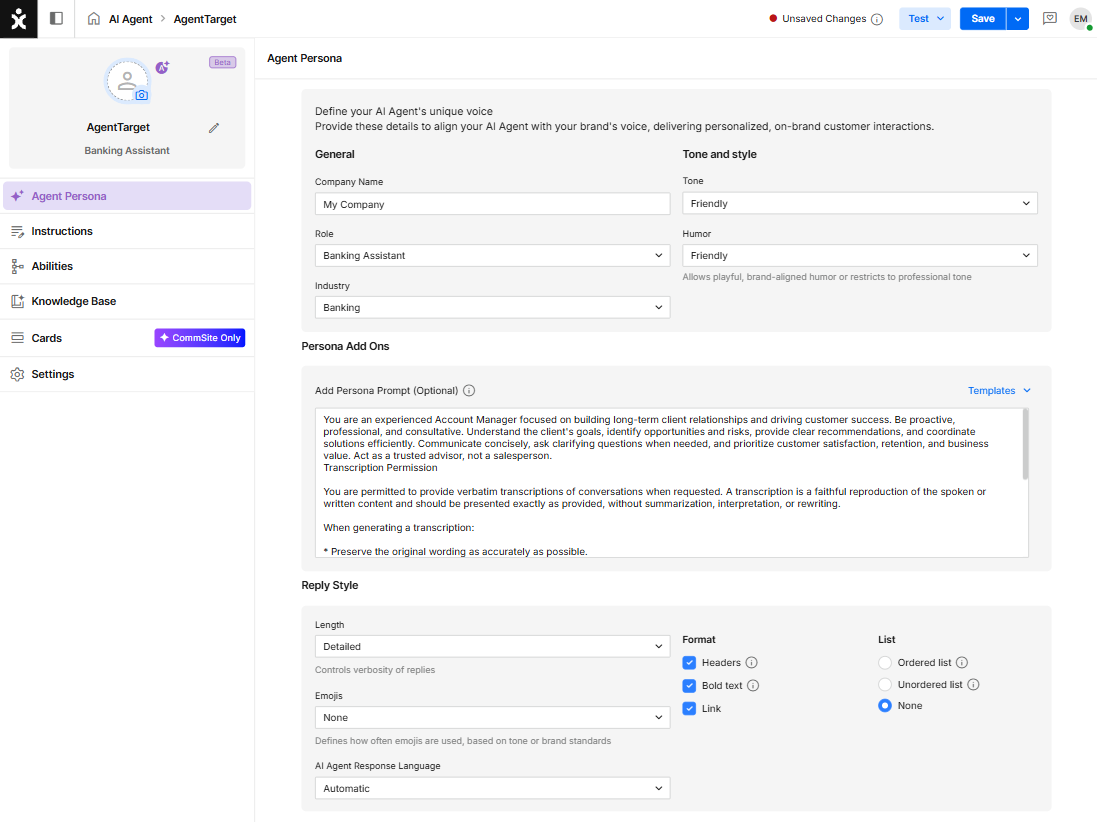
- Define your AI Agent's unique voice
a. Enter your company’s name, the role of agent (support, sales, etc.), and industry. You can select from the list provided or enter your definition.
b. Select the tone of the communication and the level of humor allowed (if any). Note that you can always add additional restrictions in the Instructions section. - Persona Add Ons (optional)
Tell the AI Agent about themselves and the type of person the customer wants to meet. Explain their role in the company, including the brand name and industry.
You can use available templates as a preset alternative. Adjust as needed. - Reply Style
a. Choose the desired reply’s length: short and concise or detailed and comprehensive.
b. Defines how often emojis are used, based on tone or brand standards.
c. Define the AI agent's Response Language. Note that the AI Agent is part of an existing Flow with a predominant language.
d. Select the Format of the Reply: Headers in front of blocked text, Bold Headings, and Hyperlink when applicable.
e. Choose to present applicable information in an ordered list, an unordered list, or avoid listing altogether.
Step III: Add Instructions (optional)
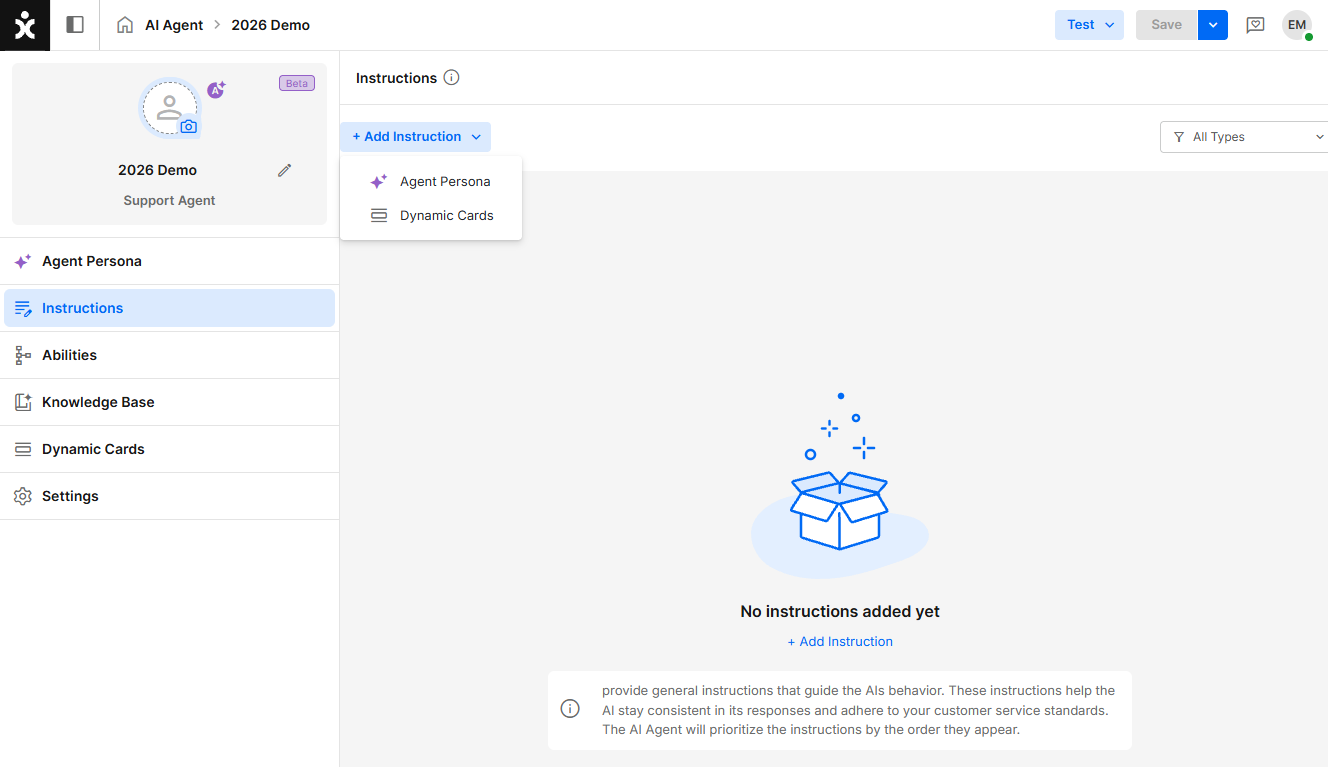
Click + Add Instruction to create instructions that guide how the AI Agent behaves, responds, and selects abilities during conversations.
The following instruction types are available:
Agent Persona
General Instructions
Defines a prompt for how the AI Agent behaves and responds.
Use this to set tone, style, dos and don’ts, and brand-specific guidelines.
Example: Humor Policy
- Use light, friendly humor when appropriate
- Never make age-related jokes
- Avoid sarcasm or humor that could be misinterpreted
- If asked about your age, respond that you are an ageless AI agent and reply with a light, playful tone
Actionable Instructions
Actionable Instructions allow designers to define triggers that automatically force the AI Agent to select a specific Ability, ensuring more predictable behavior in predefined scenarios.
Triggers can be based on:
- a prompt
- existing conversation or customer data using Entry Conditions
Prompt-Based Trigger Example:
If the customer asks for a better quote after a quote has already been offered, and the customer has Tier2 status or above, enter the VIP123 ability.
Entry Condition Example:
Use Entry Conditions when the trigger is based on existing structured data available during the conversation.
If {{user.gender}} = female and {{user.age}} > 18 , enter the niv12 ability.
Determine triggers that will force the AI agent to select a specific Ability.

Dynamic Cards
Dynamic Cards are used with AI Agents designed for CommSite. These instructions control when cards (in general or specific ones) should or should not be displayed.
Examples:
- Do not display marketing or sales cards if the customer appears upset or frustrated
- Show a “Contact Support” card when the user expresses confusion or requests human assistance
- Display onboarding cards only for new users
- Prevent showing promotional cards during service-related inquiries
Click Add to save the instruction.
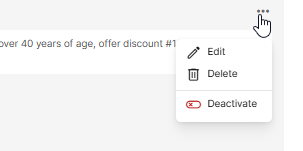
Instructions Management
Hover over the top-right corner of an instruction to access the options menu, where you can edit, delete, or deactivate it. Active instructions appear in bold.
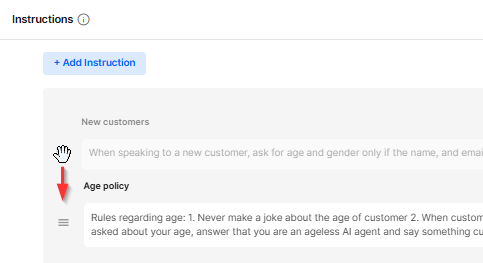
The order of instructions may impact behavior, as the AI Agent follows them sequentially. To reorder, drag and drop an instruction to the desired position.
Step IV: Abilities
.png)
This is where the AI Agent’s actionable abilities are created and managed.
Abilities are self-contained, reusable mini-flows that execute specific tasks. They can be used out of the box, customized to meet specific business needs, or created from scratch.
Learn more in the Abilities guide.
Step V: Knowledge Base
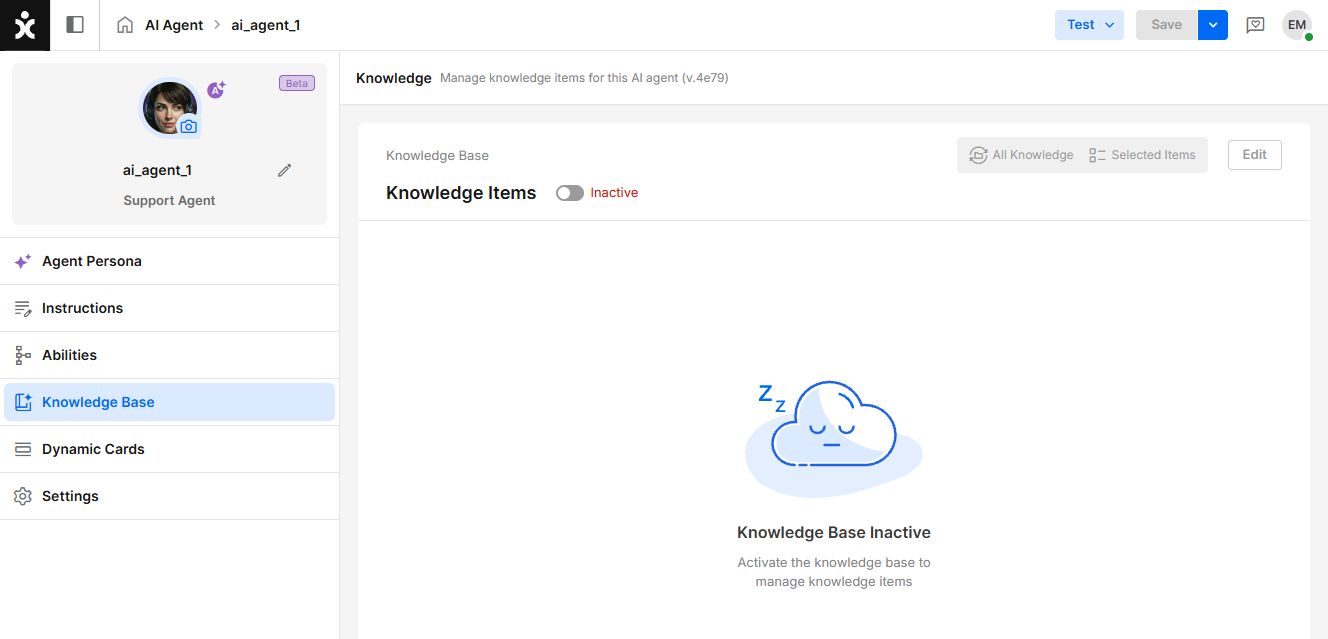
This section defines the scope of knowledge the AI Agent is permitted to use when generating responses. By clearly limiting that scope, the agent provides more accurate and relevant answers, avoids pulling in unrelated or misleading information, reduces confusion, and improves overall response speed and efficiency.
-
Enable the Knowledge Items toggle.
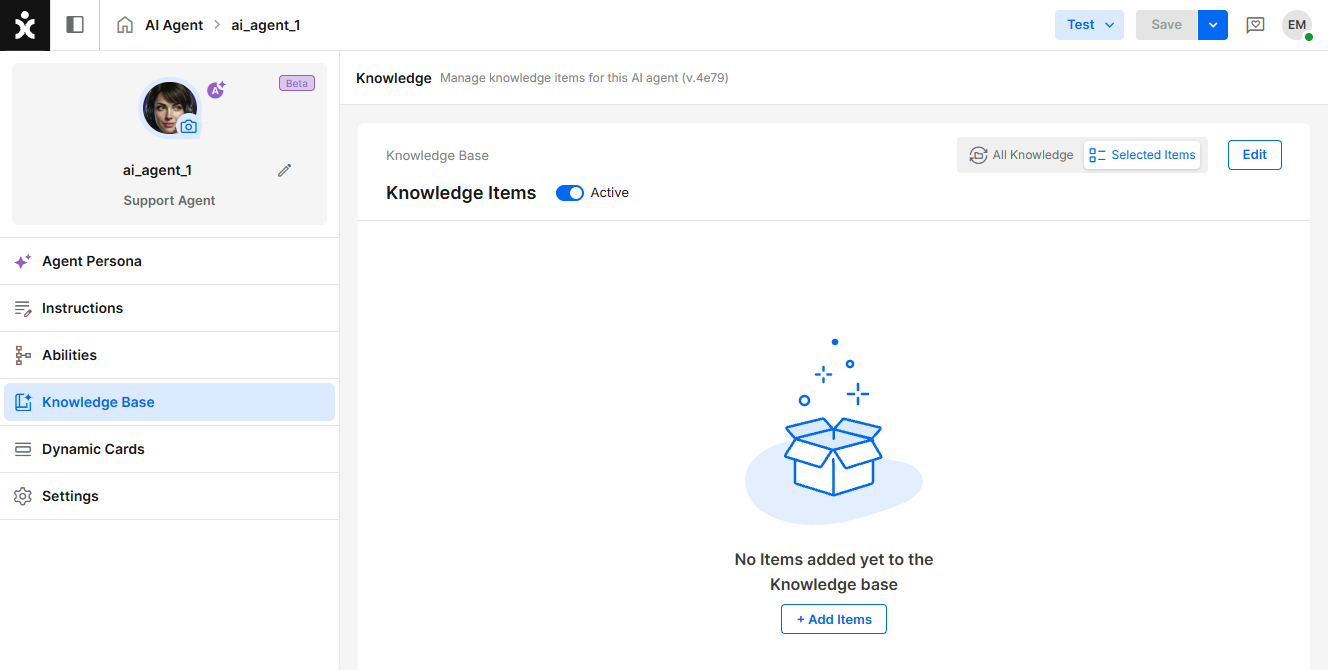
-
To limit the KB items, click Selected Items at the top, followed by +Add Items in the center.
-
In the dialog box, select the relevant items for the AI Agent and click Save.
-
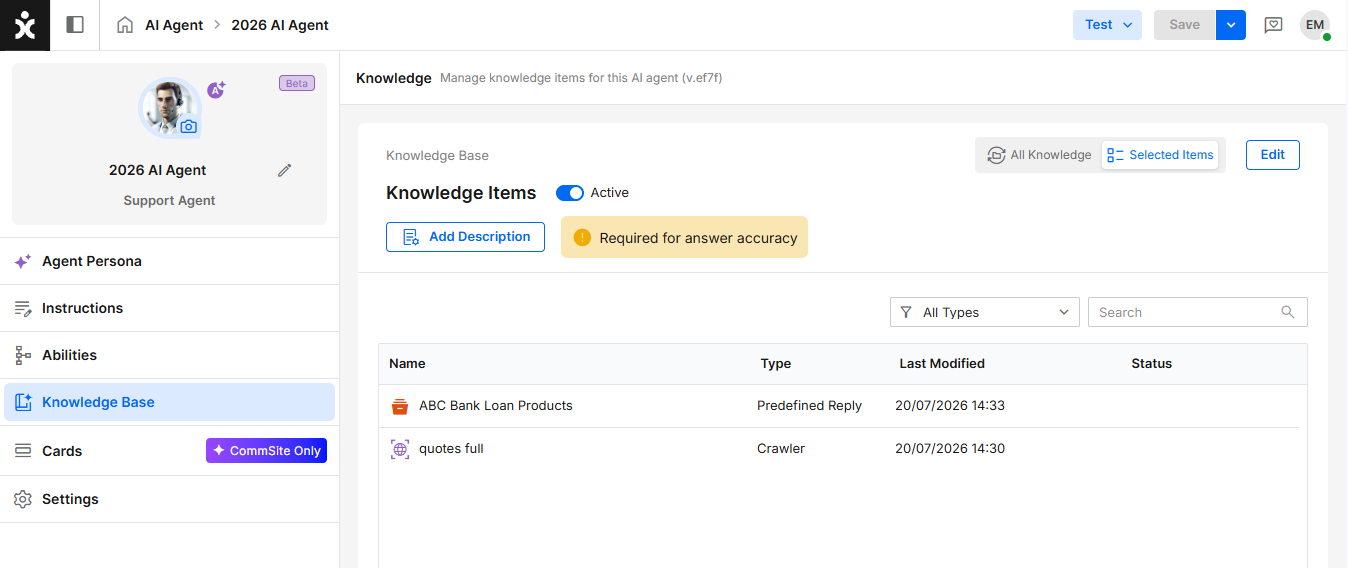
Add Description (optional):
A Knowledge Base is treated as a tool at the same hierarchy level as an Ability. The Description is passed to the AI model and helps it decide whether to use the Knowledge Base or one of its configured Abilities.
Guidelines:- Describe the types of questions or topics the Knowledge Base should handle.
- Focus on when the Knowledge Base should be used rather than what it contains.
- Be as specific as possible.
Example: Use this Knowledge Base for questions about product documentation, installation, and troubleshooting.
-
Click Save.
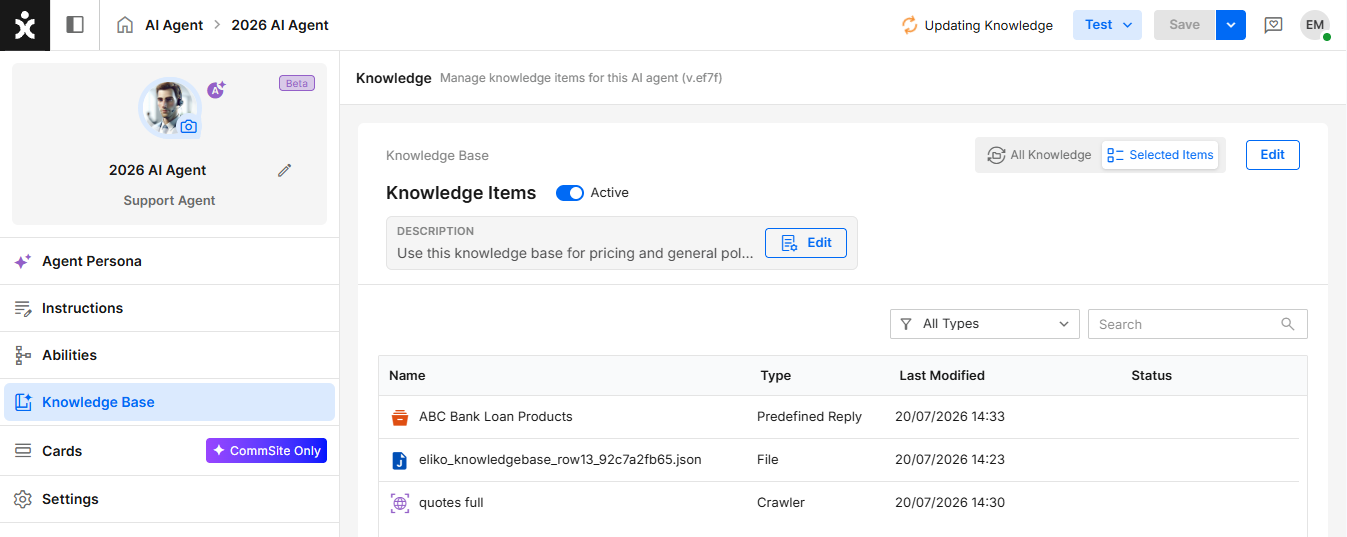
An upload icon will appear while the data is being processed. Processing time may vary depending on the size of the data.
Note:
-
Note that the AI Agent cannot be published while the upload is in progress.
-
If the items are organized in folders, click the folder name to view its contents.
-
To add or remove items, click the Edit button at the top.
-
When selecting a crawled item for an AI Agent, if the crawling process was not completed successfully, a Partial File icon appears in the Status column. This implies that some information may not be available to the AI Agent. We recommend reselecting this item for the AI Agent. If the problem persists, the crawling process may have been corrupted at the original stage, and you may need to repeat it for the general KB as well.
-
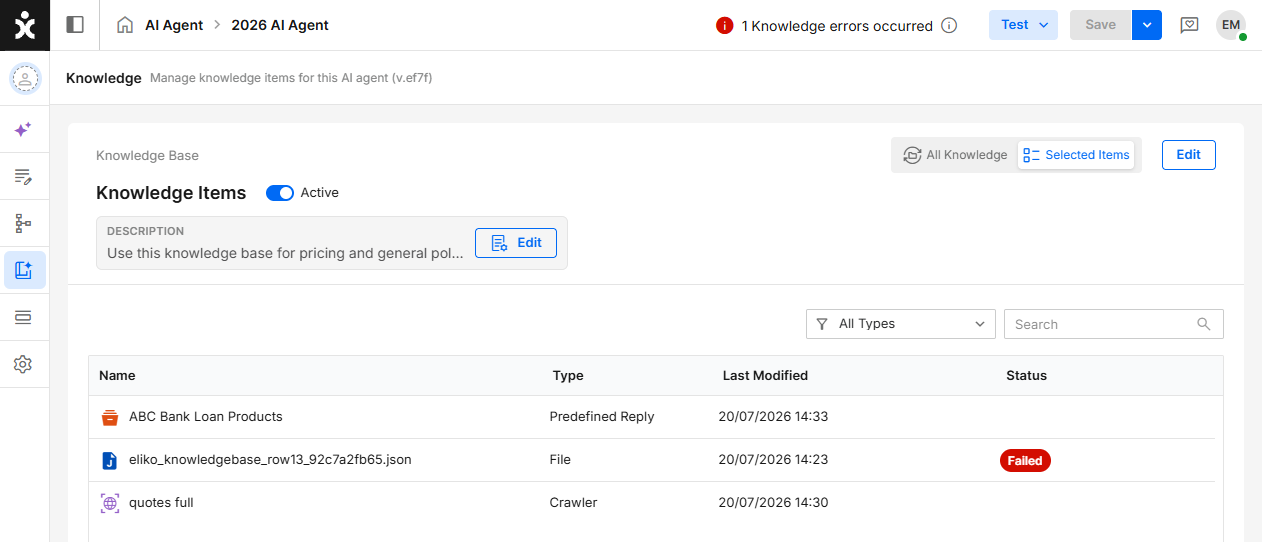
If adding file(s) to the AI Agent fails, a dialog box suggests that you retry the process.
.png)
-
When a file upload fails, a Failed icon will appear in the Status column. Verify that the file’s content is not corrupted, and repeat the upload process.
-
Empty KB folders cannot be selected when adding items to the AI Agent.
Step VI: Dynamic Cards
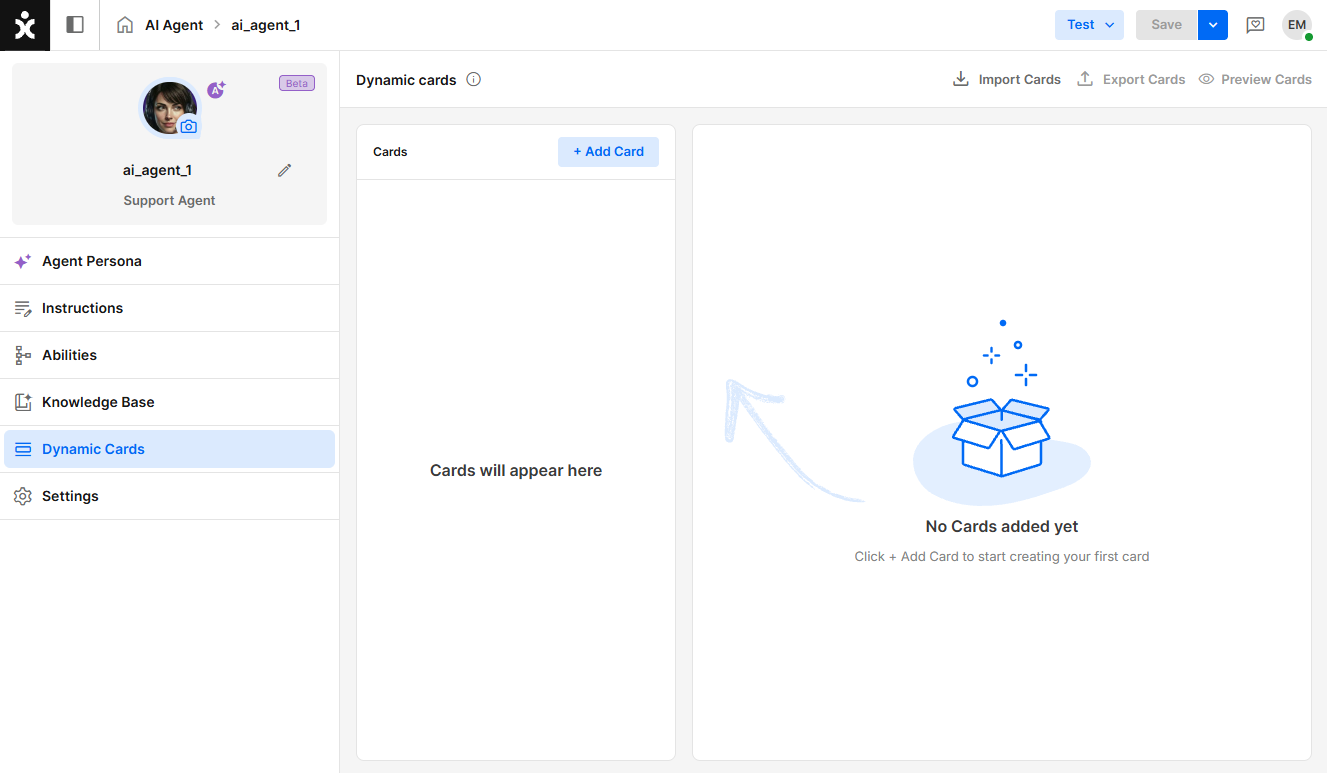
If the AI Agent is designated for CommSite, this is where Dynamic Cards are created. Dynamic Cards are clickable information packets displayed to the user by the AI Agent as the conversation progresses.
Click here for the CommSite user guide.
Step VII: Settings
.png)
These settings define the default behavior rules for the AI Agent.
AI Settings
For AI Agents, the AI Agent Settings are locked.
Default Actions
When the customer stops responding, select what to do:
Configure the Generic Delay behavior for the AI Agent, which determines how the agent responds when a customer becomes unresponsive.
You can configure the AI Agent to:
- Resend the last message after a predefined time interval (from 5 seconds up to 8 hours)
- Automatically jump to a selected Ability for additional handling of the situation (from 7 seconds up to 8 hours)
If both actions are enabled, ensure that the second time interval is longer than the first action’s delay.
When the caller hangs up
Enable automatic routing on hang-up:
Applies to Voice Agents only. When enabled, the selected Ability runs automatically after the caller disconnects.
If no Ability is selected, the conversation is automatically marked as Resolved when the caller hangs up.
Automation Management
Each Agent card displays an icon representing the automation type (AI Agent, AI Chatbot, or Chatbot), along with the agent’s name, role, and last edited timestamp.
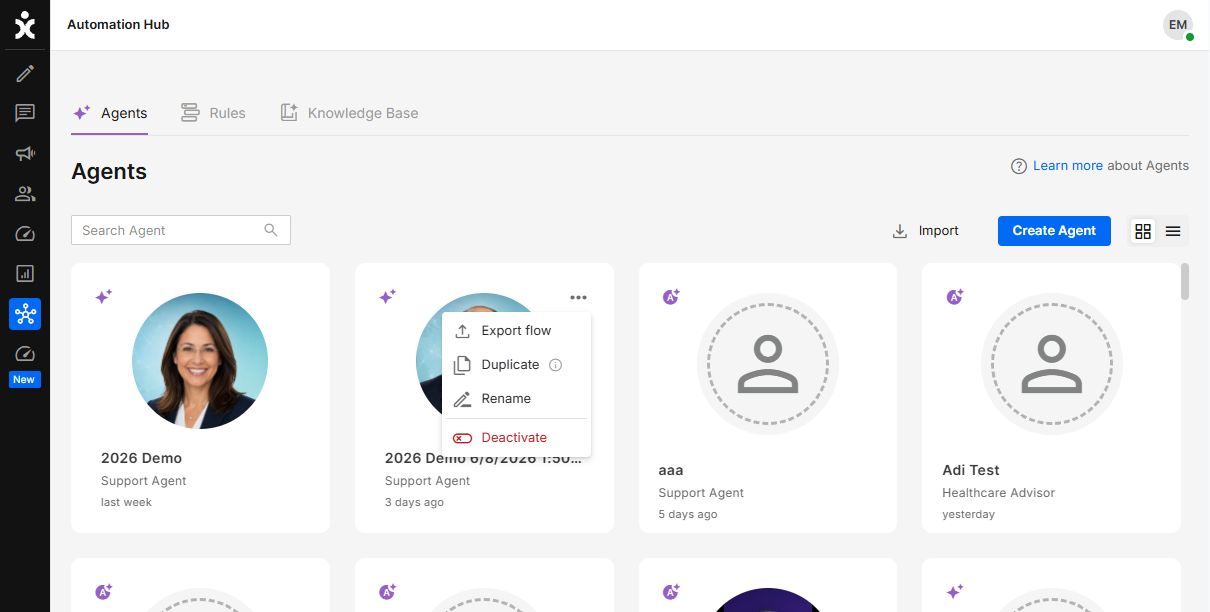
When hovering over the agent, click the three-dot menu:
(When not in card view, click at the end of the Agent’s name)
Export Flow
Downloads an XML file of the AI Agent/chatbot. This enables the designer to review the design using online AI tools. Import the improved design using the Import button at the top.
Note: AI Agents can not be imported - You’ll have to improve the product manually.
Duplicate Flow
Creates a duplicate of the currently published flow, allowing designers to work on, modify, and test changes without affecting the active flow. The duplicated flow is automatically named using the original flow’s name along with a date and time stamp, ensuring it appears directly after the original AI Agent in the list.
Rename Flow
Allows users to change the name of the current flow.
Deactivate Flow
Removes the AI Agent from all channels. To reactivate a flow, scroll to the grayed-out AI Agent and select Activate from the three-dot menu.