Overview
The Flow Builder is where your entire conversation journey is created. It offers a visual canvas that lets you map and connect steps, add capabilities, manage logic, and control how customers move through the experience.
This guide explains how to work inside the Flow Builder — how to navigate the canvas, use the tools for creating and organizing steps, search within a flow, test your AI Agent, manage versions, and understand the structure behind every conversation.
The detailed what it can do, including advanced capabilities, step types, AI behaviors, and automation options, is covered separately in dedicated guides.
For users looking for a practical starting point, a separate step-by-step tutorial is available to help you build a simple AI Agent from scratch.
Use this guide to get comfortable with the workspace, the tools, and the building blocks that make up every Flow. Once you're familiar with the environment, you can explore the specialized guides to expand your bot’s logic and capabilities.
Getting There
To create a new Flow:
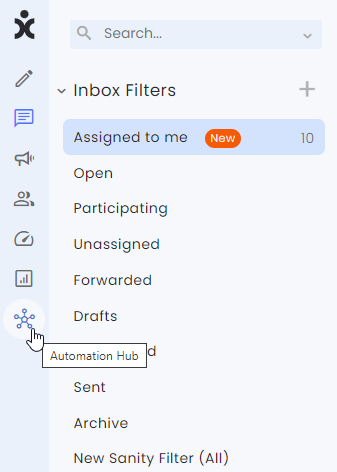
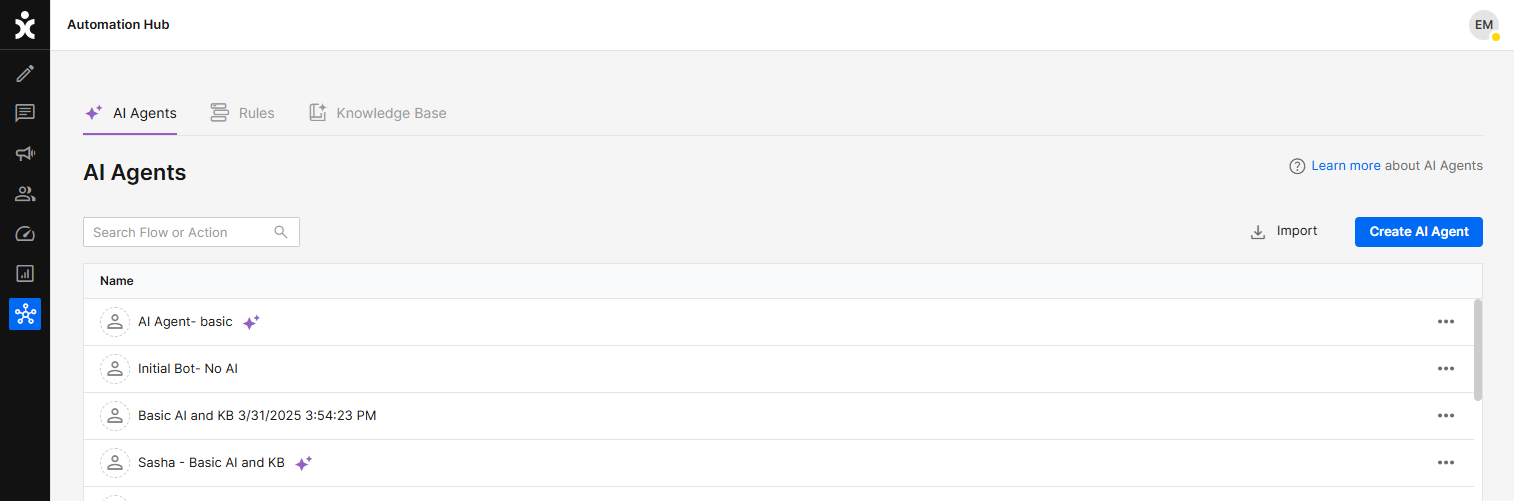
- At the main menu sidebar, click the Automation Hub icon to open the AI Agents tab.
- At the AI Agents tab, click the Create AI Agent button.
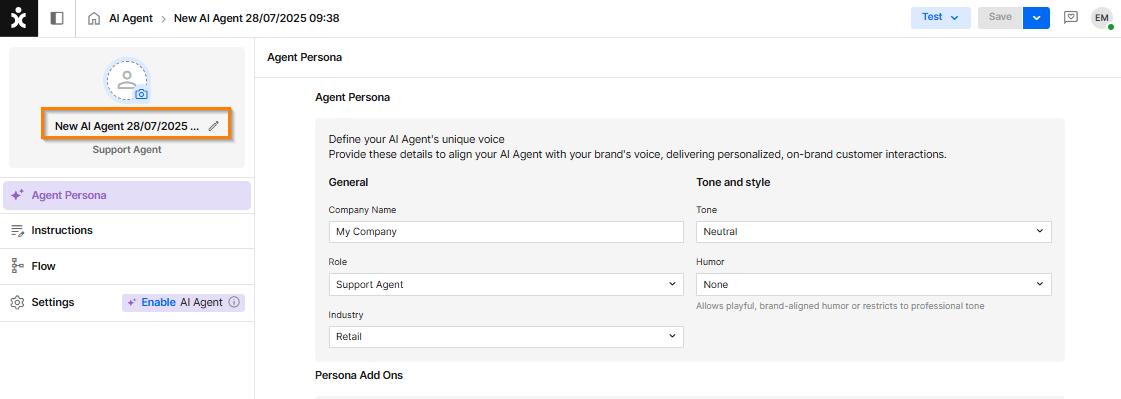
- Name your new AI agent.
You can edit the name of the new flow by clicking the name. - At the sidebar, click the Flow section.
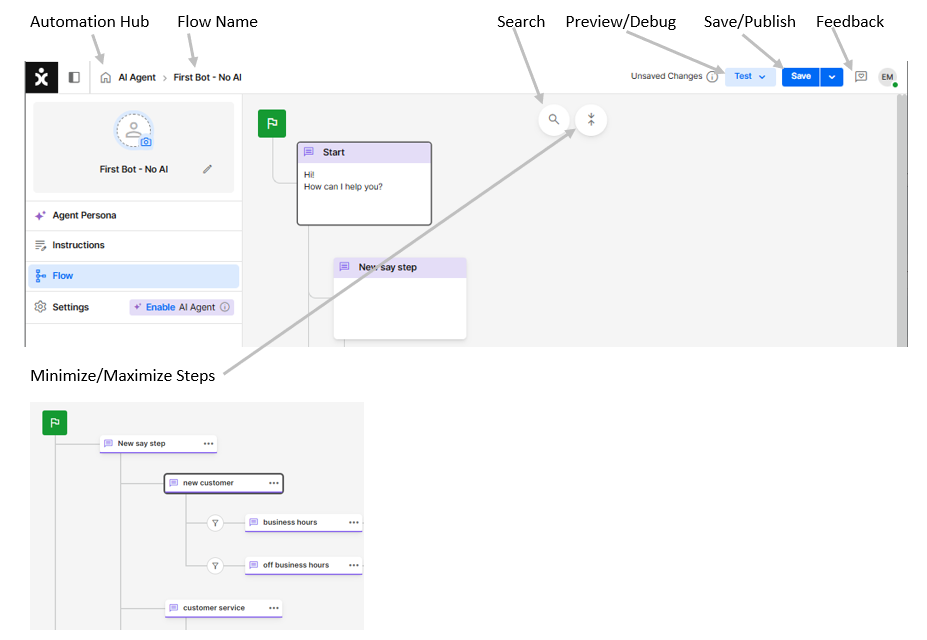
The Flow Builder Canvas
The conversation with a customer is built with different dialog Steps. Some Steps present the customer with choices (for example, buttons) or respond to free-text input. Other Steps work behind the scenes, enabling actions such as jumping to another Step or triggering an API, or use AI prompts to generate a response to the customer. Together, all these Steps form the Flow.
Building the Flow involves adding Steps to existing ones and modifying each additional Step using the Properties Panel at the side, which appears once you click on a specific step.
The steps
By default, Steps appear as choice buttons for the customers when the previous step has more than one “child”.
The content of the button is the title of the step, independently of its functionality. When selected, the step’s message will appear, and its action will be taken.
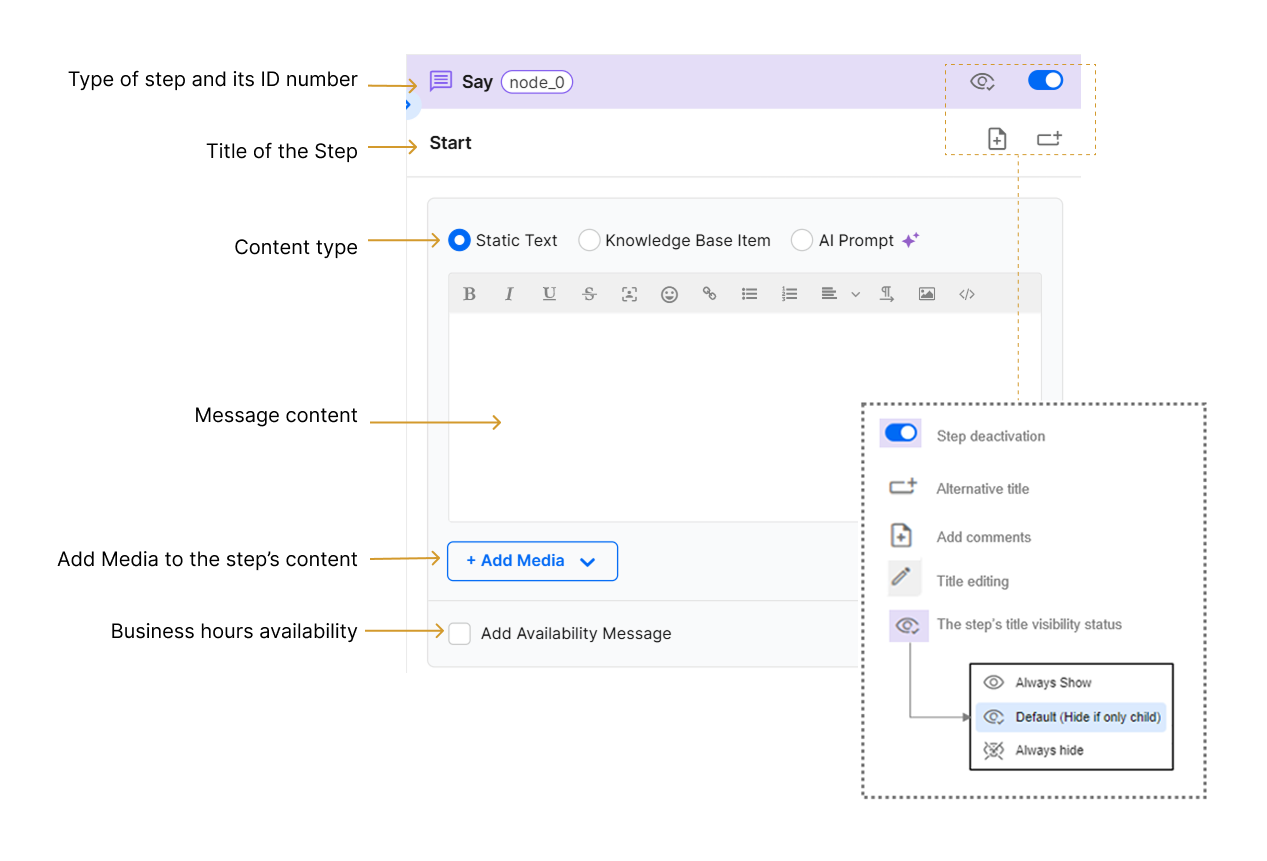
Step deactivation – Flow will ignore that step and any branch past it.
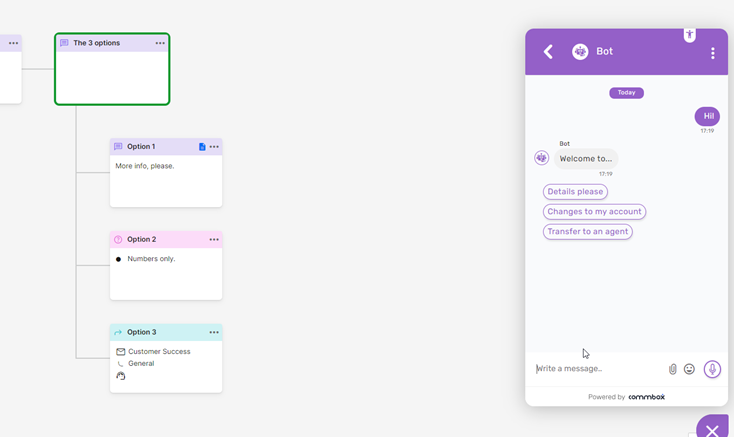
Alternative title – Flow will show those titles and not the step’s headings. See the example below where the customers do not see “Option 1” but rather “Details please,” etc.
Add comments – Add comments for yourself. Comments will not be shown to customers. Note the icon at step “Option 1”.
Title editing – Visible once you hover over the title. Edit it at any time.
Step Visibility – Enables the step’s title to appear as a sole button before the flow continues.
Types of Steps:
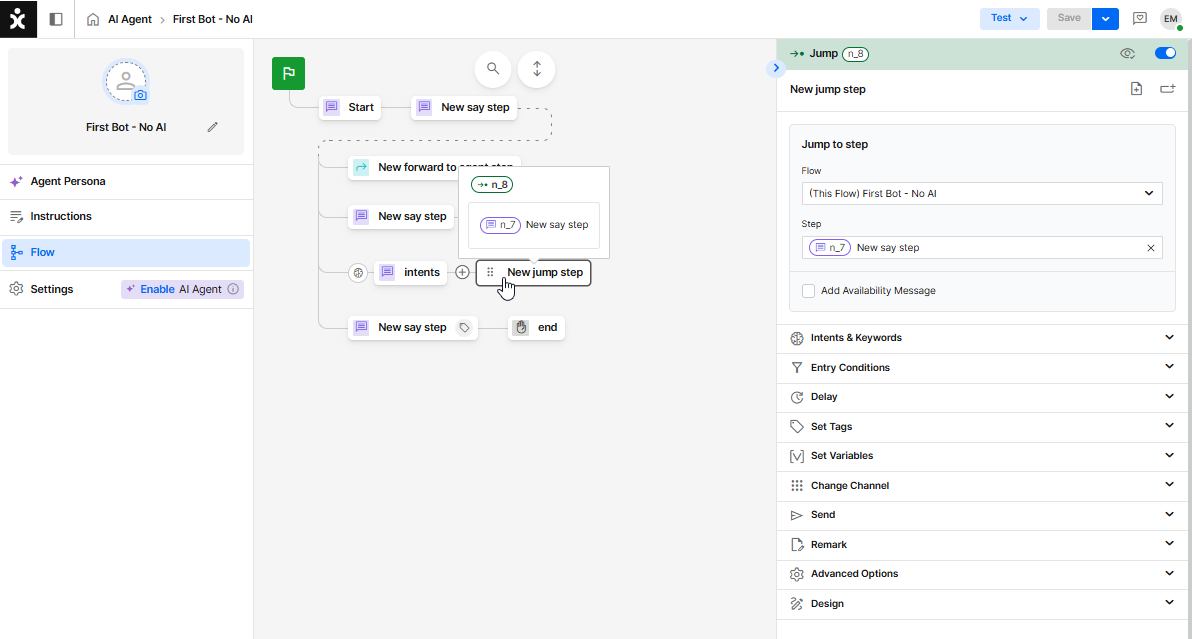
A new Step is created by hovering next to the desired step you want to build on, clicking the + sign, and selecting the type of Step from the pop-up menu.
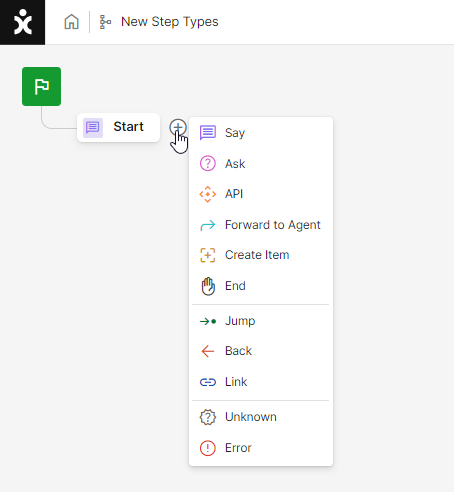
 Say – Used primarily to display information to the customer or to run behind-the-scenes processes, such as functions. Click here to learn more about this topic.
 Ask – Requests input from the customer. Click here to learn more about this topic.
 API – Makes an API call to an external service to retrieve or enter data. Click here to learn more about this topic.
 Forward to Agent – Transfers the conversation to an agent with an Open status and creates a new conversation (object). Click here to learn about implementing the best practice of this step.
 Create Item – The Bot creates a secondary conversation (Text/SMS or email only) for the customer.
 End – The flow ends, and the conversation’s status changes to Resolved or Irrelevant.
 Jump – This step advances the flow to another step in the current flow or to another flow.
 Back – Sends the flow a specified number of steps backward. This is not considered best practice; use the Jump step instead.
 Link – This step will present a link or hyperlink in the conversation. May not work with WhatsApp.
 Unknown – The flow will be diverted to this step when the bot receives unexpected information, such as a customer typing free text (which isn't an exact match of the button names) instead of selecting a button or entering unrelated information. If more than one Unknown step is used, the flow will be diverted to the closest one.
 Error– This step is triggered when API calls return an error or no response. It must be placed at a higher hierarchy than the associated API step. If multiple Error steps are used, the flow will be directed to the closest one.

Right Click Functionalities
Note: by hovering over any step and right clicking the mouse, you can see available actions regarding the step.
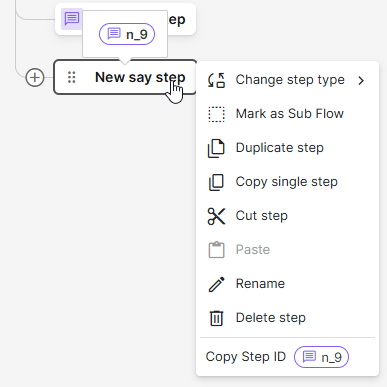
Change step type - select the desired option from the list presented
Mark as Sub Flow - Designate this step and all its children as a sub flow.
Duplicate step - Create a duplicate sibling (at the same hierarchical level as the original)
Copy single step - You can paste it anywhere the encircled plus sign appears
Cut step/tree - Cut the selected step and all its children. You can paste it/them anywhere the encircled plus sign appears
Rename - Rename the step
Delete - Delete the step
Alternative to Cut and Paste Option:
Left-click on the desired step and hold it down. Then, drag the step and all its children to the available new locations within the flow.
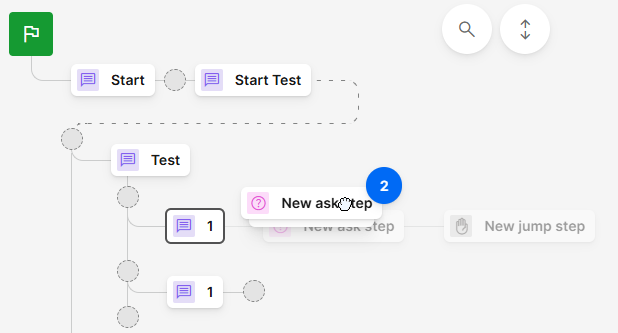
Note the number indicating how many steps are being dragged. Your selected destination will be highlighted as you let go of the dragged steps into their new location.
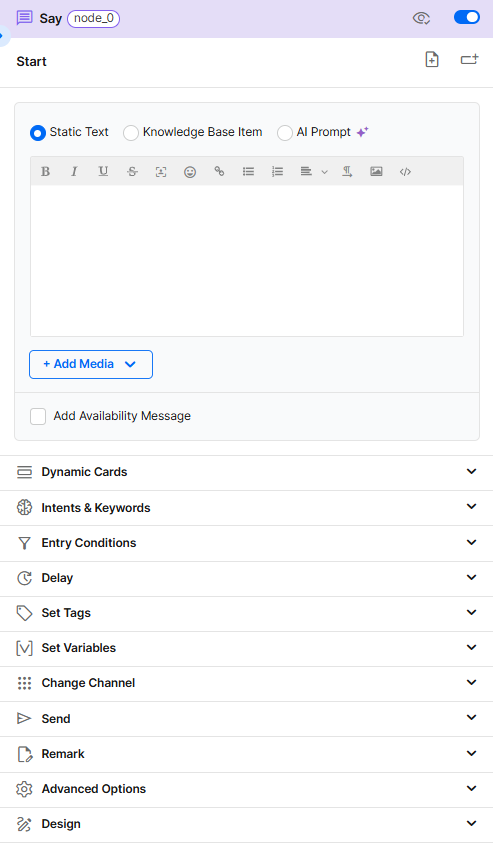
The Properties Panel
The top part of the Properties Panel includes the Step’s properties.
The lower part contains the steps’ settings and functionalities.
The Top Bar
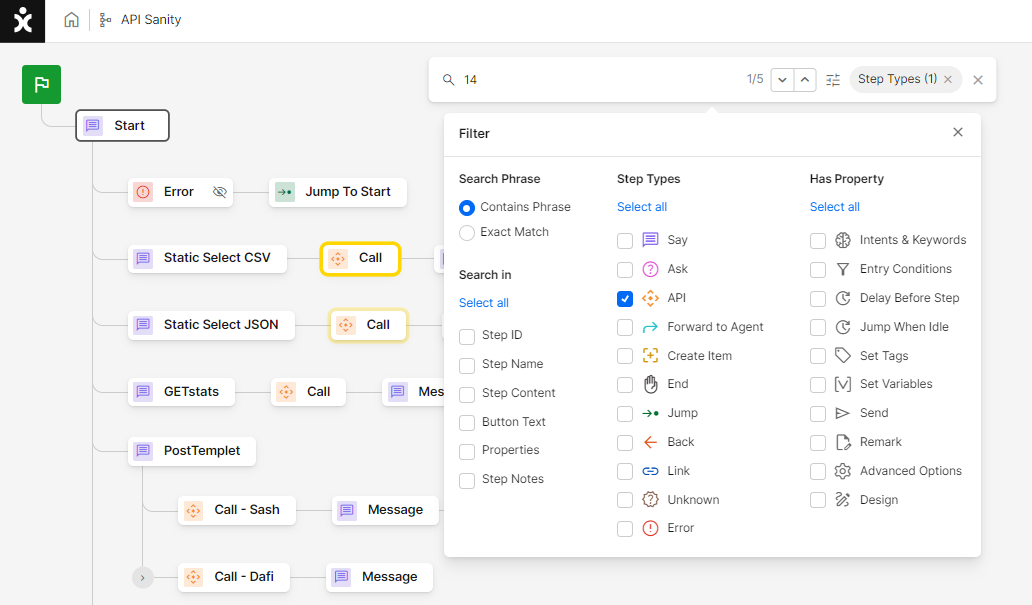
Search
The new Flow builder has an extensive search capability that enable users to filter results by the step’s type, the specific content area (step name, button text, etc.), by the flow’s property, or as combinations of the above. The relevant steps are then highlighted to show all results.
Test - Preview
Test the Flow actions by selecting a chat channel that can ran the AI Agent you are designing.
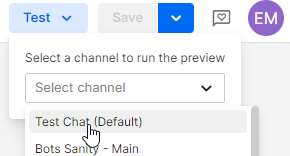
Note: By choosing the test channel (default), a new object in CommBox will not be opened. By choosing a real channel, a new object will be created, which is useful for debugging.
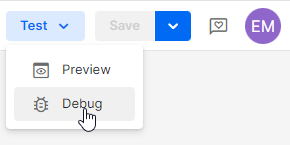
Test – Debug
The debugger enables admins to see the historical context of any conversation by entering the conversation ID. Learn more about this capability in the Advanced Capabilities guide.
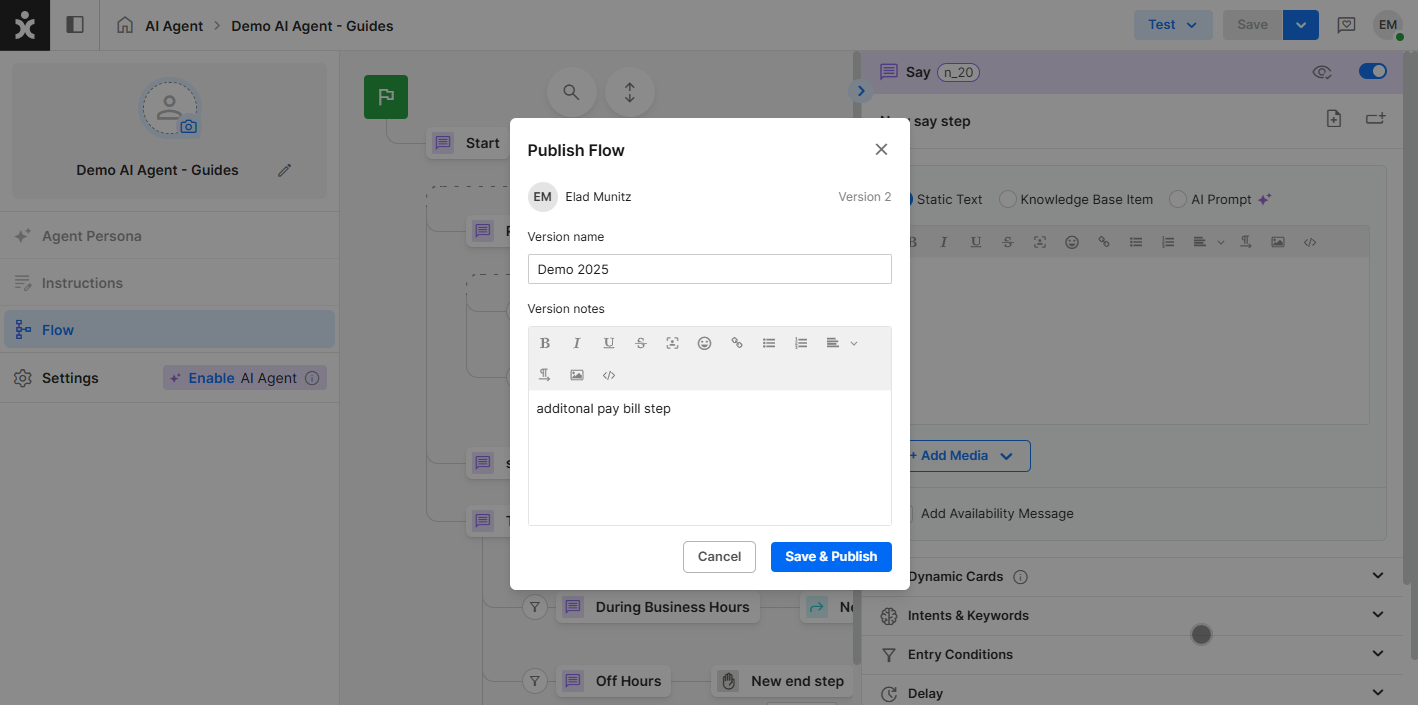
Published Versions
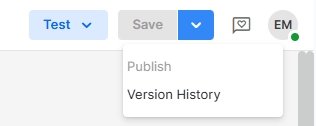
To save a specific version of a flow, click the down arrow next to the Save button, provide a version name, and add a descriptive comment to help track changes over time, and click Save & Publish.
You can view or publish any previously saved version by selecting Version History from the Save button dropdown and clicking Restore on the desired version.
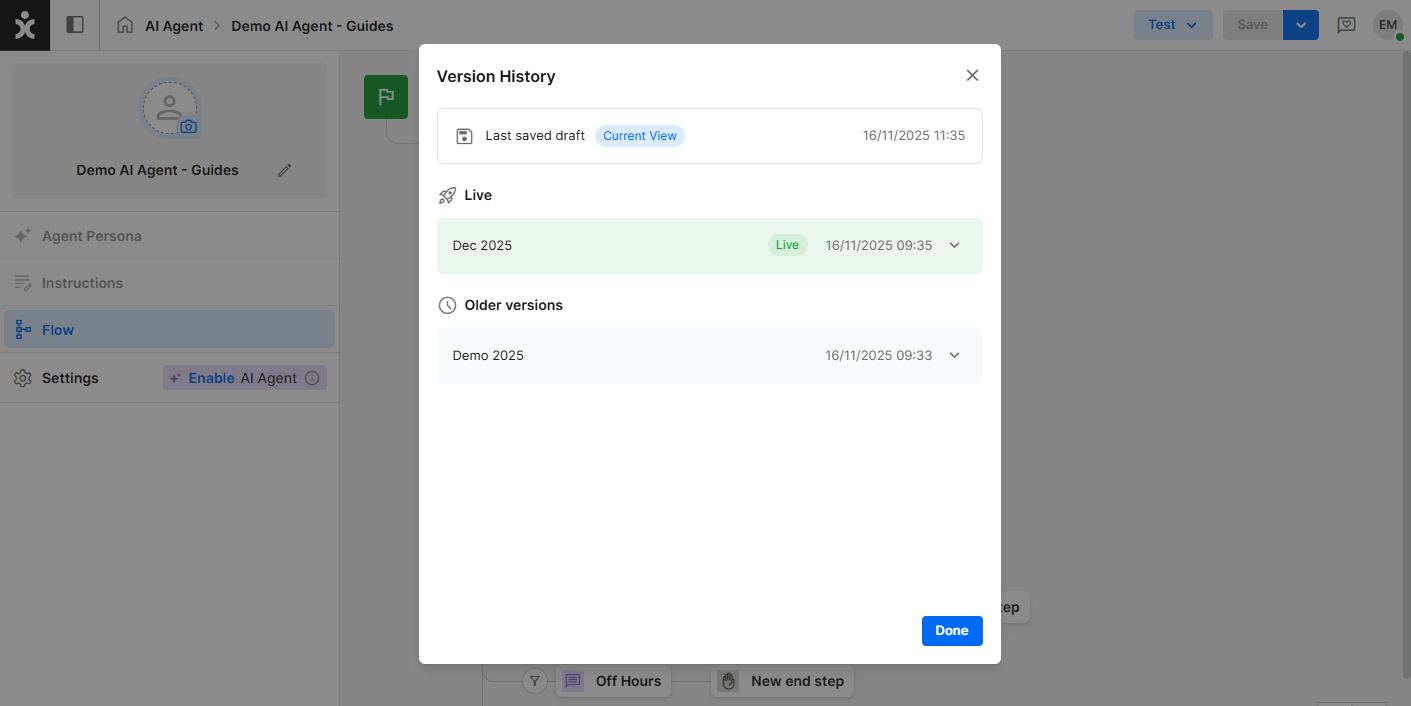
Note: Saving too many versions may slow system performance. To prevent this, configure automatic deletion of older versions in the Maintenance module.
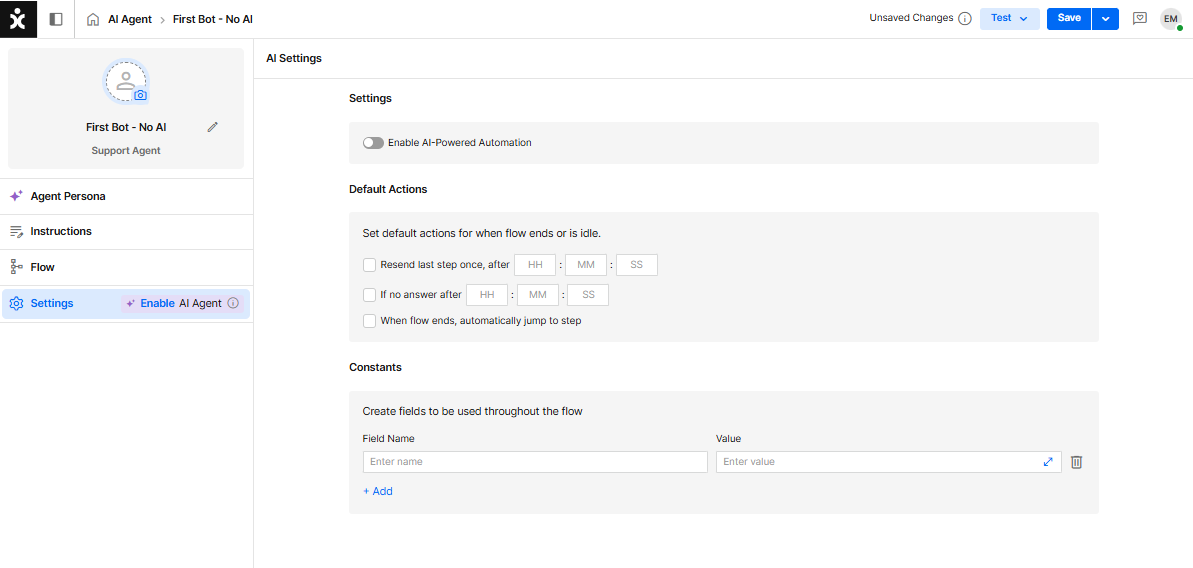
The Settings Section
The Settings area defines default actions for key scenarios such as idle customers, no response, navigation, data collection, and AI behavior. When building complex bots, configuring Flow Settings streamlines development and helps reduce both setup time and effort.
Click here to learn more about this topic.
What’s Next?
Keep the momentum going! You can dive into Advanced Capabilities to explore more automation features, check out the AI Agent Settings guide to see how AI can power your flows, or jump right in with the Creating a Basic Flow step-by-step tutorial. Pick whichever path sparks your curiosity and start creating!