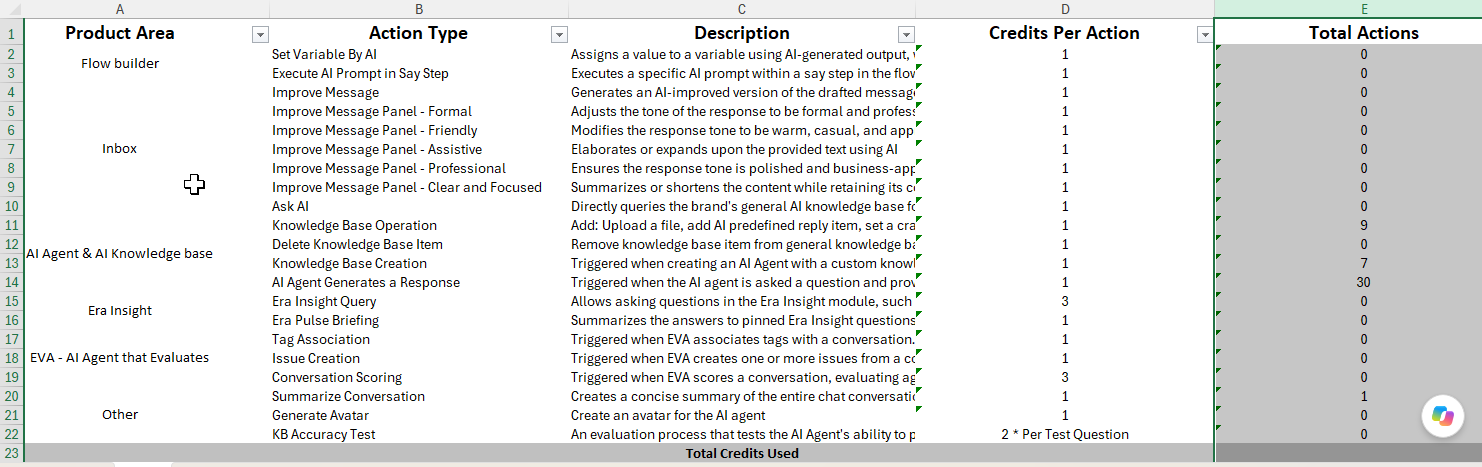
Overview
CommBox integrates Artificial Intelligence (AI) throughout its customer communication platform, enabling organizations to automate customer interactions, assist human agents, evaluate service quality, and analyze business performance.
The Era AI settings allow administrators to manage and monitor AI credit consumption across CommBox's AI-powered features.
From this page, administrators can:
- Enable or disable Era AI.
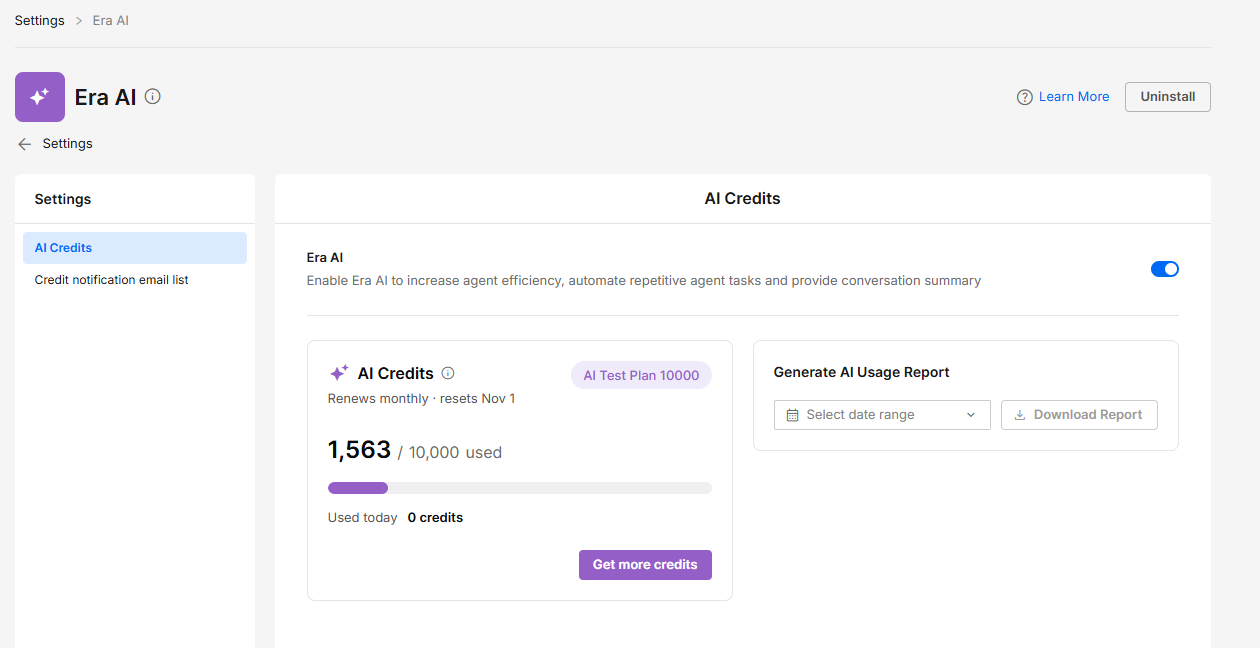
- View the current AI credit balance and credit renewal date.
- Request additional AI credits.
- Download detailed AI consumption reports.
- Configure email notifications for AI credit balance alerts.
Getting Additional Credits
Navigate to Settings > Era AI > AI Credits tab.
The page displays the current AI credit balance and the next credit renewal date.
To request additional credits, click Get more credits. This notifies the CommBox Customer Success team, who will assist with purchasing additional credits.
Email Notifications
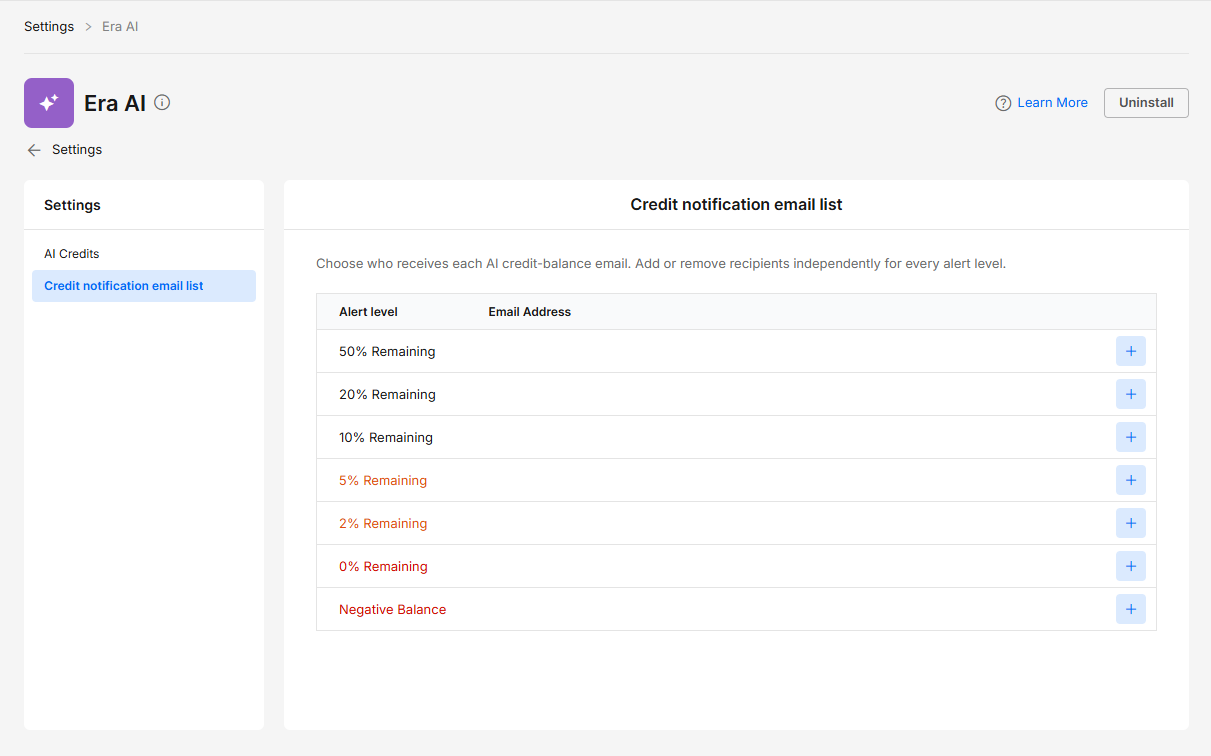
Administrators can configure automated email notifications to alert designated recipients when the AI credit balance reaches specific levels.
- Navigate to Settings > Era AI and select the Credit notification email list tab.
- Click the + icon next to the desired Alert level.
- Enter the email address of the person responsible for replenishing the AI credits.
- Click Add Email.
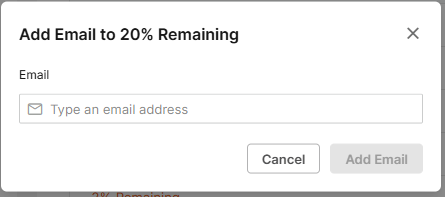
Note: The same email address can be added to multiple alert levels.
Enabling AI in Communication Channels
AI capabilities must be enabled in individual communication channels before agents can use them during customer interactions.
If your organization integrates CommBox with a CRM system, such as SAP, Salesforce, or SysAid, AI capabilities must also be enabled in the relevant integration channels.
- Navigate to Settings and select the relevant communication module, such as Chat, Facebook Messenger, SMS, or WhatsApp.
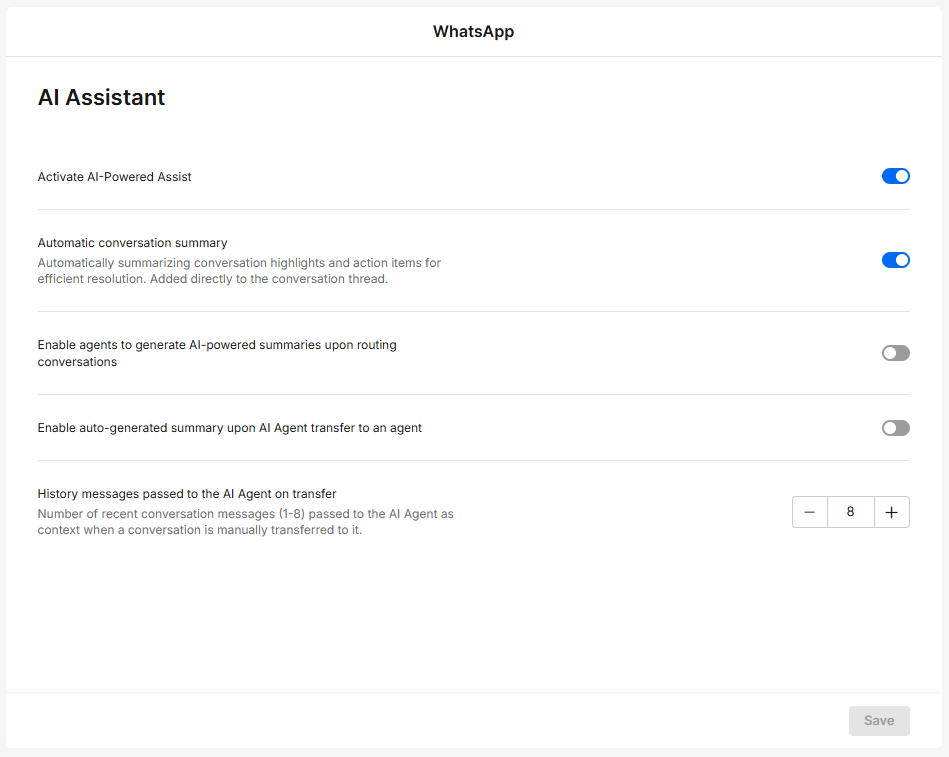
- Select the desired channel and expand the AI Assistant section.
- Enable the desired AI capabilities:
- Activate AI-Powered Assist – Enables AI-powered tools for agents, including Ask AI, Improve Message, and Conversation Summary.
- Automatic conversation summary – Automatically generates a conversation summary when its status changes to Resolved. The summary is added directly to the conversation thread.
- Generate AI-powered summaries upon routing – Allows agents to generate a conversation summary when routing a conversation to another channel. The receiving channel must also have AI enabled.
- Auto-generated summary upon AI Agent transfer – Automatically generates a conversation summary when an AI Agent transfers a conversation to a human agent.
- History messages passed to the AI Agent on transfer – Defines the number of recent conversation messages (1–8) passed to the AI Agent as context when a conversation is manually transferred to it.
- Click Save at the bottom of the page.
Repeat these steps for each communication channel where AI capabilities are required.
Enabling AI in Chatbots
Flow Builder supports both standard automation flows and AI-powered flows. Organizations without AI Agent capabilities can create standard flows and proceed directly to the canvas.
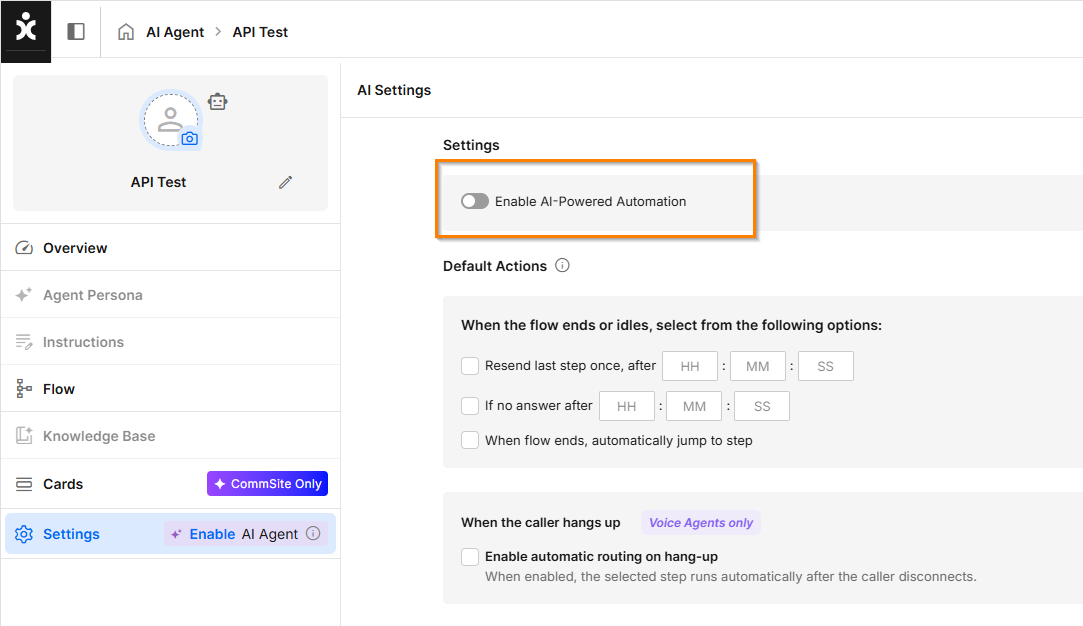
To enable AI capabilities in existing Chatbots (automations without AI):
- Navigate to Automation Hub > AI Agents and select the desired Chatbot.
- Select Settings and enable the AI-Powered Automation.
Note that the icon of the agent has changed and that now all the settings sections are available - Return to Agent Persona and configure the AI Chatbot's identity and behavior.
Note: An active AI credit account is required to use AI Agent capabilities. If your organization does not have one, contact your CommBox Customer Success representative.
AI Consumption Report
The AI Usage Report provides a detailed breakdown of AI credit consumption over a selected date range.
To download the report:
-
Navigate to Settings > Era AI to the AI Credits tab.
-
Click Select date range.
-
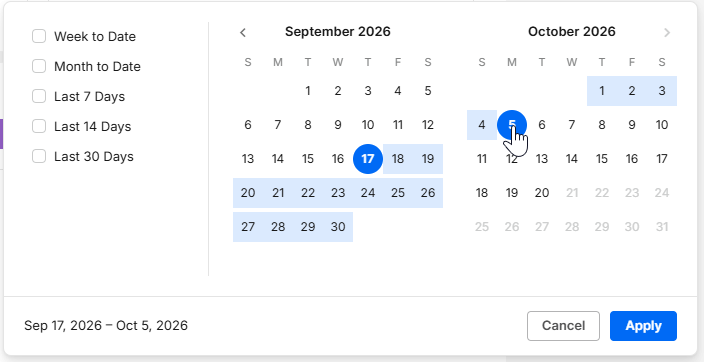
Select the desired date range:
- Preset date range: Select a predefined date range and click Apply.
- Custom date range: Use the calendar arrows to navigate to the desired month and select the start date. Navigate to the end month and select the end date, then click Apply.
- Specific date: Click the same date twice, then click Apply.
-
Click Download Report to download the AI consumption report for the selected period.