Overview
When the automation is unable to resolve the customer’s concerns or issue, the automation journey should be transferred to a human agent or to a different AI agent flow.
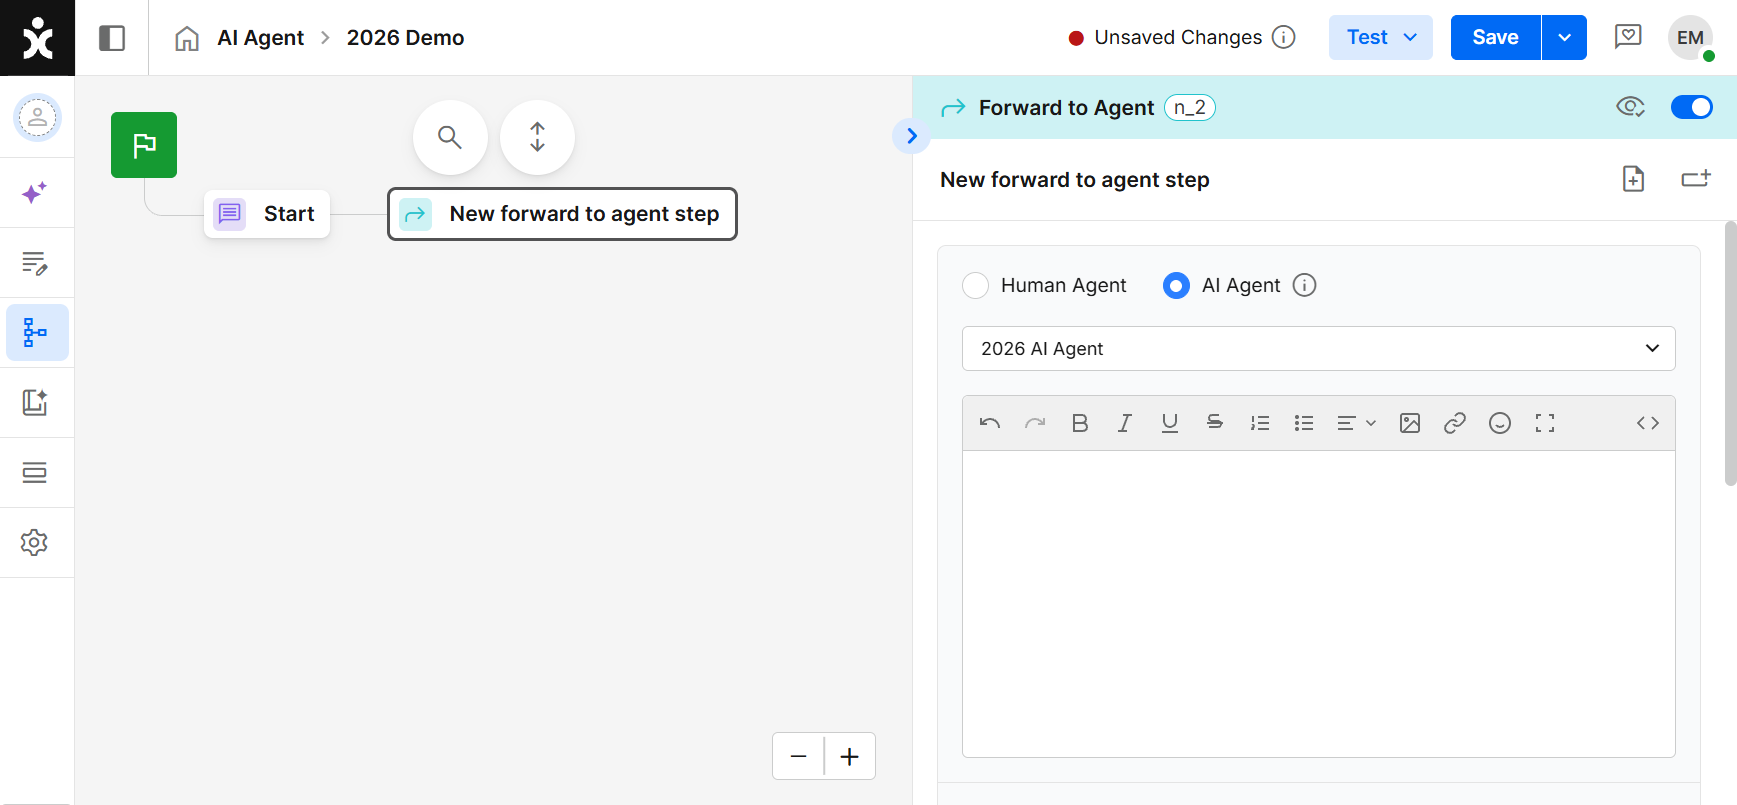
Chatbots and AI chatbots can also transfer the conversation to another AI agent. Simply select the desired AI Agent.
Since transferring to a human agent is a central function of any automation, this guide outlines the best practices and functionality of the Forward to Agent step for Chatbots and AI Chatbots.
To illustrate a typical call center setup, we will include the Business Hours module and briefly explain how channel settings influence the forwarding process.
Key Considerations
A. The Forward to Agent step should be the last step in a branch of the flow.
B. By default, the step opens a new conversation (object) on the same channel in which the flow is currently running.
C. You can route the conversation to a different team by selecting a different channel in the Change Channel step settings > Static Channel.
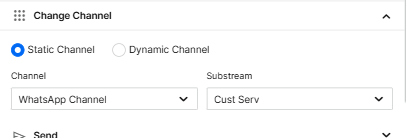
When choosing Dynamic Channel as the forwarding mode, the destination channel is determined at runtime based on the values assigned to ForwardStreamId and ForwardSubStreamId in the Set Variables anywhere in the flow.
Best Practice
Step 1: Configuring Auto Messages
AI Agents should tailor their response before transferring to a human agent based on the current availability status of the channel:
• Active - The channel is active and has available agents ready to receive calls.
• Busy - The channel is active, but no agents are currently available.
• Inactive - The channel is not active.
• Off business hours - There are no agents present due to non-working hours.
-
Navigate to Settings > Business Hours module, and select (or create) the appropriate channel that will be use with the flow.
-
In the Auto Messages section, entered the messages for the active and inactive/off business hours availability statuses.

-
Click Save at the top of the page.
-
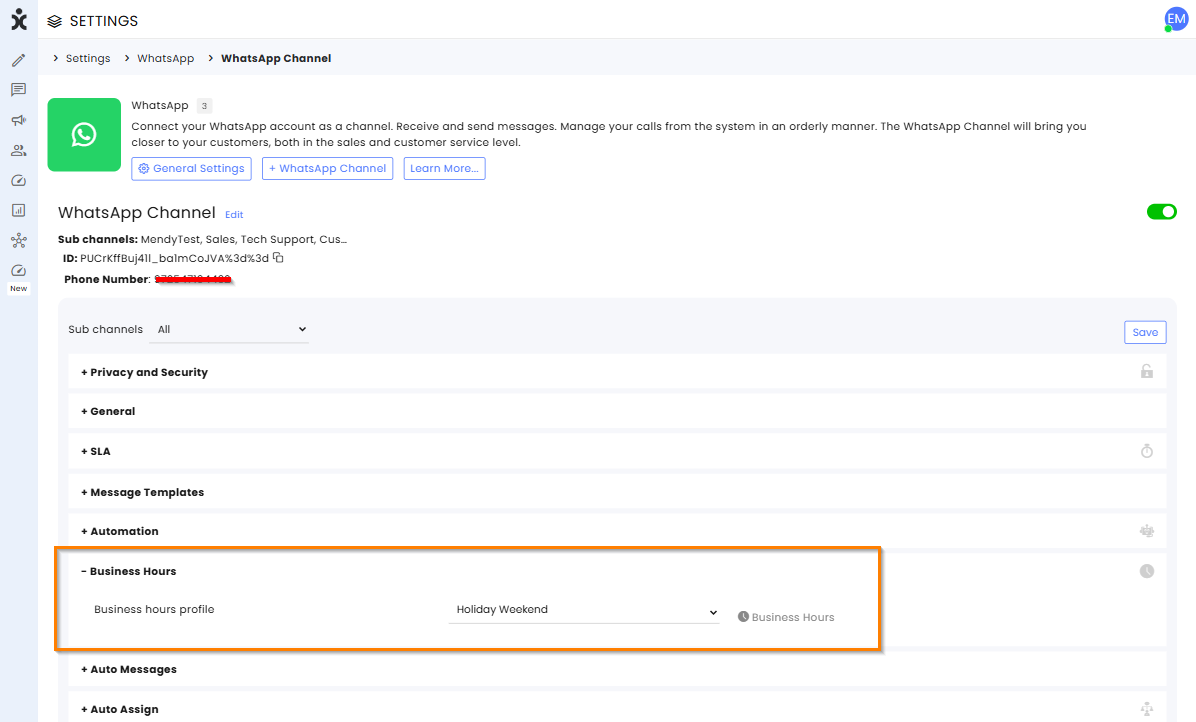
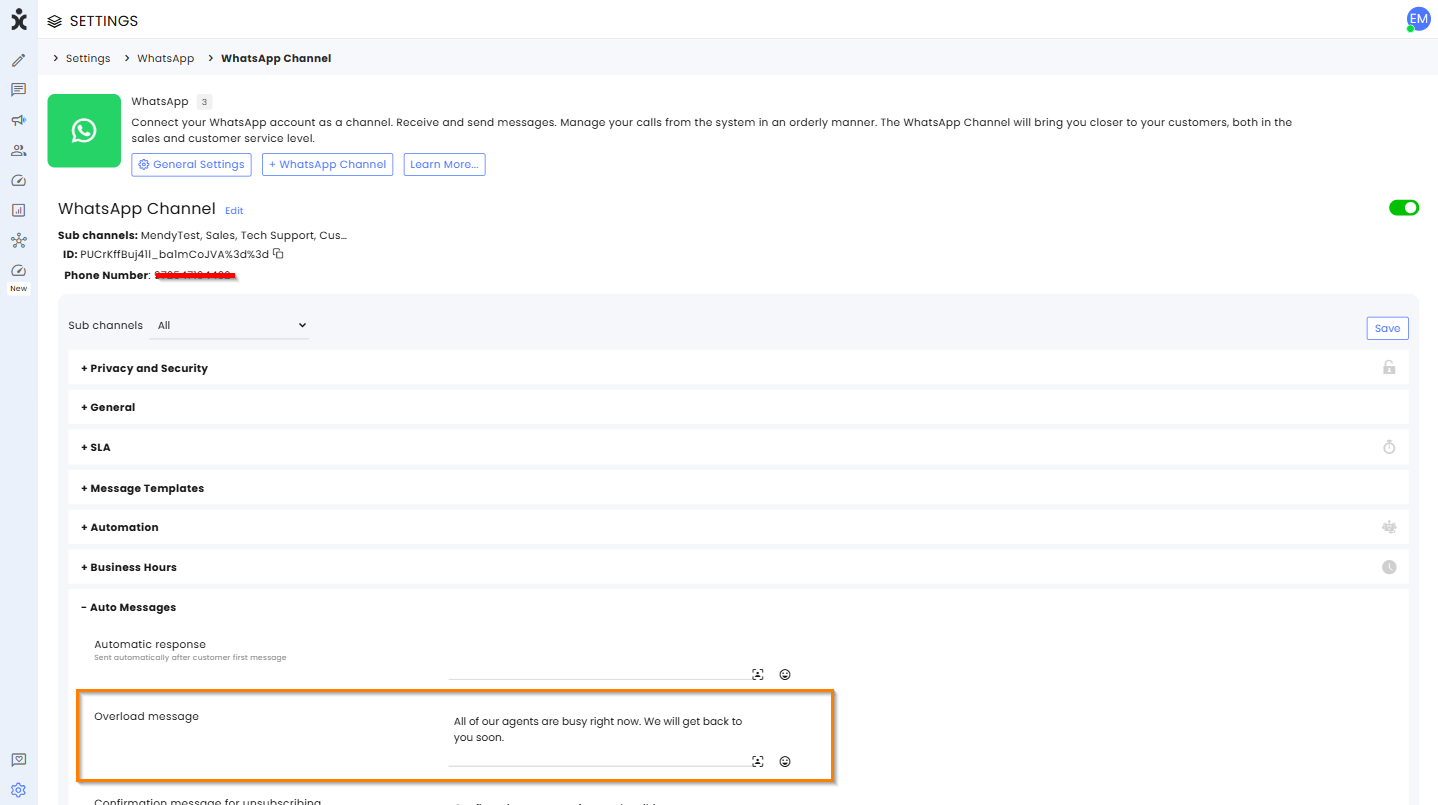
Navigate to Settings and select the communication type you want to use for the flow.
-
At the Business Hours section of the Channel settings, select the Business Hours channel you just configured, and click Save at the top of the page.
-
At the Auto Messages section, enter the Overload (busy) message and click Save at the top of the page.
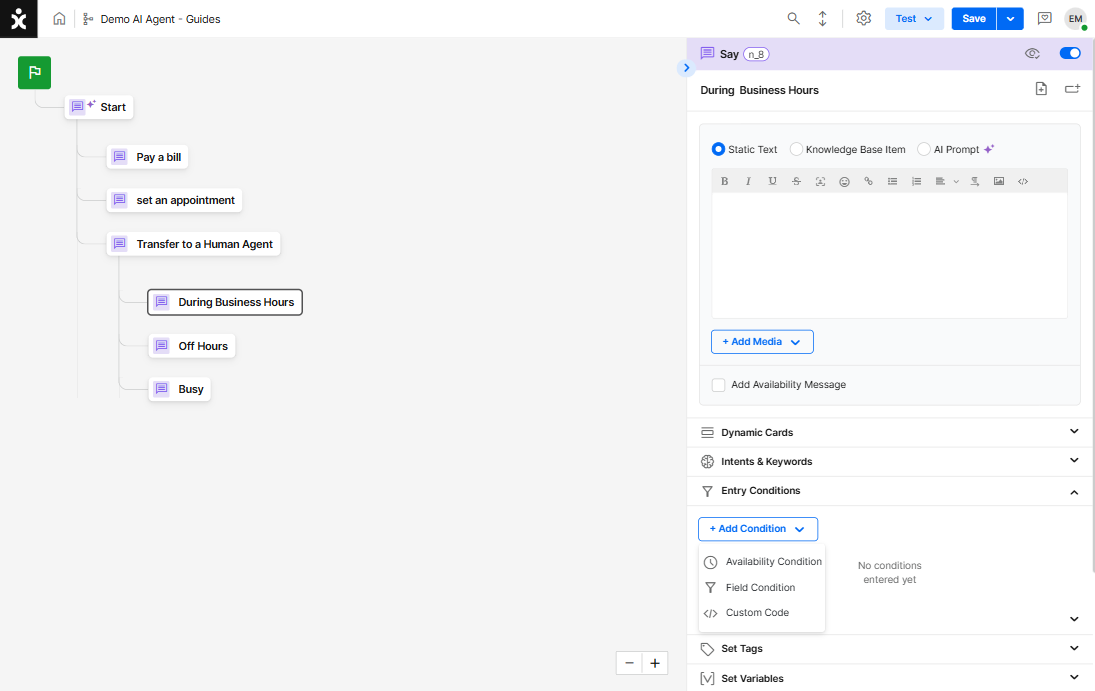
Step 2: Building the Flow
-
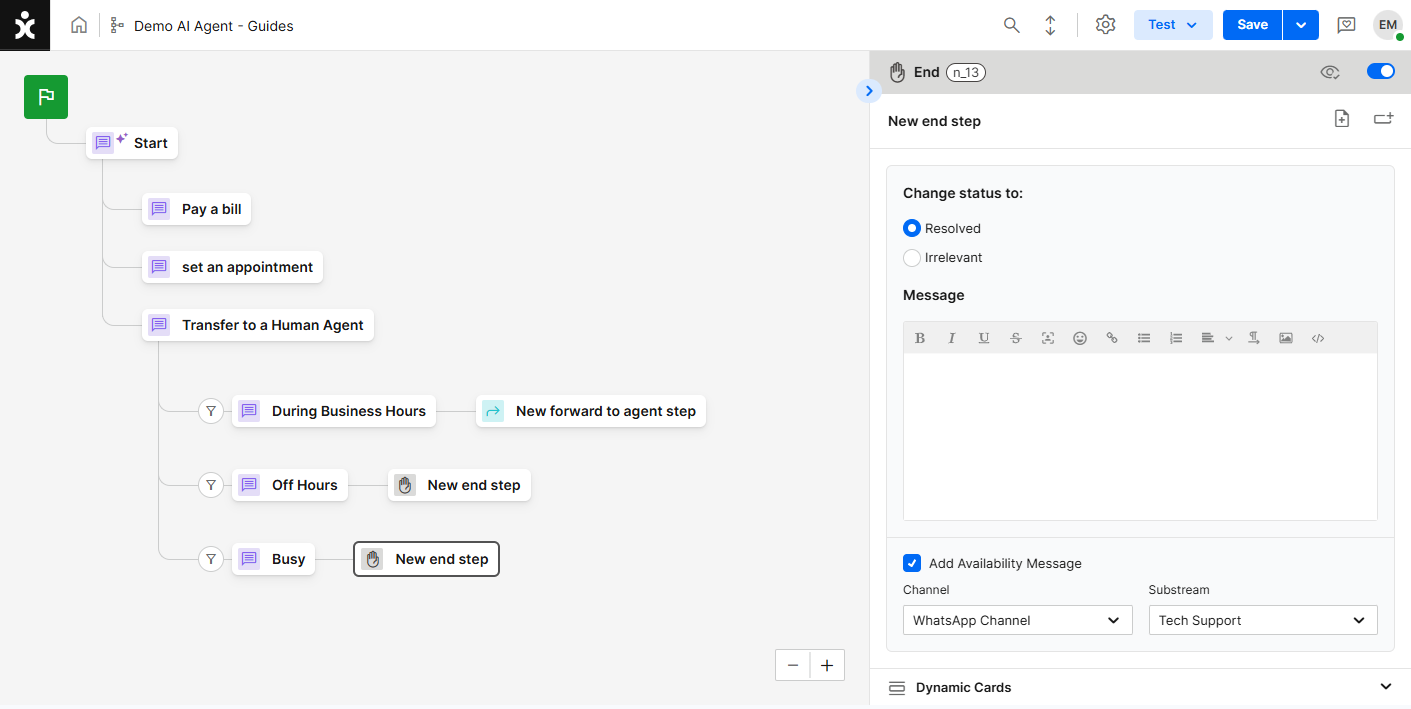
Create a new Say Step and add three child branches: “During Business Hours”, “Off Hours”, and “Busy”.
-
Configure Availability Entry Condition for each child:
For “During Business Hours”:
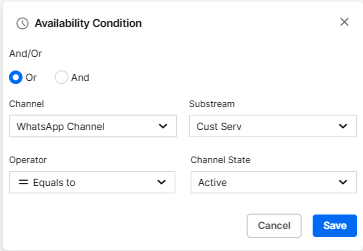
a. At the Entry Conditions capability, click +Add Condition > Availability Condition.
b. Select the relevant channel and subchannel (substream) and set the state to Active.
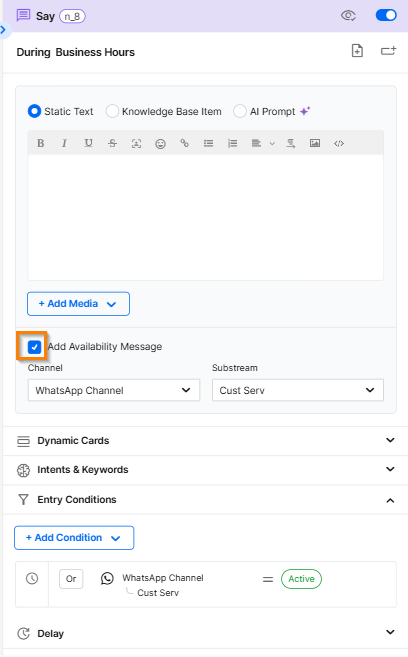
c. Check the Add Availability Message, so the customer receives the default business-hours response configured for that channel, and select the appropriate channel.
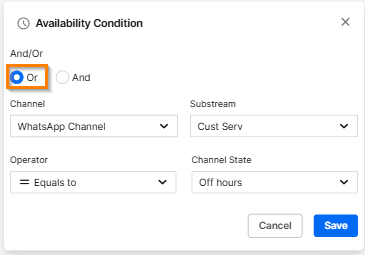
For “Off Hours”:
a. At the Entry Conditions capability, click +Add Condition > Availability Condition.
b. Select the relevant channel and subchannel (substream) and set the state to Inactive.
c. Add a second Availability Condition and set it to Off Hours.
d. Ensure the logical operator between these conditions is OR (the branch triggers if either condition is true).
The Say step should look something like this:
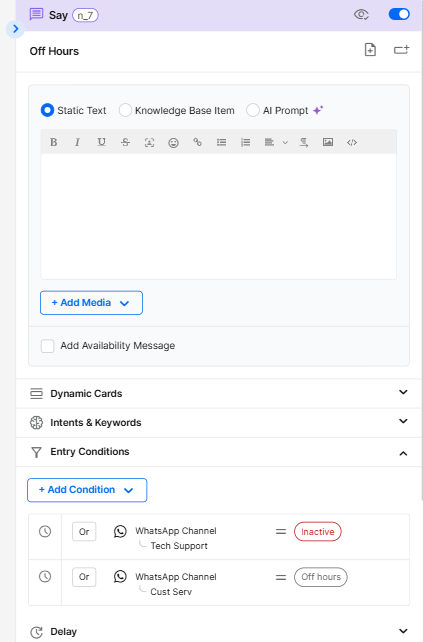
e. Check the Add Availability Message, so the customer receives the automatic off-hours message.
For “Busy”:
a. At the Entry Conditions capability settings, click +Add Condition > Availability Condition.
b. Select the relevant channel and subchannel, and set the state to Busy.
c. Check the Add Availability Message so the customer receives the channel’s overload (busy) auto message (set at the channel settings).

- Add a new Forward to agent step to each of the three branches.

Note:
Even when no agents are available, the flow will still create a new conversation in Open status, allowing an agent to call back the customer later.
If preferred, organizations may add an End Step instead to avoid opening a new object when there are no agents available.