Overview
SMS campaigns are marketing or communication initiatives that use text messaging to engage customers, promote products, send updates, or drive conversions.
This guide explains how to create, manage, and optimize SMS campaigns in CommBox, including key considerations, setup instructions, and campaign performance tracking.
Key Considerations
-
Set Realistic Audience Limits
When an AI agent isn’t available to handle callbacks or follow-up interactions, plan your campaign audience based on your team’s capacity. Estimate how many responses your staff can handle within SLA targets, and adjust your audience size accordingly to maintain a smooth, timely customer experience. -
Monitor Campaign Performance
Regularly review the Overview and Metrics dashboard to assess campaign results. Key metrics such as Sent, Replied, and Duration can reveal which campaigns resonate best with your customers to help refine future targeting and message content. -
Ensure Consent and Compliance
In most regions, businesses must obtain explicit opt-in consent from customers before sending SMS messages. Contacts should provide their mobile number and confirm their willingness to receive future communications. Always ensure your contact lists comply with local data protection and communication regulations. -
Opt-Outs
Opt-out is detected automatically when the contact sends ‘Unsubscribe’ (or the translated equivalent) on any channel and in any conversation. Those contacts are skipped in future campaigns on the same channel. Regular messages can still be sent to opt-out customers. -
Personalization and Audience Accuracy
Personalize messages using user properties that pull customer-specific data (e.g., name, order number, or tier level). Ensure that your audience file is accurate, up to date, and free of duplicate or invalid numbers to maintain deliverability and message relevance.

Creating a New Campaign
-
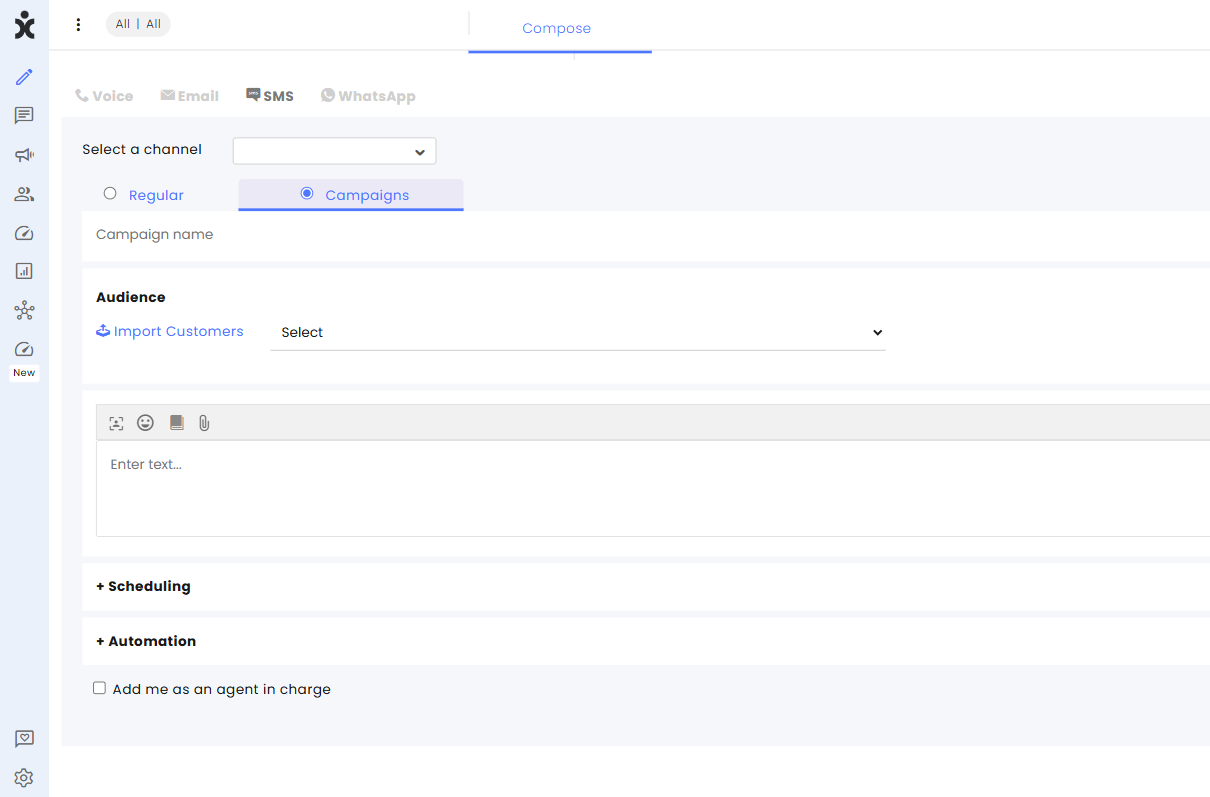
At the CommBox platform, click the Compose section (pencil icon) at the main sidebar, and select the SMS tab.
-
Select a channel that will be used for sending messages out.
-
Select the Campaigns option.
-
Enter the Campaign’s name.
-
Select the Audience that will receive this campaign. You can add customers by clicking Import Customers (optional – see below for details).
Note:
When selecting a Dynamic audience file, the final number of recipients is determined by the filter criteria at launch time.
A limit box will appear to cap the number of outgoing messages. Enter the number that will help prevent an overload on your team’s capacity to handle responses.

Use case example: Every morning, we send a campaign to customers who initiated a call after business hours the day before, inviting them to call us back. We limit the number of messages to the number of callbacks we can adequately manage. -
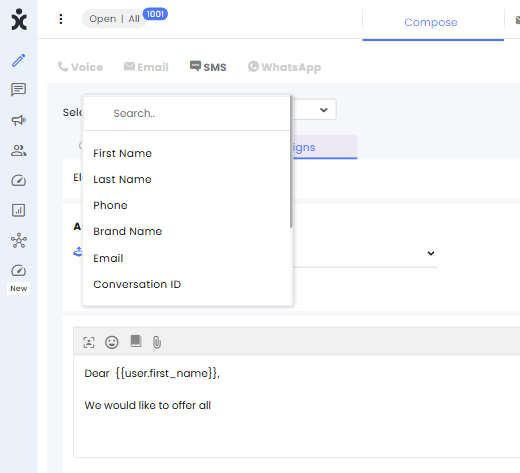
Compose the message for the customers. You can use the user properties to personalize your message. The User properties draw data directly from the selected audience list or imported CSV columns.
-
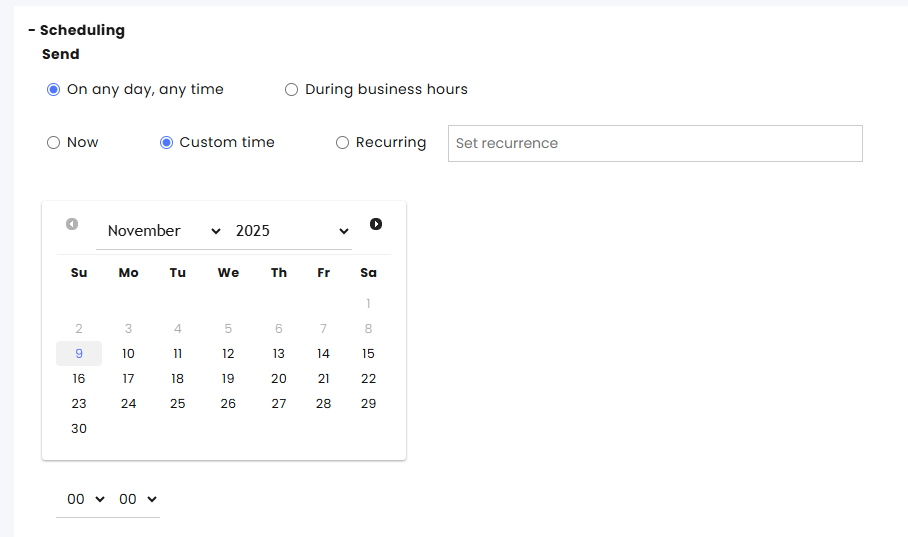
In the Scheduling section, define the sending timeframe:

a. **Send**Select whether to limit campaign messages to go out only during business hours or have no limitation on the sending time.When choosing the **During business hours** option, select the desired business hours profile.
b. **Starts**-
Select Now to launch the campaign immediately.
-
Select Custom time for starting the campaign.
-
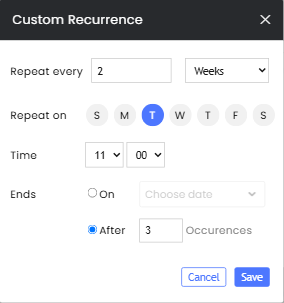
Select Recurring to open a dialog box to set how often the campaign will be repeated.
-
Campaigns can repeat daily or every X number of days, ending on a specified date or after X number of launches.
-
Campaigns can repeat weekly or every X number of weeks, ending on a specified date or after X number of launches.
Note: -
Sending will fail if there is an internal contradiction with sending times. Example: Sending a campaign every Sunday at 7 AM (Recurring) when the selected business hours profile starts at 8 AM.
-
Recurring campaigns will be treated as separate campaigns, and each launch will be listed separately in the Overview and metrics page.
-
-
c. Ends
- The campaign automatically ends 24 hours after all messages are sent, during which responses are considered part of the campaign.
Alternatively, choose a **Custom Time** to close the campaign earlier or later.
-
Set the Automation that will reply to customers who respond to the campaign (optional). The selected AI Agent will be used for customers associated with the campaign while the campaign is active.
-
Enable Add me as an agent in charge to assign all replies to your inbox automatically. (optional).
-
Click Create Campaign to finalize setup.
Launching of the Campaign
Review the campaign’s details, provide an email address for notification when the campaign has been completed, and click Launch.
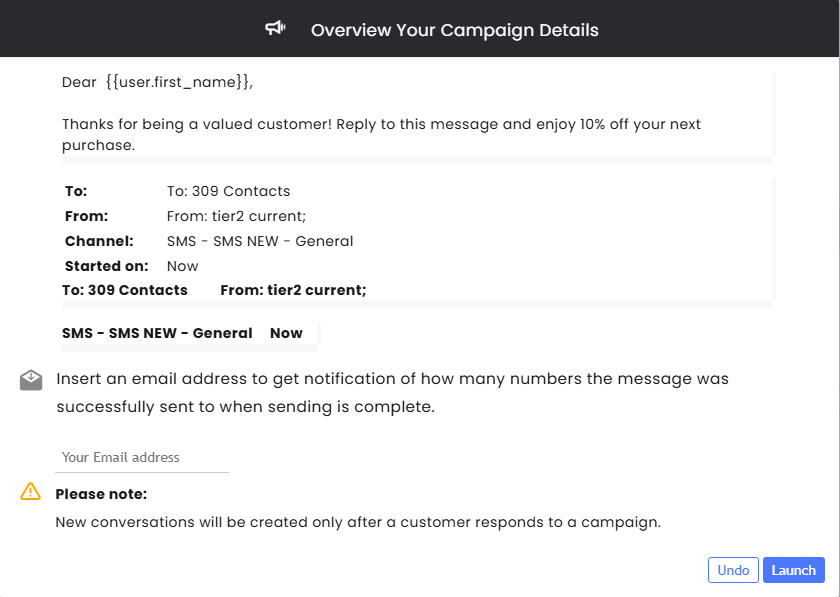
Once completed, the notification email will be sent to the designated recipient.
Importing Customers
-
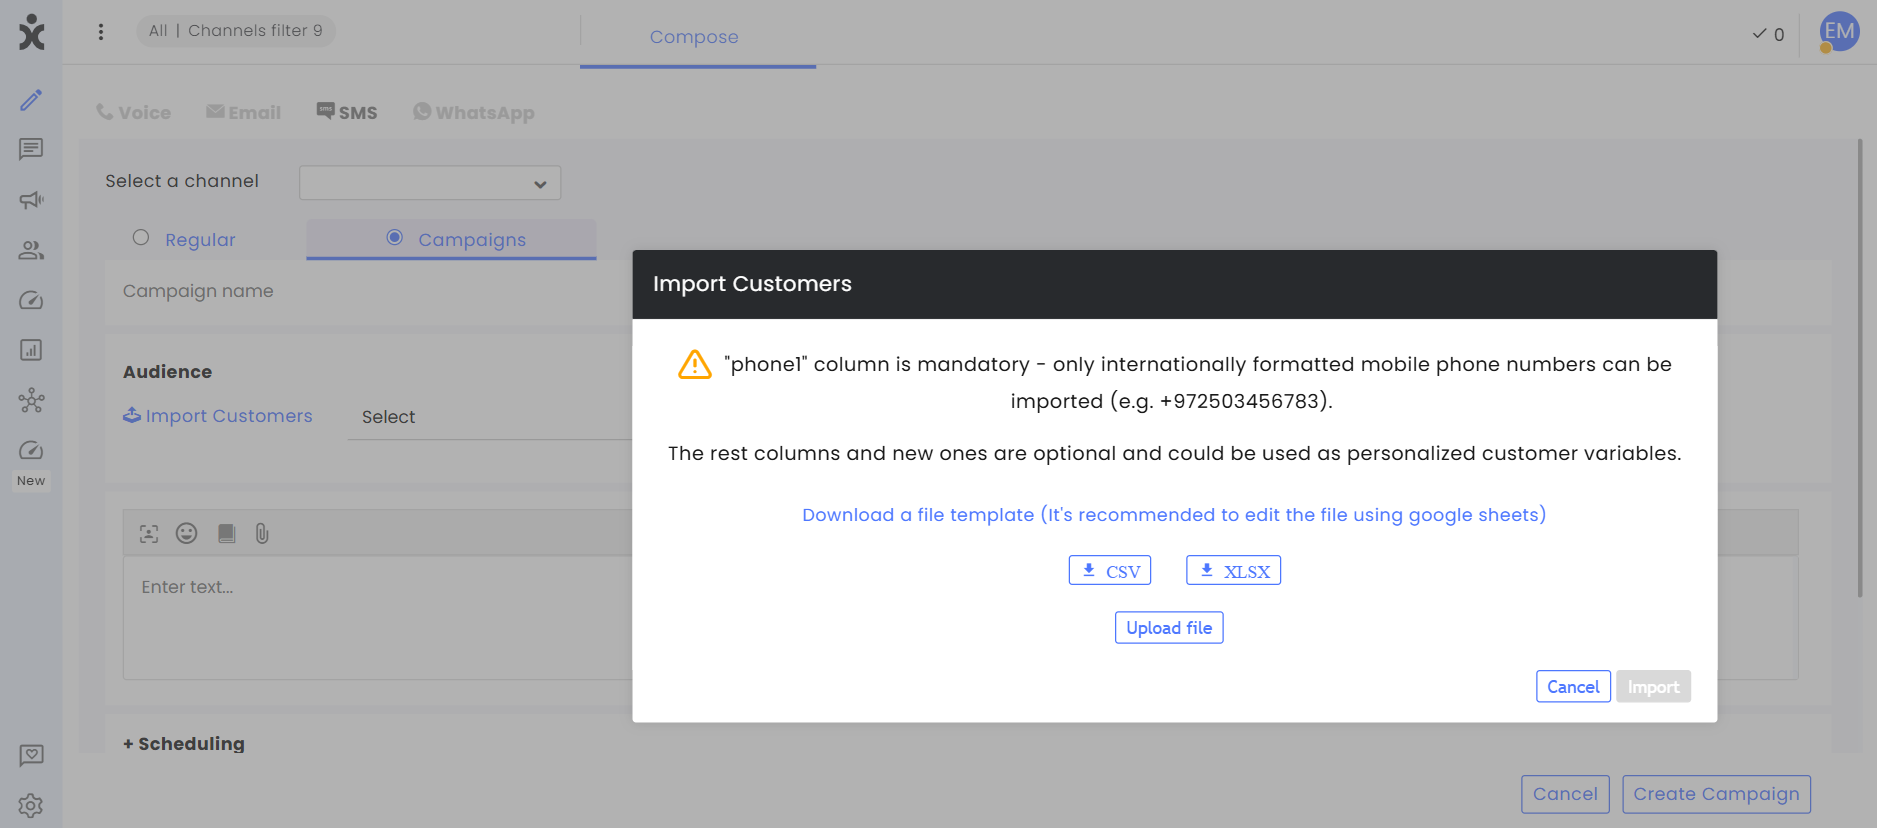
To add additional customers to the campaign, click Import Customers in the Audience section.
-
In the dialog box, you may download a sample of a table that can be used for this purpose.
Note the following guidelines:-
All tables must have a column heading for Phone1, and all customer phone numbers must be in international format (including the country code).
-
Additional columns used by your account can be added to the file as long as they match the custom field settings. When uploading the CSV file, you will need to write the titles of additional columns and add the customers’ information under them.
-
We recommend editing the file using Google Sheets.
-
-
Click Upload file to upload the contacts list and select the appropriate file.
-
Once uploaded, click the Import button in the lower right corner.

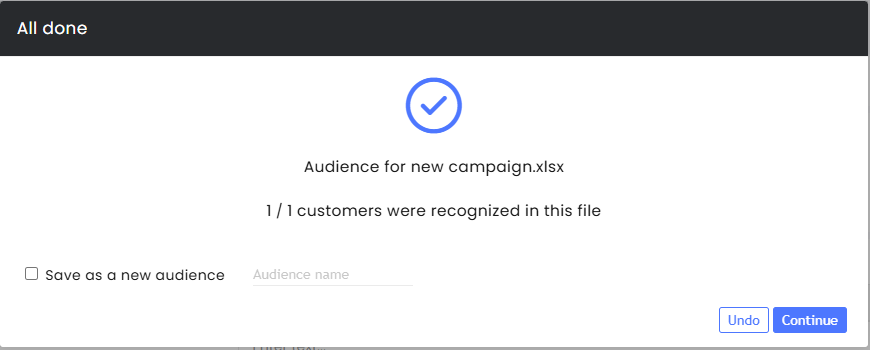
Upon successful import, you can save the file as a new audience and name it. -
The selected file will appear as an Audience ready for use. Click Continue.
Campaigns overview and metrics
Go to Campaigns on the main sidebar and click Overview and Metrics to view:
Active campaigns
Scheduled campaigns
Completed campaigns

Components
Each Campaign shows:
- Name – Campaign name (or timestamp if unnamed)
- Sent – Number of messages successfully delivered
- Replied – Number of responses received
- Time Left – Remaining active duration for ongoing campaigns
- Duration – Total campaign lifetime
- Audience – Linked audience name and customer count
- Channel – Channel used to send messages
- Script – Automation flow connected to responses
- Status:
- Scheduled – Waiting to start
- Sending – Currently sending
- Sending Completed / Done – All messages sent, campaign expired
- Paused – Temporarily stopped (e.g., due to rate limits)
- Canceled – Stopped manually before or during sending
Exporting Reports
When clicking the 3-dot menu, you can export the information into an Excel file.
Permissions
Admins can limit the agents’ access to the Overview and Metrics page to view only campaigns associated with their teams, enabling each department to focus exclusively on its own campaign activities. This eliminates the need to review irrelevant data and ensures that departments retain full control over their campaign information.
To restrict agents’ access to only the channels they are permitted to view, admins must enable the Campaigns > View Overview and Metrics by channels permissions.
To grant agents the same visibility as admins, enable Admin Permissions > Campaigns Overview and Metrics.
.png)