Overview
Instagram is a popular social networking app that focuses on sharing content (Posts) such as photos and short video clips (Stories and Reels), both publicly and privately (private pages, direct messaging, or DMs). The Instagram module enables communication with customers via Instagram and supports Instagram posts (messages) and DMs (private messages).
This article covers connecting your Instagram accounts to CommBox and configuring channel settings.
Prerequisites
To integrate with CommBox, your Instagram pages must be set up as a business account.
On the Instagram App:
- Go to your profile, tap in the top-right corner, and click the Edit button.
- Toward the bottom, click Switch to professional account.
- Review the information and click Continue.
- Select a category that best describes your business and click Done.
- Review your contact information and set up your professional account.
Key Considerations:
-
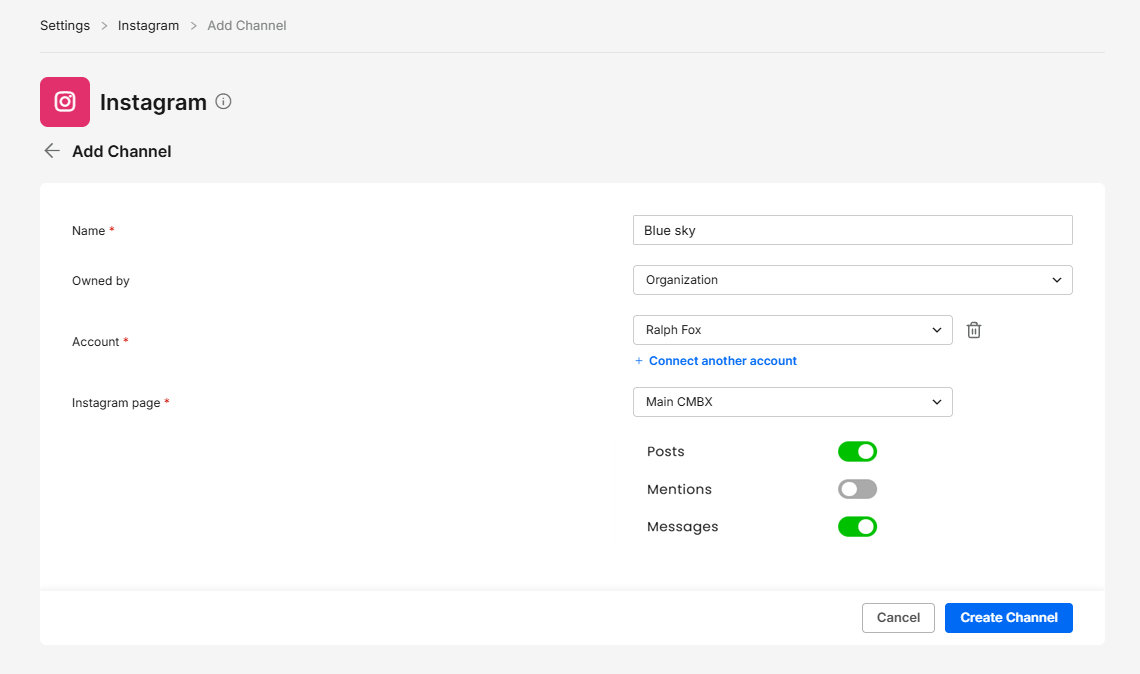
Note that Facebook automatically sets subchannels (posts, mentions, messages). Use the toggles to enable the ones you want to follow in the account’s settings
-
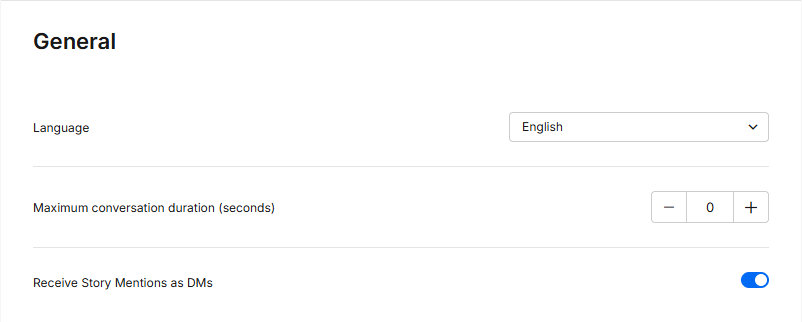
Filter Story Mentions as DMs to help reduce inbox noise, enabling greater control over the conversations that are created.
-
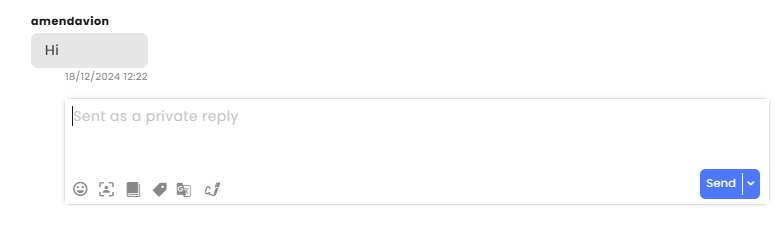
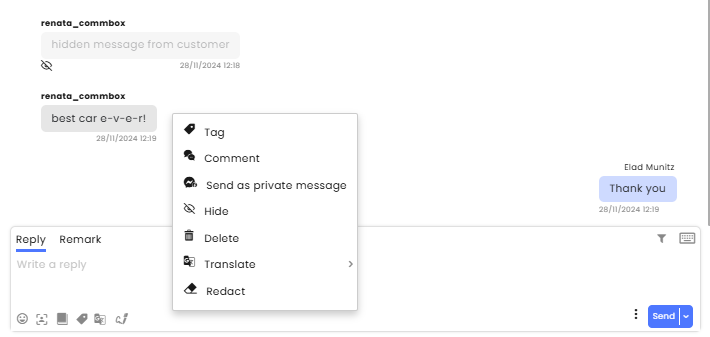
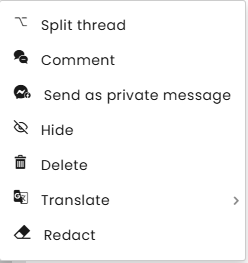
Agents can respond to the customer via a private message (only once) by clicking the 3-dot menu next to the message and selecting “Send as private message” or a direct comment by selecting “Comment”.
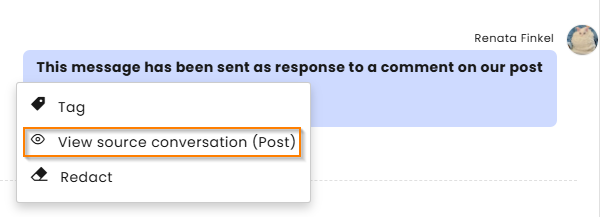
When sending a private message, you can view its content by clicking on the linked option at the 3-dot menu.
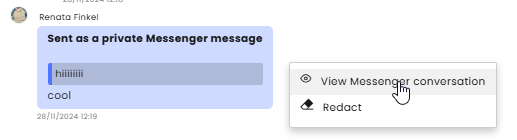
At the private conversation, you have an option to view its original post.
-
Hiding a comment on a post will delete it from the post for all viewers except the agent (grayed out) and the comment's owner.
• The manual split of the conversation is set at the Channel settings. When enabled, agents can select Split thread on the 3-dot menu, to make their reply the beginning of a new conversation.
-
CommBox supports Instagram’s mentions but not hashtags.
-
Automation bots can receive Instagram direct messages (DMs) from customers, but only via the Instagram mobile app. The web version does not provide the necessary menu options.
Creating a New Instagram Channel
Selecting an existing Instagram account
-
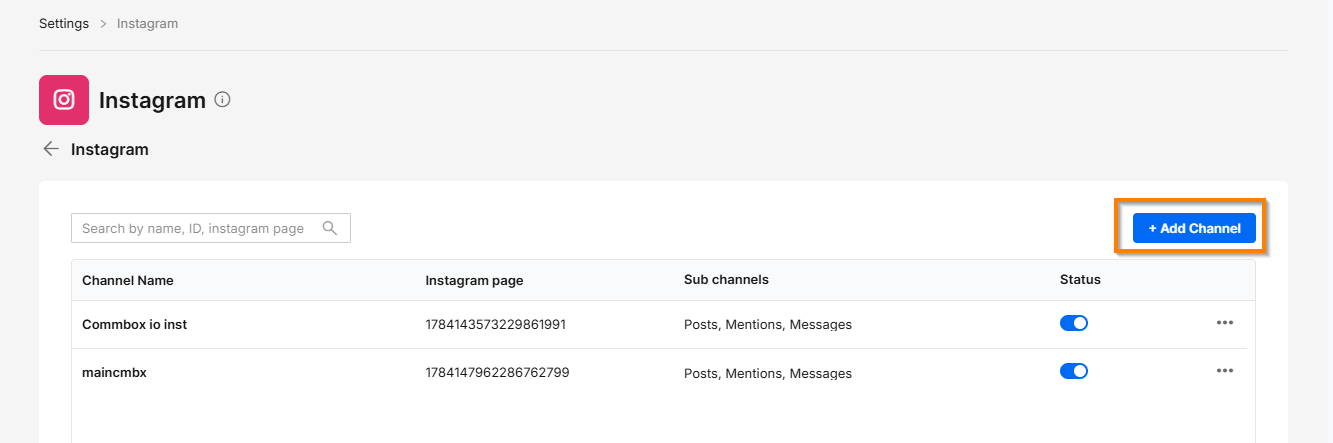
On the Settings page, select the Instagram module (from the Channels section), and at the top of the page, click +Add Channel.
-
Enter a unique name for the new channel.
-
Select the Team that will own this channel (optional)
-
Select the Instagram account used in this channel and the specific content (A new selection menu will open if there is more than one page).
-
Click Create Channel.
.png)
Adding a new Instagram account
-
On the Settings page, select the Instagram module (from the Channels section), and at the top of the page, click +Add Channel.
-
Enter a unique name for the new channel.
-
Select the Team that will own this channel (optional)
-
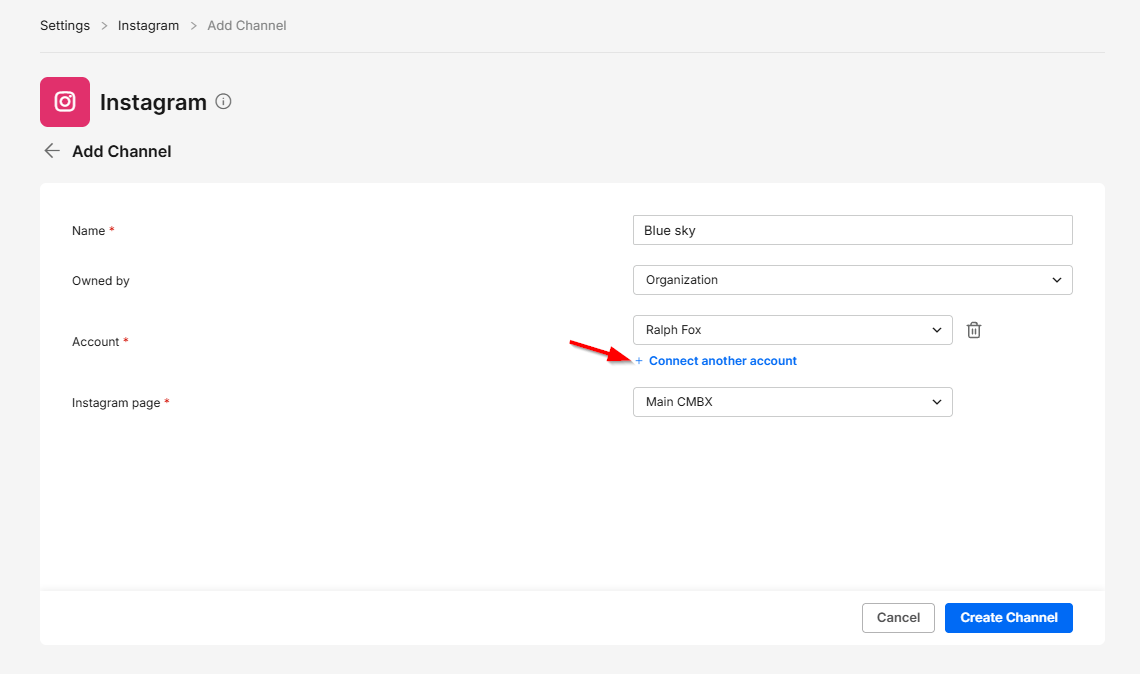
Next to the accounts menu, click Connect another account, which will connect you to Facebook.
-
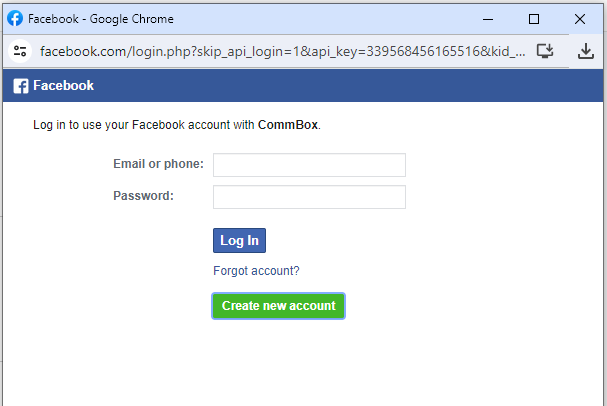
In the new Facebook dialog box, enter your Facebook credentials.
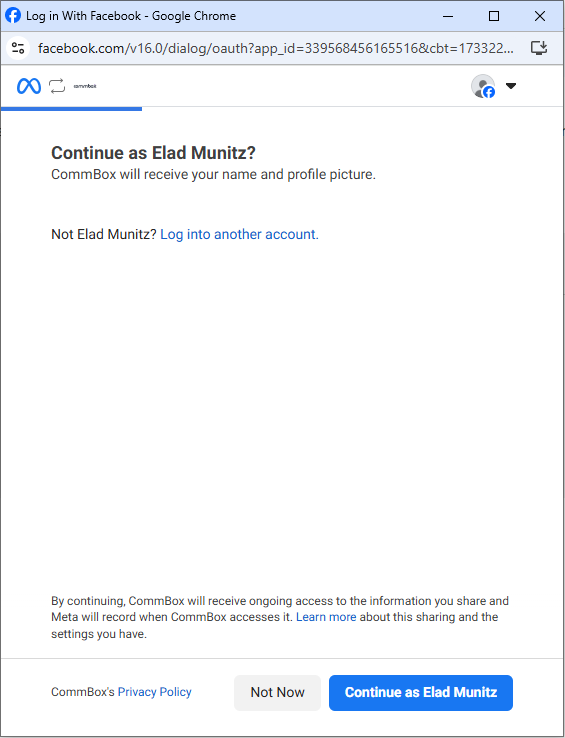
If recognized by the platform, click Reconnect to continue as the user.
-
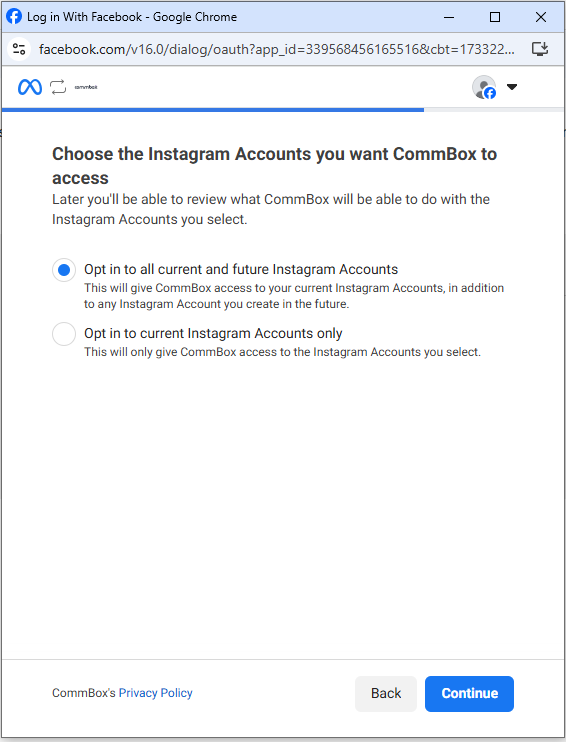
Let CommBox access pages from your account(s) and click Continue.
-
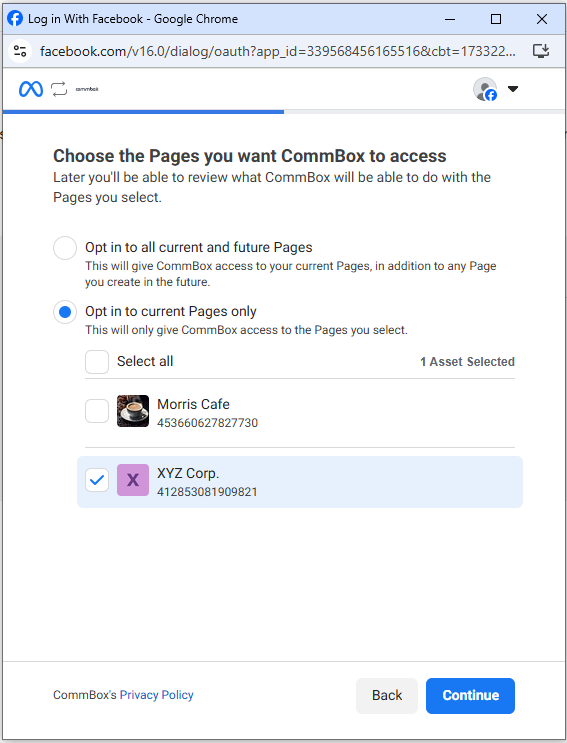
Select the Facebook pages you want to integrate with CommBox and click Continue.
-
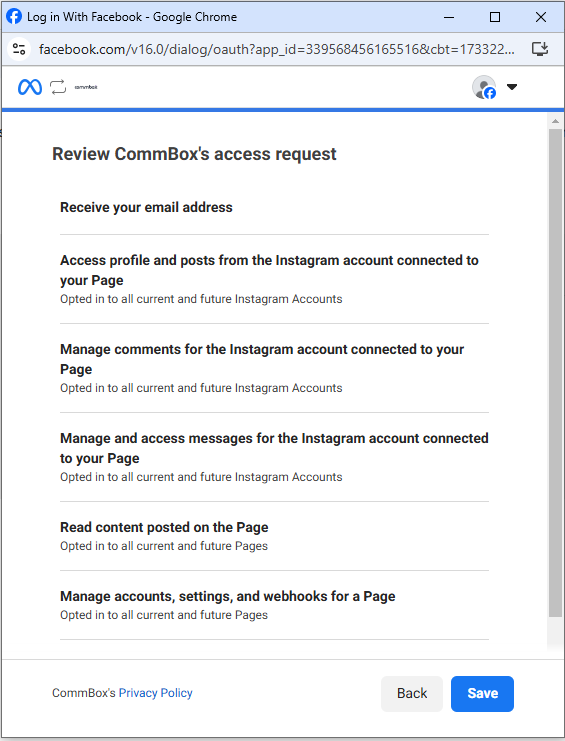
On the next page, review the permissions you want to give CommBox, such as receiving email addresses, viewing content, or managing an account, and click Save.
-
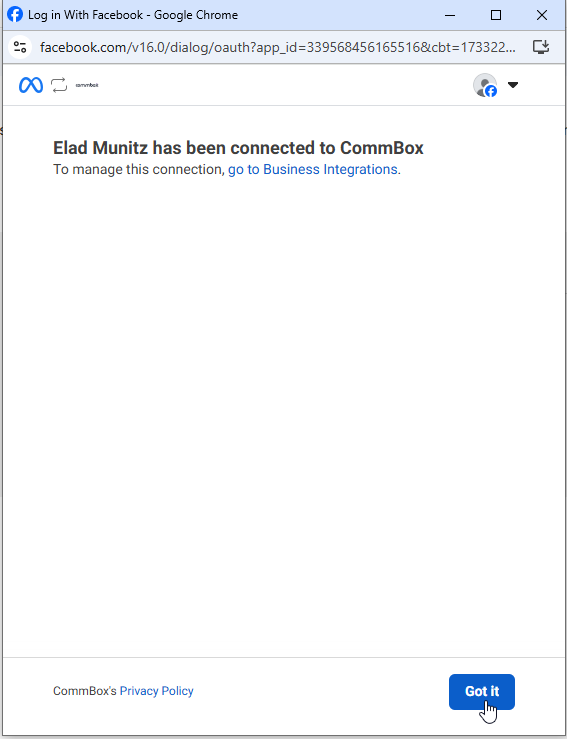
You successfully linked your Facebook account to CommBox. Click Got it to return to the CommBox platform.
-
You can now select this account for the new Instagram channel. Finish the process by clicking Create Channel.
Channel Settings
General
.png)
Language - the operating language within the module itself
Maximum conversation duration (seconds) – The time limit for the conversation.
Receive Story Mentions as DMs – When enabled, such a mention will open a new conversation.
SLA
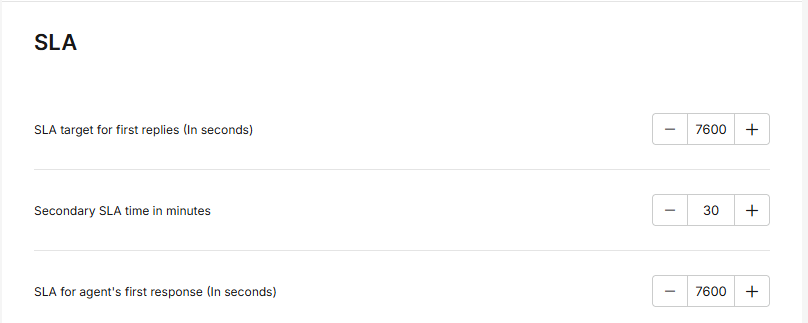
Service Level Agreement determines the acceptable waiting time for customers before they receive service from the service provider. Once that time passes and the agent does not reply to the customer, there is an SLA breach.
SLA target for first replies (in seconds) – The time limit for the agent to respond to the customer's first message to avoid an SLA breach.
SLA target for next replies (in seconds) – The time limit for the agent to respond to the customer's first message to avoid an SLA breach.
SLA for agent’s first response (in seconds) – Measures how long it took the assigned agent to answer the call independently of how long the customer was in the system. When left empty, the general SLA applies.
Note: The channel settings override the main SLA settings.
Click here for more information about this capability.
Business Hours

Business Hours profile - Select the Business Hours settings to determine when this channel operates and what auto-messages should be displayed after hours.
Click here for more information about Business Hours.
Auto Message

Automatic response – This is an automated message sent in response to the end customer’s first message.
Customer Satisfaction Survey
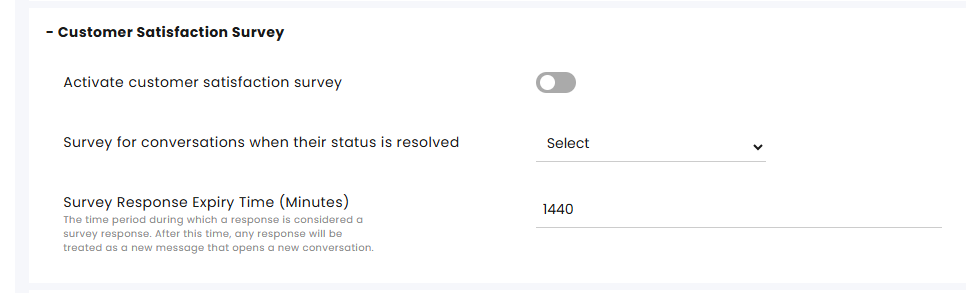
Activating the Customer Satisfaction Survey – Enables sending surveys to customers once their conversation status is set to Resolved.
Survey for the conversations when their status is resolved – Select the survey for this chat.
Survey Response Expiry Time (Minutes) – Specify the duration (in minutes) during which a customer's reply is considered a valid response to the Satisfaction Survey. After this period, any new reply will initiate a new conversation.
In the Customer Satisfaction settings, you can create and customize surveys.
Click here for more information about this capability.
Automation
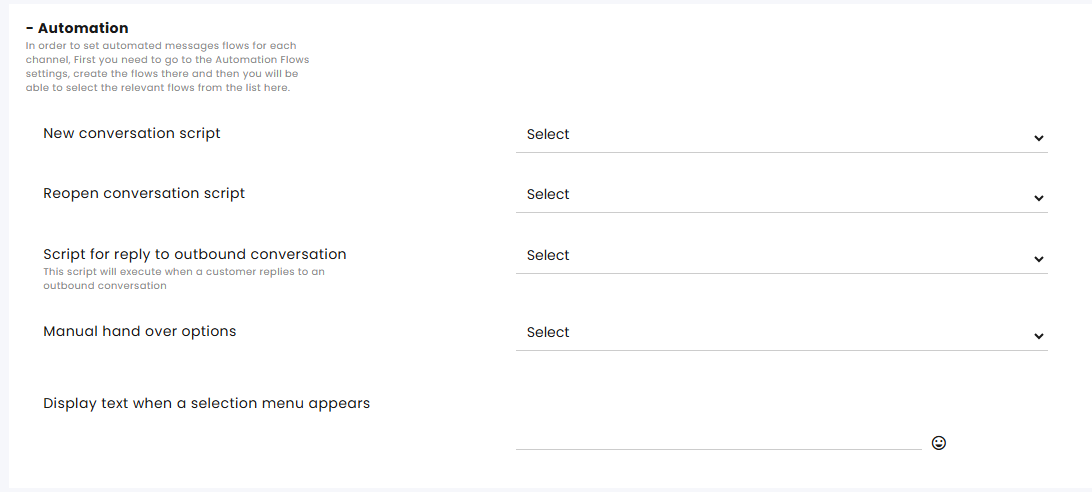
A script refers to a flow designed to meet a specific need. Learn more about our Automation bot capabilities in the automation section of the help center.
New conversation script– Select the bot that will be triggered by the customer’s first message. This script will run in each new conversation on this channel.
Reopen conversation script – When a conversation is Resolved and the customer returns, this is the script the customer will get.
Note: If the Split Conversation settings in this channel are set to 0 (always open a new conversation after it has been resolved), this setting becomes irrelevant since the customer always gets the new conversation script and can go back to the conversation.
Script for a reply to an outbound conversation - This script will be executed when a customer replies to an outgoing conversation.
Manual handover options - This allows multiple selections of scripts that will be displayed in the assignment’s menu when the agent wants to divert the customer for further help to another bot, for example, changing password procedure or charging a credit card.
Display text when a selection menu appears - Enter the text displayed above the selection menu when it emerges.
Auto Assign
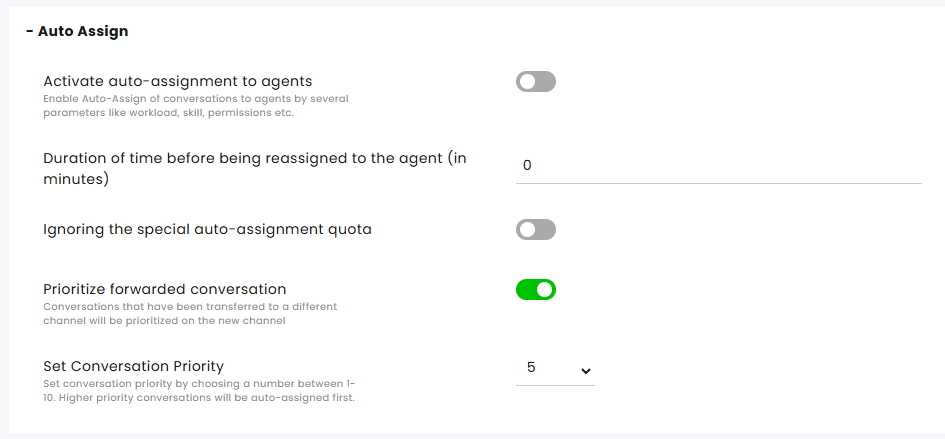
Activate auto-assignment to agents - set whether to enable/disable the channel’s auto-assignment capability.
Duration of time before being reassigned to the agent (in minutes) - Select the time before the system reassigns conversations to available agents.
Ignoring the Special Auto-Assignment quota – Activate/Deactivate this feature. When activated, the system overlooks the agent’s assignment quota and assigns conversations using the Special auto-assignment feature.
Special assignments include:
-
Send and assign to me- Selected by the agent when initiating communication in Compose.
-
Conversation Assign – An agent can select themselves or others as the agents for a conversation.
-
Agent in charge – An agent is added to the customer info card as the agent in charge. Customers with an agent in charge are referred to as VIP customers.
-
Direct link
-
Snoozed conversation – Conversations that the agents assigned to themselves at a preset date and time.
Prioritize forwarded conversations - Conversations that were forwarded from another channel will be given priority assignment on the new channel if the following conditions are met:
-
The conversation is assigned to an agent while it is being forwarded
-
The agent forwarding the conversation has no access to view the destination channel
If the conversation meets all the following criteria, it will receive priority above other conversations.
Set Conversation Priority – Each communication channel has a default priority rate (1- highest priority, 10- lowest priority). Note that the priority can be overridden by other factors within the system.
Customer Verification

Not relevant to the Instagram module
Split Conversations
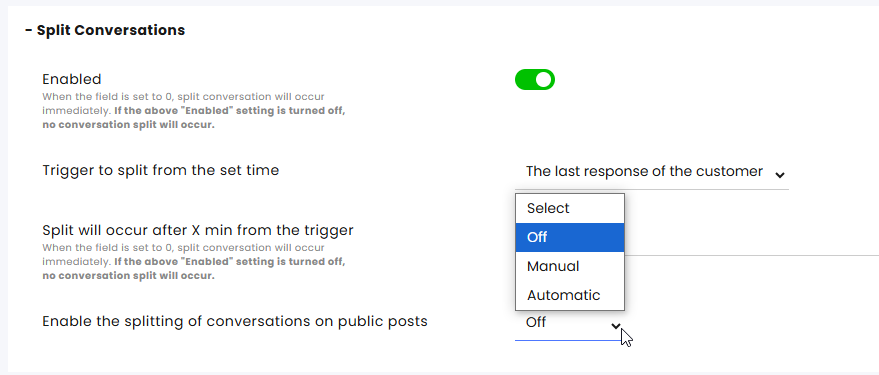
Enabled – When toggled On, Split can occur with the “handled” mark on a conversation. After the customer’s response, the conversations will open as new or in the same thread.
Trigger to split from the set time—The conversation could split automatically after the customer's last response or after the status is changed to Resolved.
Split will occur after X min of inactivity - When the field is set to 0, the split conversation will occur immediately. No conversation split will occur if the above switch is set to Off.
Enable the splitting of conversations on public posts – Splitting threads starts a new conversation (object) when replying to the message. Selecting “Manual“ enables the agent select “Split thread” from the 3-dot menu next to the message and to start a new conversation. Selecting “Automatic“ will start a new conversation for every incoming message.
Privacy and Security
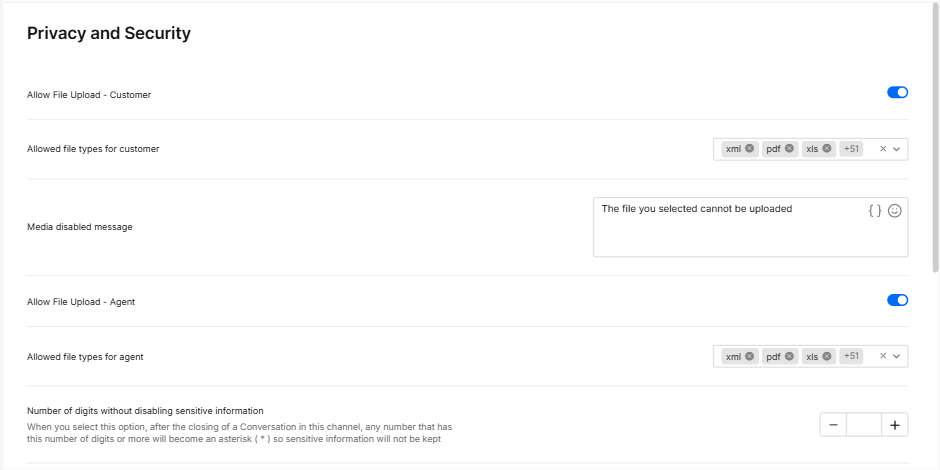
Allow file upload - customer: Allow/block the customer to upload files.
Allowed file types for customer – Lists the file types which the customer can upload.
Media disabled message – The message is displayed when the customer attempts to upload an unallowed file type.
Allow file upload - Agent: Allow/block the agent to upload files.
Allowed file types for Agent – Lists the allowable file types.
Number of digits without disabling sensitive information - Enter the number of digits that will be visible at the closing of the conversation. Subsequent digits will be masked with asterisks () at that time. For example, entering the number 3 here will turn the number 6543210 into “654***” at the end of the conversation.
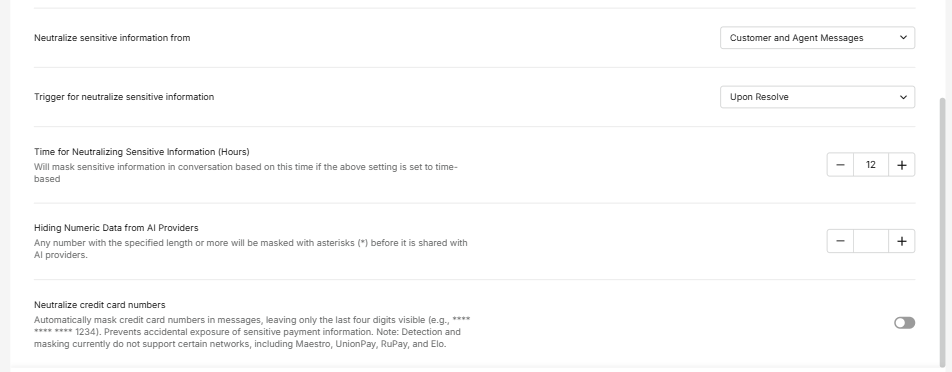
Neutralize sensitive information from - Prevent selected participants (Customer and/or Agent) from viewing sensitive numeric information. Numbers are replaced with asterisks when the selected trigger occurs.
Trigger for neutralize sensitive information - Select the trigger to activate the above settings.
Time for Neutralizing Sensitive Information (Hours) - Will mask sensitive information in conversation based on this time if the above setting is set to time-based
Hiding Numeric Data from AI Providers - Any number with the specified length or more will be masked with asterisks (*) before it is shared with AI providers.
Neutralize credit card numbers - Automatically mask credit card numbers in messages, leaving only the last four digits visible (e.g., **** **** **** 1234). Prevents accidental exposure of sensitive payment information. Note: Detection and masking currently do not support certain networks, including Maestro, UnionPay, RuPay, and Elo.
Maintenance
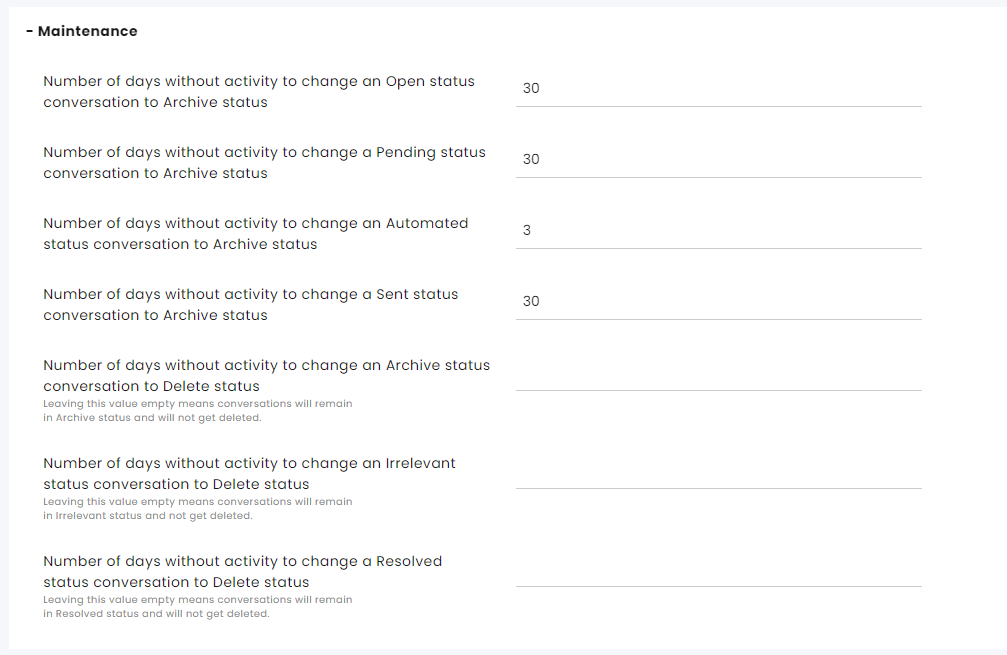
Number of days without activity to change an Open status conversation to Archive status - Default is 30 days.
Number of days without activity to change a Pending status conversation to Archive status - Default is 30 days.
Number of days without activity to change an Automated status conversation to Archive status - Default is 30 days.
Number of days without activity to change a Sent status conversation to Archive status - Default is 30 days.
Number of days without activity to change an Archive status conversation to Delete status - Leaving this value empty means conversations will remain in Archive status and will not get deleted.
Number of days without activity to change an Irrelevant status conversation to Delete status - Leaving this value empty means conversations will remain in Irrelevant status and not get deleted.
Number of days without activity to change a Resolved status conversation to Delete status - Leaving this value empty means conversations will remain in Resolved status and will not get deleted.
Set additional aspects of maintenance including permanently deleting conversations at the Maintenance settings page.
Click here for more information about this capability.
CRM Integrations
For information about these areas, see the relevant CRM guide.