Overview
WhatsApp campaigns are marketing or communication initiatives that use WhatsApp to engage with customers, promote products, send updates, or initiate conversions. These campaigns can be highly effective due to WhatsApp’s high engagement rates and direct communication style. This guide discusses the creation of a new campaign and the different aspects of the management of the campaign.
![]()
Key Considerations
A. Initial communications with the customers must be done via an approved WhatsApp Template.
B. Within 24 hours after the customer responds to a message, the campaign may include open text messages that will be sent to the customers instead of a template.
C. Before messaging individuals on WhatsApp, businesses must obtain opt-in permission (which does not need to be specific to WhatsApp) from contacts. Individuals need to provide their mobile phone number or be given explicit opt-in permission confirming their willingness to receive future messages or calls from that business.
D. Opt-out is detected automatically when the contact sends ‘Unsubscribe’ (or the translated equivalent) on any channel and in any conversation. Those contacts are skipped in future campaigns on the same channel. Regular messages can still be sent to opt-out customers.
New Campaigns
Creating a New Campaign
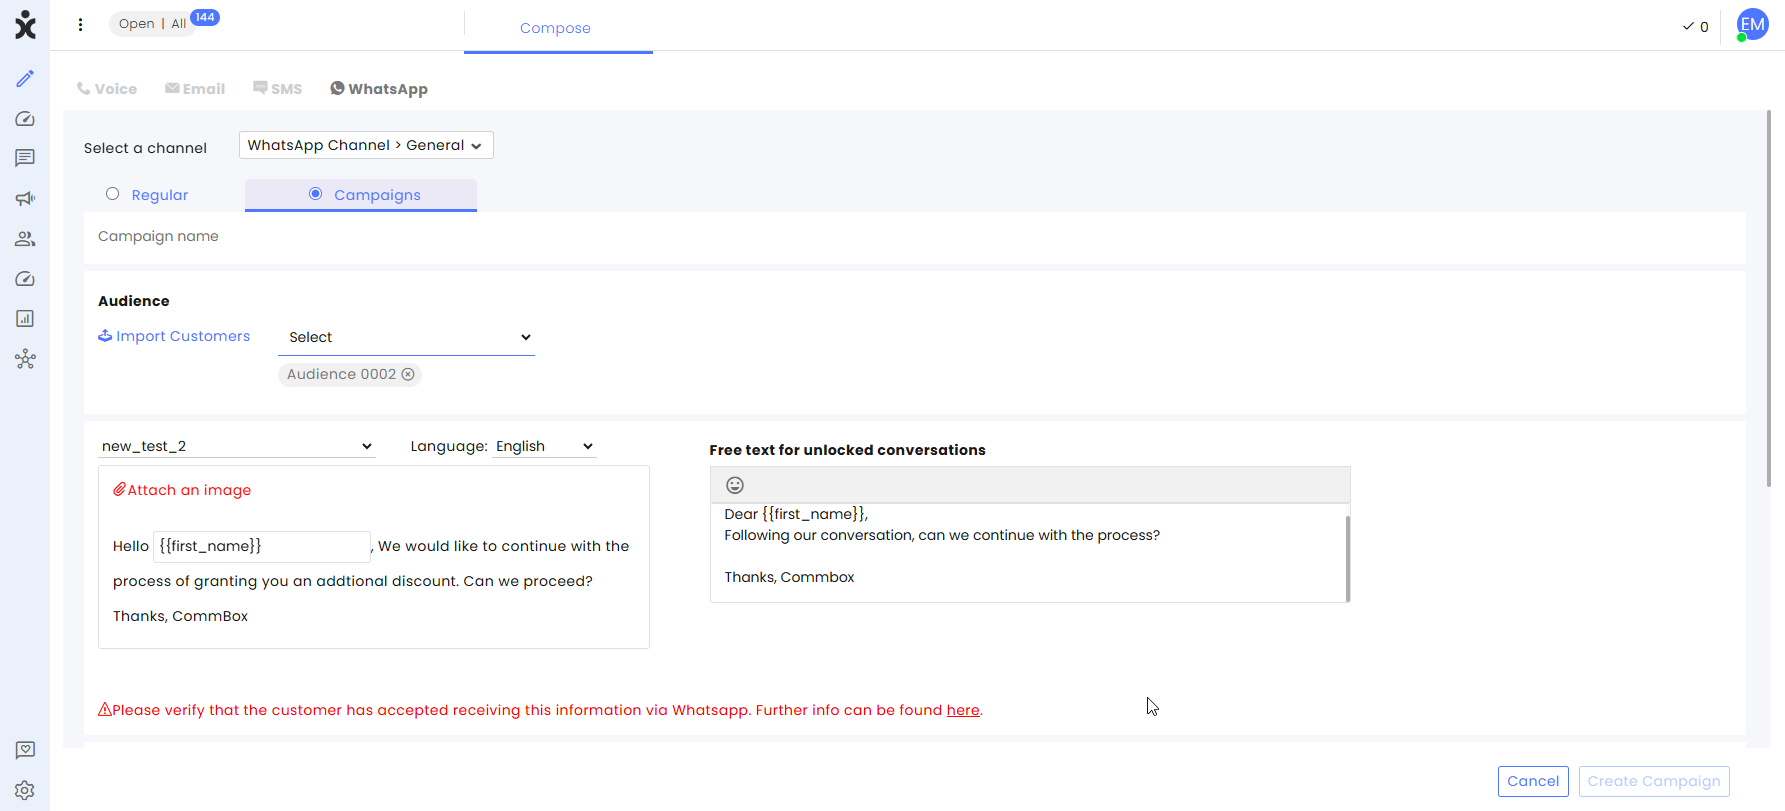
- At the CommBox platform, click the Compose section (pencil icon) at the main sidebar, and select the WhatsApp tab.
- Select a WhatsApp channel that will be used for sending messages out.
- Select the Campaigns option.
.png)
- Enter the Campaign’s name.
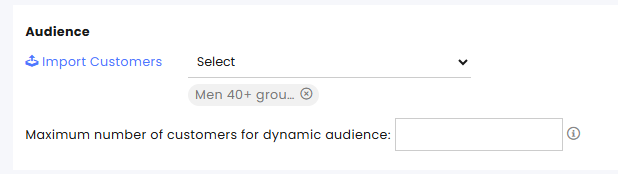
- Select the Audience that will receive this campaign. You can add additional customers by clicking Import Customers (optional – see below for details).
Note that when selecting a Dynamic audience file, the number of relevant customers is based on the matchings to the filter’s criteria at the time of launching (and therefore not set). A limit box will appear when sending a dynamic audience file to prevent sending too many messages that might not have the organizational resources to handle the response to the campaign. The system will only send the campaign to the first matching customers up to the limit set. Ignore these settings if they are irrelevant to your needs. Click here to learn more about Audiences.
Use case example: Every morning, we send a campaign inviting customers who initiated a call the day before after business hours to call back. We limit the number of messages to the number of callbacks we can adequately manage.
- Select the template that will be used. Once selected, the template’s language and content will appear in this section.
- For existing customers, you can use a template with a placeholder that will be populated with the customer’s information details.
- Hover over the input field and click the plus sign.
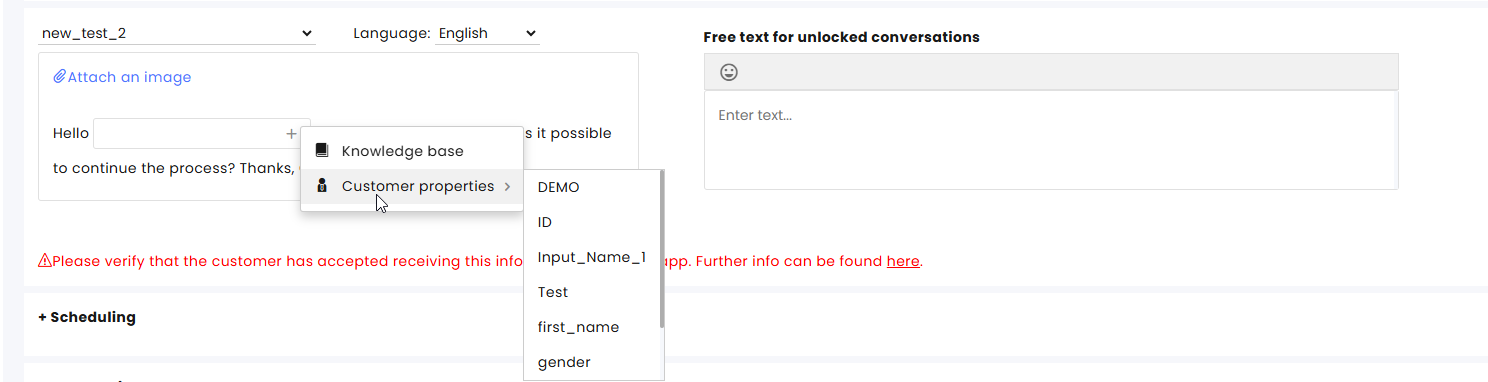
- Hover over the input field and click the plus sign.
b. Select Customer properties to enter information found in the customer's info pane or select Knowledge base to enter a predefined item in that field.
- At the Scheduling section, select the sending time and the start/end of the campaign.
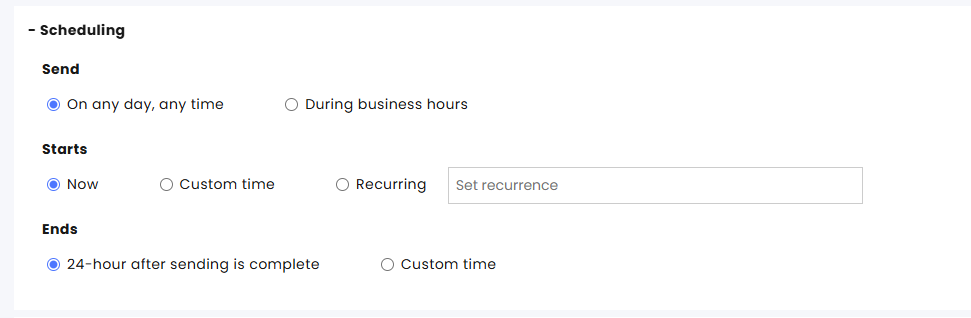
Send
- Select whether to limit campaign messages to go out only during business hours or have no limitation on the sending time.
- When choosing the During business hours option, select the desired business hours profile.
Starts
- Select Now to launch the campaign immediately.
- Select Custom time for starting the campaign.
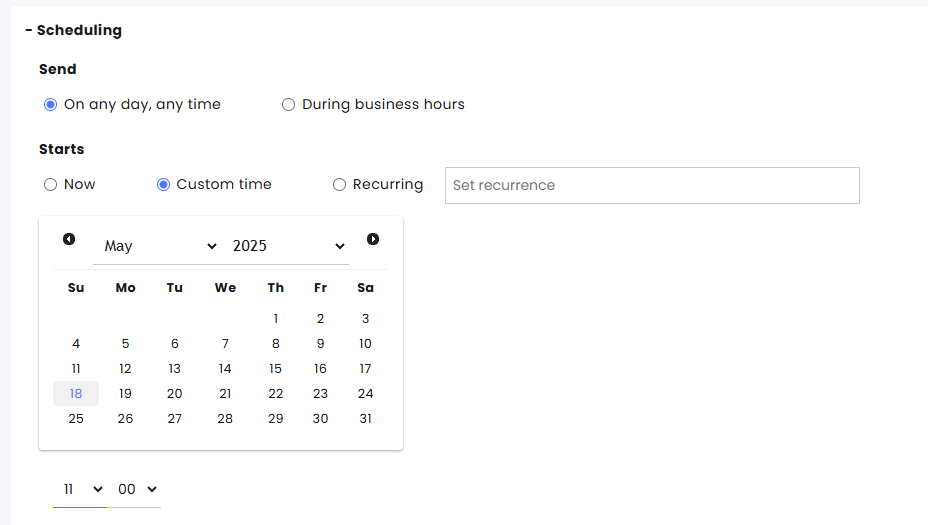
- Select Recurring campaigns to resend this campaign multiple times at preset intervals. Recurring campaigns will be treated as separate campaigns and each launching will be listed separately in the Overview and metrics page.

Note: Sending will fail if there is an internal contradiction when sending times. For example, sending the campaign every Sunday at 7 AM (Recurring) when the selected business hours profile starts at 8 AM.
Ends
The duration of the sending of the campaign depends on the number of customers you send the campaign to. When the sending is completed (there was an attempt to send the message to all selected customers), a 24-hour window will open by default, in which responses to the campaign message will be considered “campaign response”.
Select the time frame for ending the campaign, after which responding customers will not be associated with the campaign.
- 24 hours after sending is complete
- Custom time, which will end the campaign regardless of sending status.
9. Set the Automation that will reply to customers who respond to the campaign (optional). This Flow will be used for customers associated with the campaign while the campaign is active.
- Check Add me as an agent in charge to designate all replying customers to you (optional).
- Click Create Campaign.
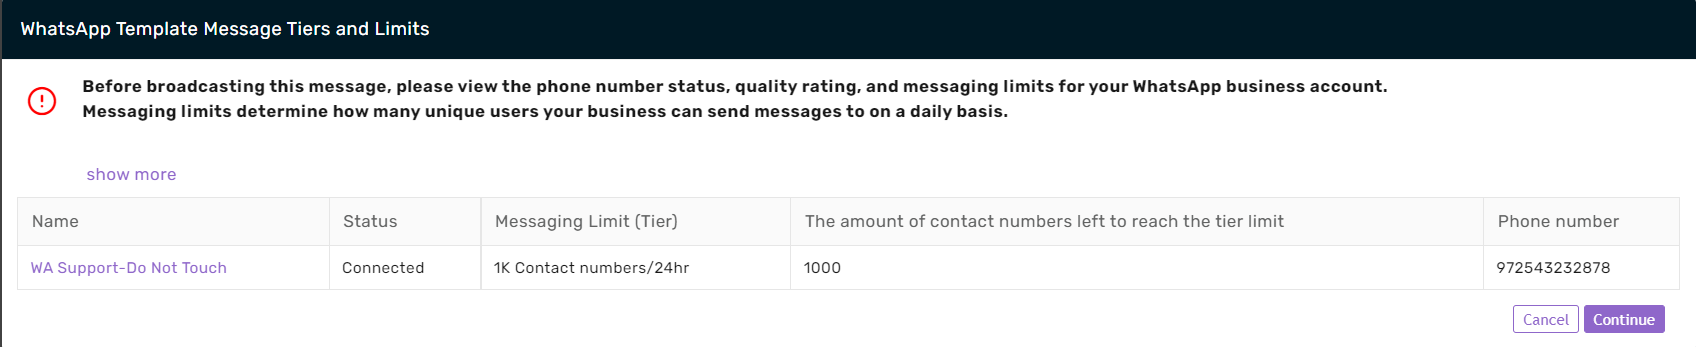
Launching of Campaign
- Once you click Create campaign, verify that your WABA status is connected and that the number of contact numbers to reach the tier limit is more than the amount of contact you wish to send the campaign to.
Click here for more information about WhatsApp template message tiers and limits.
- After verifying you are safe to launch the campaign, click on Continue.
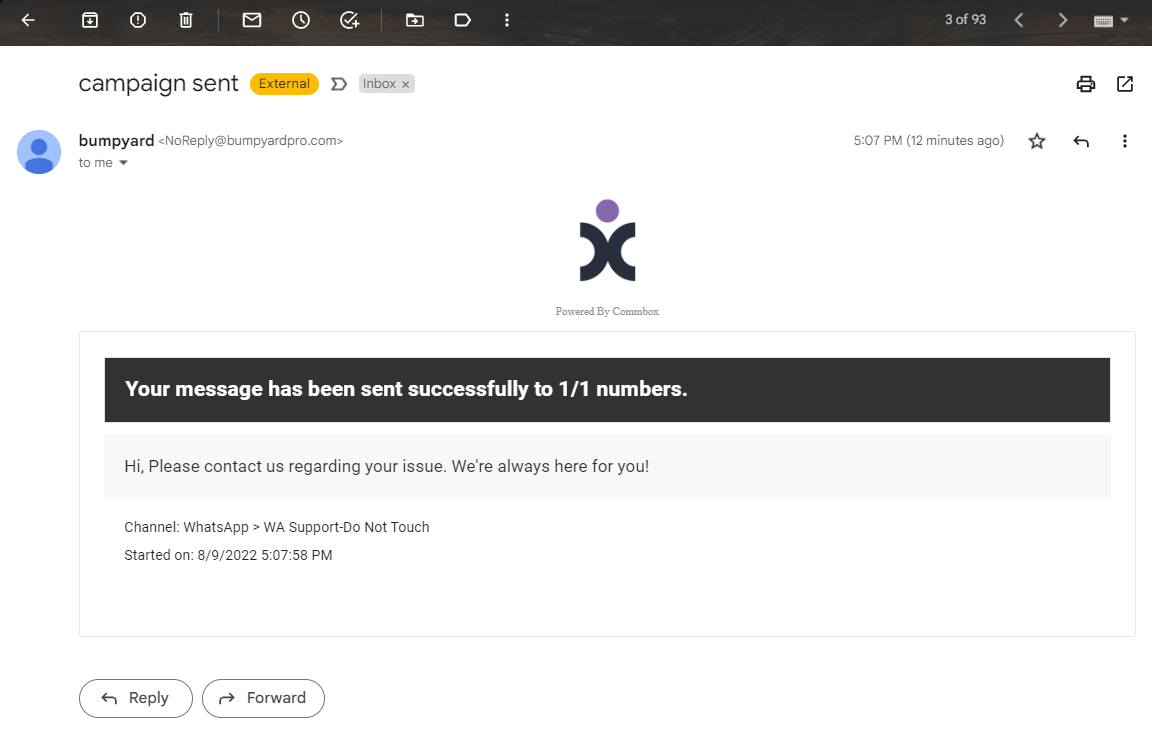
- Review the campaign’s details, provide an email address for notification when the campaign has been completed, and click Launch.
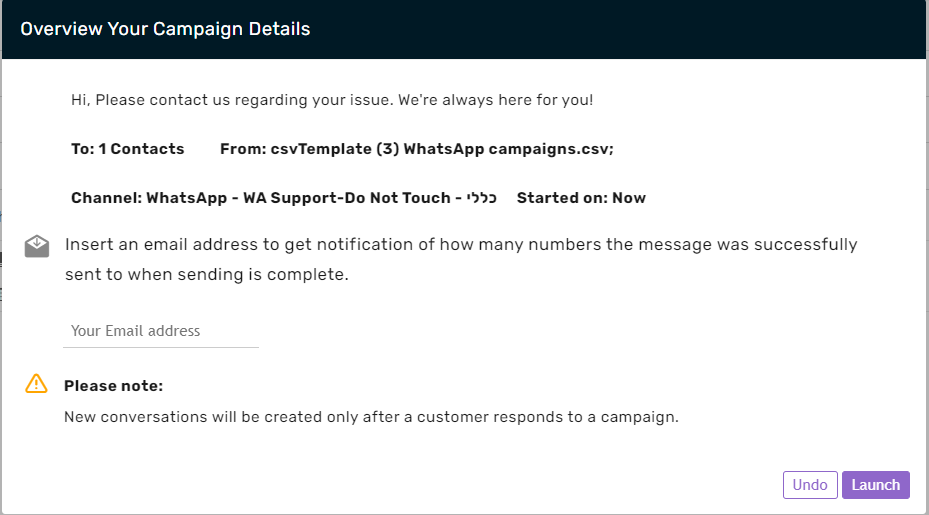
Once completed, the notification email will be sent to the designated recipient.
Importing Customers
1. To add additional customers to the campaign, click Import Customers in the Audience section.

2. In the dialog box, you may download a sample of a table that can be used for this purpose.
Note the following guidelines:
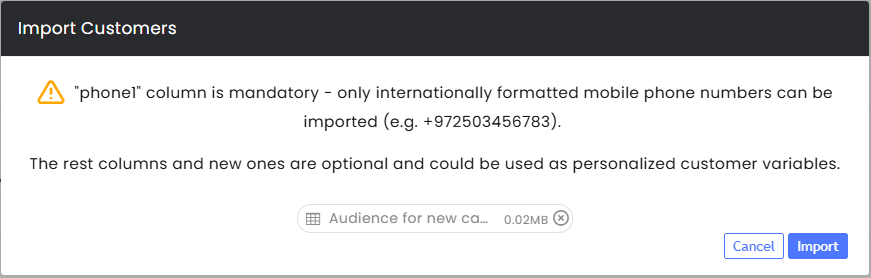
a) All tables must have a column heading for Phone1, and all customer phone numbers must be in international format (including the country code). 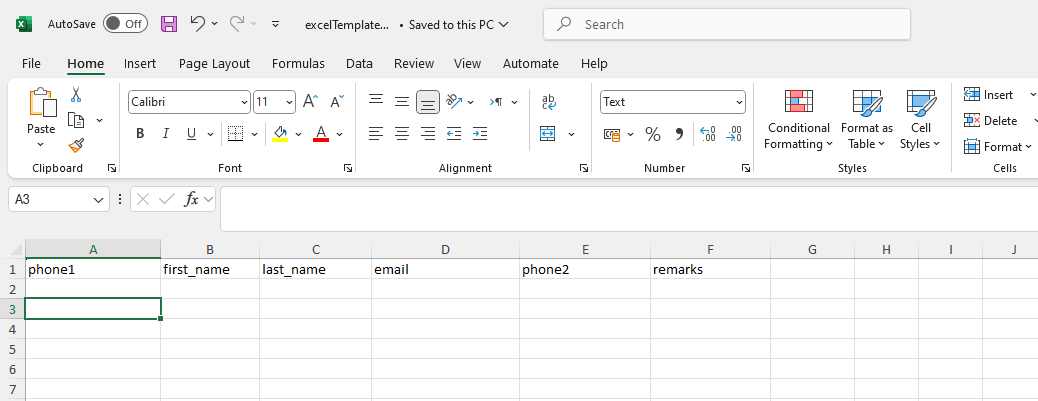
b) Additional columns used by your account can be added to the file as long as they match the custom field settings.
c) When sending a template with parameters, you can add additional columns to the file with the parameter’s title as the column heading and the personalized customer variables for those placeholders.
d) When uploading the CSV file, you will need to write the titles of additional columns and add the customers’ information under them.
e) CSV updates each customer’s permanent record. By default, all existing customer fields are always recognized to match or create new customer entries (for example, Name or Email). Additional columns (for example, order number or product ID) will be used solely for campaign personalization and might not be saved to the customer’s details unless your admin settings allow it. Please verify whether your CSV imports update global records or remain strictly campaign specific.
f) We recommend editing the file using Google Sheets.
3. Click Upload file to upload the contacts list and select the appropriate file.
4. Once uploaded, click the Import button in the lower right corner.
Upon successful import, you can save the file as a new audience and name it.
5. The selected file will appear as an audience ready for use. Click Continue.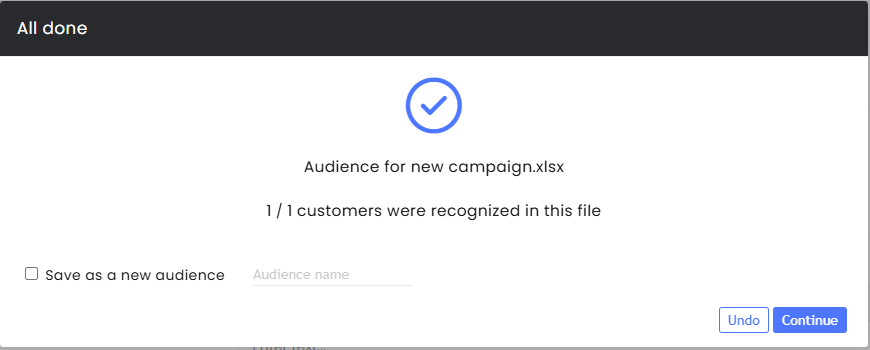
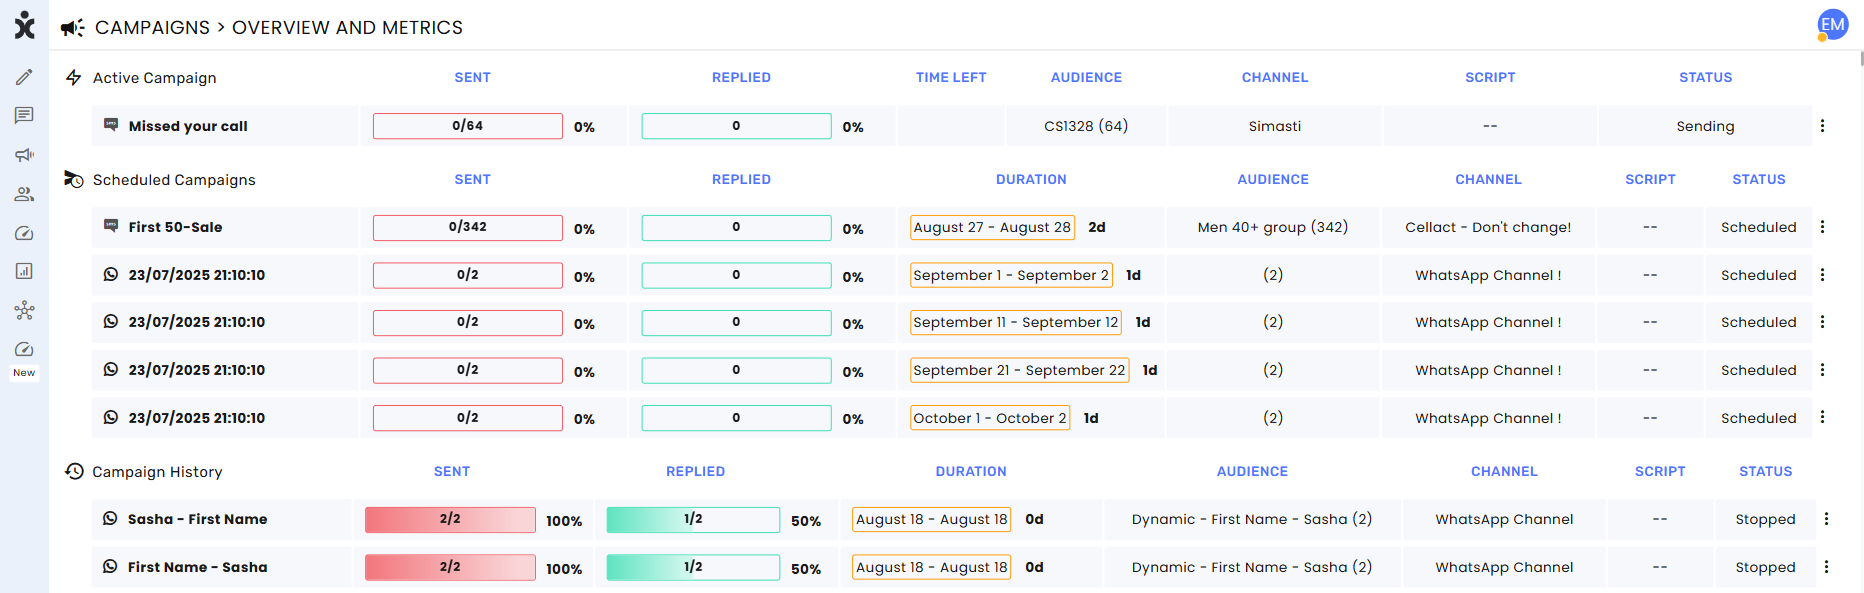
Campaigns Overview and Metrics
Navigate to Campaigns on the main sidebar and click Overview and Metrics to view:
Active campaigns
Scheduled campaigns
Completed campaigns
Components
Each Campaign shows:
- Name – Campaign name (or timestamp if unnamed)
- Sent – Number of messages successfully delivered
- Replied – Number of responses received
- Time Left – Remaining active duration for ongoing campaigns
- Duration – Total campaign lifetime
- Audience – Linked audience name and customer count
- Channel – Channel used to send messages
- Script – Automation flow connected to responses
- Status:
- Scheduled – Waiting to start
- Sending – Currently sending
- Sending Completed / Done – All messages sent, campaign expired
- Paused – Temporarily stopped (e.g., due to rate limits)
- Canceled – Stopped manually before or during sending
Exporting Reports
When clicking the 3-dot menu, you can export the information into an Excel file.
Permissions
Admins can limit the agents’ access to the Overview and Metrics page to view only campaigns associated with their teams, enabling each department to focus exclusively on its own campaign activities. This eliminates the need to review irrelevant data and ensures that departments retain full control over their campaign information.
To restrict agents’ access to only the channels they are permitted to view, admins must enable the Campaigns > View Overview and Metrics by channels permissions.
To grant agents the same visibility as admins, enable Admin Permissions > Campaigns Overview and Metrics.
.png)