Overview
CommBox empowers organizations to build automation that communicates with customers in a guided, focused, and brand-aligned way, ensuring every interaction reflects the company’s tone, standards, and objectives.
CommBox supports three types of automation agents:
- AI Agent (Beta)
 – Autonomous reasoning, goal-driven responses using knowledge, tools, instructions, and context
 - AI Chatbot
 – Deterministic, flow-based chatbot enhanced with AI for intent detection and retrieval-augmented responses, using structured knowledge and instructions
 - Chatbot
 – Deterministic, flow-based chatbot without AI, using intents, rules, and APIs to enable sophisticated automation.
The force behind the chatbot is the CommBox Flow Builder, which adds a robust set of capabilities enabling the design of intelligent, dynamic, and highly automated customer journeys. With these tools, you can pave the road for the chatbot to follow, enhance operational efficiency, and elevate the entire customer experience from start to finish.
This guide focuses on the initial setup of a chatbot and managing Automation. For instructions on creating flows, refer to the Flow Builder articles.
Note about CommSite:
CommSite uses the automation to transform an organization’s entire website content into an AI-guided conversational experience. When using Chatbots, cards are configured directly within individual flow steps. A card is displayed whenever the customer reaches the step where it is configured.
This guide does not cover the Cards section, as it is specifically for CommSite. Click here to learn more about CommSite.
Steps to Set Up a Chatbot
- Name the Chatbot
Assign a clear and recognizable name. - Design the Flow
Map out the customer journey, covering all relevant scenarios the chatbot may encounter. - Configure Settings
Apply general rules to the entire flow, including enabling or disabling AI capabilities.
Step I: Naming your Chatbot
-
At the main side bar, navigate to Automation Hub, select the Agents tab, and click the Create Agent button at the top corner of the page.
.png)
-
In the dialog box, enter a unique name for the chatbot, select the Chatbot box, and click Create.
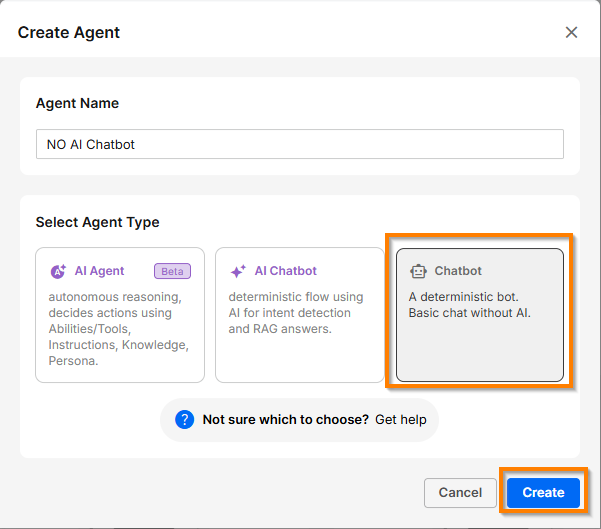
Note: When the AI capabilities are not enabled, only the Flow Builder and the Settings sections are available. Enable AI capabilities by toggling on the Enable AI-Powered Automation in the Settings section.

-
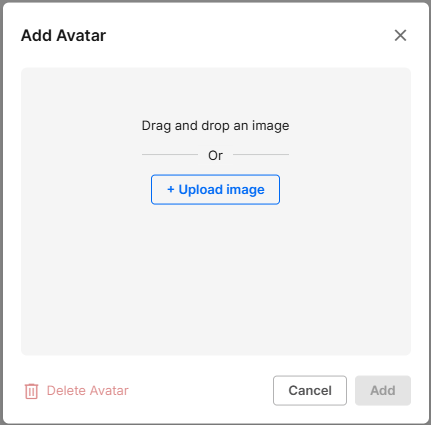
Click the camera icon to add an Avatar to the chatbot (optional). Upload an image and click Add.
Step II: The Flow Builder
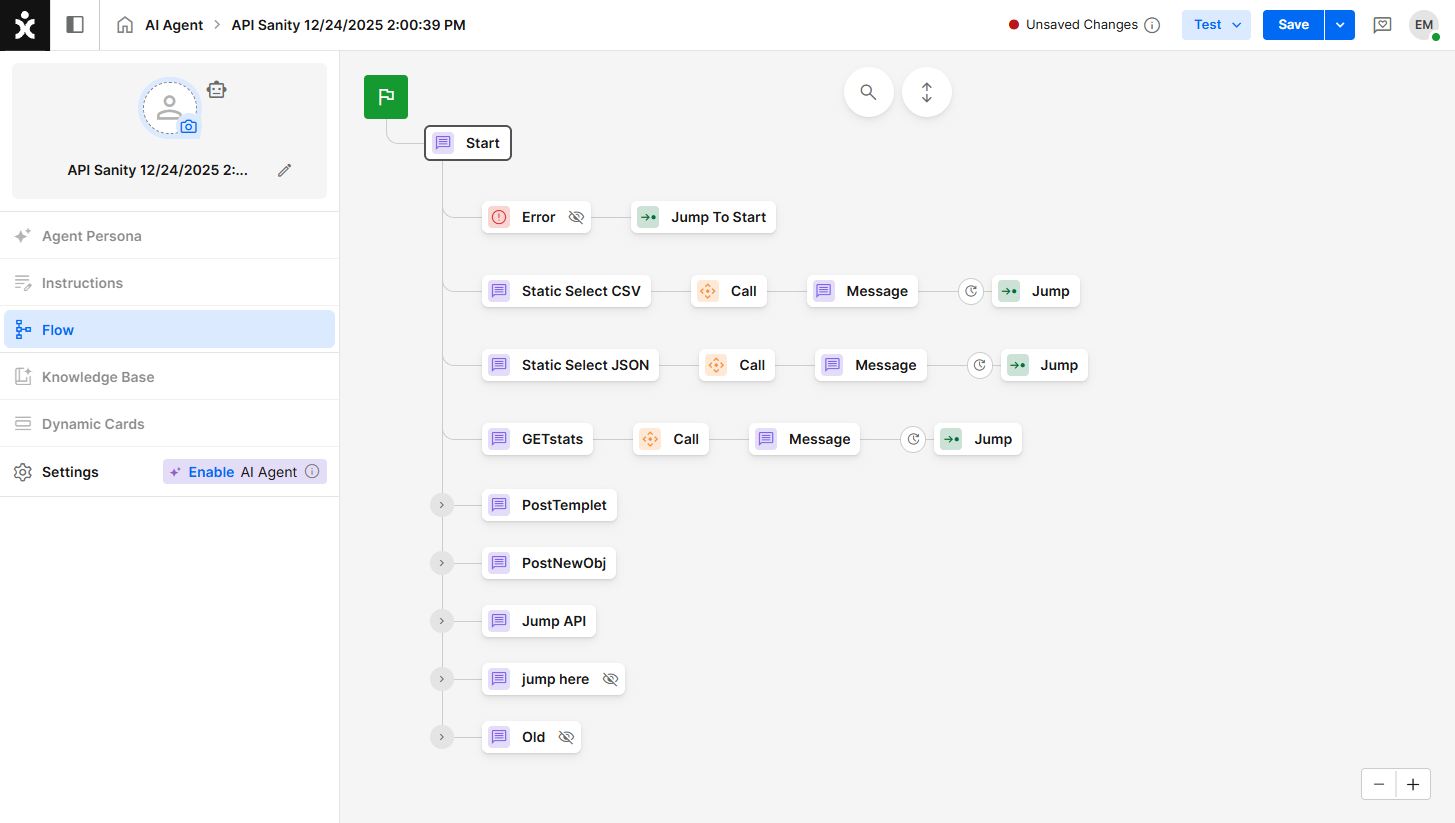
This is where the Flow is constructed.
Even if the AI capabilities are not active, the Flow Builder can still construct a powerful chatbot.
See the Flow builder articles to learn more about this topic.
Step III: Settings
The Settings area is where you can define default actions for key scenarios such as idle customers, no response, navigation, data collection, and AI behavior. When building complex bots, configuring Flow Settings streamlines development and helps reduce both setup time and effort.
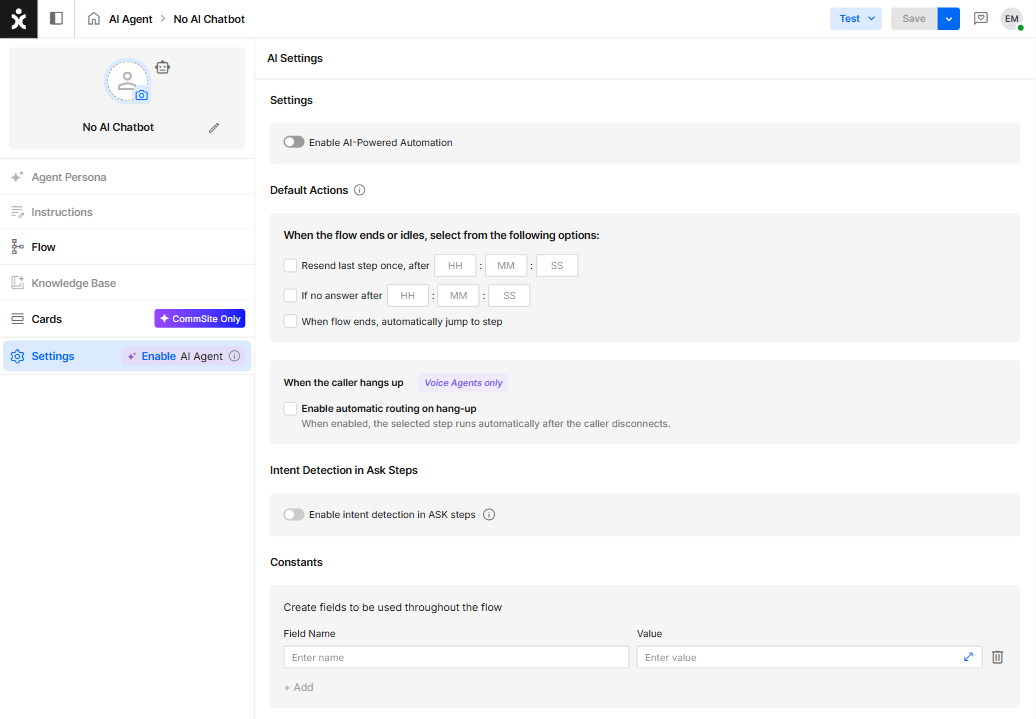
AI Settings
Enable AI-Powered Automation
Enabling the AI Agent Settings unlocks advanced capabilities within the flow.
- The AI Agent can respond to customer inquiries based on organizational knowledge base items you provide, using a specific persona for that role.
- To use this capability, it must be activated both at the flow level and the module level, and requires a replenishing token account. For assistance, contact your Customer Success (CS) representative.
Default Actions
Default actions are triggered when:
- A customer becomes idle.
- A flow reaches the end of the branch with no End or Jump step.
Note: This is not considered best practice. Ensure every branch leads to its intended path, ending by jumping to a specified step or transferring the conversation to a human agent.
You can choose one, multiple, or none of the following default actions:
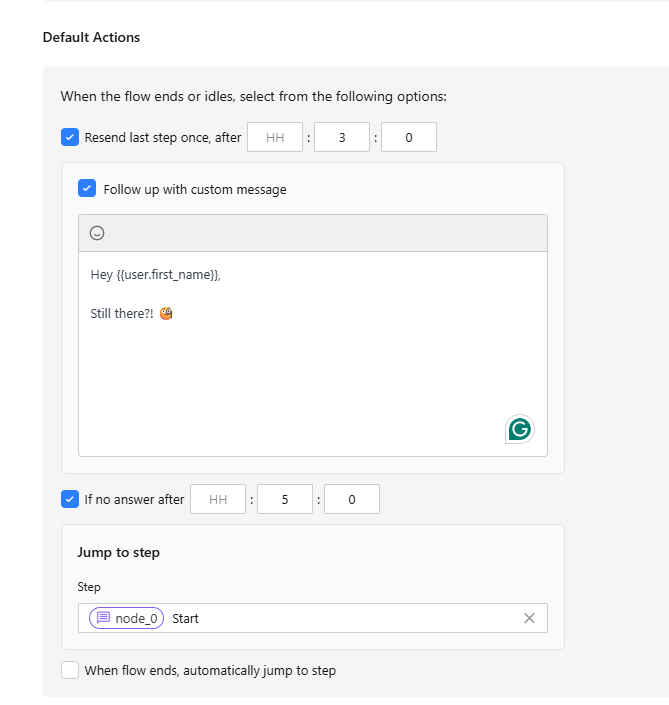
- Repeat the Last Step
When choosing to repeat the last step after a set time (from 5 seconds up to 8 hours), you can also add a message prompting the customer to respond.
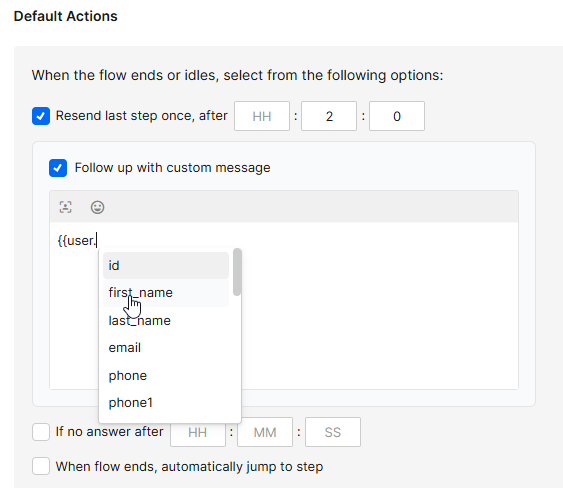
We recommend keeping it short and including an emoji. If the flow collects customer information, you can also include a dynamic field. Type double curly brackets followed by user-dot ( {{user. ) to display the available customer fields for selection.
- Jump to a Specific Step
You can redirect idle customers to a different step in the flow (from 7 seconds up to 8 hours). If you also selected to send a message, make sure the “If no answer” time span is longer than the first “Resend last step” interval.
.png)
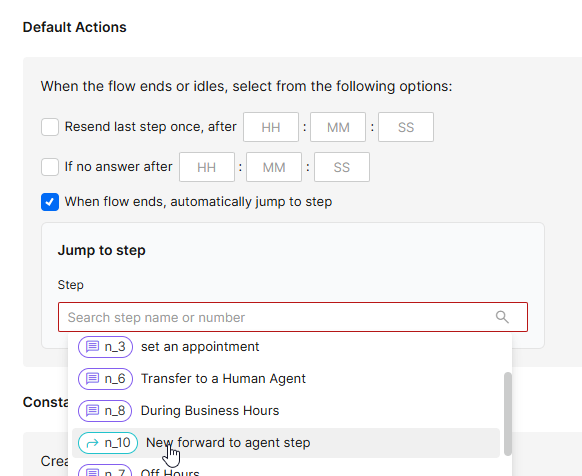
- End the Flow with a Specific Step
Select the default step that will be used when the flow ends.
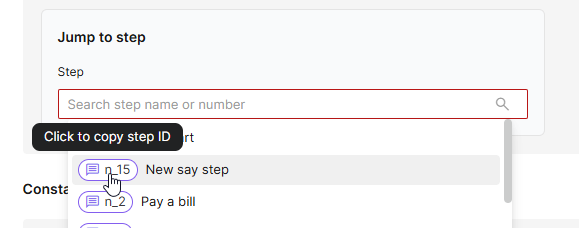
Note: Clicking on the actual Step icon will let you copy the Step ID. Use it in the search pane to locate the exact step in the flow.
For Voice Agents Only: When the caller hangs up:
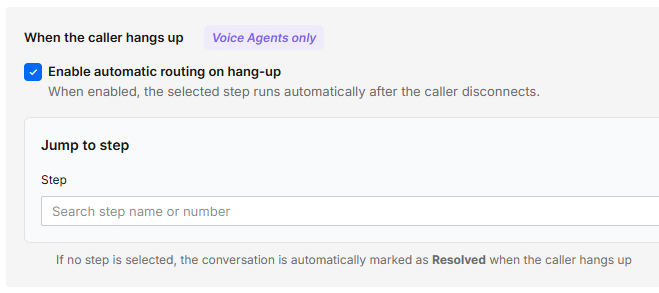
Enable automatic routing on hang-up:
Applies to Voice Agents only. When enabled, the selected step runs automatically after the caller disconnects.
If no step is selected, the conversation is automatically marked as Resolved when the caller hangs up.
Intent Detection in Ask steps
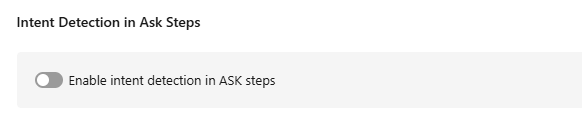
When enabled, the Flow can detect intents within an Ask step, allowing intent recognition during the data collection process—not only when end users enter free text in standard message nodes.
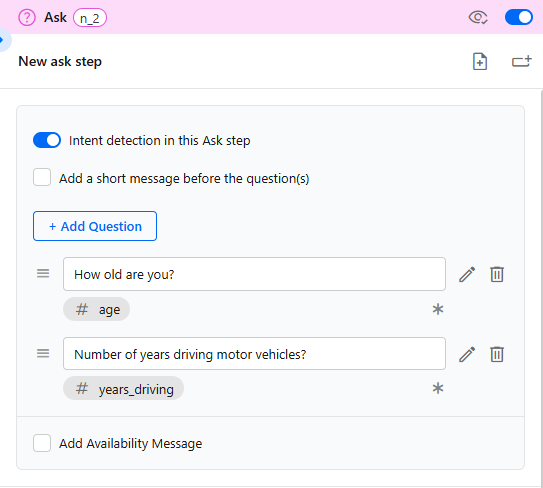
Note: Once enabled at the Settings section, a toggle will appear at every Ask step. Enabling that Intent detection applies to all questions asked at that step.
Constants
Constants allow you to create reusable Fields within the flow.
- Example 1: Define a field called Age with a value “<21.” Customers who are under 21 can then be directed to a dedicated step for younger drivers.
- Example 2: Create a field called MembershipStatus with a value “Premium.” This allows the flow to automatically route premium members to a priority support queue, while regular members remain in the standard flow
Automation Management
Each Agent card displays an icon representing the automation type (AI Agent, AI Chatbot, or Chatbot), along with the agent’s name, role, and last edited timestamp.
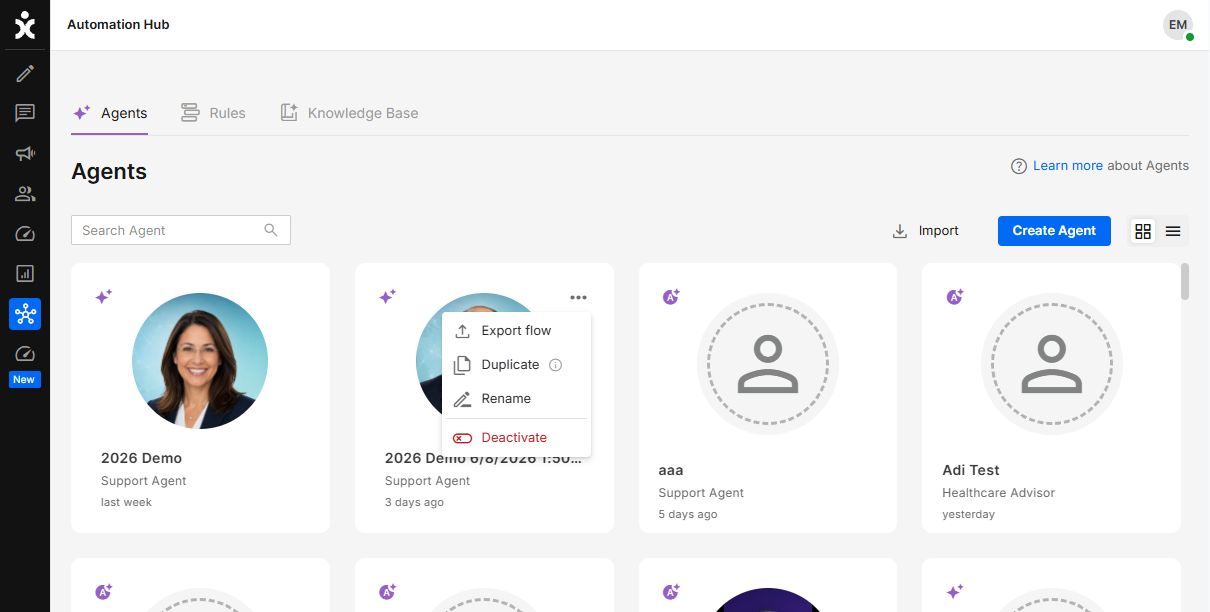
When hovering over the agent, click the three-dot menu:
(When not in card view, click at the end of the Agent’s name)
Export Flow
Downloads an XML file of the AI Agent/chatbot. This enables the designer to review the design using online AI tools. Import the improved design using the Import button at the top.
Note: AI Agents can not be imported - You’ll have to improve the product manually.
Duplicate Flow
Creates a duplicate of the currently published flow, allowing designers to work on, modify, and test changes without affecting the active flow. The duplicated flow is automatically named using the original flow’s name along with a date and time stamp, ensuring it appears directly after the original AI Agent in the list.
Rename Flow
Allows users to change the name of the current flow.
Deactivate Flow
Removes the AI Agent from all channels. To reactivate a flow, scroll to the grayed-out AI Agent and select Activate from the three-dot menu.