Overview
Telegram is an app used for content sharing and encrypted messaging/online chat and funds transferring/payments. The CommBox’s Telegram module enables the management of all incoming Telegram conversations directly and seamlessly.
This guide covers general information about the application and instructions for creating a new channel in CommBox. For general configurations, refer to the Channel Settings section.
Prerequisites
You have an Admin classification in CommBox to create and manage Telegram channels within CommBox.
Key Considerations:
- Conversation Initiation: Customers initiate conversations by clicking on a link to the Telegram channel (bot) found on the business page of the organization or by searching for it in Telegram.
- Reactions emojis: Customers can add reactions emojis to their messages to indicate their concerns and feelings while communicating with the agent.
- Premium Telegram users cannot use custom emojis for this type of communication.
- Telegram channels opened prior to December 2024 need to be reactivated to enable this feature.
- Response Time: CommBox supports the Telegram platform in real-time.
Creating a new Channel
The new channel is created in Telegram with the new name and API key entered into the CommBox platform.
On the Telegram platform:
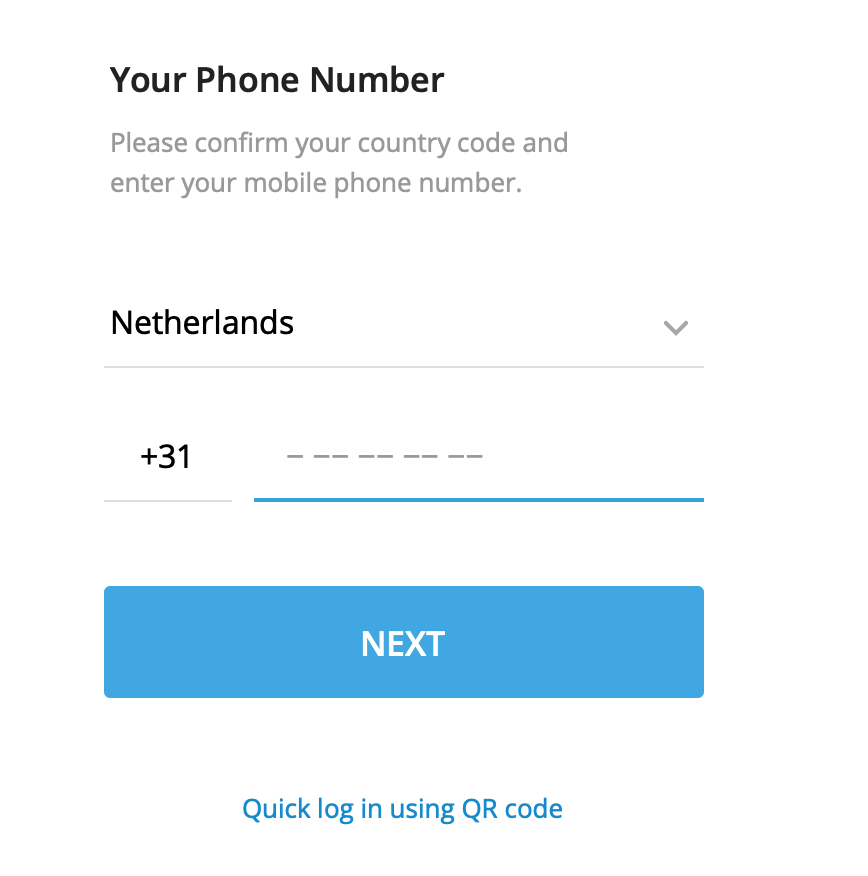
1. Open the Telegram app on your computer (first-time installation must be from a laptop or desktop computer). If you don’t have an account yet, connect with your phone number.
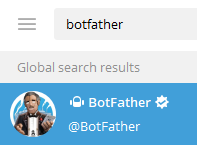
2. Search ‘BotFather’ in the search bar.
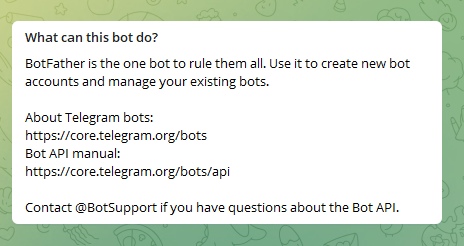
3. Enter the relevant channel name in the message text box
4. Access the relevant channel you want to link with the Telegram module, type /newbot , and click send.
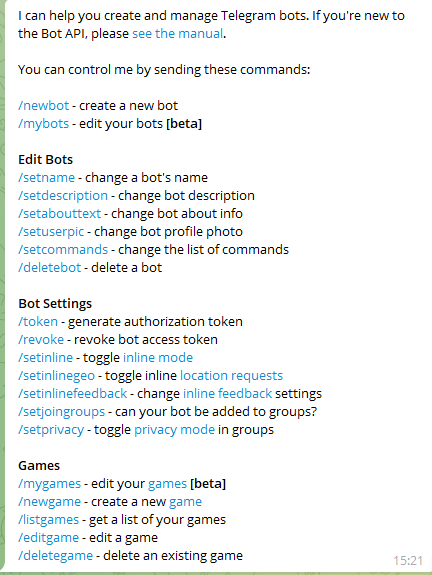
5. Choose a name for the new channel you just created, for example, CommBox Telegram.

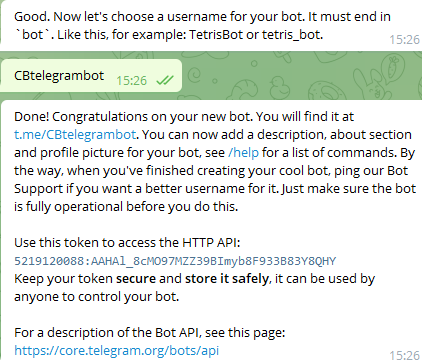
6. Enter a unique username for the newly created channel, for example, ‘CBtelegrambot’ (ending with the letters ‘bot’).
If the name was not previously used, you should receive a message that confirms that the bot has been created with a security API token (API key).
At the CommBox platform:
1. Navigate to Settings, select the Telegram module from the communication channels section, and click the +Telegram Channel button.

2. Enter a unique name for the channel exactly as you entered it in Telegram. Add sub-channels (optional)
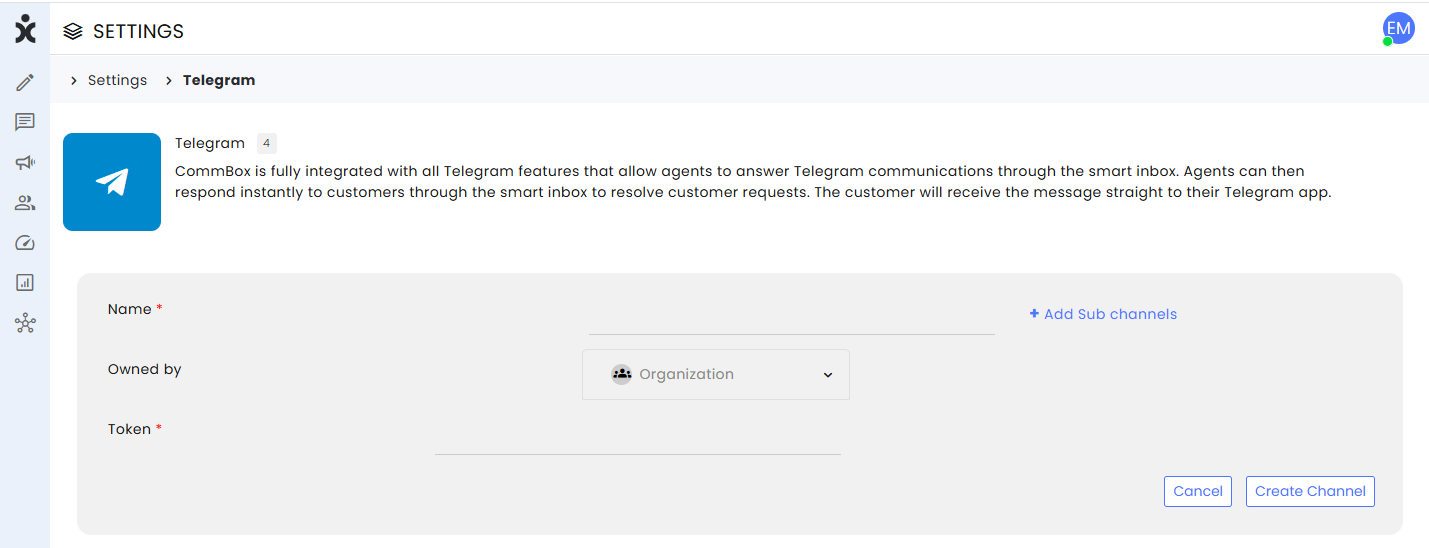
3. Select a team to own this channel (Optional – If no team is selected, this channel will be accessible to the entire organization by default).
4. Copy the API token from Telegram and paste it into the Token space.
5. Click Create Channel.
Channel Settings
General

Language – The language displayed during the communication.
Maximum conversation duration (seconds) – The time limit for closing the conversation after the First Response. Past that point, the agent will receive an indication that the conversation has exceeded the time limit.
SLA

Service Level Agreement determines the acceptable waiting time for customers before they receive service from the service provider. Once that time passes and the agent does not reply to the customer, there is an SLA breach.
SLA target for first replies (in seconds) – The time within which the agent must respond to the customer's first message to avoid an SLA breach.
SLA target for next replies (in seconds) – The time within which the agent must respond to subsequent customer messages to avoid an SLA breach.
The channel settings override the main SLA settings.
Click here for more information about this capability.
Automation
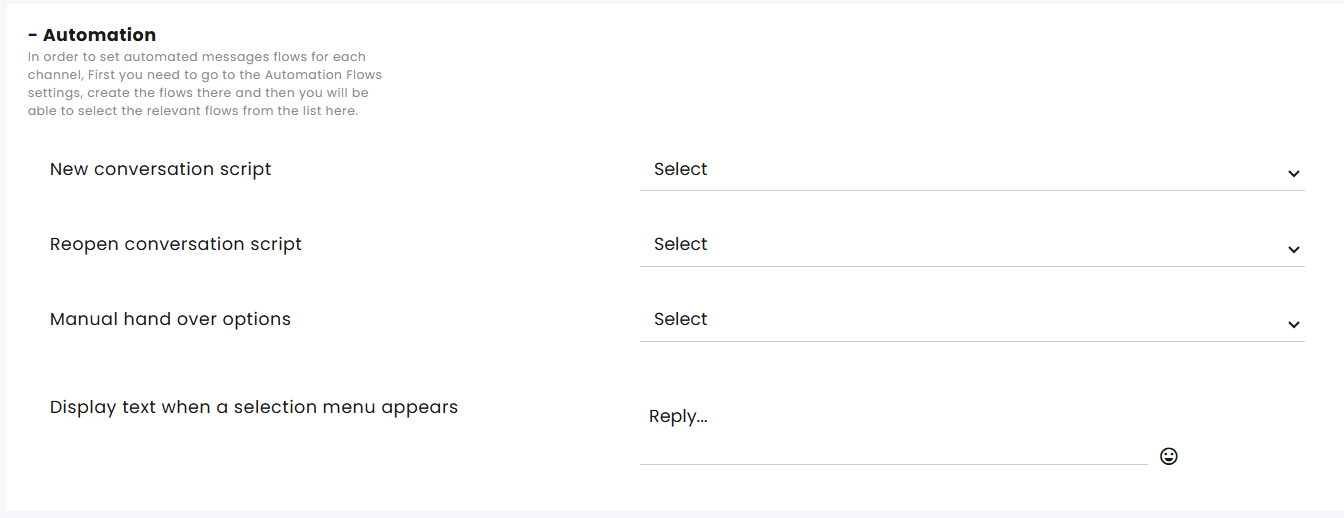
A script refers to a flow designed to meet a specific need. Learn more about our Automation bot capabilities in the automation section of the help center.
New conversation script – Select the bot that will be triggered by the customer’s first message. This script will run in each new conversation on this channel.
Reopen conversation script – When a conversation is resolved and the customer returns, the customer will receive this script.
Note: If the Split Conversation settings in this channel are set to 0 (always open a new conversation after it has been resolved), this setting becomes irrelevant since the customer always gets the new conversation script and can go back to the conversation.
Manual handover options - This allows multiple selections of scripts that will be displayed in the assignment’s menu when the agent wants to divert the customer for further help to another bot, for example, changing password procedure or charging a credit card.
Display text when a selection menu appears – Enter the wording here.
Business Hours

Business Hours profile - Select the Business Hours settings to determine when this channel operates and what auto-messages should be displayed after hours.
Click here for more information about Business Hours.
Auto Messages

Automatic response – The automated message sent in response to the customer’s first message.
Auto Assign
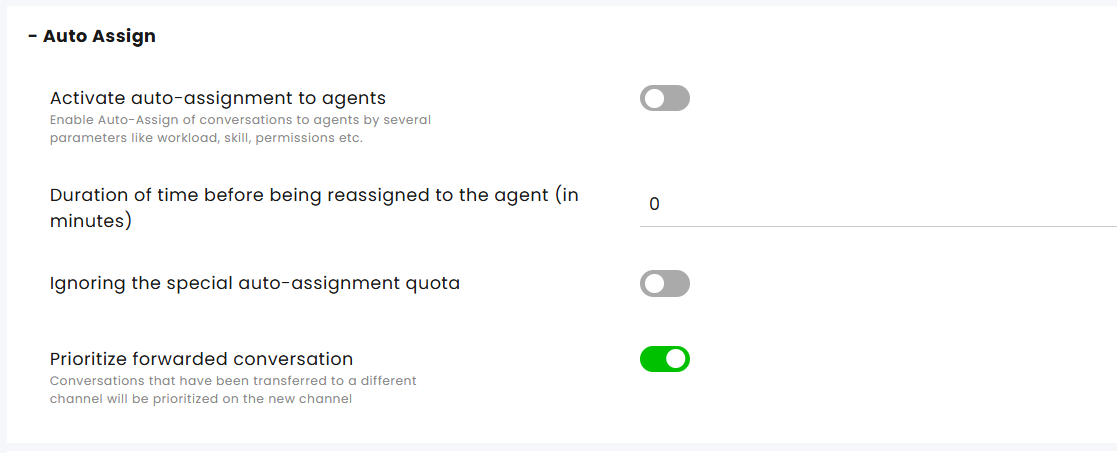
The Auto Assign settings at the channel settings overrides those that were set at the general Auto Assign settings.
Activate auto-assignment to agents - Activate/Deactivate auto-assignment of conversations from this channel to agents.
Duration of time before being reassigned to the agent (in minutes) - Select the time before the system reassigns conversations to available agents.
Ignoring the Special Auto-Assignment quota - Activate/Deactivate this feature. When activated, the system overlooks the agent’s assignment quota and assigns conversations using the Special auto-assignment feature.
Special assignments include:
a. Send and assign to me - Selected by the agent when initiating communication in Compose.
b. Conversation Assign – An agent can select themselves or others as the agents for a conversation.
c. Agent in charge – An agent is added to the customer info card as the agent in charge. Customers with an agent in charge are referred to as VIP customers.
d. Direct link
e. Snoozed conversation – Conversations that the agents assigned to themselves at a preset date and time.
Prioritize forwarded conversations - Conversations that were forwarded from another channel will be given priority assignment on the new channel if the following conditions are met:
- The conversation is assigned to an agent while it is being forwarded
- The agent forwarding the conversation has no access to view the destination channel
If the conversation meets all the following criteria, it will receive priority above other conversations.
Customer Satisfaction Survey
.png)
Activating the Customer Satisfaction Survey – Enables sending surveys to customers once their conversation status is set to Resolved.
Survey for the conversations when their status is resolved – Select the survey for this channel.
Survey Response Expiry Time (Minutes) – Specify the duration (in minutes) during which a customer's reply is considered a valid response to the Satisfaction Survey. After this period, any new reply will initiate a new conversation.
On the Customer Satisfaction settings, you can create surveys and customize them.
Click here for more information about this capability.
Privacy and Security
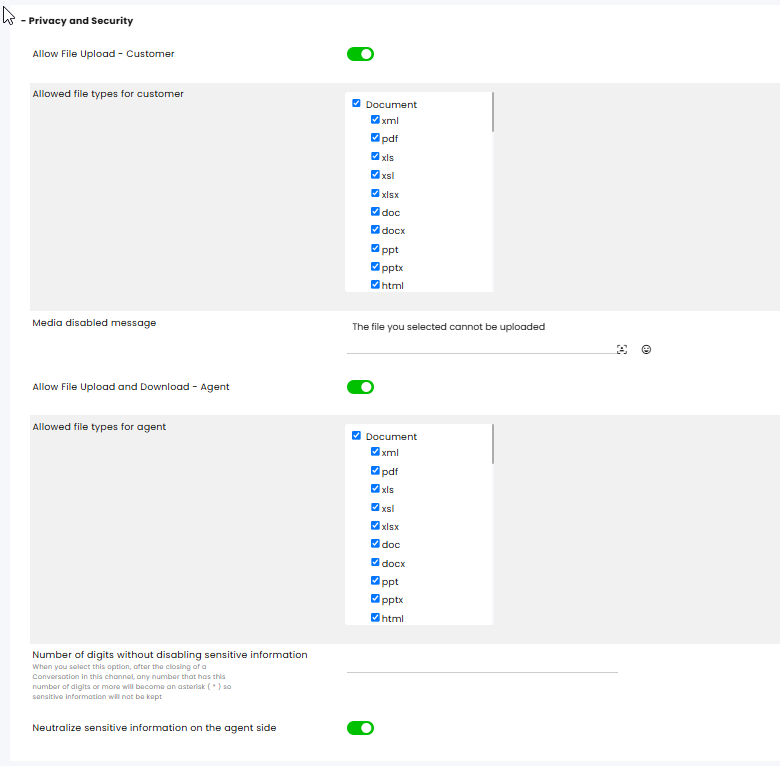
Allow file upload - customer: Allow/block the customer from uploading files.
Allowed file types: Check the boxes for file types that can be uploaded and sent by the customer.
Allow file upload and download - agent: Allow/block the agent from sending files to the customer and download files sent by the customer.
Allowed file types for agents – Specifies which file types are enabled.
Number of digits without disabling sensitive information – When activated, any number with an equal or greater number of digits than specified will be replaced with asterisks (*) to hide sensitive information. For example, if you enter the value three, the number 31782 will appear as 31***.
Neutralize sensitive information on the agent side - Toggle to enable/disable the masking of numbers entered by agents with asterisks after the status is handled.
Intents

The Intents capability identifies keywords or phrases during the dialog with the customer.
Click here to learn more about this capability.
Split Conversations
.png)
Enabled – When enabled, a new conversation will open for the same customer. When disabled, conversations with the customer continue in the same thread.
Trigger to split from the set time – Determine what causes the split to occur—the customer's last message or the conversation's change of status.
Split will occur after X min from trigger – Enter the number of minutes. When entering 0, the split is immediate.
Maintenance
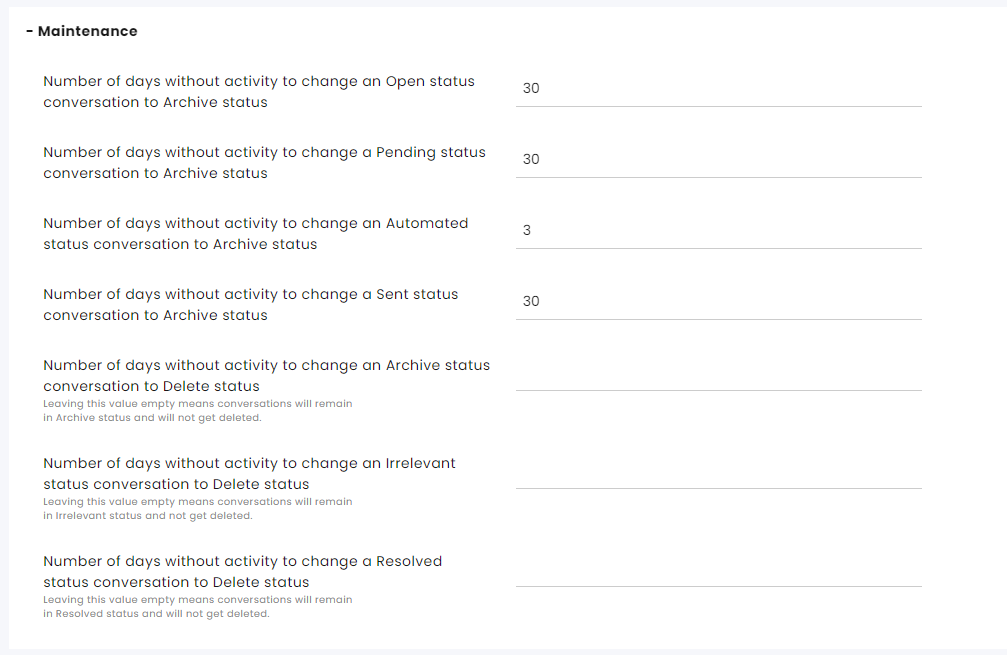
Number of days without activity to change an Open status conversation to Archive status
Number of days without activity to change a Pending status conversation to Archive status
Number of days without activity to change an Automated status conversation to Archive status
Number of days without activity to change a Sent status conversation to Archive status
Number of days without activity to change an Archive status conversation to Delete status - Leaving this value empty means conversations will remain in Archive status and will not get deleted.
Number of days without activity to change an Irrelevant status conversation to Delete status - Leaving this value empty means conversations will remain in Irrelevant status and not get deleted.
Number of days without activity to change a Resolved status conversation to Delete status - Leaving this value empty means conversations will remain in Resolved status and will not get deleted.
Set additional aspects of maintenance including permanently deleting conversations at the Maintenance settings page.
Click here for more information about this capability.
CRM Integrations
See information in the relevant guides.
